

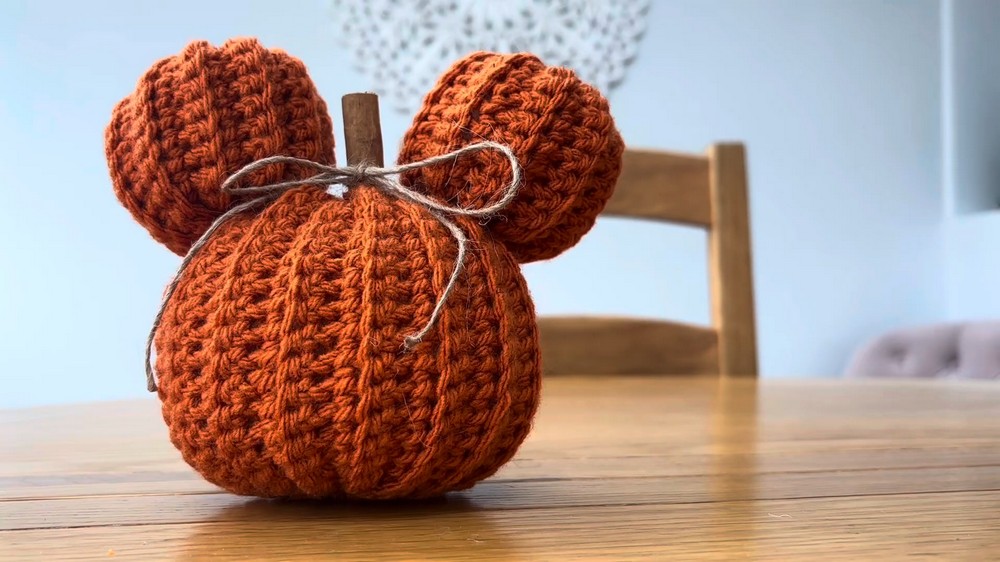
Bright Crochet Mickey Mouse Pumpkin For Fall Decorating
Playful autumn vibes shine with this Free Crochet Mickey Mouse Pumpkin Pattern, adding a whimsical handmade touch to festive décor and seasonal gifts
Handmade decorations have a way of infusing warmth and individuality into any space, and this Free Crochet Mickey Mouse Pumpkin Pattern is no exception. With its playful combination of fall-inspired elegance and the iconic Disney aesthetic, this crochet project captures the essence of whimsy and charm. Perfect for Halloween decorations or cozy autumn displays, it offers both a delightful nod to childhood nostalgia and the satisfying accomplishment of handcrafting something truly unique.
How You Can Finish a Crochet Mickey Mouse Pumpkin Pattern Easily

The beauty of this project lies in its versatility. Not only does it showcase the joy of combining classic seasonal themes with Disney magic, but it’s also an accessible and rewarding pattern that introduces fun customization opportunities.
At its heart, the Free Crochet Mickey Mouse Pumpkin Pattern is a testament to the creativity and care behind handmade decorations. More than just a festive piece, it serves as a cheerful reminder of the beauty of combining art, tradition, and a touch of personal whimsy.
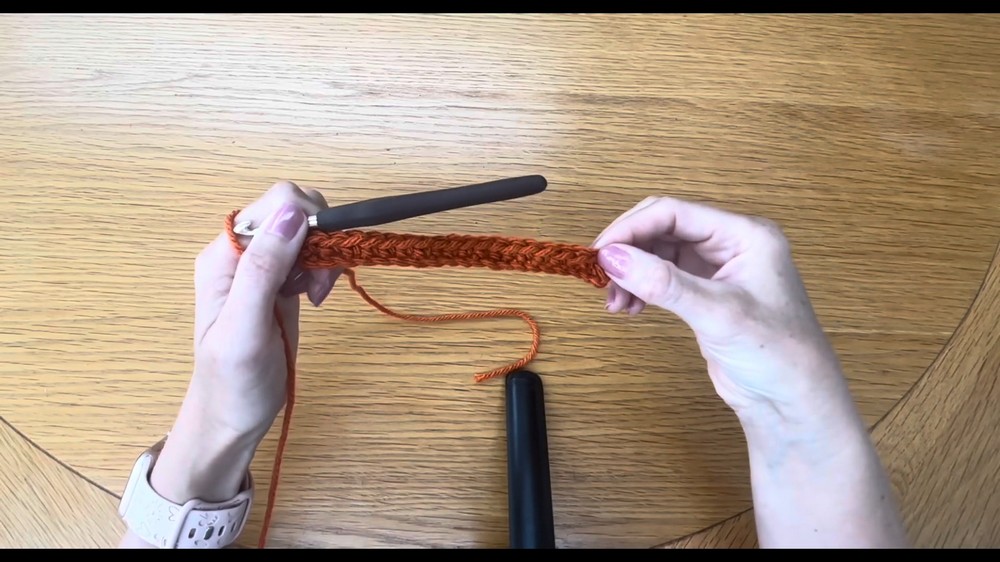
The pattern starts with a rectangular base crafted by chaining 20 stitches and working through 33 rows of double crochets. By making stitches in the back loops only, the pumpkin achieves a ribbed texture that replicates the natural grooves of a real pumpkin.
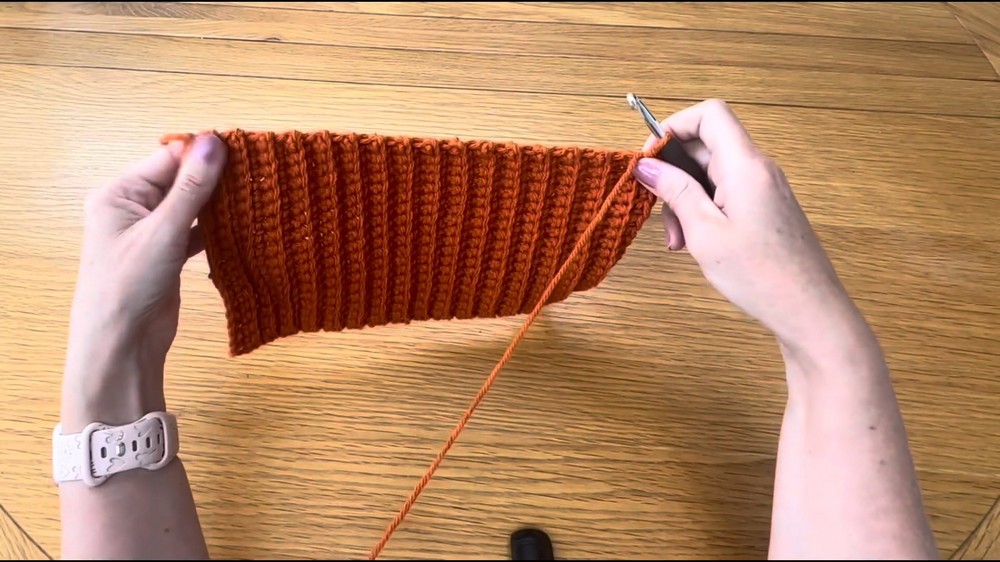
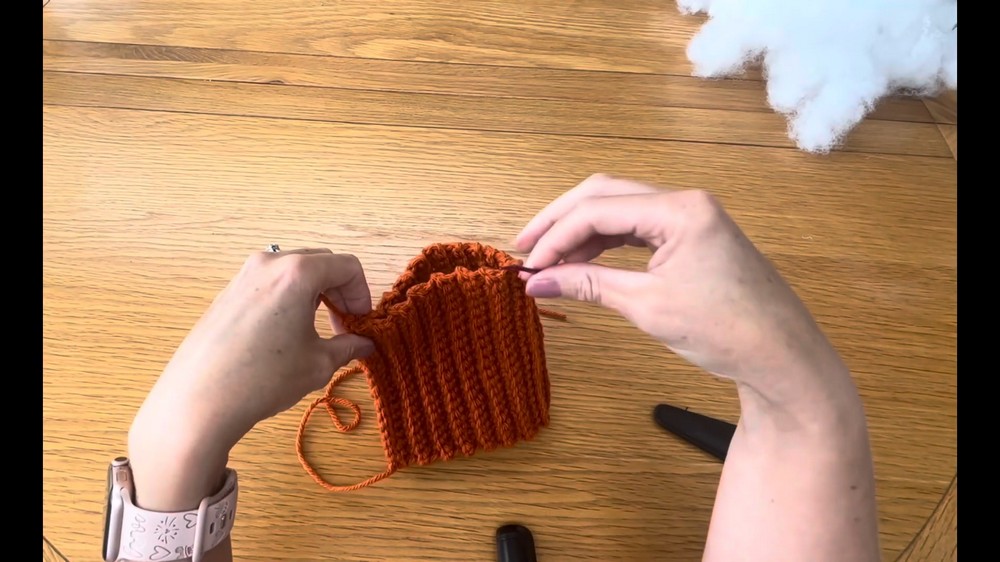
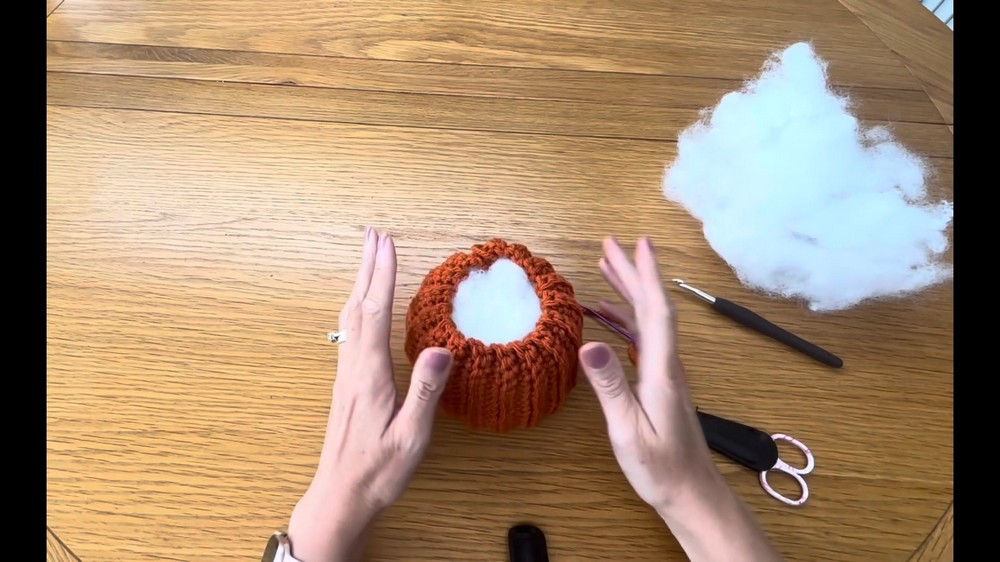
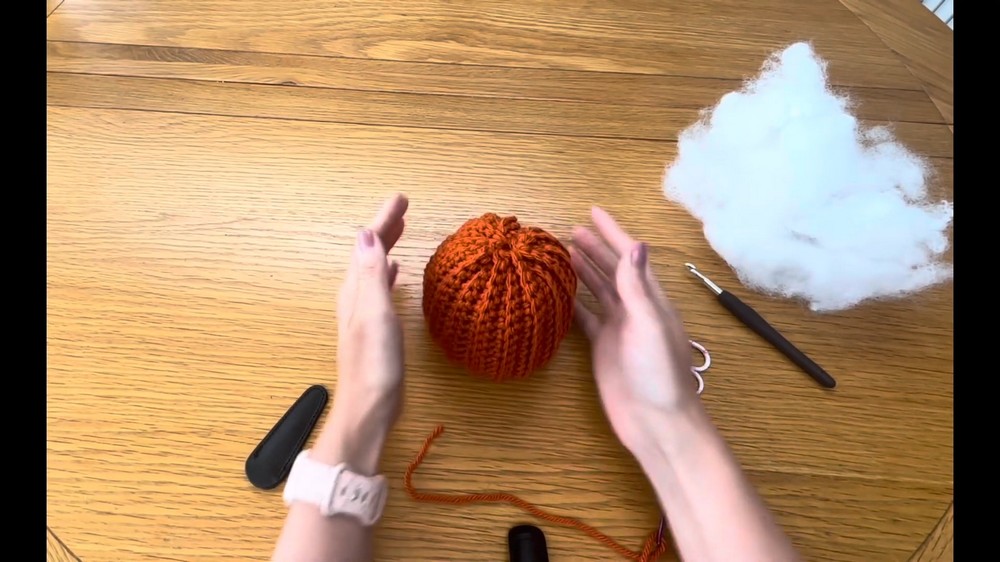
The rectangular piece is then folded and stitched into a cylindrical shape. The careful closing of the ends, first with a cinched stitch and then with the addition of soft stuffing, brings the pumpkin to life with an appealing three-dimensional quality.
A cinnamon stick serves as the finishing touch for the stem, providing both visual interest and a subtle, natural fragrance. The next step in this free crochet Mickey Mouse pumpkin pattern is the addition of Mickey’s signature ears.
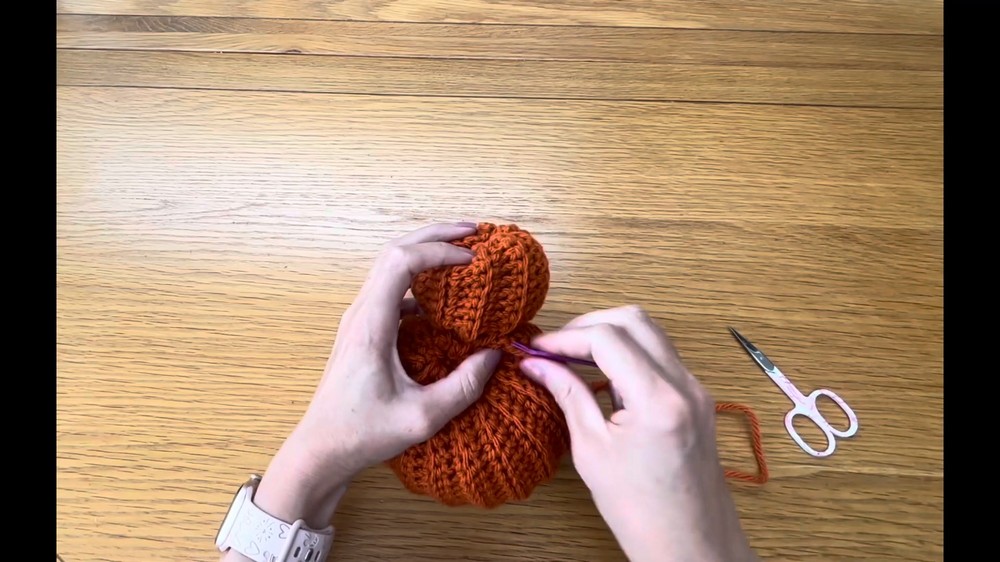
Smaller rectangles are crocheted similarly by chaining 13 stitches and completing 19 rows of 12 double crochets. These pieces are stuffed lightly before being neatly sewn onto the pumpkin’s sides.
Precise placement and secure attachment ensure the final product captures Mickey’s distinctive silhouette. For those looking to give their creation a feminine touch, a bow can be added to transform the design into Minnie Mouse.
Special Features
- Unique Design: Combines the shape of a pumpkin with iconic Mickey Mouse ears for a playful twist.
- Seasonal Charm: Perfect for Halloween or fall-themed décor.
- Beginner-Friendly Techniques: Utilizes double crochet stitches and simple assembly, making it suitable for crochet enthusiasts with basic skills.
- Customizable Touches: Add a cinnamon stick stem, a bow for Minnie-inspired versions, or adjust stuffing for varying shapes.
Materials Needed
- Yarn: Hayfield Bonus chunky in burnt orange (for the pumpkin), brown string (for accents).
- Crochet Hook: Size 6 mm.
- Cinnamon Stick: Used as the finishing touch for the pumpkin’s stem.
- Sewing Needle: For stitching ends and assembling the pumpkin.
- Scissors: To trim excess yarn cleanly.
- Stuffing: Polyester fiberfill or any soft stuffing material to give the pumpkin shape.
Level of Difficulty
This project is suitable for confident beginners to intermediate crocheters. While the stitches used (like double crochet and slip stitch) are beginner-friendly, assembling the pumpkin (especially attaching the ears) may require some patience and attention.
Tutor’s Suggestions
- Leave Long Tails: Ensure 30 cm tails at the start or end of rows for stitching up the pumpkin and the ears.
- Monitor Stuffing: Avoid overstuffing, as it may stretch the yarn and create visible gaps. However, under-stuffing might leave the pumpkin looking deflated.
- Choose the Best Side: After stitching, flip your work, and use the side you find neater as the exterior.
- Secure Ears Well: Place the ears carefully and ensure they are stitched securely for a balanced look.
- Experiment with Details: Add a bow for a Minnie Mouse version or adjust the cinnamon stick for a whimsical finishing touch.
Uses
- Ideal for fall and Halloween-themed décor.
- Can be given as a handmade gift for Disney lovers or Halloween enthusiasts.
- Makes a unique tabletop or shelf decoration, adding a cozy seasonal vibe.
Tip for Success
Work with consistent tension throughout your rows to maintain uniformity in stitch size. Before attaching the ears, hold them in place with pins or clips to ensure perfect symmetry before stitching them on permanently.
Step-by-Step Instructions
This charming tutorial teaches you how to crochet a delightful Mickey-inspired pumpkin, perfect as a Halloween decoration or a whimsical gift. The project combines simple crochet techniques with creative embellishments, such as cinnamon sticks and detailed ears. The result is a fun and festive piece that adds a handmade touch to your seasonal decorations.
Conclusion
This Mickey pumpkin project is a delightful way to enhance your crochet skills while creating a unique seasonal decoration. With its whimsical design and beginner-friendly approach, it’s perfect for adding a handmade touch to your Halloween festivities.


