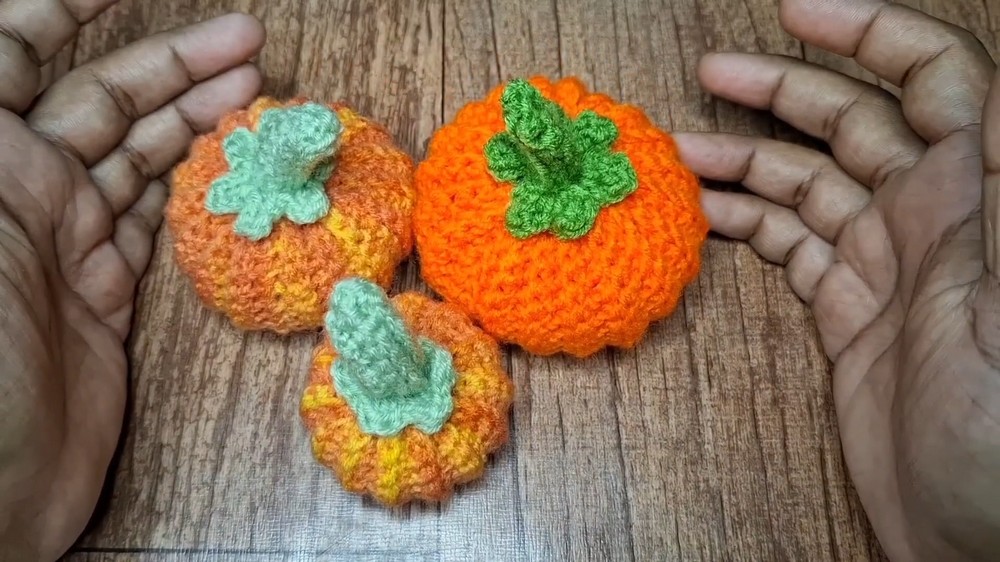
Unique Crochet Halloween Pumpkin That Brings Harvest Vibes
Bring festive spirit alive with the Free Crochet Halloween Pumpkin Pattern, perfect for autumn décor, party accents, or thoughtful handmade gifts.
In autumn, when crisp air sweeps through and warm tones fill the season, small handmade touches often carry the most meaning. Pumpkins have long been a symbol of harvest and festivity, from lining porches to brightening indoor displays. The Free Crochet Halloween Pumpkin Pattern brings that same spirit into a soft, handmade form that can be treasured for years. With its playful shape and timeless seasonal appeal, it becomes an excellent centerpiece, a thoughtful gift, or a decorative accent for parties and gatherings.
Cute Crochet Halloween Pumpkin Pattern for Seasonal Displays
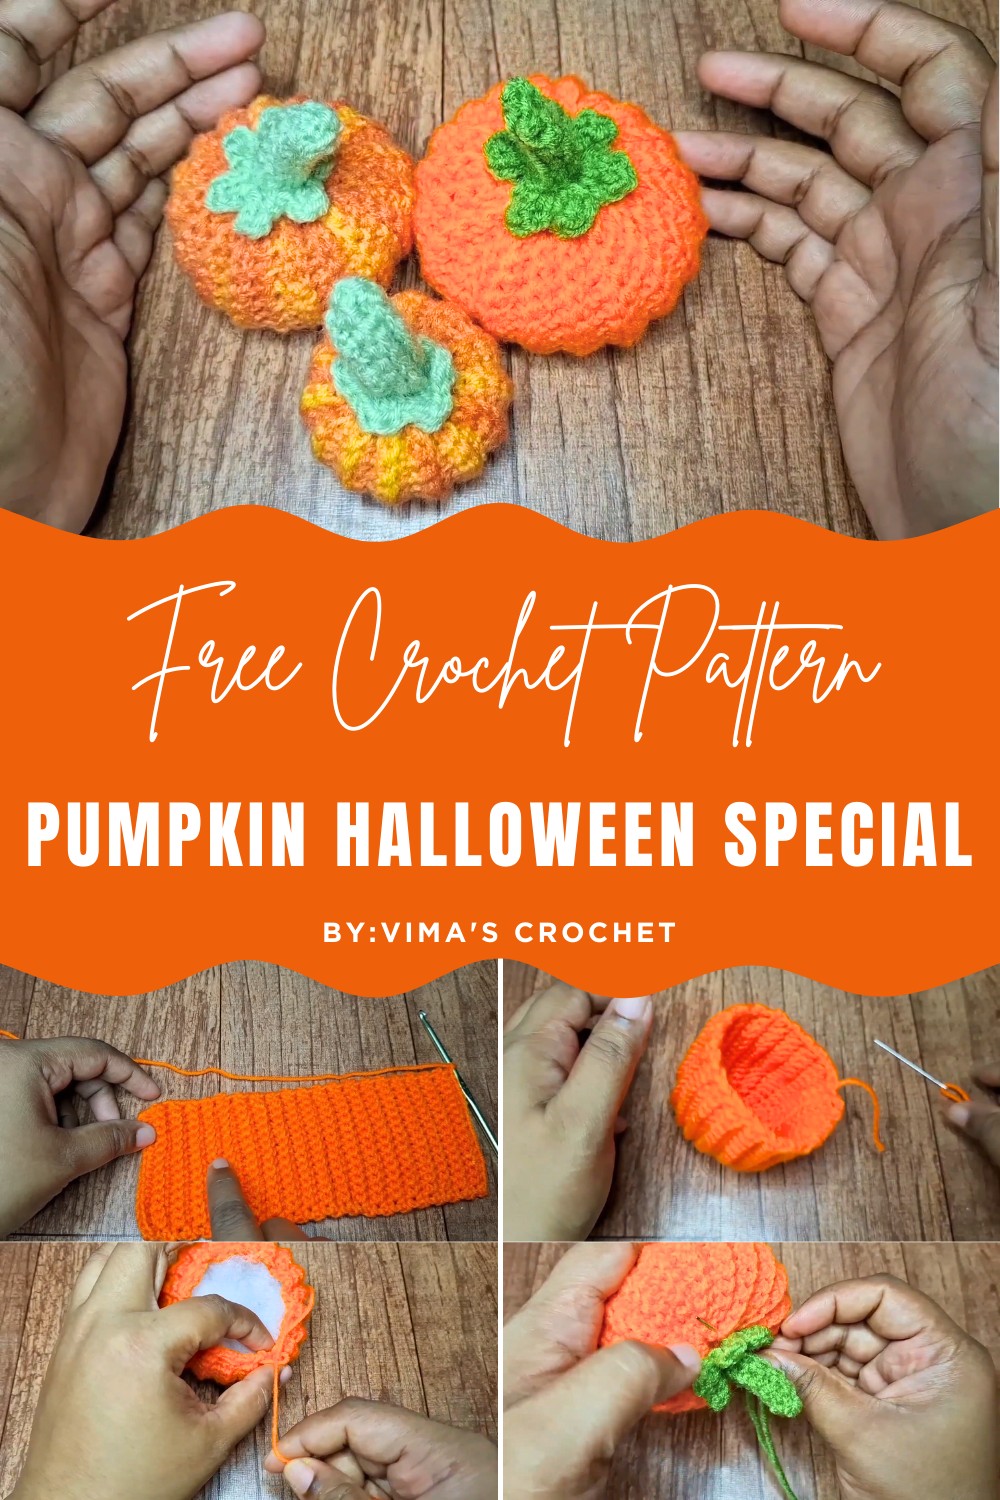
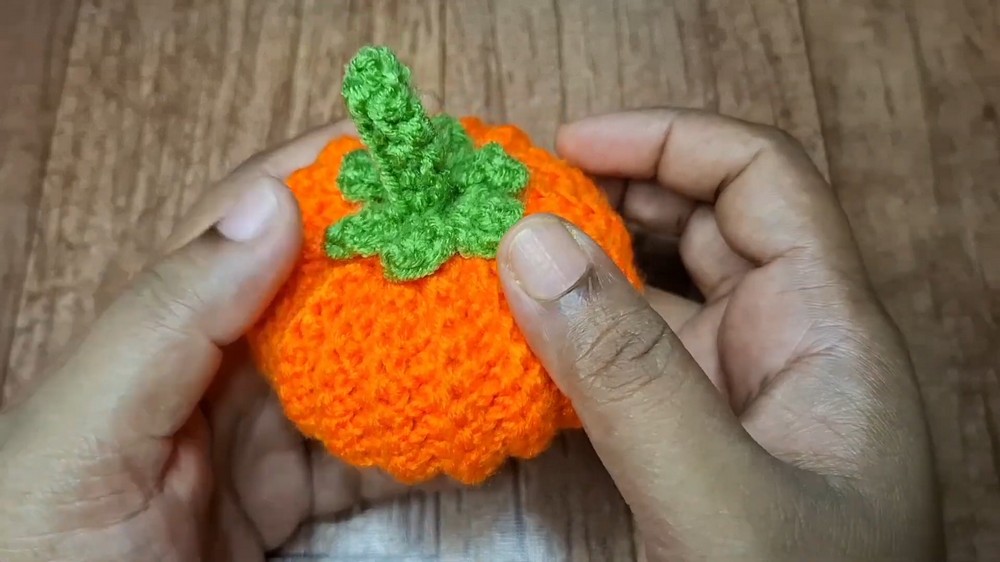
The process shapes a plump form that mirrors the charm of a real pumpkin while remaining lightweight and durable. Gentle rounds gradually build fullness, while simple techniques ensure the structure holds beautifully. Once complete, a stem detail crowns the piece, giving it a polished finish that enhances its seasonal character. Its approachable steps make it enjoyable for those new to crochet, while still providing a satisfying project for more experienced hands.
What makes this pattern so rewarding is its versatility. Whether styled in traditional orange, deep rustic shades, or even playful colors for a modern twist, the pumpkin adapts seamlessly to personal taste. The Free Crochet Halloween Pumpkin Pattern adds warmth, charm, and festive delight to any autumn setting.
Special Features of the Textured Pumpkin
- Realistic Design: The ridged texture replicates a pumpkin’s natural shape, making it visually appealing.
- Customizable Size: You can easily adjust the pumpkin’s size based on the thickness of the yarn and the height of the crochet panel.
- Versatility: It fits various uses, such as table decor, gift items, or playful autumn accessories.
- Beginner-Friendly Assembly: The project uses simple techniques, including whip stitching, stuffing, and a crochet stem.
Materials Needed
- Yarn:
- Pumpkin Body: DK yarn (3 lightweight); the tutor uses orange yarn named “Spice.”
- Stem: DK yarn in green; the tutor uses the color “Middle.”
- Ensure both yarns are of similar weight for consistent proportion.
- Crochet Hook:
- The instructor uses a 4 mm crochet hook for tighter stitches, though the yarn recommends a 4.5 mm hook.
- Additional Tools:
- Yarn Needle
- Scissors
- Measuring Tape
- Polyfill Stuffing
Step-by-Step Instructions
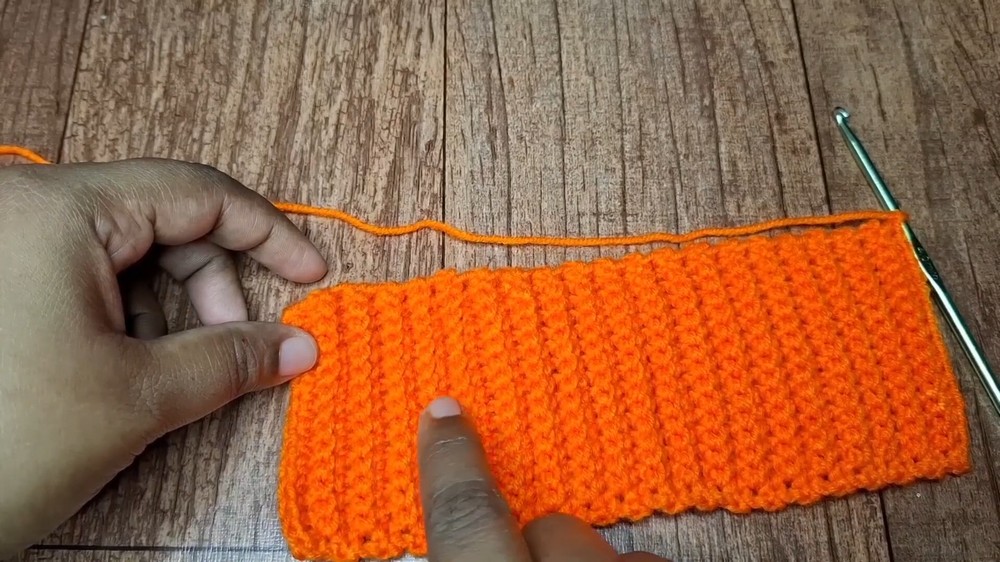
Step 1: Crochet the Pumpkin Panel
- Start with Orange Yarn: Leave a tail, create a slip knot, chain 16.
- Ridge Row Technique:
- Work in the back hump of the chain starting from the second chain from the hook. Make single crochets across (15 stitches total).
- Chain one and turn your work.
- For each row:
- Work the first and last stitches in the whole stitch (both loops).
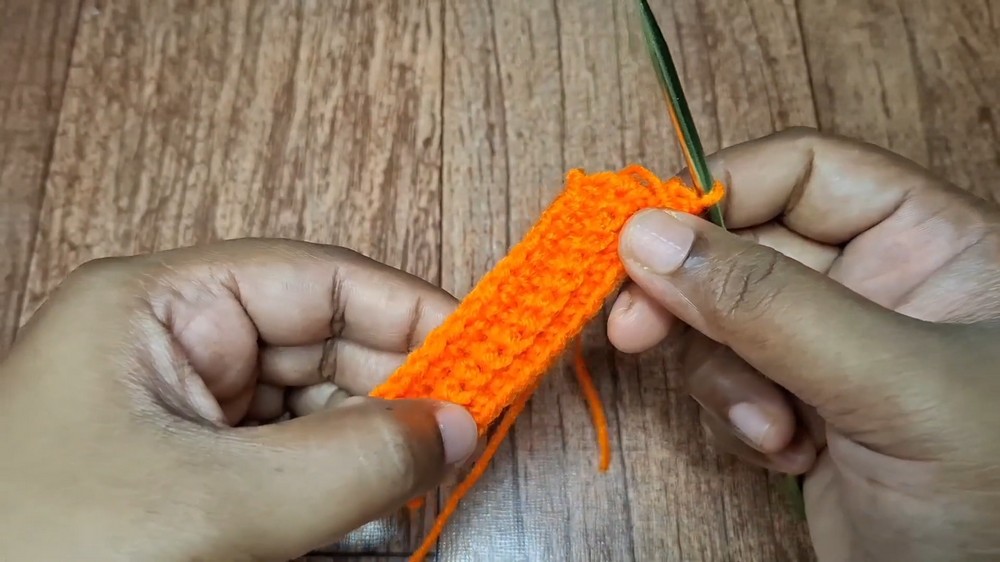
- Work back loop only single crochets for the remaining middle stitches (13 stitches).
- Work the first and last stitches in the whole stitch (both loops).
- Continue this process, alternating plain edges with ridges in the middle.
- Measure Progress:
- Continue working rows until the panel measures 7½ inches.
- Check the measurement by laying the panel flat and stretching slightly if needed.
- Finishing the Panel: Leave a tail, cut the yarn, pull it through, and cinch lightly.
Step 2: Assemble the Pumpkin Body
- Fold the Panel: Fold it horizontally, aligning both ends.
- Join Edges:
- Use a yarn needle and whip stitch along the edges to close them.
- Work carefully to ensure even stitching.
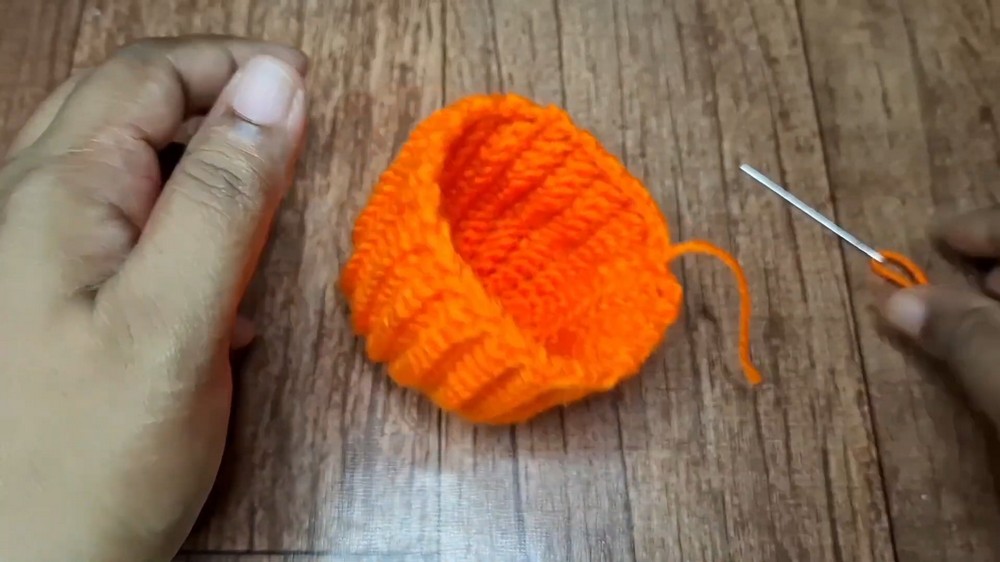
- Close One End:
- Insert the needle into spaces near the edge and cinch tightly, creating a round closure like the top of a hat.
- Weave in the yarn tail securely and trim.
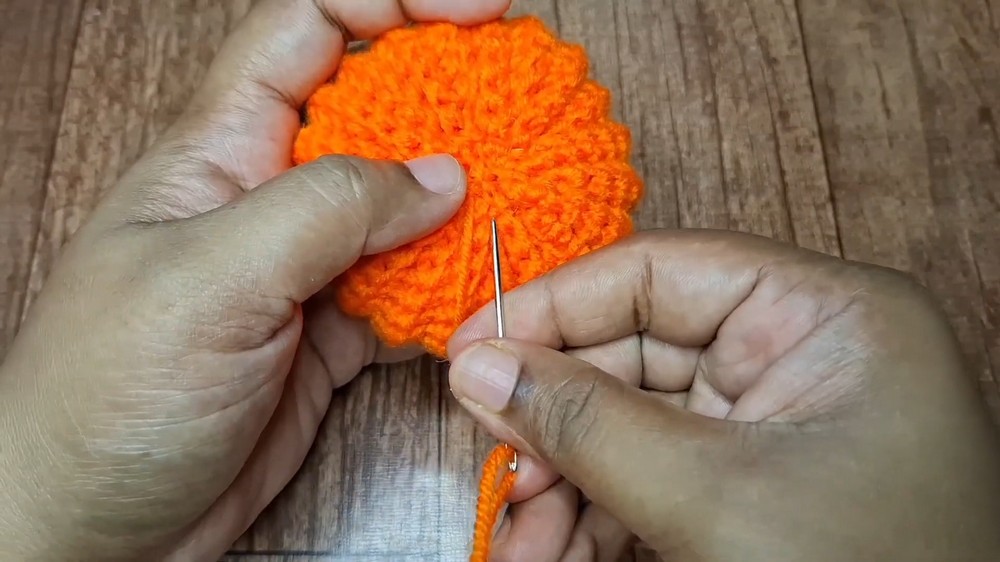
Step 3: Add Stuffing to the Body
- Flip the assembled piece inside out so the seams are hidden inside.
- Gently add polyfill stuffing to the pumpkin, shaping and filling to ensure an even, plump appearance.

- Close the other end following the same method as before (cinching and weaving).
Step 4: Create and Attach the Stem
- Stem Construction:
- Use green yarn to create a slip knot and chain 7.
- Work into the back hump starting from the second chain (6 stitches total).
- Chain one, turn, and work single crochets in the first and last stitches (whole).
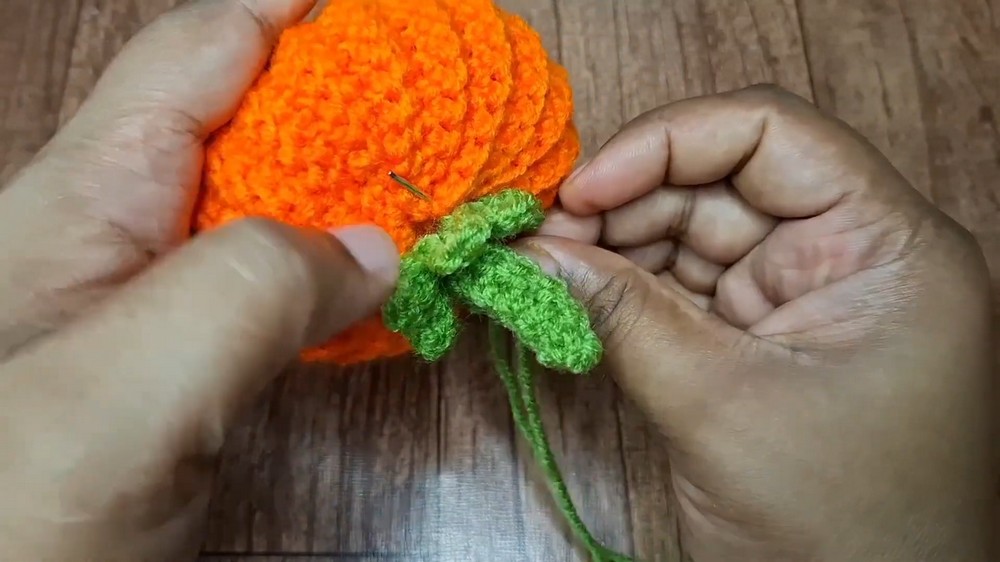
- For the remaining middle stitches, work in the back loop only (4 stitches).
- Repeat this for three rows.
- Fan Effect for Stem Top:
- At the short edge (end of rows), work 2 single crochets in each space (6 stitches total).
- Chain two, work one double crochet, and slip stitch into the same stitch. Repeat for all six spaces to create a fan-like top.
- Form the Stem Shape:
- Fold the stem into a tubular shape and whip stitch along the long edge to close.
- Add slight curvature by pulling the yarn for a realistic look.
- Attach the Stem:
- Position the stem on top of the pumpkin.
- Use the tail of green yarn and whip stitch the stem securely onto the pumpkin, ensuring alignment with the ridges.
Level of Difficulty
This project is beginner-friendly, with easy-to-follow stitches and assembly methods. The ridged texture requires basic understanding of “back loop only” single crochets, but the instructor provides clear guidance. Whip stitching and stuffing techniques are accessible even to crochet newcomers.
Tutor’s Suggestions
- Customize Size:
- For larger pumpkins, use thicker yarn and a larger hook.
- For smaller pumpkins, use thinner yarn and adjust panel size accordingly.
- Match Yarn Weights: Ensure the green yarn for the stem matches the orange yarn to avoid disproportionate results.
- Experiment with Colors: Don’t hesitate to use different combinations of autumn shades like brown and yellow for variety.
- Maintain Tension: Use slightly tighter tension to keep the pumpkin’s shape stable.
Uses of the Textured Pumpkin
- Decor Items: Display them as tabletop centerpieces or mantel decor during autumn and Thanksgiving.
- Gift Ideas: Perfect for handmade seasonal presents.
- Seasonal Accessories: Can be hung on garlands, attached to wreaths, or used as hanging ornaments.
Tip for Success
For a more pronounced ridge effect, ensure you only grab the back loop for middle stitches. This technique gives the pumpkin its iconic textured appearance. Additionally, be gentle when pulling yarns to close the top and bottom to avoid breaking the yarn.
Conclusion
This textured pumpkin project is a delightful crochet activity that combines simplicity with creativity. Whether you aim for large, plush pumpkins or tiny decorative ones, this tutorial equips you with all the necessary steps and tips for success.