
Free Crochet Clutch Bag Pattern For Everyday Elegance
Keep your look effortlessly chic and stylish with this free crochet clutch bag pattern that lets you create a sleek, modern accessory perfect for any outing or special occasion.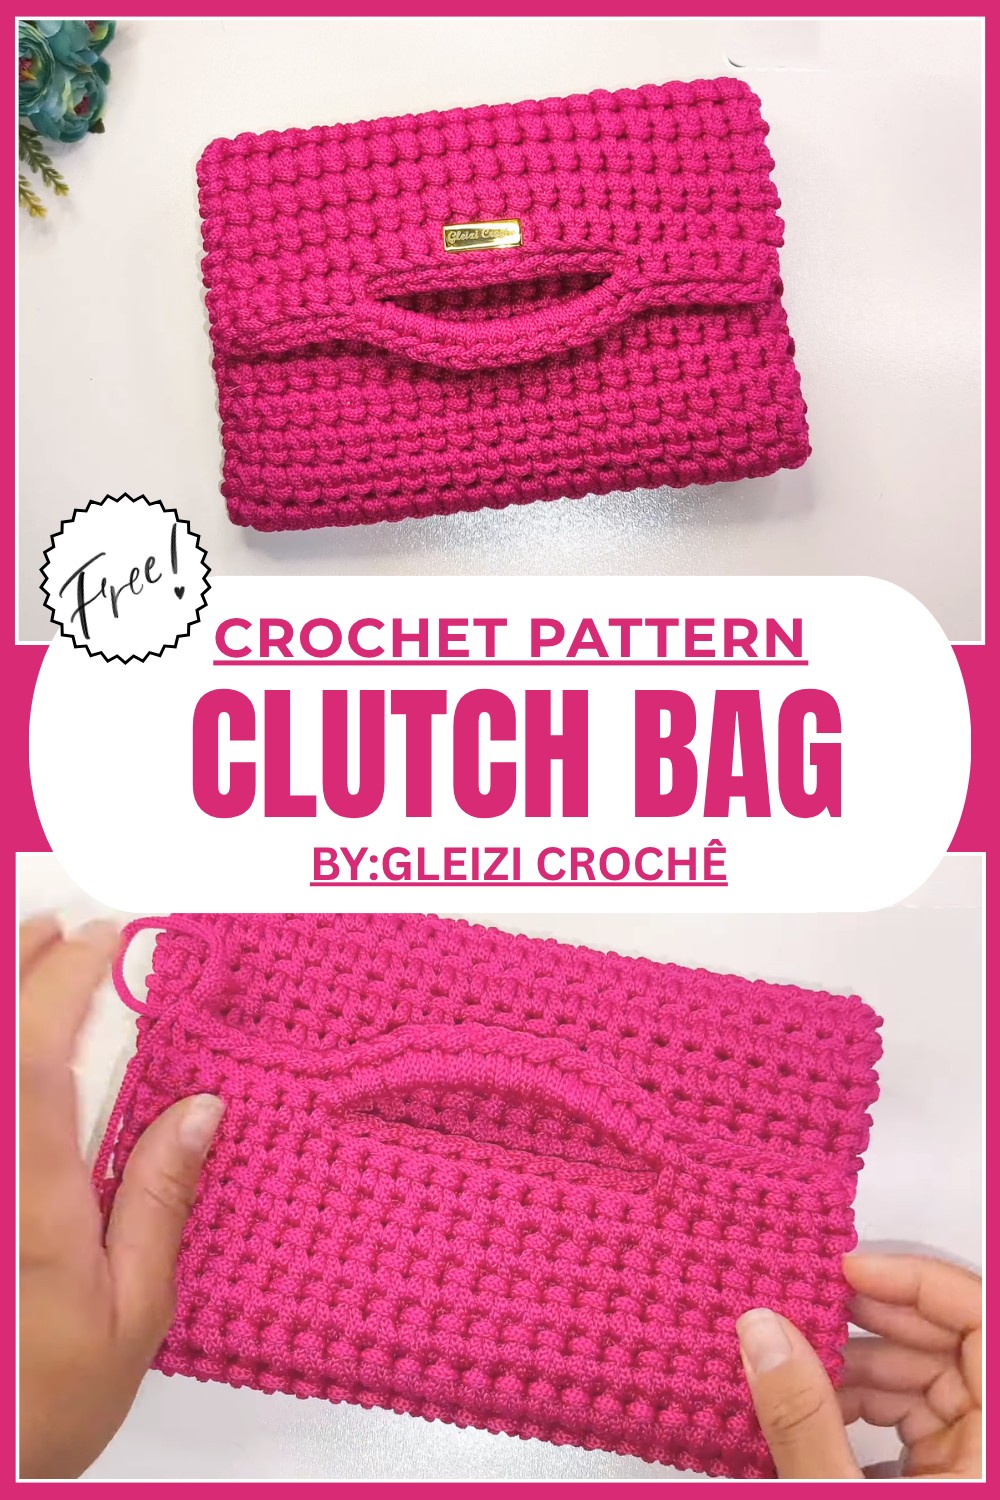
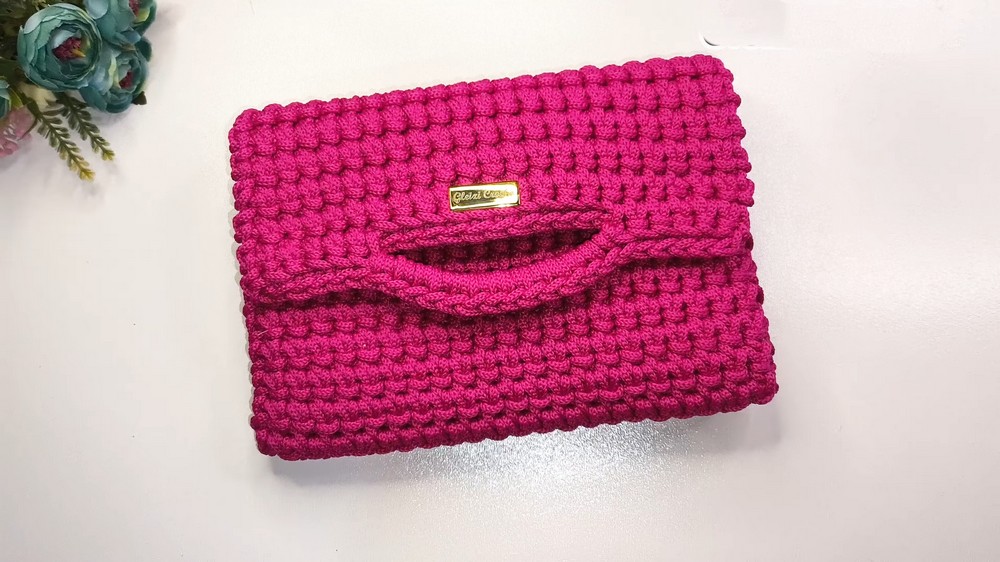
Beautiful Free Crochet Clutch Bag Pattern for Every Outfit
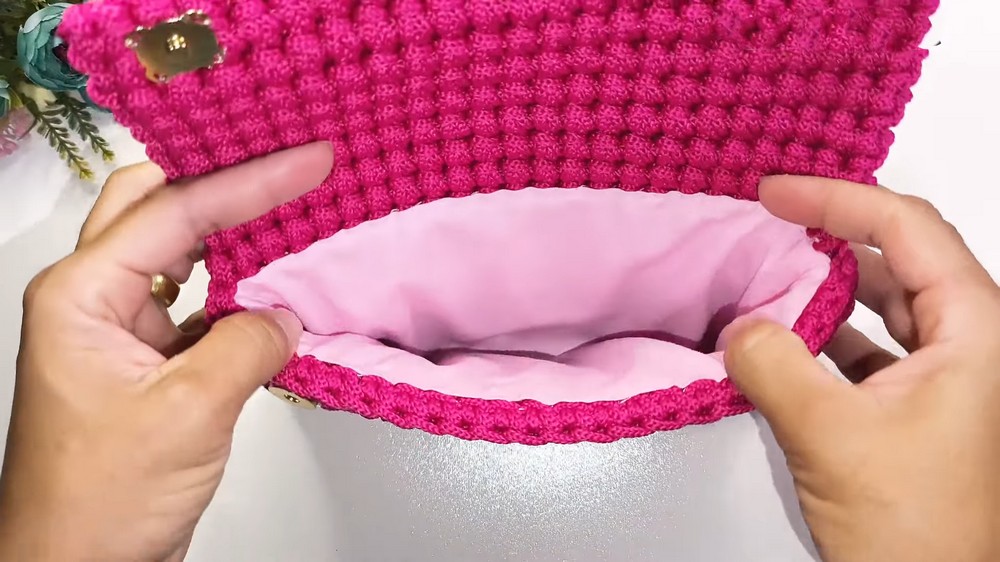
Pick your favorite yarn color and crochet a fancy and elegant purse that’s perfect for parties or special dinners. This stunning accessory is shaped like a sleek, rectangular pouch with a smooth, glossy texture and a neat metal lock to keep your essentials safe. Following this Free Crochet Clutch Bag Pattern, you can easily make your own chic and stylish bag that looks like it came straight from a luxury boutique. The beauty of this clutch lies in the thick and shimmery yarn, giving it a high end look that’s bound to impress. Its firm structure and soft inner lining make it ideal for holding your phone, lipstick, and other small essentials.
Whether you use it as the perfect finishing touch to your outfit or gift it to someone special, this handmade treasure will feel truly luxe. Best of all, it’s simple to create, making it the perfect project to show off your creativity while crocheting a gorgeous and durable clutch.
Crochet Clutch Bag Pattern
Materials Required
- Yarn
- 4mm polypropylene yarn (preferred for structure and durability).
- Crochet Hook
- 4mm crochet hook.
- Sewing Supplies
- Fabric for the lining (choose a sturdy cotton or polyester material).
- Sewing thread matching the color of the fabric.
- Hand sewing needle or a sewing machine for the lining.
- Bag Accessories
- Magnetic button for the closure.
- Optional: Chain strap with carabiners for handles.
- Other Tools
- Stitch markers.
- Scissors.
- Measuring tape.
- Lighter for finishing polypropylene thread.
- Needle for weaving in ends.
Special Techniques Used
- Single Crochet (sc):
- Insert hook, yarn over, pull through, yarn over again, and pull through both loops.
- Folded Single Crochet:
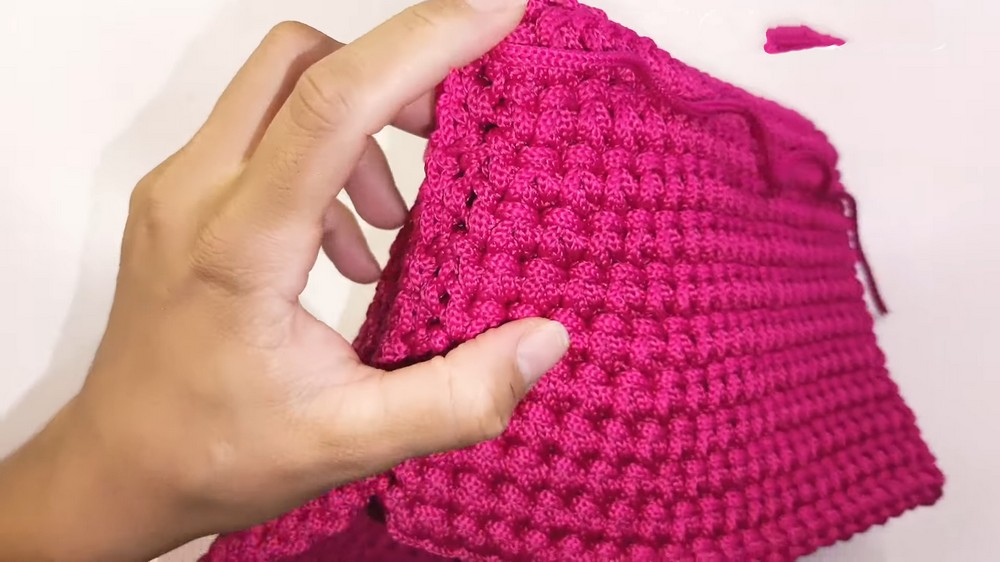
- In each row, crochet into the back loop of the stitch from the previous row, creating a folded ribbed texture.
- Hidden Finishing:
- Use a lighter to carefully melt the edge of the polypropylene yarn for a clean and secure finish.
- Use a lighter to carefully melt the edge of the polypropylene yarn for a clean and secure finish.
Step by Step Pattern
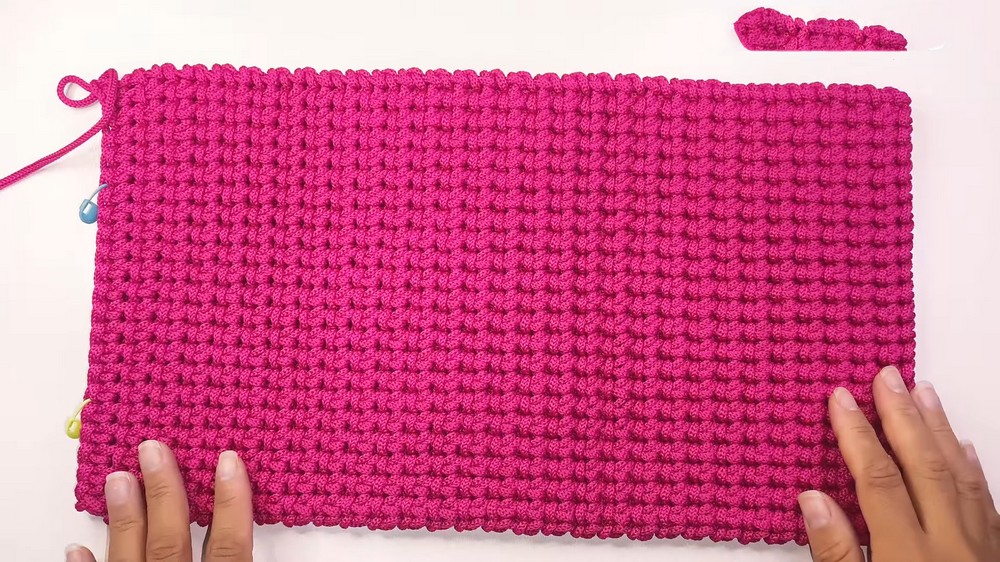
Step 1: Create the Base of the Bag
- Create a slipknot and insert your 4mm crochet hook into it.
- Chain 22 sts for the foundation chain.
- Work 1 single crochet (sc) into the second chain from the hook and across all chains (21 sc in total).
- Tip: Turn the work and continue into the back loops for a cleaner edge.
- Measure the row to ensure it is about 22 cm in length.
Step 2: Build the Bag Body
- Chain 1 to turn your work and start the next row.
- Follow the folded single crochet technique:
- Insert hook into the back loop of the first stitch.
- Pull through yarn and complete the single crochet.
- Repeat this method across the row for 22 stitches.
- Continue working in rows of folded single crochet until the fabric measures 39 cm in height.
- Adjust the height if you want a larger or smaller bag.
- When you finish the desired height, fasten off and weave in the ends.
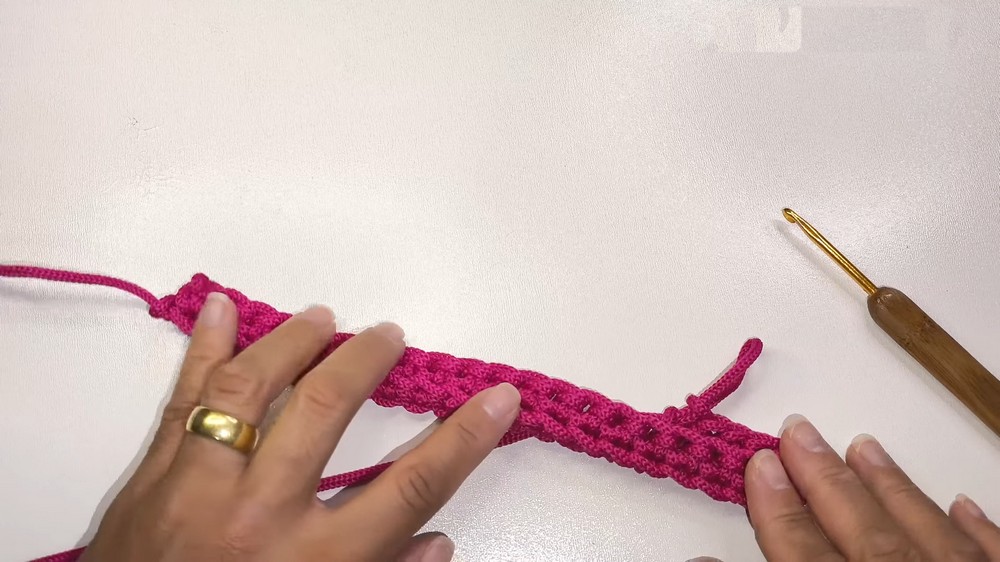
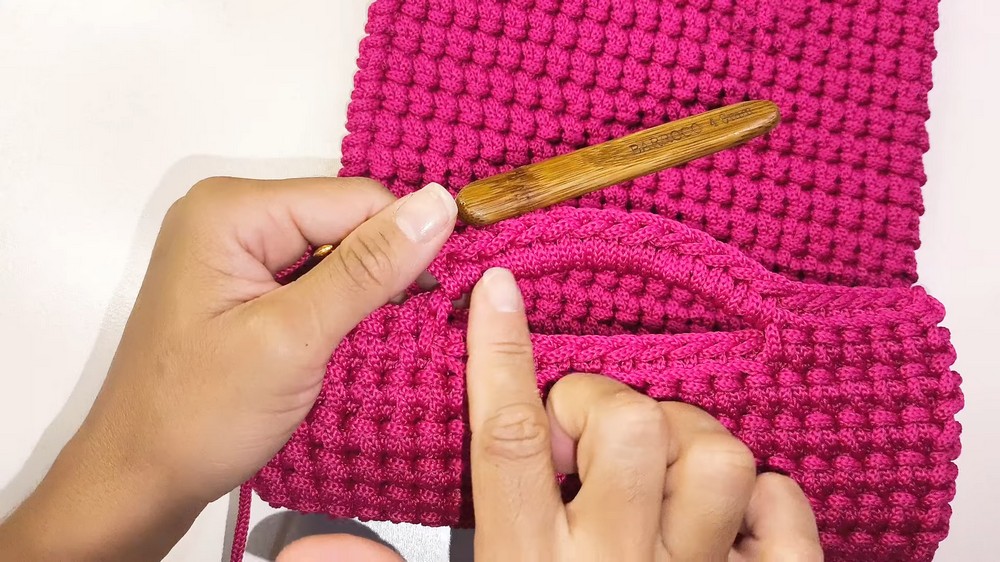
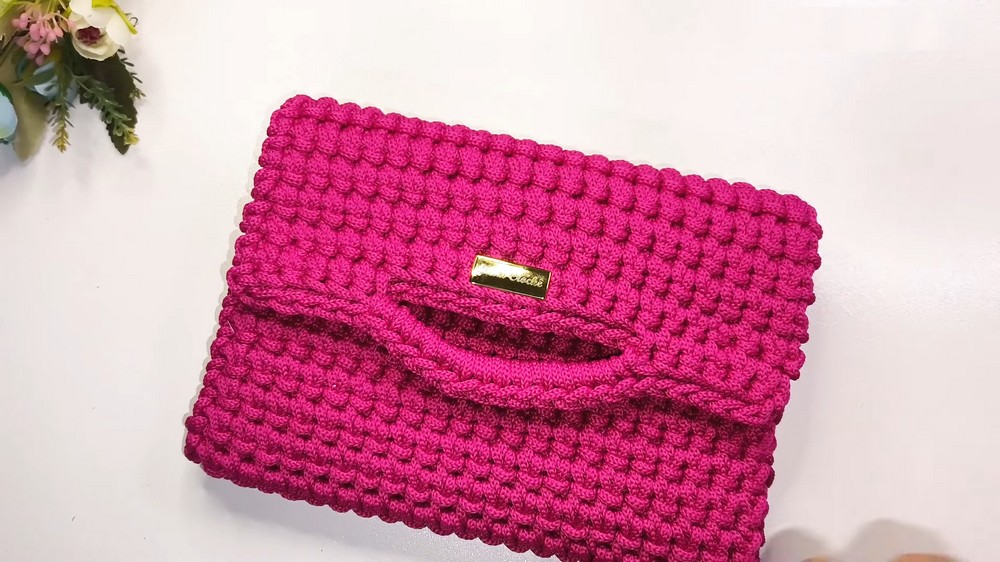
Step 3: Create the Handles/Openings
- Arrange the rectangle flat and measure 6 stitches in from each side. Use stitch markers to mark these points.
- Leave 6 stitches on either side for the handles' edges and 10 stitches in the middle for the opening.
- From one end:
- Work sc in the first 6 stitches.
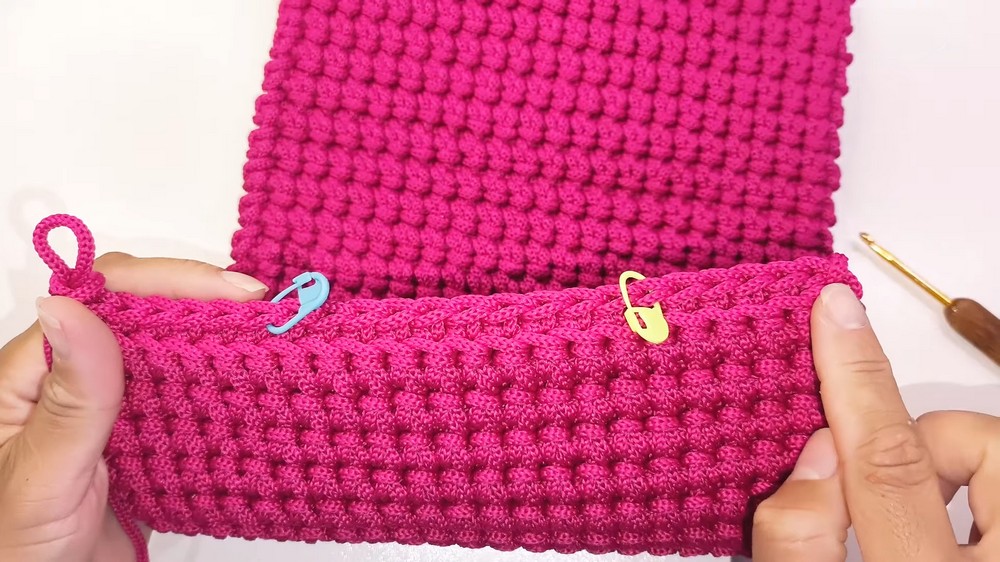
- Chain 13 and skip the next 10 stitches (accommodating the opening).
- Insert the hook into the stitch marked after the chain and continue with sc to the edge.
- Work sc in the first 6 stitches.
- Turn the work and repeat:
- Work sc stitches into the chain space to create a structured handle.
- Continue to the end and repeat for the other side.
- Fasten off and secure all corners.
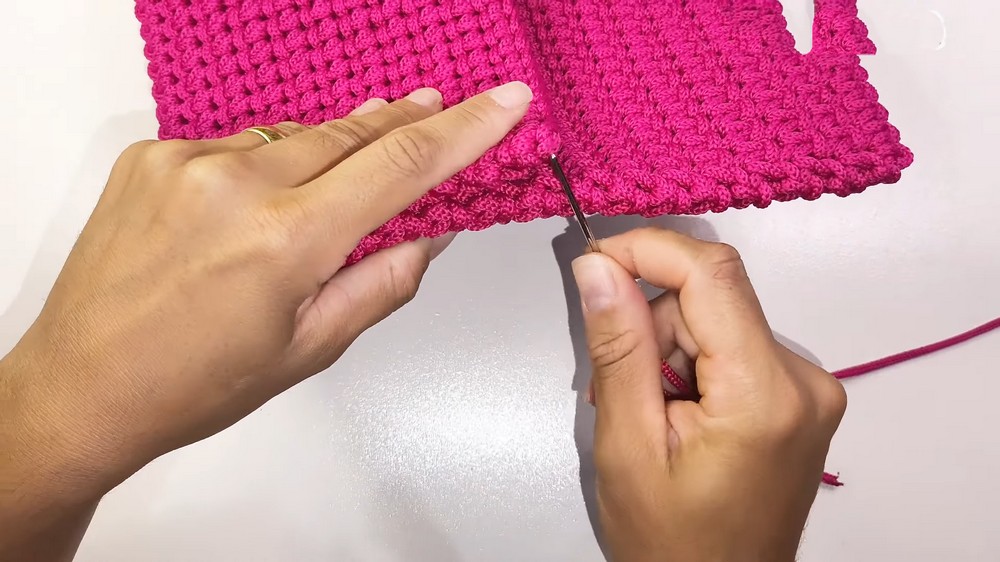
Step 4: Sew the Sides
- Fold the bag in half with the wrong side out.
- Using a needle and polypropylene yarn, sew along the bag edges using small, even stitches.
- Work from the inside to ensure a smooth finish.
- Make small knots to secure the sides.
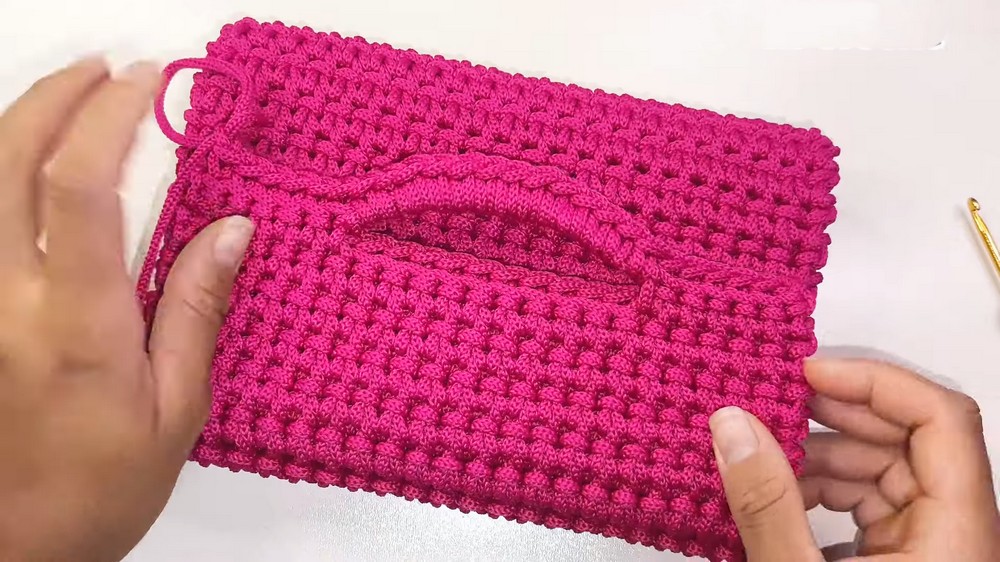
- Weave the ends of the yarn into nearby stitches. For polypropylene yarn, carefully melt the ends with a lighter for clean finishing, ensuring no stray threads remain visible.
Step 5: Create and Attach the Lining
- Lay out your chosen fabric and cut a rectangle measuring:
- 21 cm (width) plus an extra 1 cm seam allowance on both sides.
- 39 cm (length) plus an extra 1 cm seam allowance.
- Fold the fabric in half, right sides in, and sew the sides together using straight stitches:
- Use a sewing machine or hand sew with a backstitch.
- Use a sewing machine or hand sew with a backstitch.
- Once sewn, turn the lining right side out.
- Insert the lining into the bag with the seams hidden against the bag walls and secure with fabric glue or discreet hand stitching along the edges.
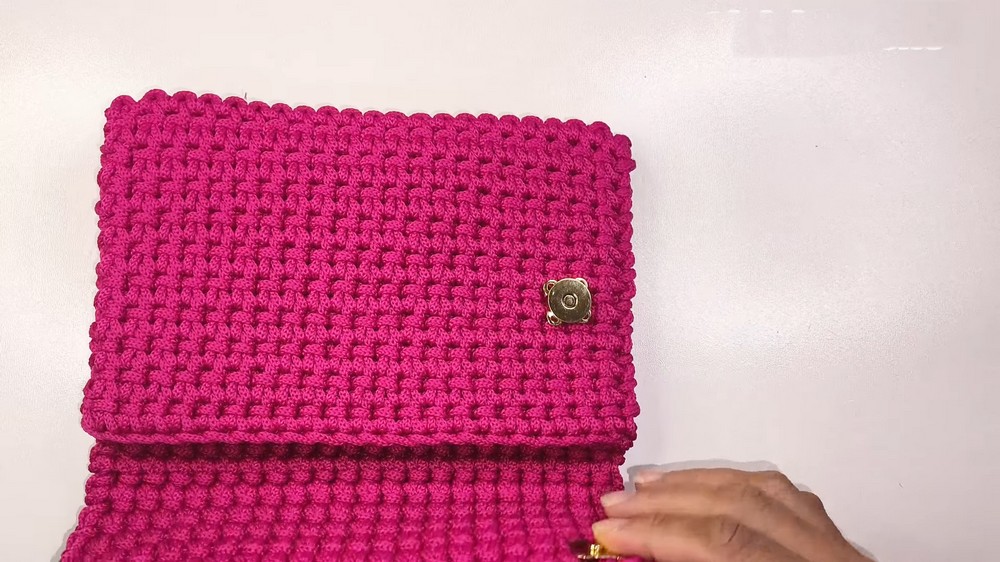
Step 6: Attach the Magnetic Button
- Center the magnetic button on the opening flap.
- Using matching thread, secure the button firmly to the fabric lining.
- Ensure it is aligned properly for easy snapping when the bag is closed.
- Ensure it is aligned properly for easy snapping when the bag is closed.
Step 7: Attach Handles (Optional)
- Insert the carabiner handles into the corner holes created by the chained openings to add a functional shoulder strap.
- Test for balance and adjust as needed.
Finishing
- Carefully inspect your bag for loose threads or uneven edges.
- Use the lighter to finalize any loose ends on the polypropylene yarn, giving a polished and professional look.
Final Measurements
The completed bag should measure approximately:
- 23 cm wide
- 16 cm tall
Final Words and Tips
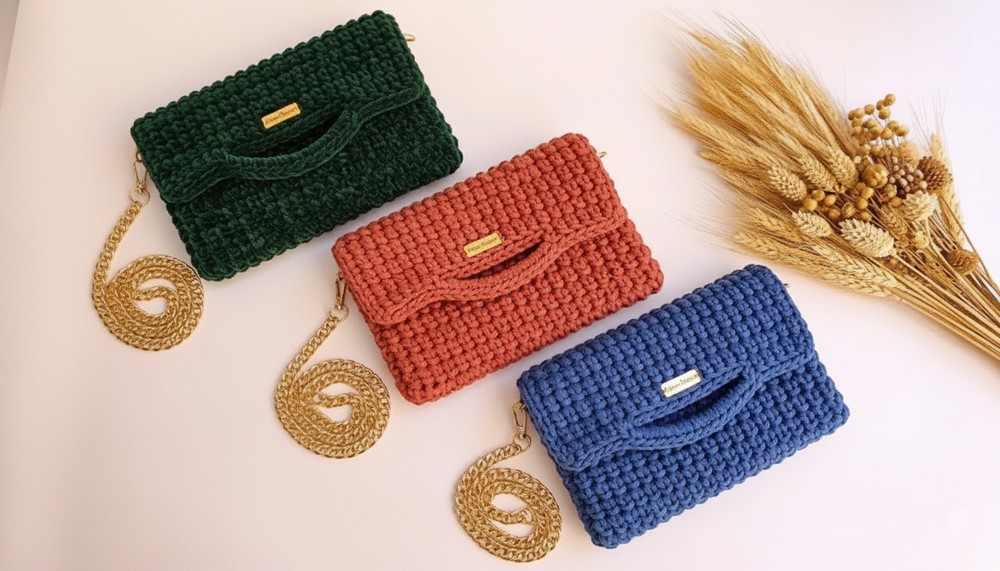
- Customization:
- Use colorful yarn or add a decorative appliqué on the front for a unique style.
- Experiment with different sized chains for the handles to make the bag larger or smaller.
- Care Tips:
- Spot clean the bag with a damp cloth. Avoid machine washing, especially if the lining fabric is delicate.
- Troubleshooting:
- If the bag feels loose after completing the handles, adjust the chain count or tension as per personal preference.
- Practice the folded single crochet technique on a small swatch if you are unfamiliar.
- Gift Idea:
- This bag makes a thoughtful handmade gift. Pair it with a matching crochet keychain or small wallet.
- This bag makes a thoughtful handmade gift. Pair it with a matching crochet keychain or small wallet.