Enchanting Free Crochet Mini Bag Pattern To Show Off Your Style
Carry your essentials in style with this free crochet mini bag pattern that lets you create a cute, trendy, and useful everyday bag, adding a touch of handmade charm to your outfit.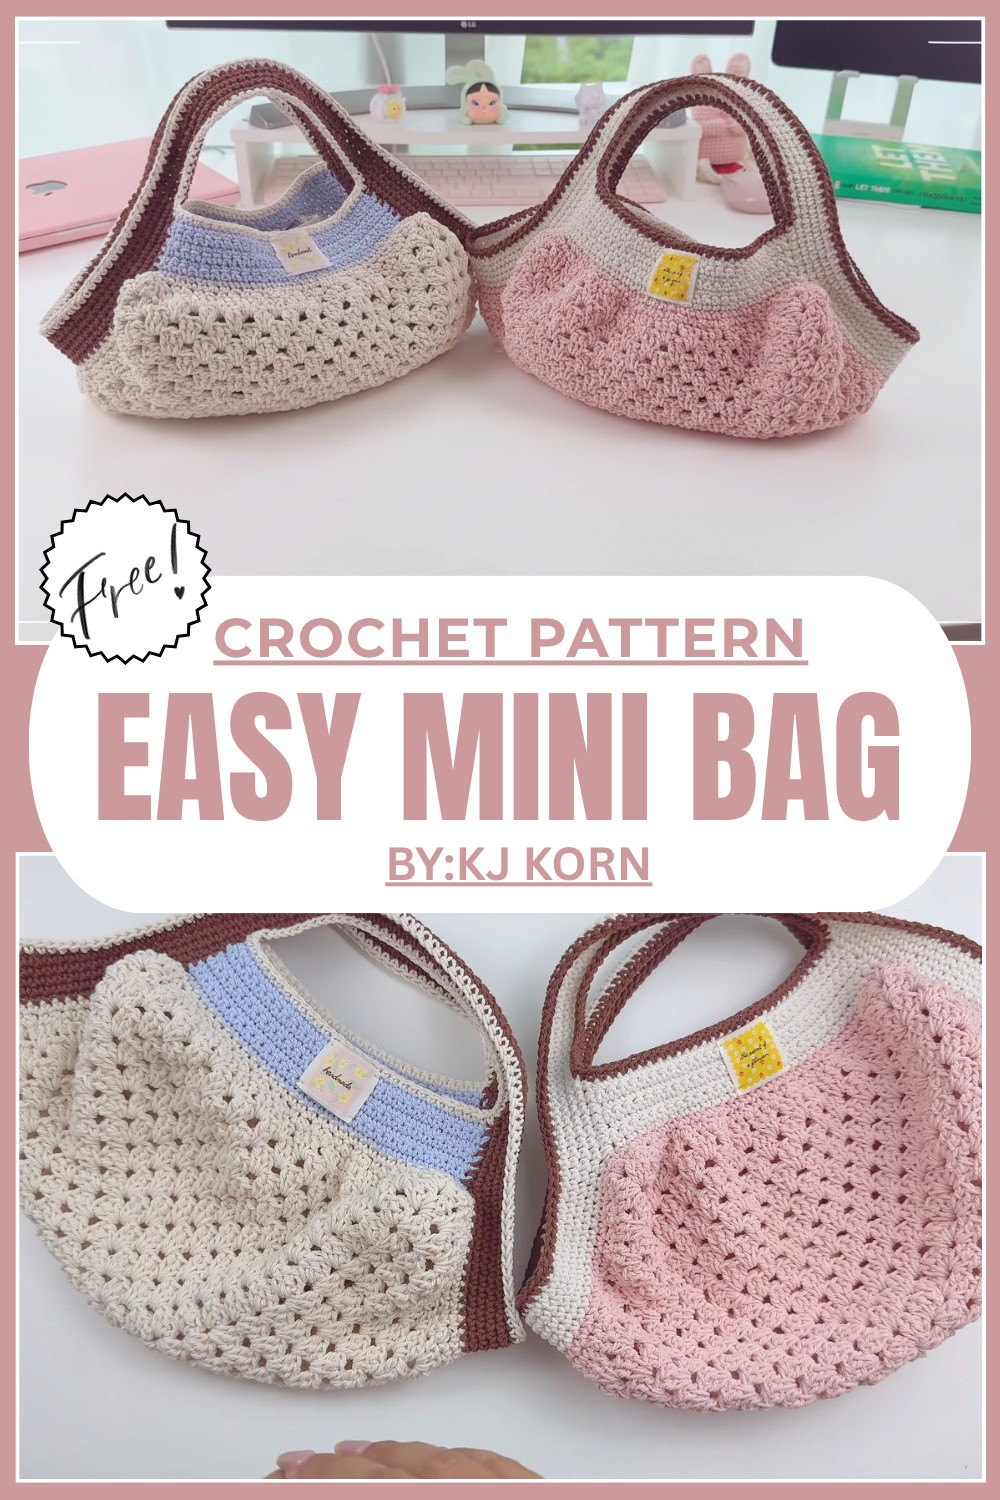
Adorable Free Crochet Mini Bag Pattern You’ll Fall in Love With
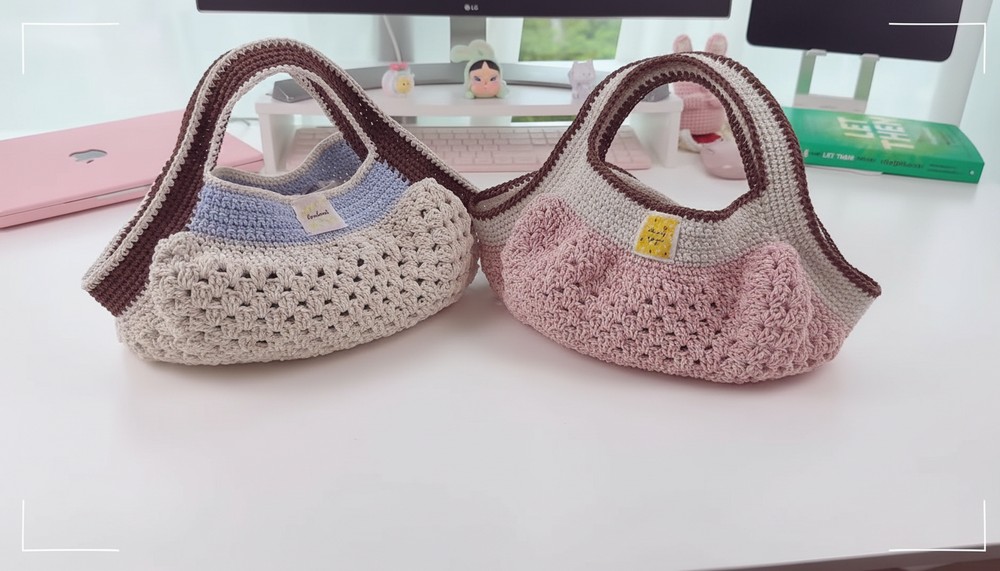
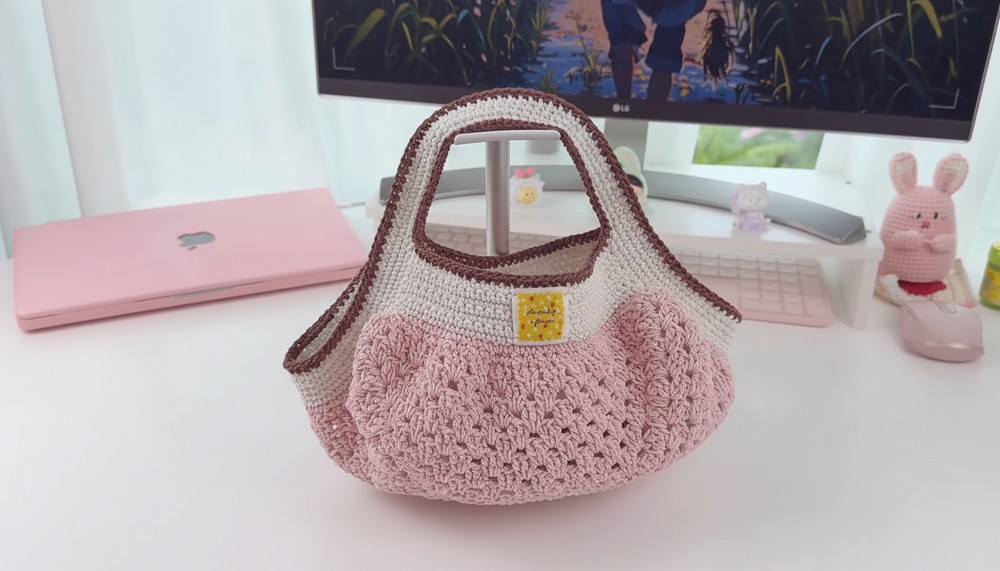
Prepare your favorite yarn and get ready to create something amazing—a tiny, stylish mini bag that feels like a treasure you’ll love to carry everywhere. This Free Crochet Mini Bag Pattern is the perfect project for anyone who wants to make a beautiful and practical accessory with their own hands.
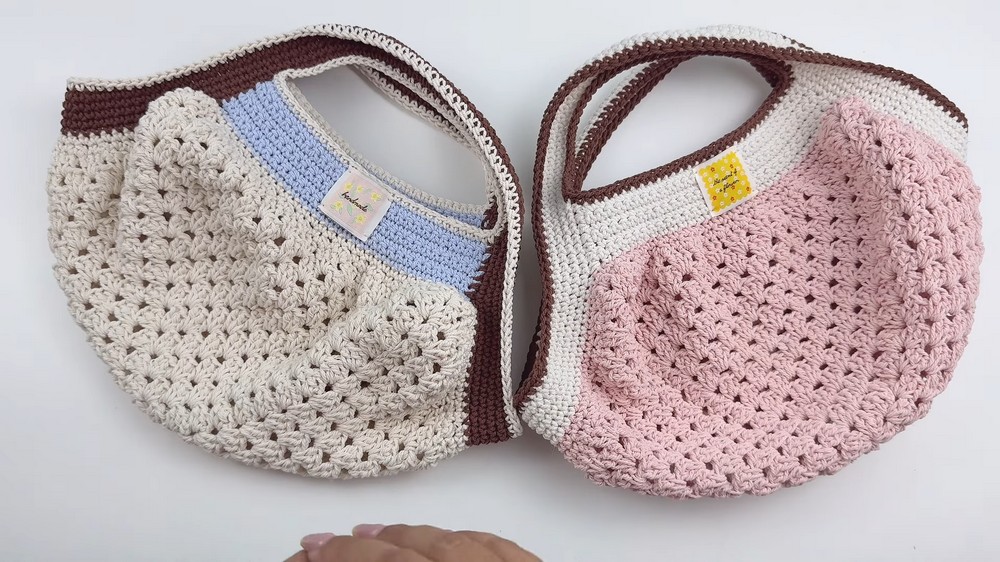
Starting with a simple granny square, you’ll watch your bag take shape step by step into a sturdy and elegant design. Its charming size, 30 cm wide and 27 cm tall, makes it ideal for carrying essential items like your phone, wallet, or makeup. The soft cotton rope texture and colorful details bring it to life, making it stand out beautifully. 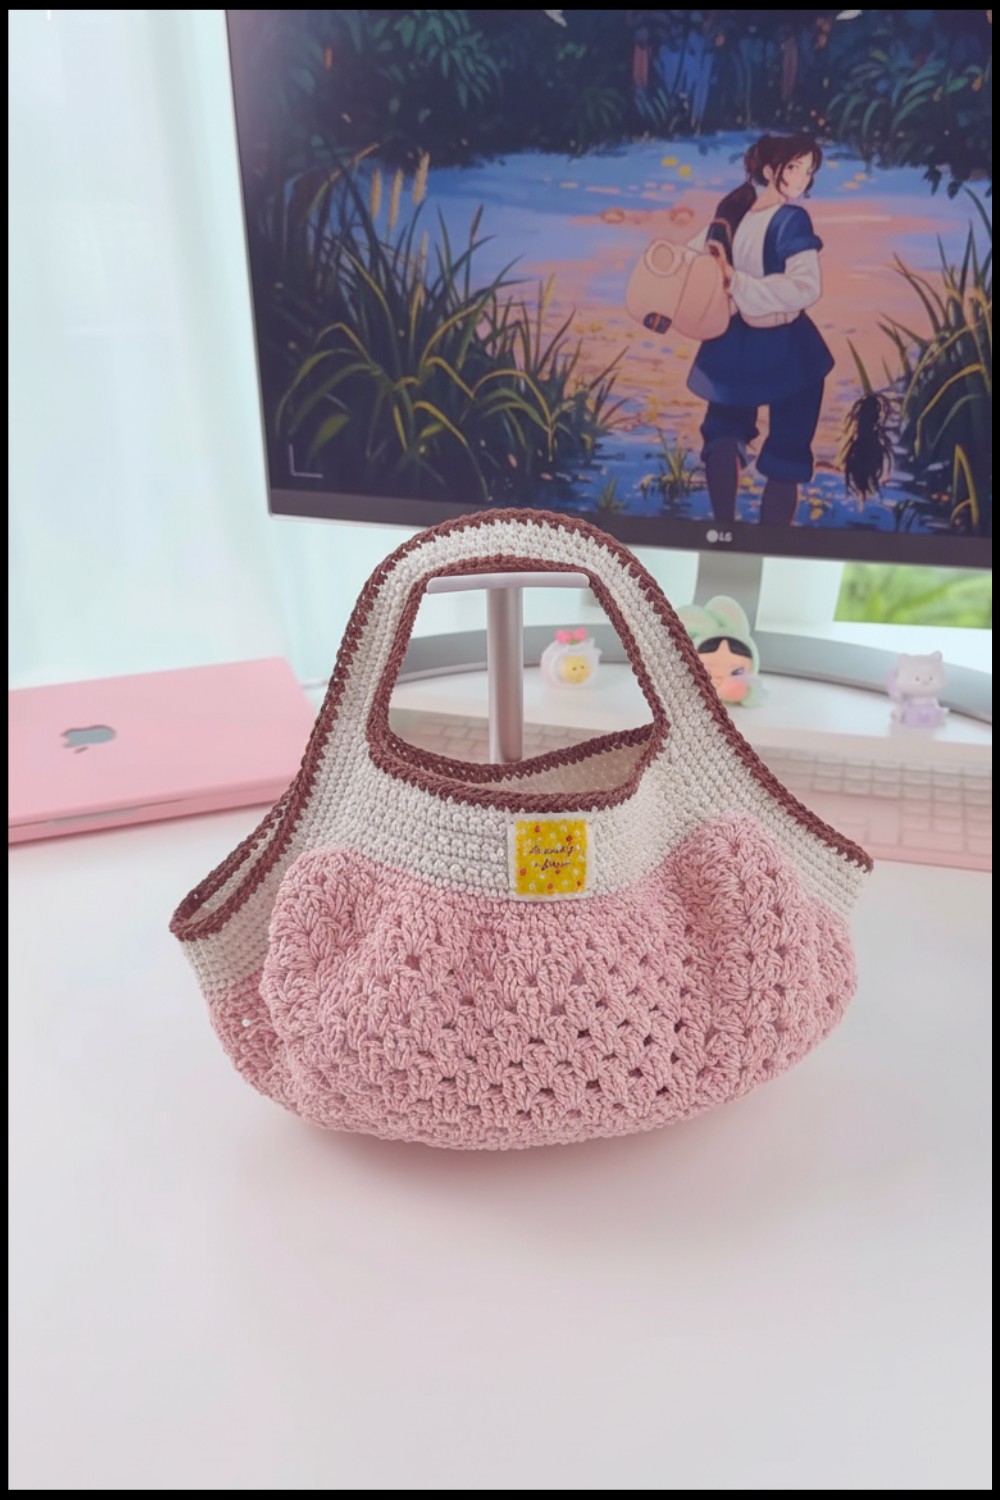 You can even make it extra special by adding handles, a magnetic button, or choosing your favorite yarn colors. Easy to crochet and stunning to show off, this bag is perfect for gifting or keeping as your own stylish statement piece.
Free Crochet Mini Bag Pattern
Approximate Finished Size
- Width (at widest point): about 30–31 cm
- Height (from base to top edge, not including handles): about 27 cm
Size can be adjusted by changing the number of granny square rounds.
Materials
- Yarn:
- 2 mm cotton rope (or similar fine cotton cord)
- Main Color (MC): White – approximately 180 g
- Contrast Color 1 (CC1): Brown – approximately 30 g
- Contrast Color 2 (CC2): Accent color for panels/handles/edging – approximately 10–20 g
- Hook:
- 3.0 mm crochet hook (Japanese size 5/0)
- Notions:
- Scissors
- Yarn/tapestry needle
- Stitch markers
- Optional: Magnetic snap button
- Optional: Small drawstring pouch to use as a liner/organizer inside the bag
Crochet Terms & Abbreviations (US Terms)
- ch = chain
- sc = single crochet
- dc = double crochet
- sl st = slip stitch
- st(s) = stitch(es)
- sp = space
- dec = decrease (sc2tog: single crochet two stitches together)
- rep = repeat
- RS = right side
- WS = wrong side
Special Techniques
1. Adjustable Start (Slip Knot or Magic Ring)
The video starts with an oversized slip knot and working into the first chain, but you may use a magic ring if preferred.
Slip knot method (as in video):
- Make a slightly larger slip knot than usual.
- Ch 3. The loop at the slip knot + 3 chains = 4 chain “segments.”
- Work into the first chain (closest to the slip knot).
Alternative (magic ring):
- Make a magic ring.
- Work the first round instructions into the ring instead of the first chain.
2. Marking the First Stitch of a Round
Whenever the pattern mentions marking the first stitch:
- After making that stitch, place a stitch marker in it.
- Move the marker up each round to keep track of where the round begins.
3. Single Crochet Decrease (sc2tog)
Used in Round 16 to shape the bag:
- Insert hook into next st, yarn over and pull up a loop (2 loops on hook).
- Insert hook into next st, yarn over and pull up a loop (3 loops on hook).
- Yarn over and pull through all 3 loops.
4. Invisible Join in Rounds of Single Crochet
Used after the final sc round for a clean finish:
- Cut yarn and pull tail through the last loop on the hook.
- Thread tail onto a yarn needle.
- Skip the first stitch of the round, insert the needle under both top loops of the second stitch from front to back, pull through.
- Insert needle back into the center of the last stitch you made (under both top loops) and pull through.
- This creates a fake “V” that mimics a real stitch. Then weave in tail on WS.
Pattern Instructions
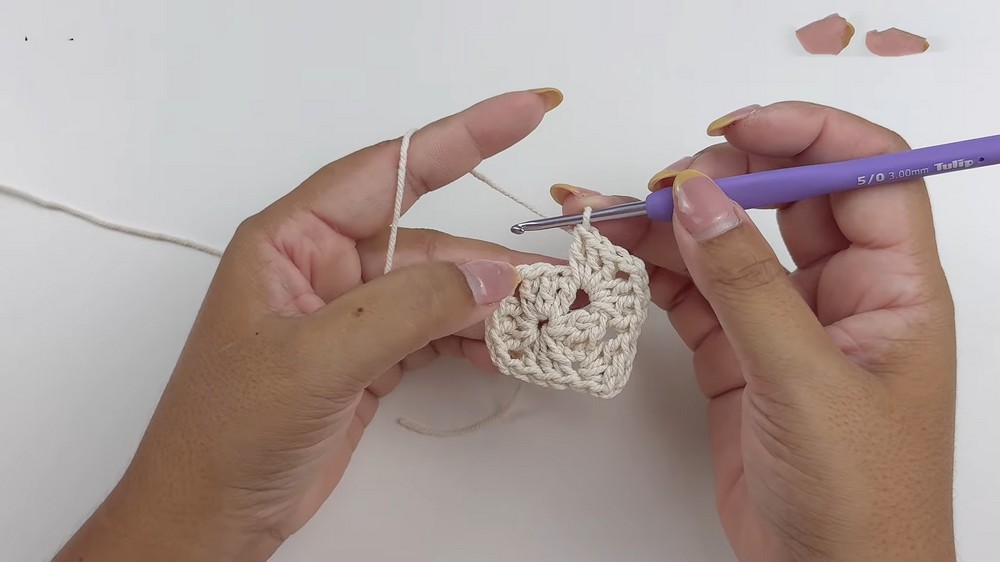
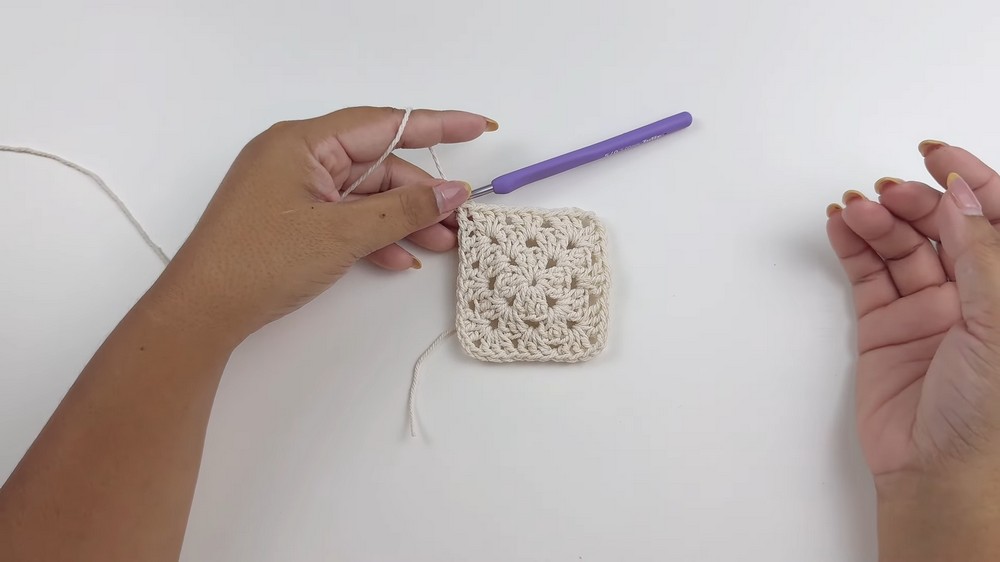
PART A – Granny Square Base
This forms the bottom of the bag.
Round 1
- With Main Color (MC), make a slightly larger slip knot.
- Ch 3.
- Count back from the hook and place a stitch marker in the 3rd ch – this chain will count as your first stitch.
- Work 2 sc into the first chain (the chain closest to the slip knot).
- Note: If this method is difficult, start with a magic ring and work into the ring instead.
- Note: If this method is difficult, start with a magic ring and work into the ring instead.
- Ch 2.
- In the same space (first chain or magic ring), work:
- 3 dc, ch 2, 3 dc, ch 2, 3 dc
You now have 3 groups of 3 dc plus your earlier scs in the same central area.
- 3 dc, ch 2, 3 dc, ch 2, 3 dc
- To close the round, work 1 dc into the 3rd chain where the marker is.
- This dc acts as a chain‑2 corner (completing the fourth side of the square).
- This dc acts as a chain‑2 corner (completing the fourth side of the square).
You should now see 4 “sides,” each with a group of stitches, forming a small square with open corners.
Round 2
- Ch 2. (Counts as first dc. Place a stitch marker in the second chain if desired.)
- Work 2 dc into the same corner space (the space where you just finished Round 1).
- Skip 3 stitches (the 3 dc or 3‑st group along the side).
- In the next corner ch‑2 space:
- Work 3 dc, ch 2, 3 dc – this forms a corner.
- Skip 3 stitches again and work 3 dc, ch 2, 3 dc in the next corner space.
- Repeat Step 5 around until you have worked into 3 corners.
- For the last side:
- Skip 3 sts, work 3 dc into the next space.
- Then work 1 dc into the top of the starting ch‑2.
- This final dc acts as the last half of the corner (replacing “ch 2, dc joining” to keep it seamless).
Round 2 is complete; your square is growing.
Round 3
- Ch 2. (Counts as 1 dc; mark the second chain if helpful.)
- Work 2 dc into the same corner space.
- Skip 3 sts, then 3 dc in the next side space.
- Skip 3 sts again, 3 dc in the next side space (if present).
- At each corner ch‑2 space:
- Work 3 dc, ch 2, 3 dc.
- Continue around the square:
- Along sides: always skip 3 sts, 3 dc in next space.
- At corners: 3 dc, ch 2, 3 dc in corner space.
- At the final section:
- Skip 3 sts, 3 dc in next space,
- Then 1 dc into the top of the starting ch‑2 (counts as the final corner half).
Round 4
Round 4 establishes the repeating granny square pattern used until Round 15.
- Ch 2 (counts as dc), 2 dc in the same corner space.
- Along the side:
- Skip 3 sts, 3 dc in next side space.
- Repeat as needed until you reach a corner.
- In each corner ch‑2 space:
- 3 dc, ch 2, 3 dc.
- Continue this pattern around.
- At the end:
- 3 dc in the last side space,
- 1 dc into the top of the starting ch‑2 to finish the last corner.
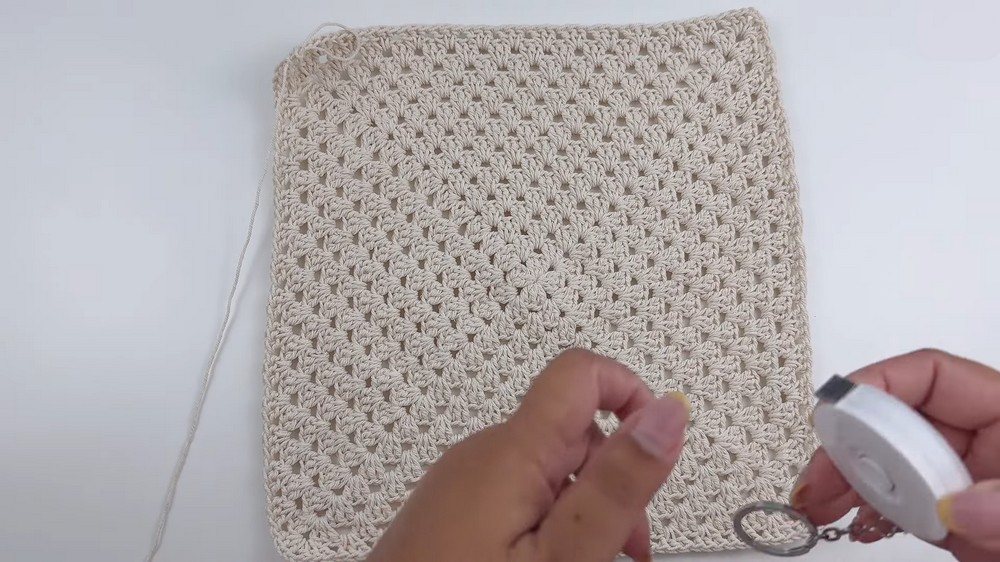
Rounds 5–15
- Work all these rounds exactly as Round 4:
- Each corner:
- 3 dc, ch 2, 3 dc in the corner space.
- Each side space:
- Skip 3 sts, 3 dc in next space.
- Each corner:
- After 15 rounds, your square should measure about 31 cm across.
Adjusting size:
- For a larger bag: add more rounds.
- For a smaller bag: work fewer rounds.
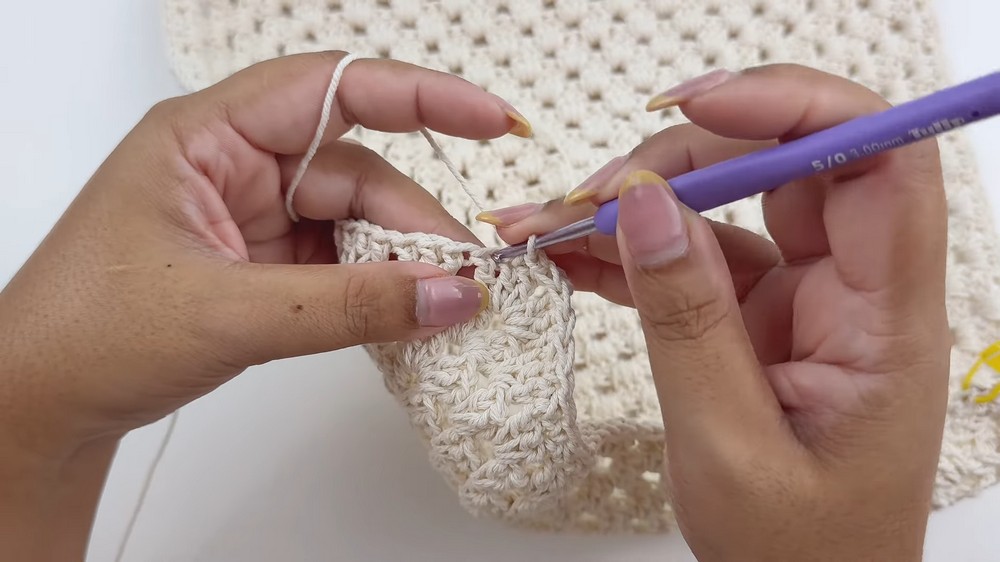
PART B – Shaping the Bag Sides (Rounds 16–17)
In these rounds, you switch to single crochet and begin forming the sides.
Round 16 – Shaping with Decreases
- Ch 1.
- Work a dec (sc2tog) over the first two sts:
- Insert hook into first st, yarn over, pull up a loop.
- Insert hook into second st, yarn over, pull up a loop (3 loops on hook).
- Yarn over, pull through all 3 loops.
- Place a stitch marker in this decrease – this is your first stitch of the round.
- Work the following sequence all around:
- 1 sc in next st, then 1 dec (sc2tog) over next 2 sts.
- 1 sc in next st, then 1 dec (sc2tog) over next 2 sts.
- At each corner section:
- Start with 1 sc in the central corner area if needed (as the video mentions “start with a single crochet in the center”).
- Then work 2 decreases at each corner:
- dec over the corner st and next st,
- dec again over the following two sts.
- This tightens and shapes the corners.
- Continue the “1 sc, 1 dec” repeat until you approach the end of the round:
- Work 1 sc, then one final dec to finish the sequence.
- Join with a sl st to the first stitch of the round.
Round 16 is complete; your flat square will now start to curve upward, forming the base of the bag.
Round 17 – Plain Single Crochet Round
- Ch 1.
- Work 1 sc into the very first stitch, and place a marker in this stitch.
- Work 1 sc in each stitch around the entire piece.
- At the end of the round, finish with an invisible join:
- Cut yarn and pull it through the last loop.
- Use needle to make an invisible join into the second stitch and back into the last stitch as described under “Special Techniques.”
- Secure the yarn tail and weave in later if you prefer.
Round 17 is complete. This sets the base height before you build the top opening.
PART C – Forming the Top Opening Panels
You now create two flat panels on opposite sides of the bag where the opening will be.
Marking Stitches
- From the stitch where you ended Round 17, count 31 stitches along the top edge on one side.
- Place a stitch marker in the 31st stitch – this marks one end of the first panel.
- On the opposite side of the bag, again count 31 stitches and mark the 31st – this ensures both sides are symmetric.
- These two 31‑st stretches form the top “panel” sections of the bag (front and back).
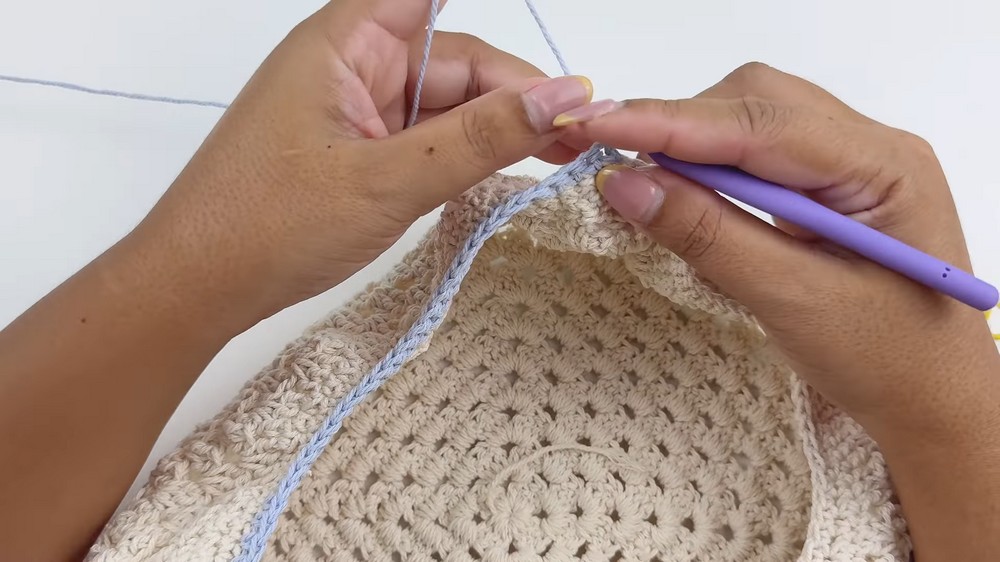
First Top Panel (Rows of sc)
Change to the panel color (e.g., blue yarn in the video – CC1 or CC2 as you prefer).
Row 1
- Make a slip knot.
- Insert your hook into the first stitch of the chosen 31‑st section.
- Yarn over, pull through the stitch, and ch 1 to secure.
- Work 1 sc in each st across until you have 31 sc or reach the marker.
- For clarity, use a stitch marker on the first stitch of the row.
Row 2
- Ch 1, turn.
- Work 1 sc in each of the 31 sts across.
Rows 3–7
- Repeat Row 2 (ch 1, turn, 31 sc) until you have 7 rows in total.
At the end of Row 7:
- Ch 1, cut the yarn, and pull through to secure.
- Leave a tail to weave in.
You now have a rectangular top panel of 7 rows by 31 sts.
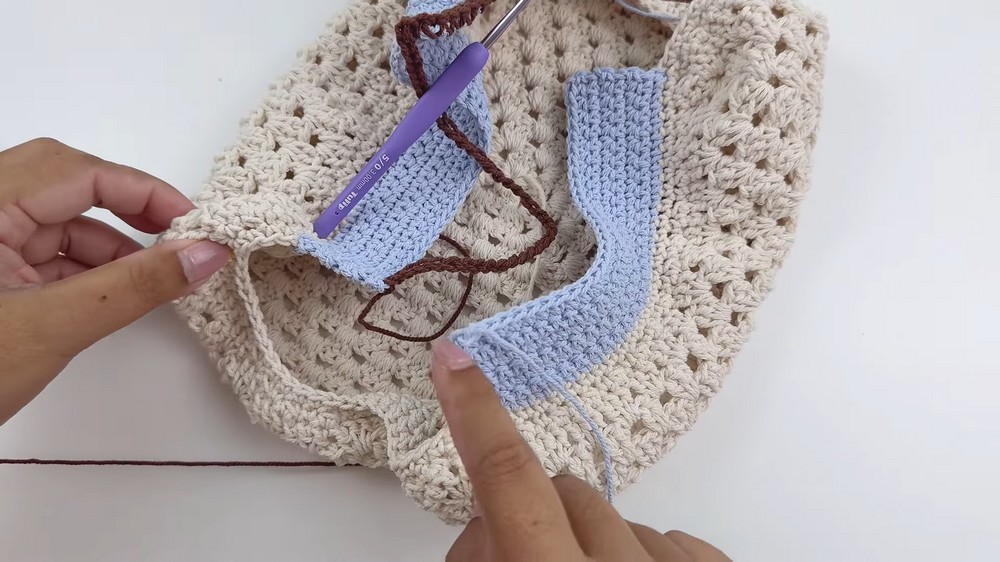
Second Top Panel
Work exactly as the first panel, on the opposite 31‑st section:
- Attach yarn with a slip knot in the marked stitch.
- Row 1: ch 1, 31 sc across.
- Rows 2–7: ch 1, turn, 31 sc.
- After Row 7: ch 1, cut yarn, pull through, and secure.
Now both sides of the bag have 7‑row sc panels for the opening.
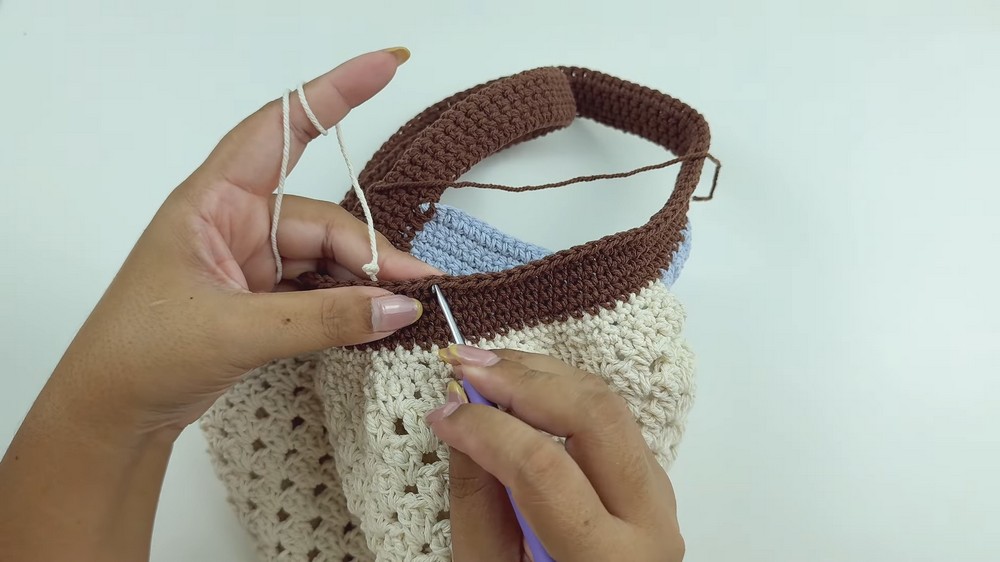
PART D – Handles and Top Rounds
You will now add handles and build up a few rounds of sc around the entire top edge.
Adding Handles (First Handle Round)
Use a new contrast color for handles and top edging (e.g., CC2).
- Make a slip knot.
- Insert the hook into the first stitch at the top edge of one panel (on the RS).
- Yarn over, pull through, and ch 1.
- Work 1 sc in each st across the first top panel.
- When you reach the end of the panel, create the first handle:
- Ch as many stitches as desired for handle length – the video uses ch 40.
- Attach the chain to the opposite panel:
- Insert your hook into the first stitch at the top of the opposite panel.
- Work 1 sc to anchor the handle.
- Continue working 1 sc in each st across the top of this opposite panel.
- At the far end of this second panel, create the second handle:
- Ch 40 (or the same count as the first handle).
- Attach the end of the chain with 1 sc into the next available stitch on the starting side.
- Continue with sc across any remaining stitches until you are back near the starting point.
You now have the first full round that includes both handles.
Continuing the Top Rounds
- From this point, continue working in the round with sc.
- Work sc into each stitch around, including:
- Every stitch on the panels,
- Every chain stitch of the handles.
- Mark the first st of the round if you want to track your progress.
From the transcript:
- After the initial round with handles, the designer continues until there are 4 rounds total around the top/handles.
- Then she adds 3 more rounds of sc for additional height, making the handles thicker.
You can reproduce that like this:
- Round 1 (Handles created) – described above.
- Rounds 2–4 – sc in each st around.
- Rounds 5–7 – sc in each st around (for a taller, thicker handle).
At the end of your last round:
- Cut the yarn.
- Use an invisible join into the second stitch of the round.
- Insert the needle back into the last stitch made, then weave in the tail to secure.
If you prefer shorter handles or a lower edge, simply work fewer rounds; for taller handles, add more.
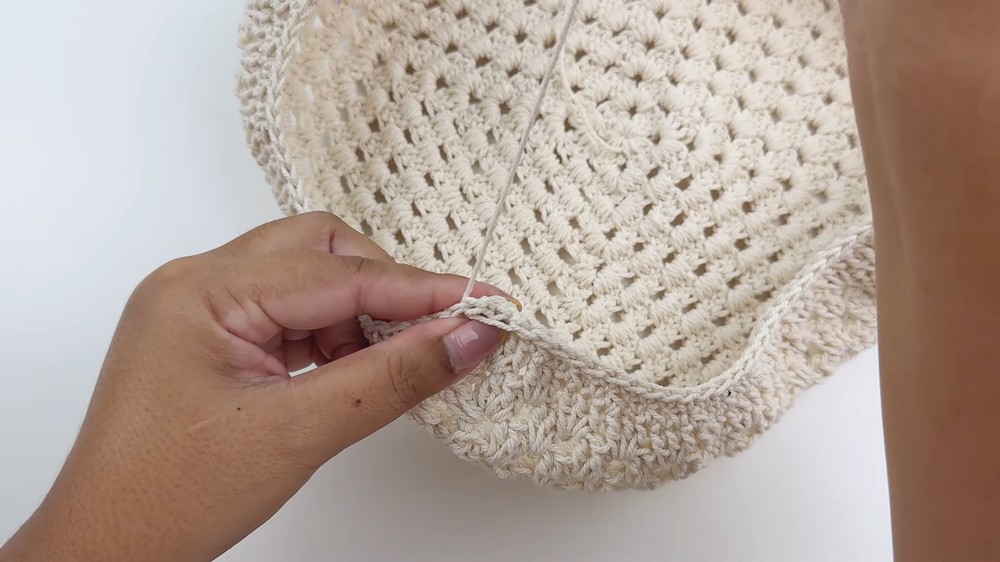
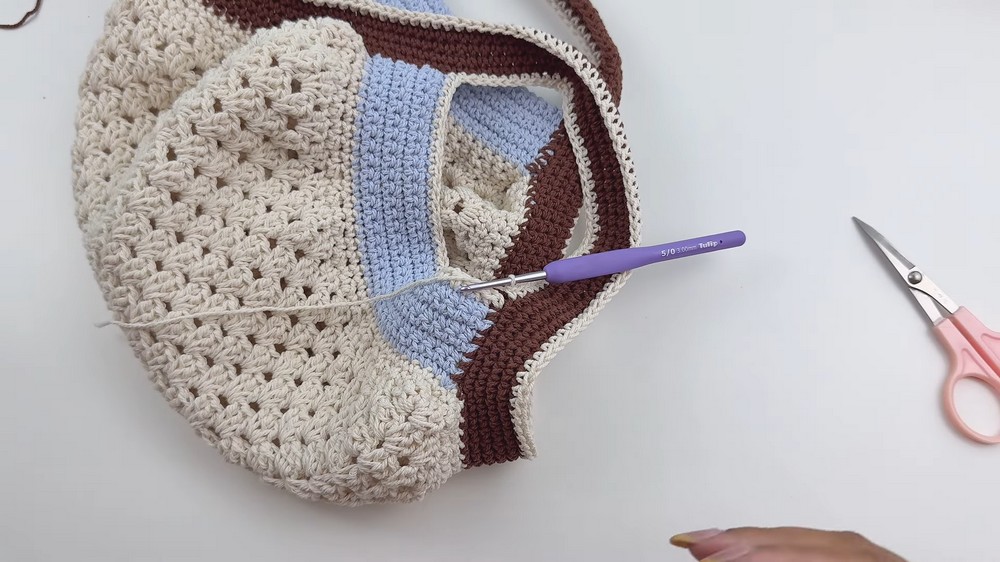
PART E – Decorative and Structural Edging
The remaining steps add neat edges around the outer and inner portions of the bag opening.
1. Outer Edge of the Bag
- Change to a new color (or reuse an existing contrast color).
- Make a slip knot.
- Start on the side of the bag (not on the handle; somewhere along the outer perimeter):
- Insert your hook into a side stitch.
- Yarn over, pull through, and ch 1 to lock it.
- Work 1 sc in every stitch around the entire outer edge of the opening:
- Around the top of the panels,
- Around the outer edges of the handles.
- When you return to the starting point:
- Cut the yarn.
- Use the invisible join into the first stitch, then back into the last stitch.
- Weave in the tail.
This creates a clean outer outline that frames the bag.
2. Inner Edge of the Handle Openings
- Using the same edging color, make a slip knot.
- Start inside the handle area on one side:
- Insert hook into an inside stitch, pull up a loop, and ch 1.
- Work 1 sc into every stitch along the inner edges:
- Along the inside of the handles,
- Along the inner top edge of the panels.
- Continue until you come back to the start.
- Cut the yarn and finish with an invisible join, then weave in ends.
- Repeat the same process on the other side (if the inside edge is divided or worked separately).
You should now have smooth, reinforced inner and outer edges around the entire opening and handles.
Finishing
- Weaving in Ends
- Use a yarn/tapestry needle to weave in all yarn tails on the inside (WS) of the bag.
- Follow the stitch paths for 4–5 cm for a secure finish, especially since cotton rope can be a bit slippery.
- Optional Magnetic Button
- Position the two halves of the magnetic snap on the inside of the bag at the center of the opening, ensuring they align when the bag is closed.
- Sew or affix them according to the button’s instructions. This helps keep items from falling out, particularly because the sides are a little shallow.
- Optional Inner Pouch or Lining
- You may place a drawstring pouch inside the bag to act as a lining and closure.
- Alternatively, sew a simple fabric lining to fit the interior dimensions.
- Blocking (Optional)
- Lightly steam block or gently shape the bag by stuffing it with towels or paper and letting it rest overnight.
- Avoid heavy stretching, as cotton rope can relax over time.
- Label/Tag
- Attach a small “handmade” label or tag to the upper edge for a professional, personalized finish, as shown in the video.
- Attach a small “handmade” label or tag to the upper edge for a professional, personalized finish, as shown in the video.
Suggestions and Customization Ideas
- Size Adjustments
- Larger bag: add more granny square rounds (e.g., 18–20).
- Smaller bag: fewer rounds (e.g., 12–13).
- You may also add extra rows to the top panels if you want a higher opening.
- Handle Customization
- Longer shoulder handles: increase chain length (e.g., 50–60 chains).
- Shorter hand‑held handles: decrease chain length (e.g., 25–30 chains).
- Add more or fewer sc rounds around the handles to make them thicker or slimmer.
- Color Play
- Use a single color for a minimalist look.
- Use a different color for the granny square base, panels, handles, and edging for a patchwork effect.
- Work stripes in the square (changing color every few rounds).
- Reinforcement
- For more structure:
- Use a tighter tension,
- Use slightly thicker cord,
- Add a sewn fabric lining,
- Or add a removable insert in the base (e.g., a plastic or cardboard sheet wrapped in fabric).
- For more structure:
- Decorations
- Add tassels, small crochet flowers, or charms to the handle bases.
- Embroider small motifs onto the panels.
Tips to Maintain the Bag
- Cleaning
- If made with cotton rope, hand‑wash gently in cool water with mild detergent.
- Do not wring aggressively; press water out gently with a towel.
- Reshape and dry flat, stuffing lightly to maintain shape.
- Avoid Overloading
- Cotton rope bags are fairly sturdy, but heavy, sharp, or bulky items can stretch or deform the bag over time.
- Avoid overfilling to keep the shape neat.
- Storage
- When not in use, store the bag flat or gently stuffed to help it retain shape.
- Avoid hanging it for long periods when empty, as this can distort handles.
- Periodic Check
- Occasionally check seams, handle joins, and areas around the magnetic button for loosened stitches.
- Repair any damage promptly with matching yarn.
Final Words
This pattern transforms a classic granny square into a modern, functional tote bag with simple shaping and clean single crochet details. The combination of a structured square base, softly shaped sides, and reinforced handles makes it both practical and stylish.
By adjusting colors, number of rounds, and handle length, you can easily adapt this design to your own style and needs. With proper care and thoughtful yarn choices, your finished bag will remain a charming, durable accessory for everyday use.