
Free Crochet Mesh Bag Pattern To Make Your Days More Stylish
Carry your items with ease using this free crochet mesh bag pattern that is perfect for making a light and strong bag for daily use and shopping trips.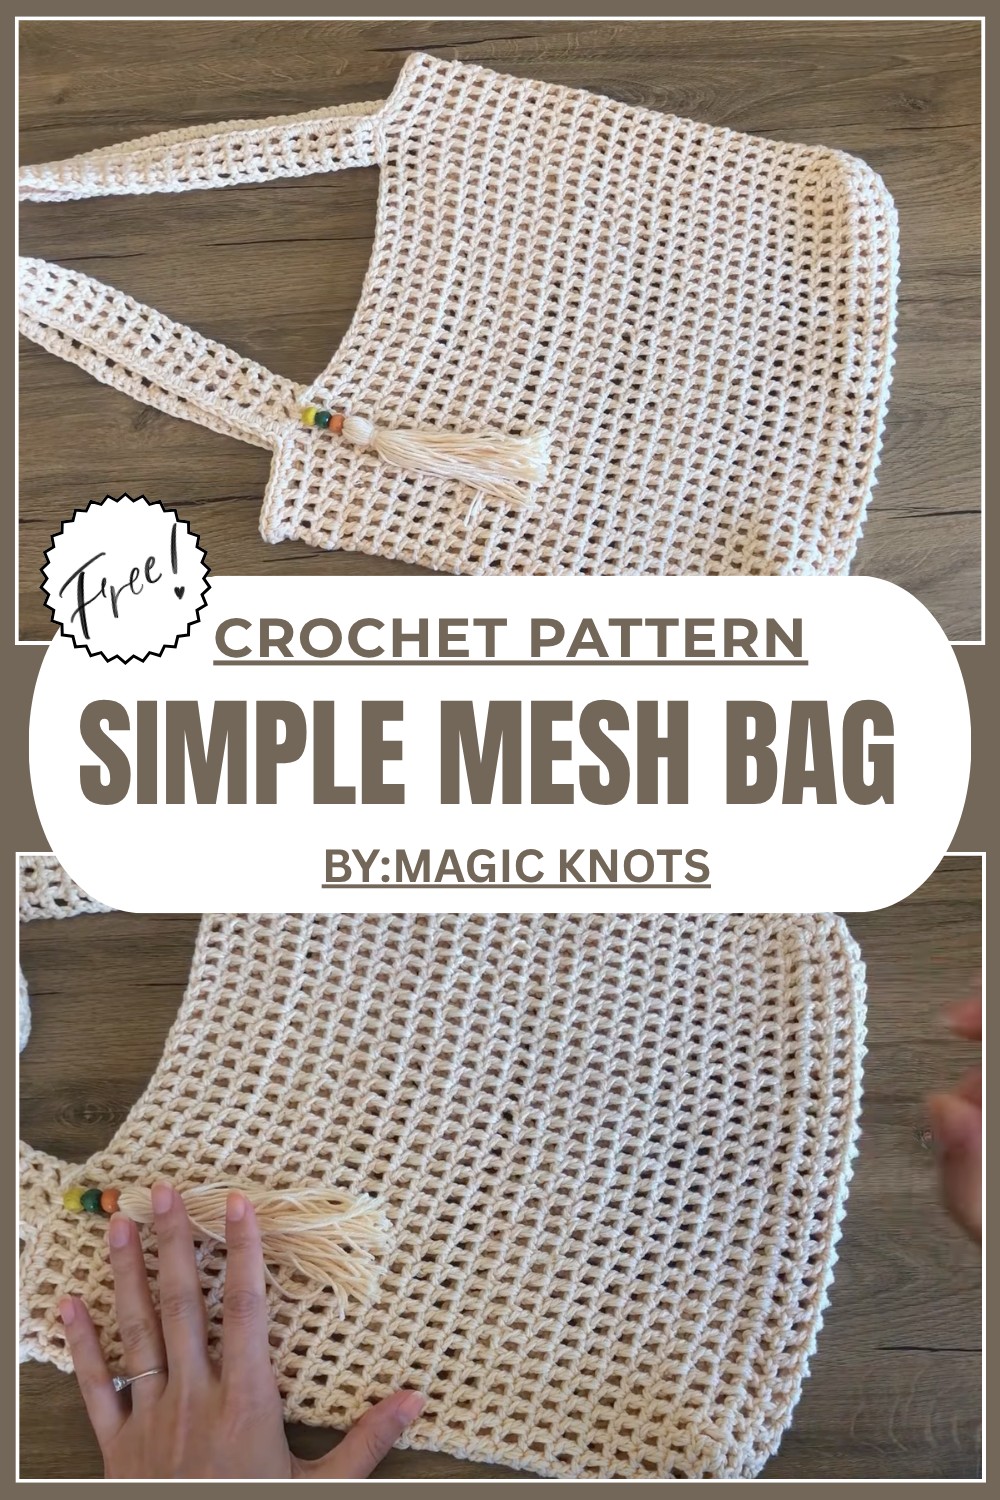
Chic Free Crochet Mesh Bag Pattern for All Your Adventures
A crochet mesh bag is a fun and easy project that looks beautiful and practical for everyday use. This free crochet mesh bag pattern will teach you to create a stylish bag that is lightweight and airy, yet strong enough to carry groceries, books, or beach items.
The bag’s design is simple and elegant, featuring a pretty lattice pattern that makes it look delicate and professional. You can customize it by using different colors of yarn, and even add small details like tassels or beads to make it unique.  Crocheted with soft cotton yarn, the bag is comfortable to hold and durable enough for repeated use. Its size and spacious design make it perfect for shopping, carrying essentials, or even a casual day out.
Lightweight Crochet Mesh Bag Pattern
Materials Needed
- Yarn:
- Nako Calico Yarn
- Content: 50% cotton
- Amount: 2.5 skeins
- Recommended color: Ecru or your preferred color (available in both soft and vibrant shades)
- Approximate yardage: 245 yards per skein
- Nako Calico Yarn
- Crochet Hook: Size 4mm
- Tapestry Needle: For weaving in ends.
- Scissors: To cut yarn.
- Beads: Optional decorative beads for the tassel (matching or contrasting tones).
- Additional Thread: For creating the tassel detail.
Techniques Used
- Chain (ch): A foundational stitch.
- Double Crochet (dc): Used for creating the mesh structure.
- Single Crochet (sc): Used for the finishing edges and straps.
- Slip Stitch: For joining rows and providing a smooth finish.
Step by Step Instructions
Base of the Bag
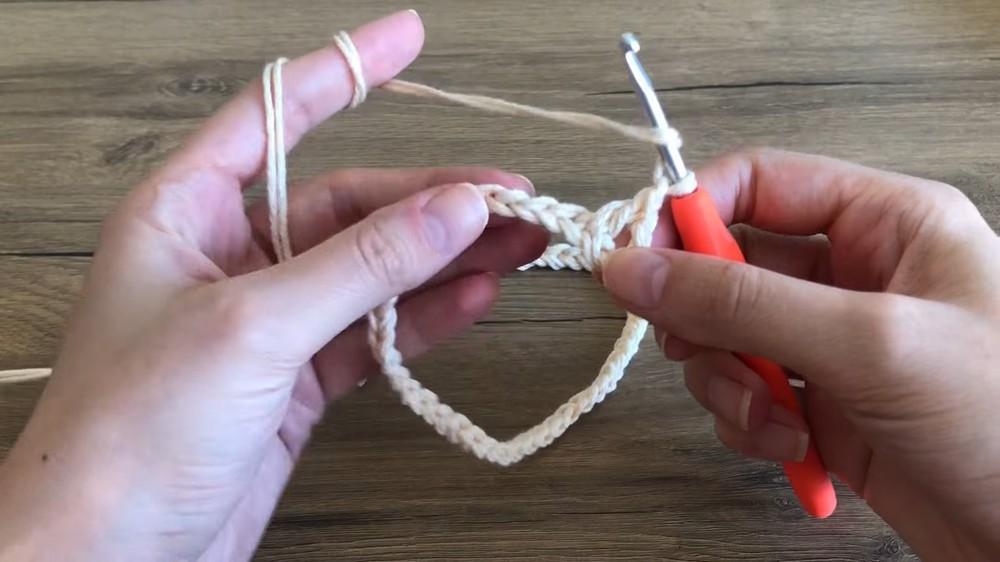
- Begin by doubling the yarn to create a solid look.
- Create the foundation chain:
- Make a slip knot on your hook.
- Chain 50 stitches. Ensure the chains are not too loose or too tight to maintain proper tension.
- Adjust the chain length if needed (based on your desired bag width).
- Optional measurement: The foundation chain should measure approximately 35 cm in width.
- Row 1:
- Work 1 double crochet (dc) into the fourth chain from the hook. Skip one chain, then work another dc into the next chain.
- Chain one, skip the next stitch, and repeat this pattern of
dc, ch 1, dc.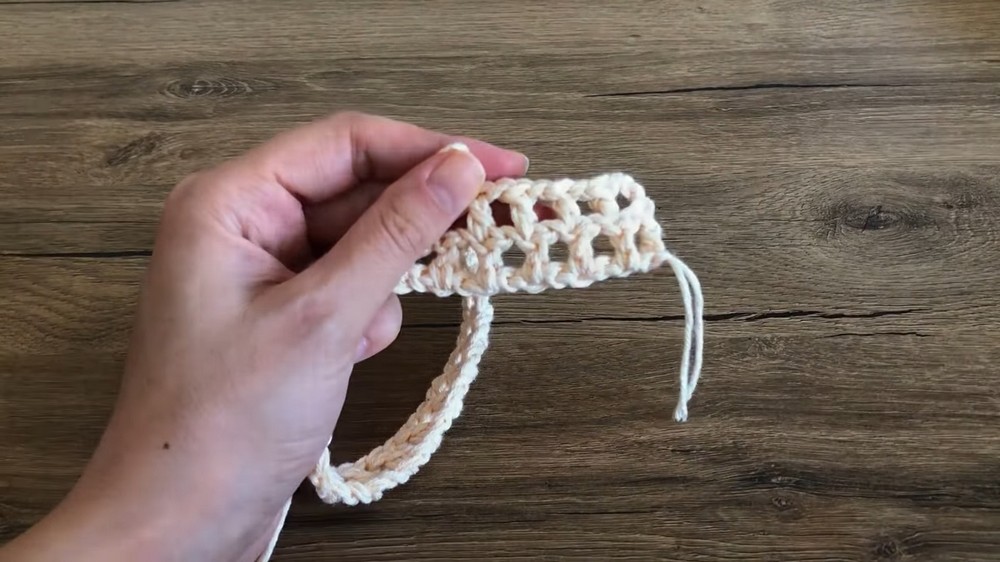
- Continue this process to create a mesh like structure (referred to as "cages").
- Finish the row with 26 cages.
- Rows 2–5:
- Turn your work, chain 3, and repeat the process of making cages (
dc, ch 1, dc) across the entire row.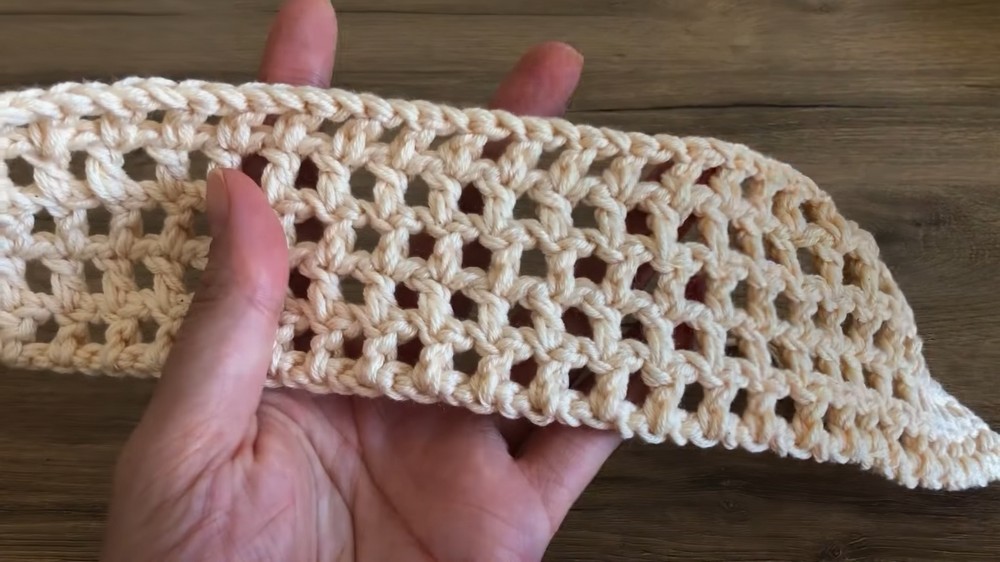
- You should have the same number of cages (26) in every row.
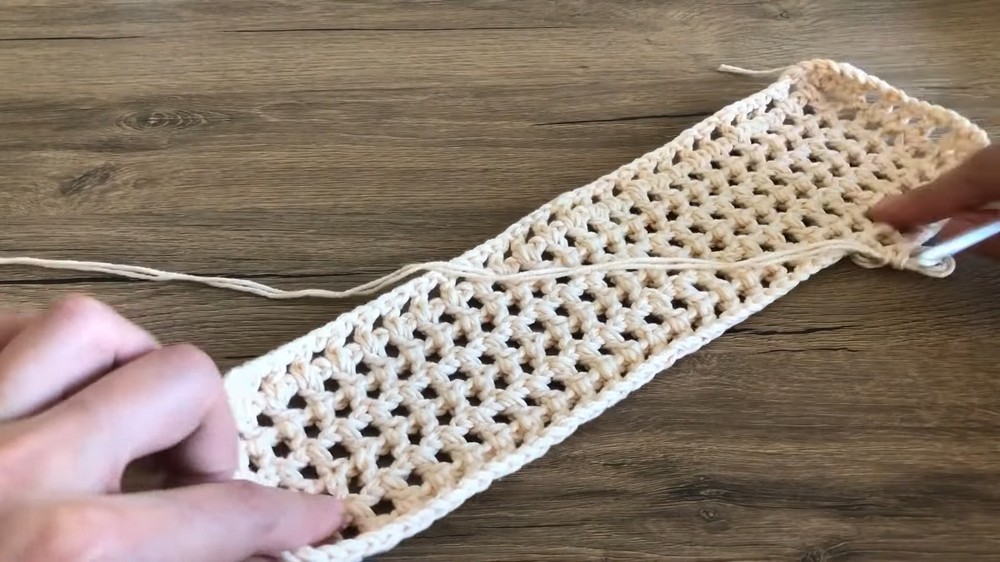
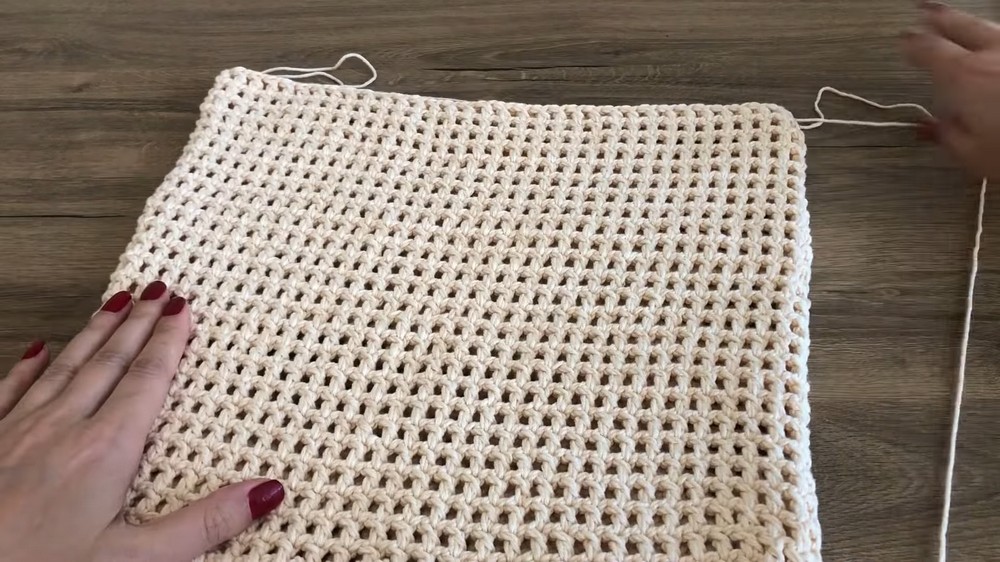
- After 5 rows, you will have a rectangular base measuring 35 cm long and 35 cm wide.
- Turn your work, chain 3, and repeat the process of making cages (
Side Panels of the Bag
- After completing the base, begin working upward to shape the bag:
- Chain 4 at the start of each row (3 chains for the dc, 1 chain for creating space between stitches).
- Continue making the cages (
dc, ch 1, dc) all around, creating rows that go upwards around the edge of the base.
- Chain 4 at the start of each row (3 chains for the dc, 1 chain for creating space between stitches).
- At each corner, work 2 double crochets, 1 chain to create the rounded edges.
- Continue to work rows of cages until the bag reaches a height of 33 cm. For counting ease, this equals 24 rows of cages, starting from the base.
Straps
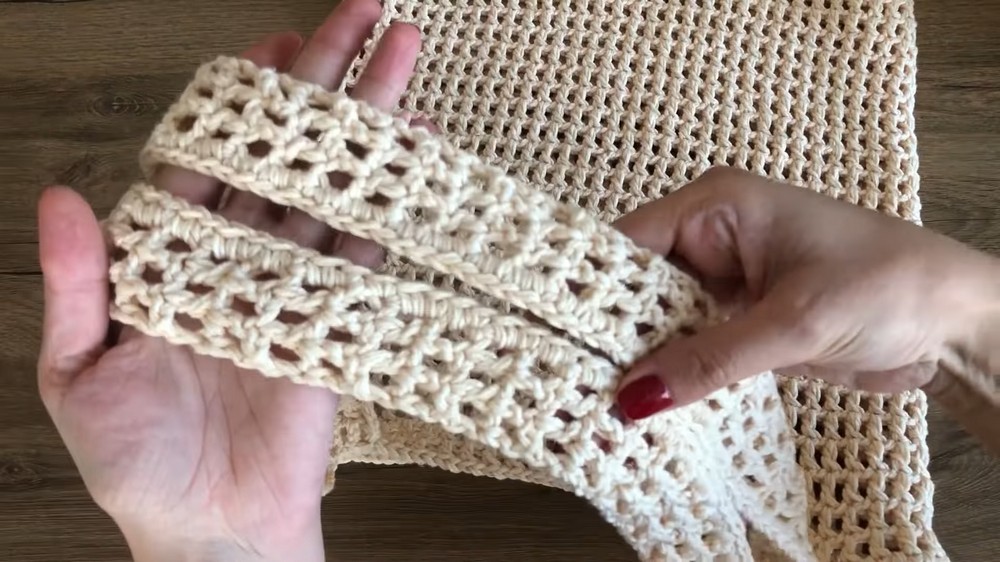
- Creating the straps:
- Chain 6 chains.
- For the first row of the strap, make a double crochet into the 3rd chain from the hook, followed by
ch 1, dc. - Skip one chain between each dc, forming 3 small spaces. Repeat until the row is complete.
- Building the length:
- Continue working the same pattern (
dc, ch 1, dc) across each row until the strap measures 55 cm in length.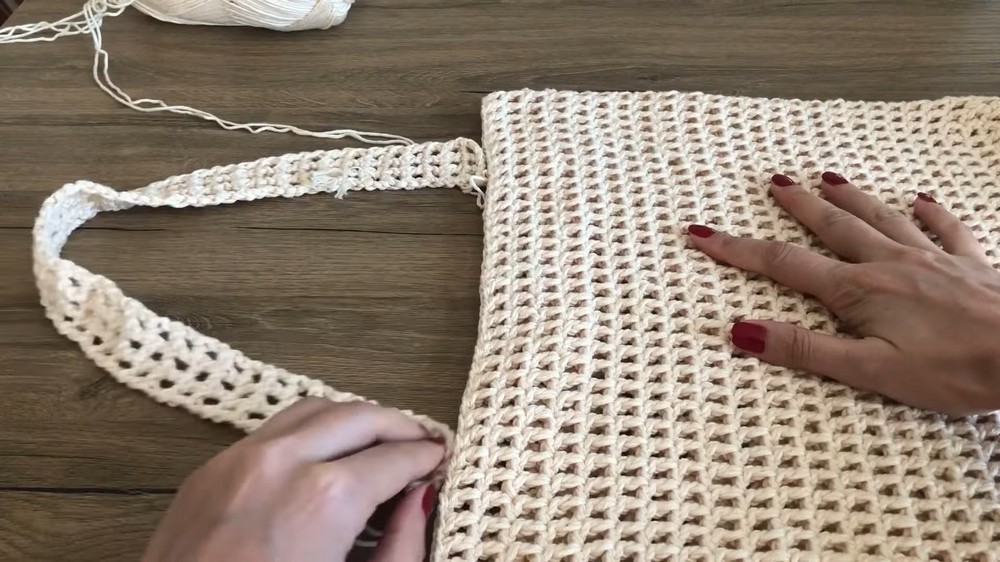
- Continue working the same pattern (
- Attaching the straps:
- Lay the finished bag flat and mark the placement for the straps.
- Measure 6 cages inward from the edges for even placement.
- Use a tapestry needle to securely sew the ends of each strap to the corresponding spot on the bag.
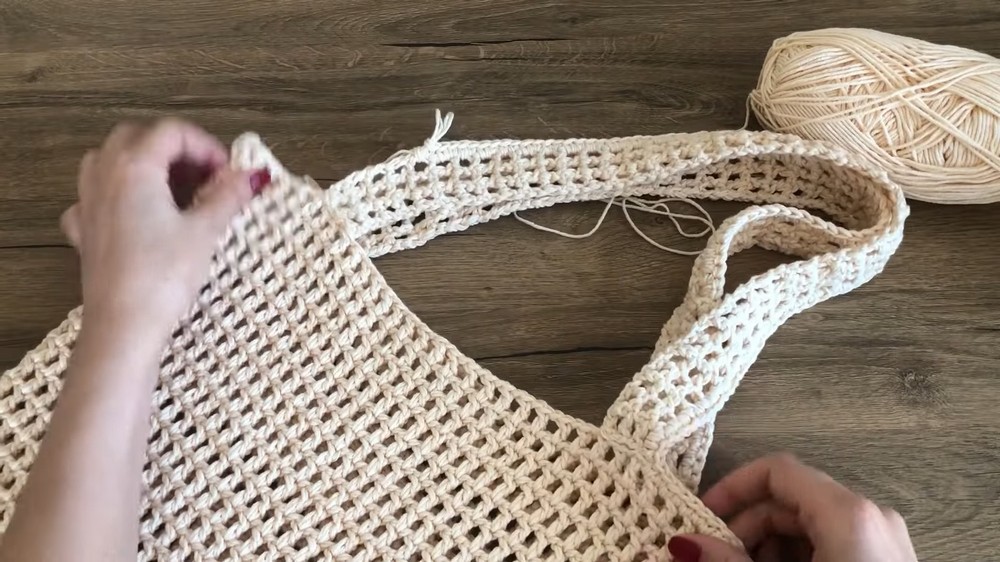
Edge Finish
- Use single crochet stitches (
sc) to finish all edges:- Start at one side of the bag and work single crochet stitches evenly around the edges, ensuring a clean and uniform look.
- Repeat the process along the edges of both straps for additional strength and a polished appearance.
- Once the single crochets are completed, fasten off and weave in all loose yarn ends using a tapestry needle.
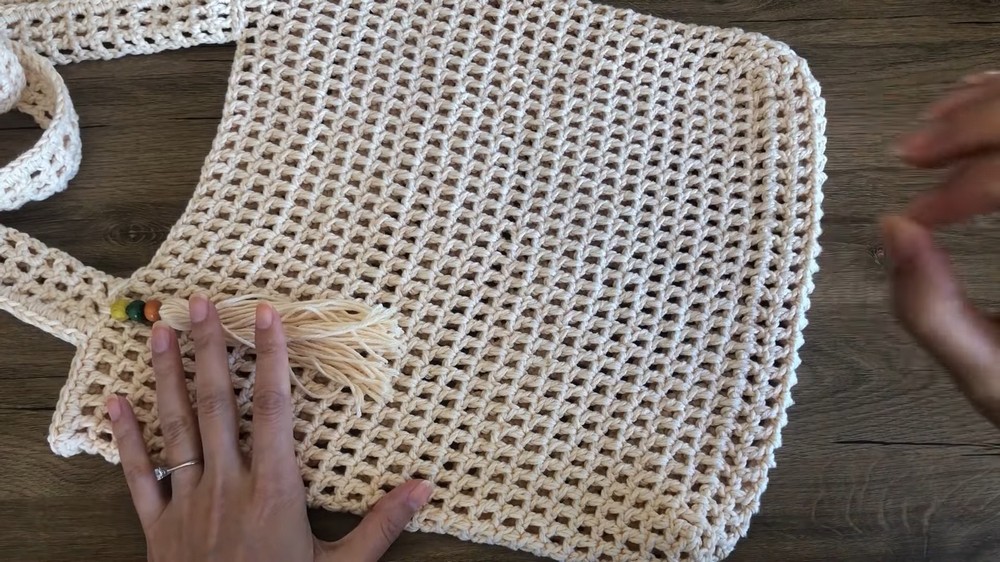
Tassel Decoration (Optional)
- Cut multiple strands of yarn of equal length.
- Fold the strands in half to create a tassel. Secure the top with an extra piece of yarn, tying it into a knot.
- Attach decorative beads to the tassel for an elegant touch.
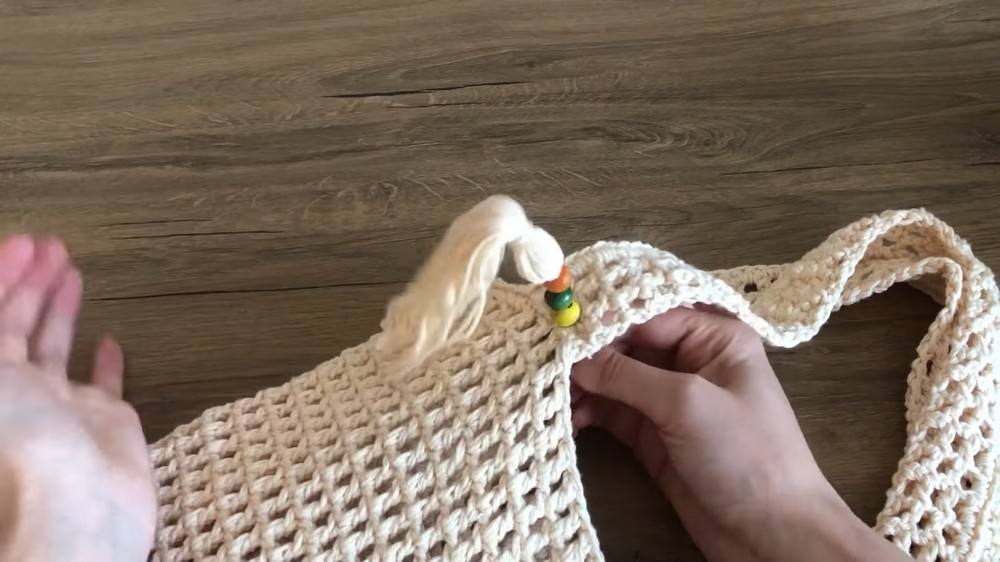
- Trim the ends of the tassel to ensure an even length.
- Secure the tassel to the side of the bag or anywhere you prefer.
Final Measurements
- Height: 34 cm
- Width: 33.5 cm
- Strap Length: 55 cm (adjustable based on personal preference)
Finishing of the Pattern
After completing all parts of the bag, examine your work for loose threads and uneven sections. Ensure the bag is structurally sound, especially at the base and the strap attachments.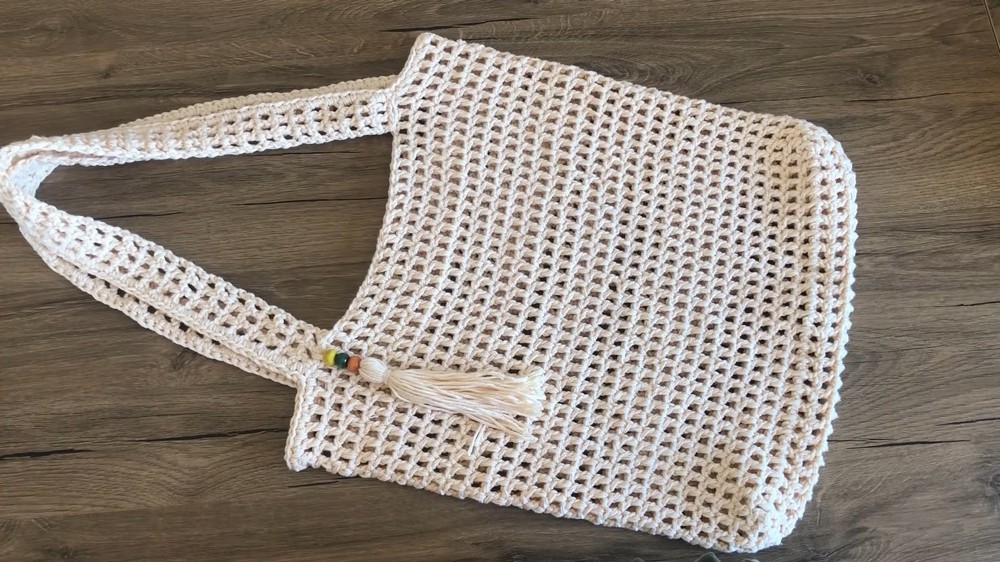
Final Words and Tips
- Customization: Adjust the size of the bag to your needs by altering the number of foundation chains and the rows of cages.
- Yarn Choice: Select soft and durable yarn for a polished look and added comfort. Cotton blends, such as the Nako Calico, work best because of their softness and sturdiness.
- Tension: Maintain consistent tension while crocheting to avoid irregularities. Check that rows lay flat and corners are even.
- Care Instructions: Wash the finished bag gently by hand to maintain the fabric's texture and shape.
- Storage: Store in a dry place to avoid any damage to the yarn. If using cotton yarn, avoid prolonged exposure to direct sunlight to prevent fading.
This mesh bag is a versatile and timeless design, ideal for shopping, everyday use, or as a beach bag. The addition of tassels and beads adds a touch of elegance, making it not only practical but also stylish. Enjoy making this gorgeous project, and we hope you carry it proudly in all your outings.