
Unique Crochet Poncho Free Pattern Perfect For Women Wear
Bring comfort and style to your wardrobe with this free crochet poncho pattern, offering a cozy and simple way to enjoy a handmade accessory you’ll love.
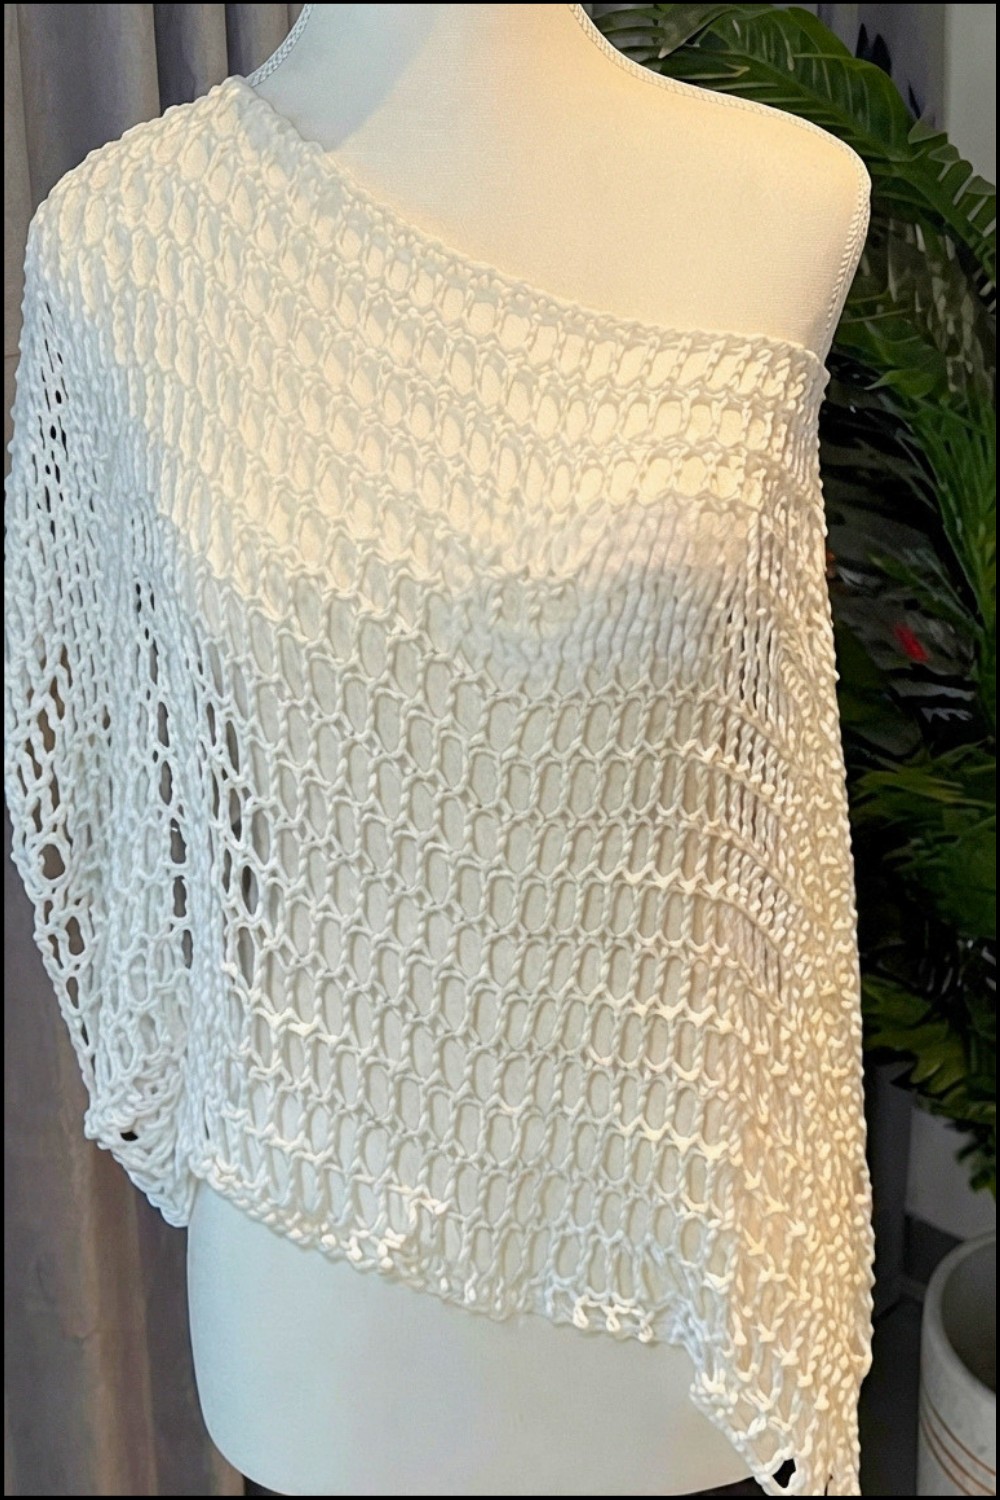
There’s something incredibly comforting about creating your own cozy wardrobe pieces, which is why I was so excited to find this free crochet poncho pattern on YouTube. The design, shared by Love, Rubi Crochet, offers an easy and charming way to craft a versatile garment that’s both stylish and practical. This poncho is a perfect blend of warmth and elegance, making it a wonderful project for anyone who loves handmade fashion with a personal touch.
Stylish Crochet Poncho Free Pattern to Complete Your Outfit
The poncho has a relaxed, rectangular shape that drapes beautifully around the shoulders and falls just to the elbows. Its open texture and flowing style give it a casual, bohemian charm that pairs well with everything from jeans to dresses. Beyond its visual appeal, this piece is fantastic for layering on chilly days, adding an extra layer of comfort without bulk. I’ve found it to be a lovely item to keep for myself or gift to someone special, as it instantly elevates any outfit while providing gentle warmth.

What makes this free crochet poncho pattern stand out is its adaptability and understated elegance. It’s a quick project that doesn’t sacrifice style, offering both decorative flair and functional benefits. Whether you want to cozy up at home or step out in something effortlessly stylish, this poncho fits the bill perfectly.
If you’re looking for an easy-to-make, flattering garment that adds a handmade touch to your wardrobe or makes a thoughtful gift, I encourage you to explore this free crochet poncho pattern. It’s a delightful way to combine creativity and comfort in one beautiful project.

Thanks to the clear and helpful tutorial from Love, Rubi Crochet, making this free crochet poncho pattern is fun and relaxing. If you’re looking for a quick and cozy project, this poncho is a wonderful way to add comfort and style to your everyday outfits.
Free Crochet Poncho Pattern

Pattern Notes
- The project is worked in rows using a treble crochet and chain 1 skip 1 pattern repeated throughout.
- Foundation chain should be an odd number matching the desired poncho width measurement.
- The neck hole is formed by folding the panel and working chains between two stitch markers placed strategically at the center.
- Both panels are worked continuously without sewing, making this a seamless and no-sew project.
- The neck hole can be adjusted by adding decreases around the opening after assembly if needed.
- Ends are finished neatly by weaving in and minimal sewing.
Skill Level
Beginner to Intermediate
Requires knowledge of: chain stitch, treble crochet (UK treble), skip stitches, increases, decreases, and working in rows. Comfortable with counting stitches and using stitch markers.
Materials
- True Boo Bamboo yarn (or any yarn of choice)
- 6 mm crochet hook (adjust size according to your yarn)
- Tape measure
- Stitch markers (optional but helpful)
- Yarn needle for weaving in ends
Measurements / Sizing
- Width: 30 inches (example given, adjustable)
- Length: approximately 17 rows for each panel (adjust as needed)
- Neck hole circumference: approximately 15 inches (customizable)
Gauge
Gauge is flexible due to garment nature; ensure consistent tension for an even stitch pattern. Approximate gauge:
- Treble crochet stitch + chain one space per repeat ≈ 1 inch wide
- Each row ≈ 1 inch tall
Stitch Abbreviations
- ch: chain
- tr (treble crochet): yarn over twice, insert hook into stitch, yarn over, pull through 2 loops, yarn over, pull through 2 loops, yarn over, pull through last 2 loops
- sk: skip
- sl st: slip stitch
Special Stitches
No special stitches beyond standard treble crochet and chains are used.
Here's The Pattern
Step 1: Foundation Chain
- Measure the desired width of your poncho. For example, 30 inches to reach elbows.

- Chain an odd number equal to your width measurement. For instance, chain 91 (or appropriate number based on your gauge).
Step 2: Row 1
- Begin with a treble crochet in the 5th chain from the hook.
- Chain 1, skip 1 chain, treble crochet in next chain.
- Repeat chain 1, skip 1, treble crochet across the row until you are one stitch before the end.
- Chain 1, then treble crochet into the last chain.
- At the end of this row, you should have treble crochets separated by chain 1 spaces, with a total of (width) stitches.
Step 3: Row 2 and Subsequent Rows
- Chain 5 (this counts as your first treble crochet plus chain 1), and turn your work.
- Treble crochet into the second treble crochet of the previous row (this is the first treble crochet under chain 1 space).
- Chain 1, skip 1 stitch, treble crochet on top of next treble crochet.
- Repeat chain 1, skip 1, treble crochet across the row, finishing with a treble crochet on the last stitch.
- Join each row with a slip stitch as needed for uniform edges.
Step 4: Repeat Pattern Until Desired Length
- Continue repeating Row 2, maintaining the chain 1, skip 1, treble crochet pattern on top of the previous row’s treble crochets.

- For example, work 17 rows for the first panel or until desired length is reached.

Step 5: Creating the Neck Hole
- Fold your completed panel in half to find the center point horizontally.
- Place a stitch marker at the center fold to mark the middle.

- Unfold and lay your panel flat.
- Determine your desired neck hole circumference (e.g., 15 inches).
- Place stitch markers at these two points to mark neck opening edges.
- Count the number of “boxes” (treble crochet + chain 1 sections) between the two stitch markers to use as a base for the neck hole.
Step 6: Working the Second Panel
- Remove the center stitch marker as it is no longer needed.
- Pick up your work where you left off. Chain 5 and turn your work.
- Treble crochet on top of the first treble crochet after the fold.
- Work the pattern chain 1, skip 1, treble crochet up to the first neck hole stitch marker.
- When you reach the marker, chain 1, then treble crochet in the chain stitch where the stitch marker is placed (this joins the neck hole edge).
- Chain the number of stitches corresponding to the counted neck hole boxes to form the neck hole opening.
- Treble crochet in the stitch on the opposite neck hole stitch marker.
- Continue the pattern chain 1, skip 1, treble crochet until the end of the row.
Step 7: Continue to Complete Second Panel
- Repeat the established row pattern (chain 5, turn, treble crochet on top of treble crochet, chain 1, skip 1, treble crochet) for the same number of rows as the first panel (e.g., 17 rows).

Step 8: Adjust Neck Hole Size (Optional)
- Try on the poncho or check the neck hole size.
- If it is too large, work rounds of decreases or single crochet around the neck hole to reduce circumference to your preference.
Step 9: Finishing
- Weave in all ends securely using a yarn needle.
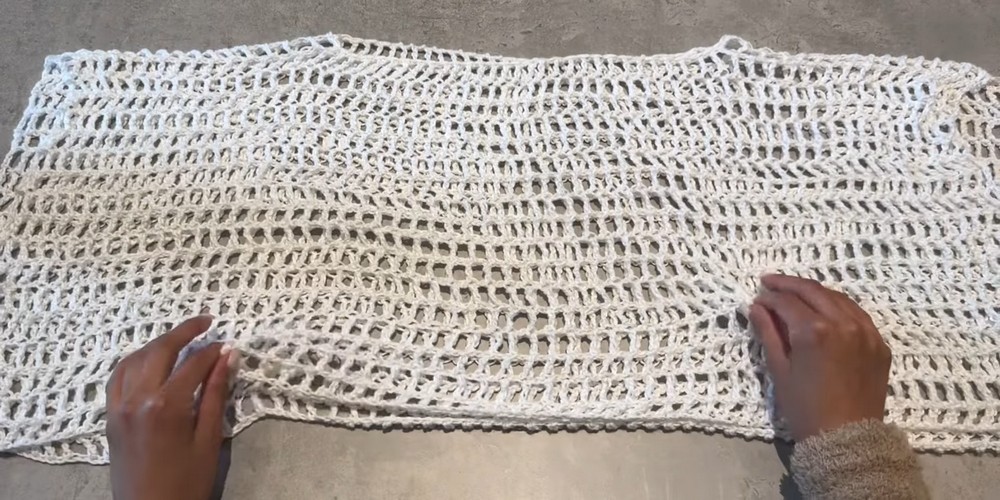
- Minimal sewing needed due to the no-sew rectangle construction.
Assembly & Finished Size
- The poncho forms a single rectangular panel folded with an open neck hole. No seaming required.
- Width (example): 30 inches (adjustable)
- Length per panel: approx. 17 rows (adjustable for length)
- Neck hole circumference: approx. 15 inches (adjustable)
- Lightweight, open yet cozy fabric for comfortable wear
- Edges and neck hole can be trimmed or adjusted by additional crochet rounds if desired
- Ready to wear immediately after weaving in ends

Summary
Create a cozy and stylish crochet poncho worked as a large rectangle with a centered neck hole. This pattern uses treble crochet stitches combined with chain spaces to form a light, airy fabric, finished with a simple no-sew assembly. Customize the width and length to fit comfortably, such as elbow-length as shown in the example.