Step Up Your Style With a Free Crochet Hooded Poncho Pattern
Stay cozy and chic with this free crochet hooded poncho pattern that is simple to follow and lets you create a soft and comfortable outfit everyone will love.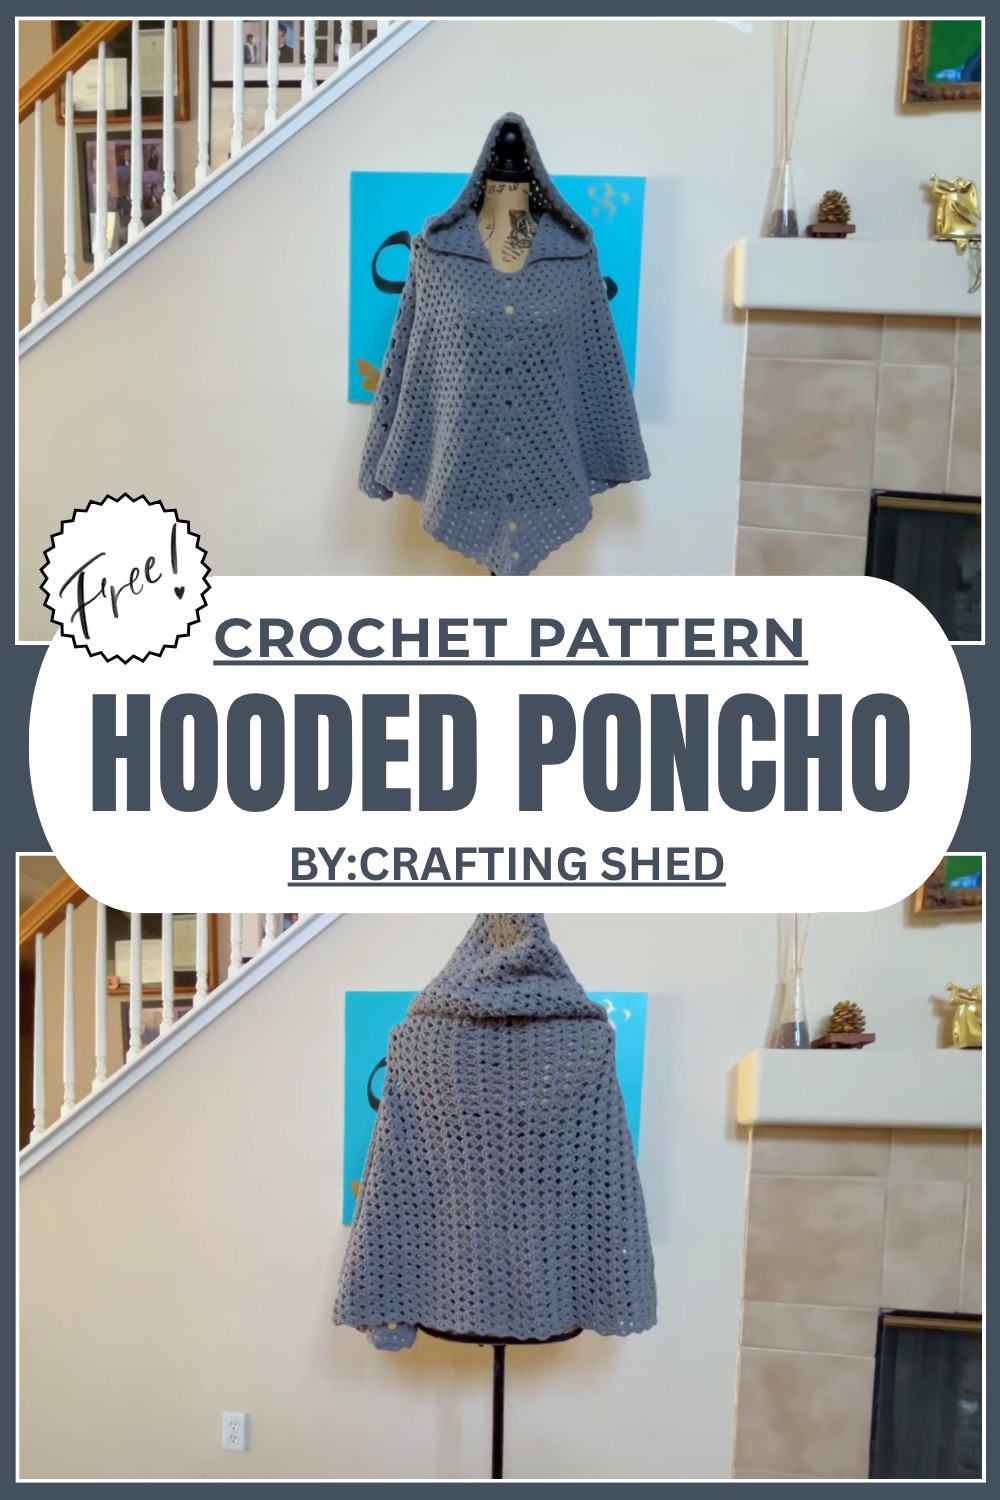
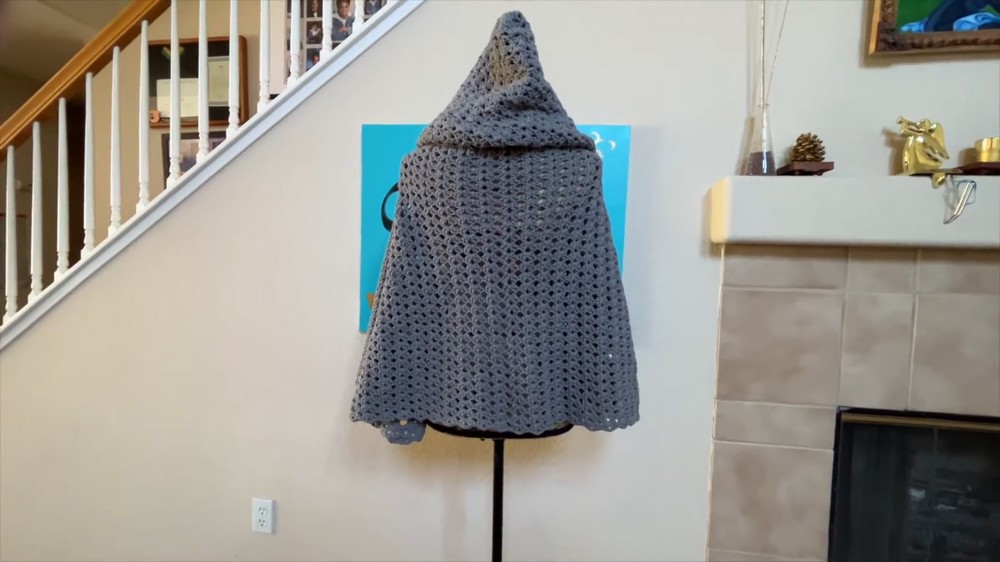
Create a Magical Look With Free Crochet Hooded Poncho Pattern
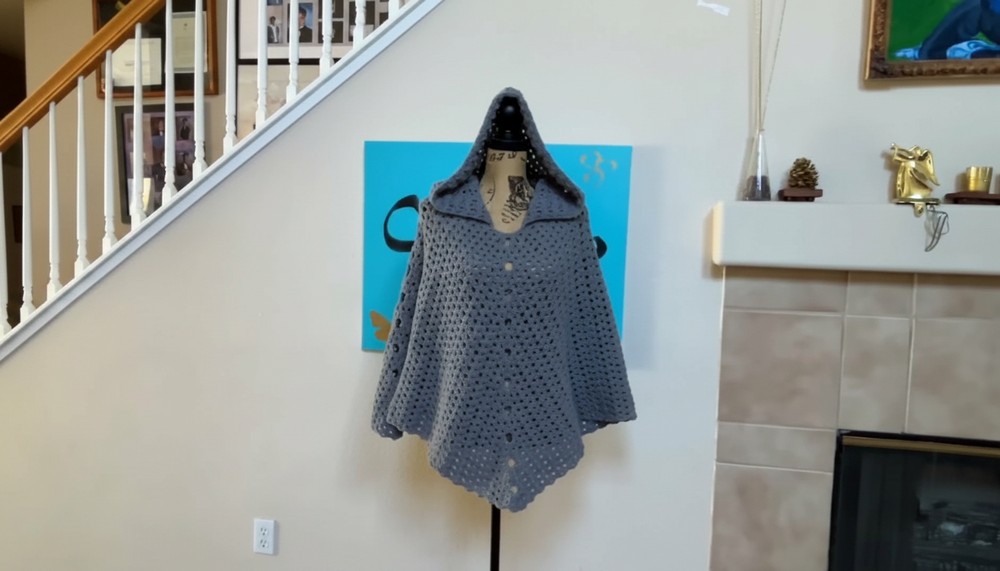
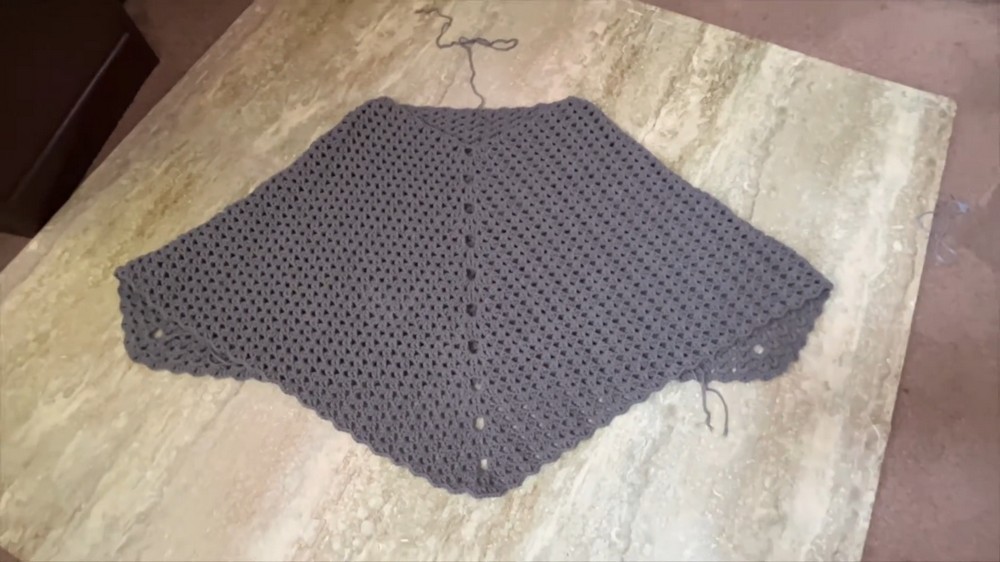
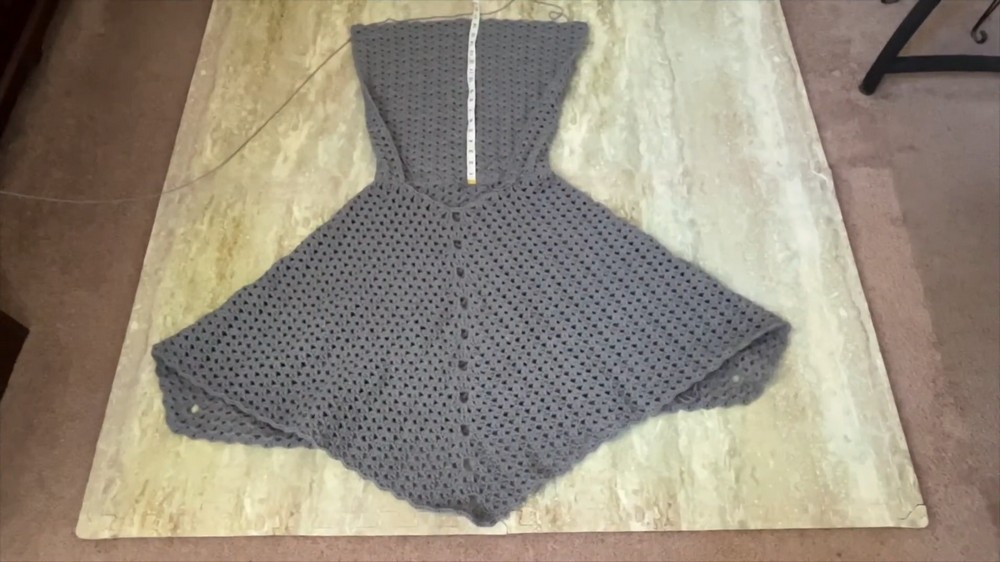
This poncho stands out with its triangle shaped front, which gives it a beautiful flare and allows for free arm movement. The back features a straight hem, making it neat and stylish. Its most magical feature is the cozy hood, which adds a touch of elegance and charm.
The pattern uses only three basic crochet stitches: chain, single crochet, and double crochet, making it perfect for beginners. Made with medium weight yarn, this poncho is not only warm and comfortable but also lightweight and easy to wear. You can pair it with anything and use it as a stylish layer on cold days or evenings. 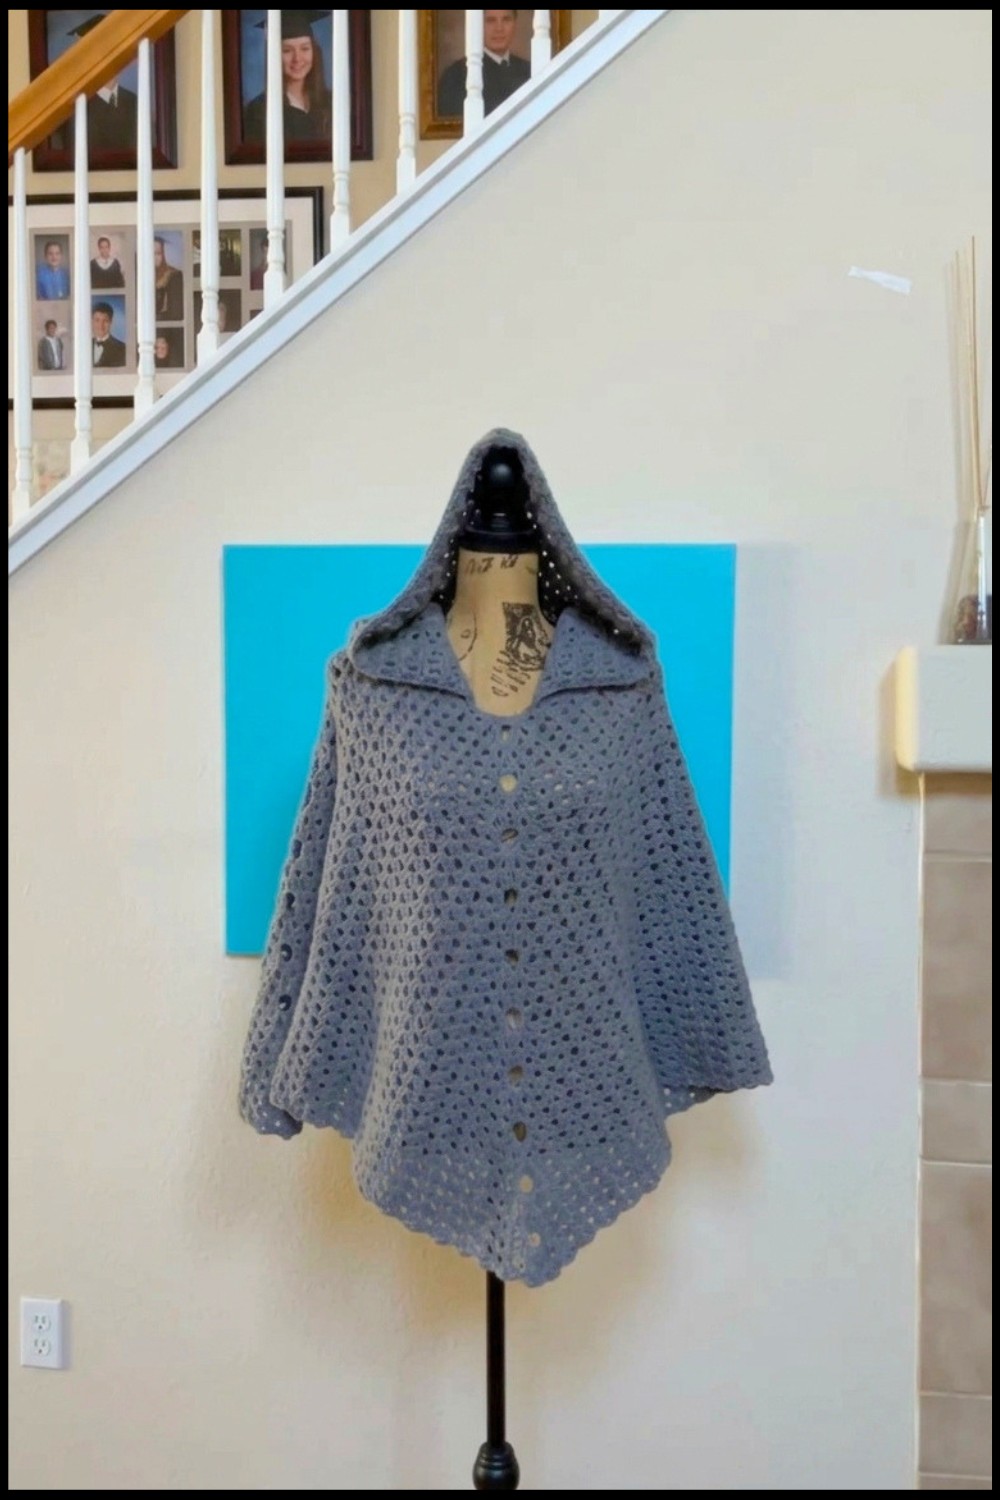 The design allows the stuff to drape beautifully, creating a flattering and unique look. This poncho is a must-try for anyone who loves simple yet stunning crochet ideas.
Materials Needed
- Yarn: 3 skeins of Size 4 Medium Weight Yarn, approximately 200g (350 yards) per skein.
- Crochet Hook: Size H (5 mm).
- Additional Tools:
- Tape measure
- Stitch markers
- Blunt needle
- Scissors
Special Techniques Used
- V Stitch:
- Instructions:
- Crochet two double crochets (DCs).
- Chain two.
- Crochet another two double crochets in the same stitch/space.
- Instructions:
- Slip Stitch:
- Instructions: Used to join starting and ending stitches or form rings.
- Chain Stitch
- Front Post Double Crochet (optional):
- Used in the band for decorative ridges.
Step by Step Instructions
Step 1: Starting the Foundation
- Start by making a slip knot.
- Chain 107 stitches.
- Note: For any adjustments, you can increase/decrease by multiples of five to adjust the size of the poncho.
- Form a ring by joining the last chain to the first chain using a slip stitch. Ensure the chain isn’t twisted.
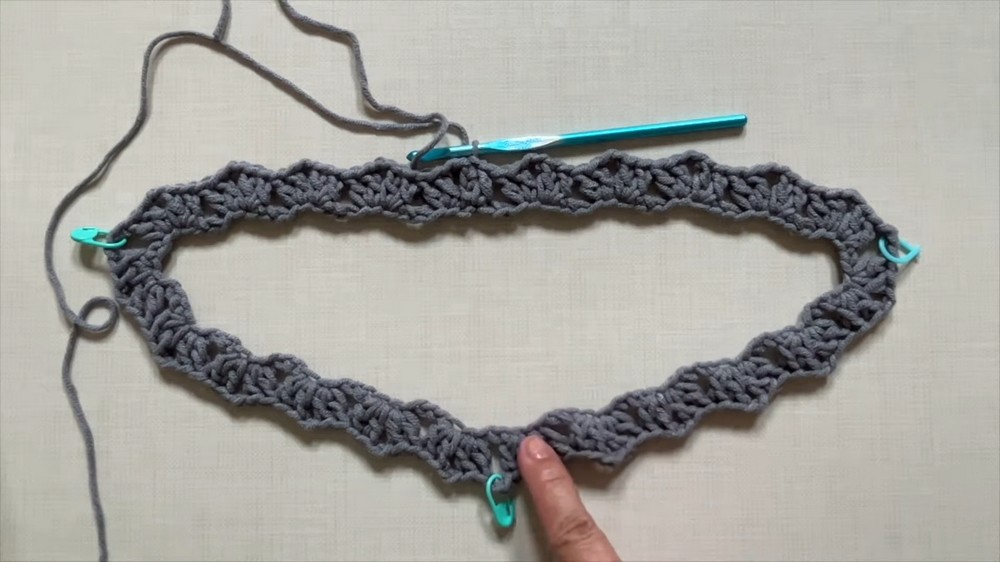
Step 2: Round 1
- Start with Chain 5.
- Into the next chain, crochet two double crochets, then chain two, and follow with two double crochets.
- This forms the first V stitch.
- Skip three chains, then repeat the V stitch in the next chain. Continue this pattern five times.
- Create the corner stitch:
- Chain 3.
- Skip 2 chains.
- Begin a V stitch in the next chain.
- Attach a marker on the corner.
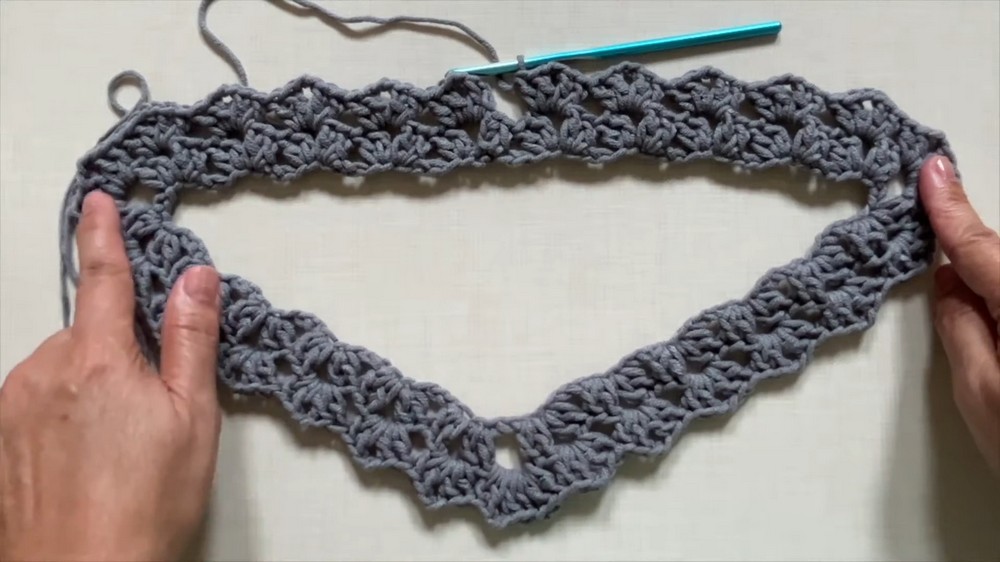
- Repeat the above process for all three sides and their corners:
- Side Two: Crochet six V stitches.
- Side Three and Side One (second half): Follow the same sequence.
- End the round:
- Skip the last three chains.
- Crochet a double crochet into the same chain as the beginning chain five.
- Slip stitch to the third chain of the beginning chain five.
Step 3: Repeating Pattern
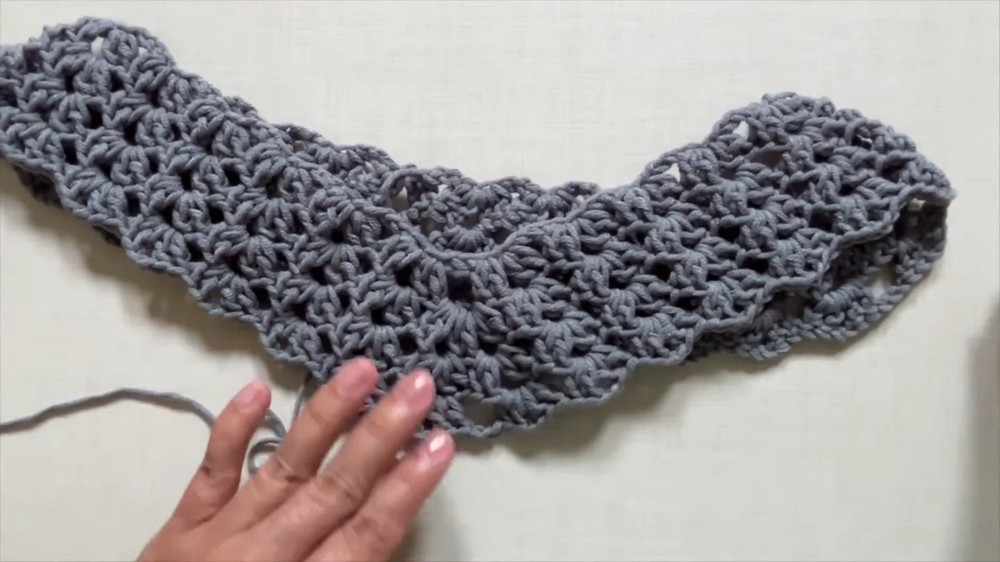
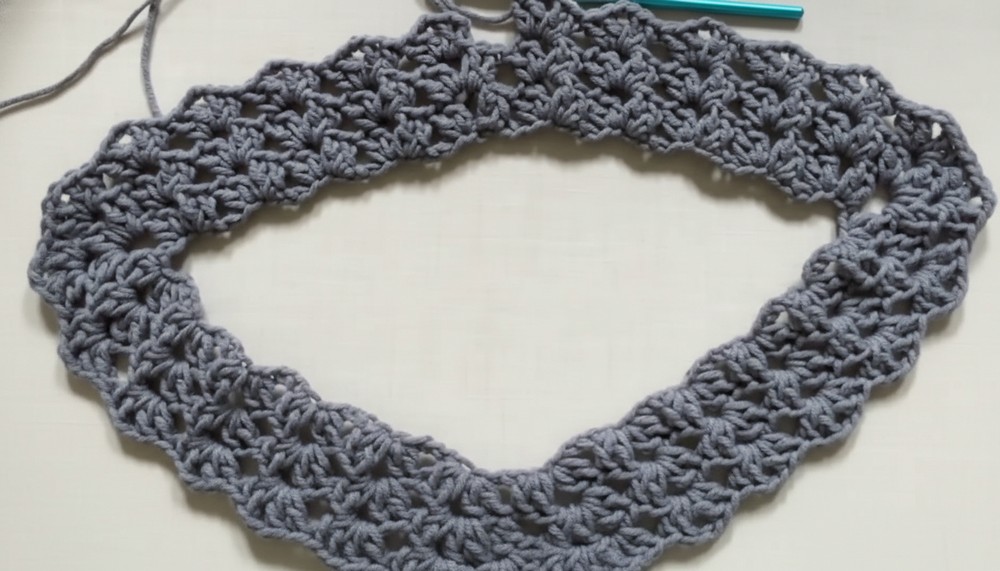
Rounds 2 to 30 simply repeat the basic structure of V stitches in chain two spaces across, expanding at corners, and ensuring uniformity of the triangle like shape follows:
- Round 2:
- Start in the chain two space by slip stitching to position yourself.
- Crochet a V stitch in each chain two space along the edges.
- Use chain three increases at corners to allow flare.
- Start in the chain two space by slip stitching to position yourself.
- Round 3 onwards: Switch between chain two spaces for V stitches and continue expanding at corners. Repeat until Round 30 or until you reach the desired size.
- The visual design will form triangular shaping with notable corners.
- The visual design will form triangular shaping with notable corners.
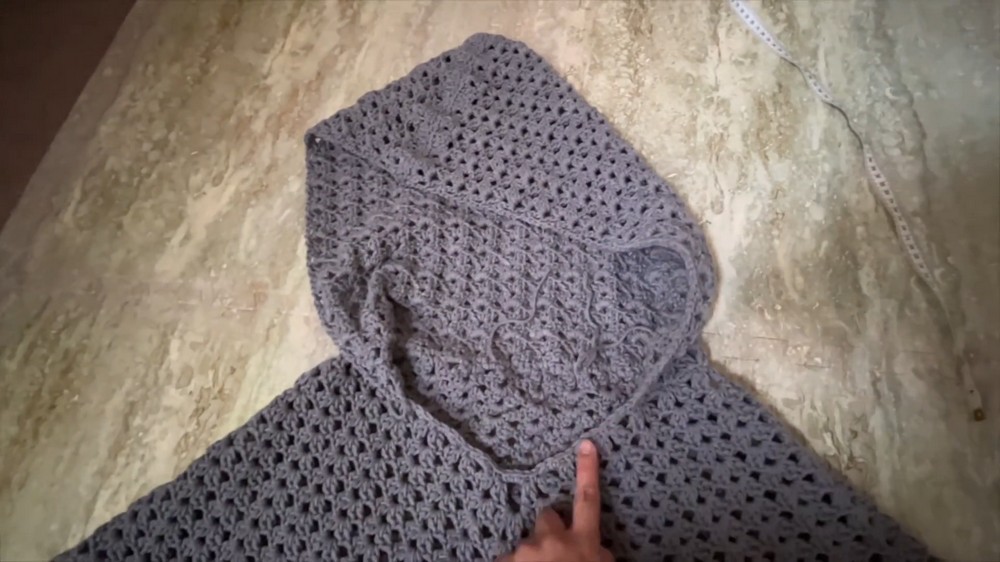
Step 4: Crochet the Hood
- Single crochet evenly along the neckline for foundation stitches:
- At chain 3 spaces, crochet three single stitches.
- In spaces between double crochets, crochet one single stitch.
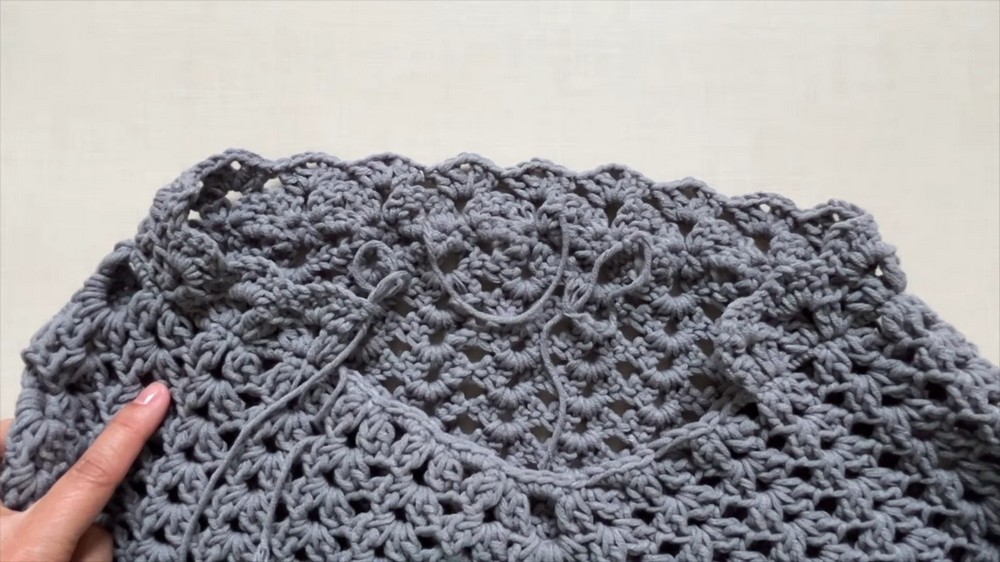
- Create the Hood Base:
- Begin the hood where marked (four V stitches counted from the center to either side of the neckline).
- Crochet rows of V stitches skipping two stitches between each, mirroring the V stitches below.
- Repeat Rows 2–26 for the hood:
- Go back and forth for even rows.
- Adjust row numbers accordingly if height differs (final height suggested is around 17 inches).
- Fold the hood fabric at the top edges and sew together using a mattress stitch.
Step 5: Adding the Band (Optional)
- Begin by crocheting evenly around the hood opening.
- Create decorative ridges:
- Alternate two double crochets and two front post double crochets.
- Alternate two double crochets and two front post double crochets.
- Finish with a round of single crochet to tighten edges slightly.
- Close the gaps where the front of the hood meets the poncho body using slip stitches for a clean alignment.
Step 6: Finishing
- Weave in loose ends using the blunt needle.
- Trim extra yarn tails for a clean final look.
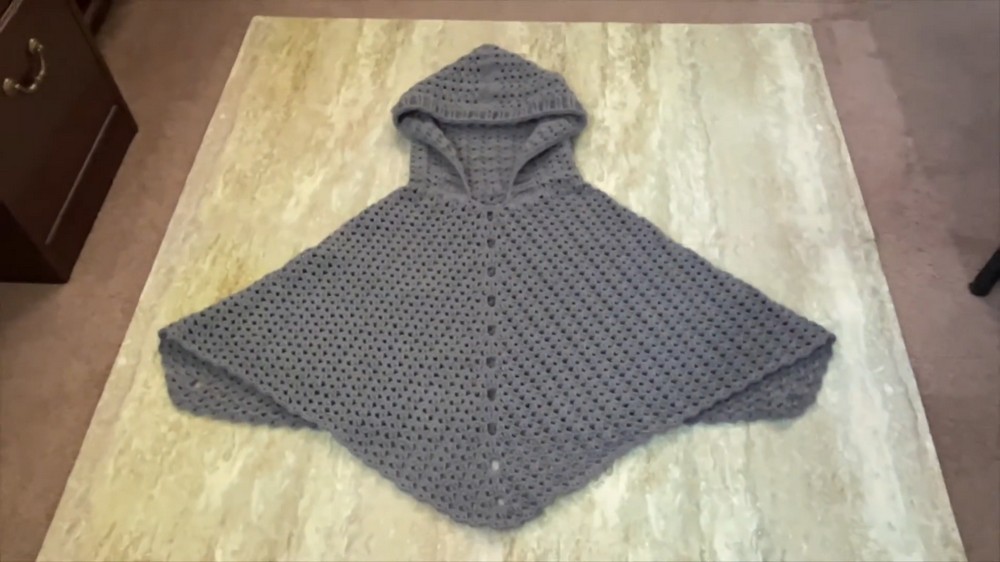
Final Measurements
- Width: 42 inches across.
- Length from neckline to hem: 23 inches at the center.
- Side length: 20 inches.
- Hood depth: 11.5 inches.
Tips to Maintain and Use the Pattern
- Blocking: Lay the poncho flat and block it gently to even out stitches.
- Customization: Feel free to adjust the row count for both the poncho and hood to achieve your preferred measurements.
- Maintenance: Handwash the poncho with mild detergent and let it air dry to maintain its shape and softness.
Final Words
This hooded poncho adds not only warmth but style to your wardrobe. Its unique triangular shaping, easy to follow stitch patterns, and magical hood design make it the perfect beginner friendly yet sophisticated crochet project. Whether you use it for chilly evenings or as a stylish layer at outdoor gatherings, it will earn you compliments every time you step out.