
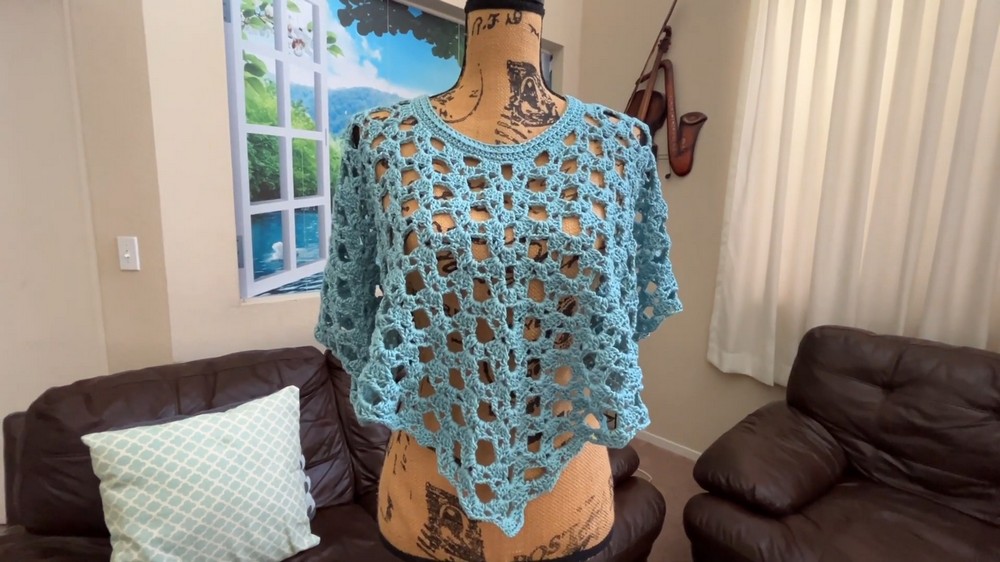
Lovely Free Crochet Summer Top Pattern You’ll Want For Relaxing Evenings
Try this free crochet summer top pattern to make a soft and breezy outfit that feels light to wear and is fun to create even if you are still learning.
Make This Flowy Crochet Summer Top Perfect for Layering Over Dresses
Whether you're heading to the beach, lounging at home, or looking for a stylish handmade piece, this crochet summer top works for any occasion.
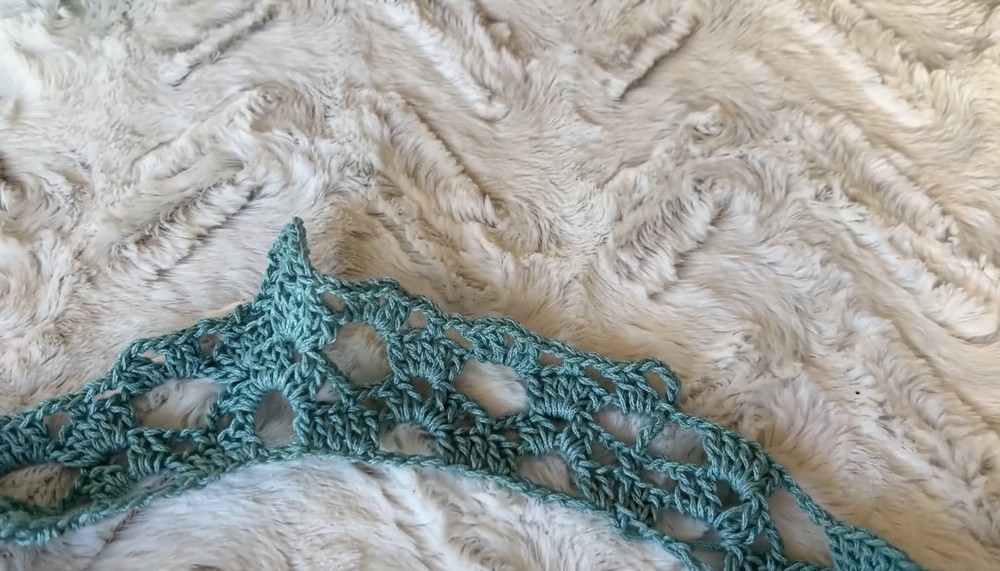
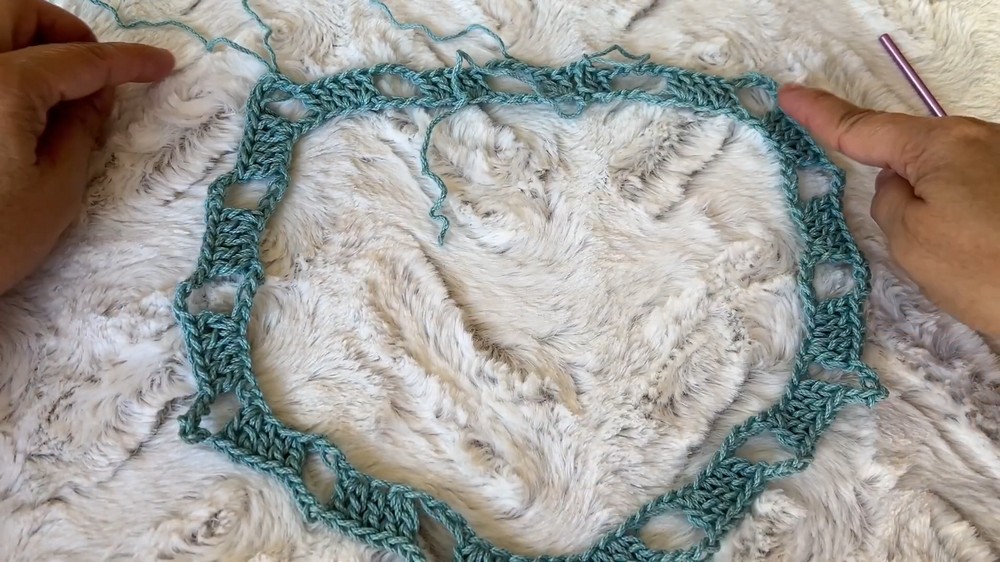
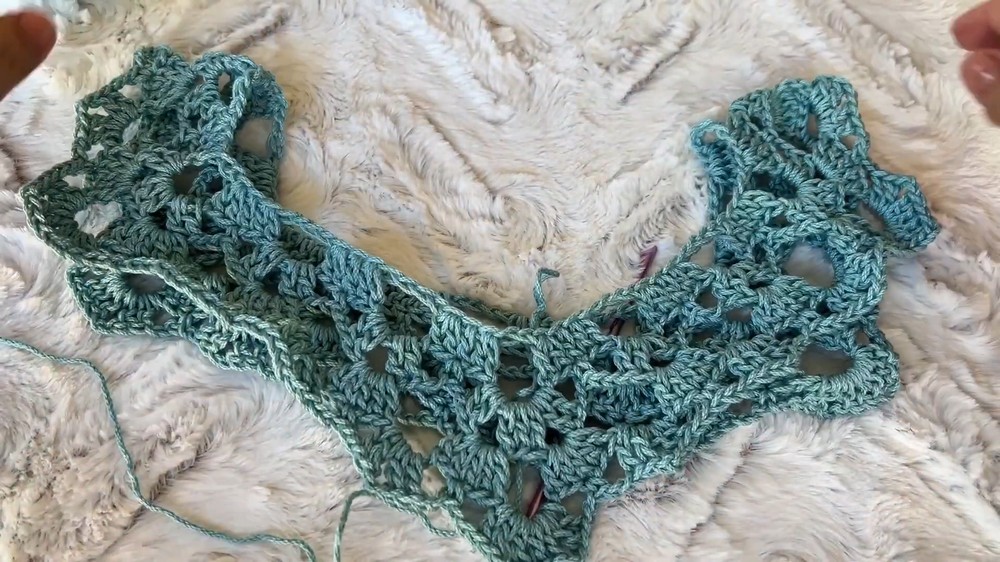
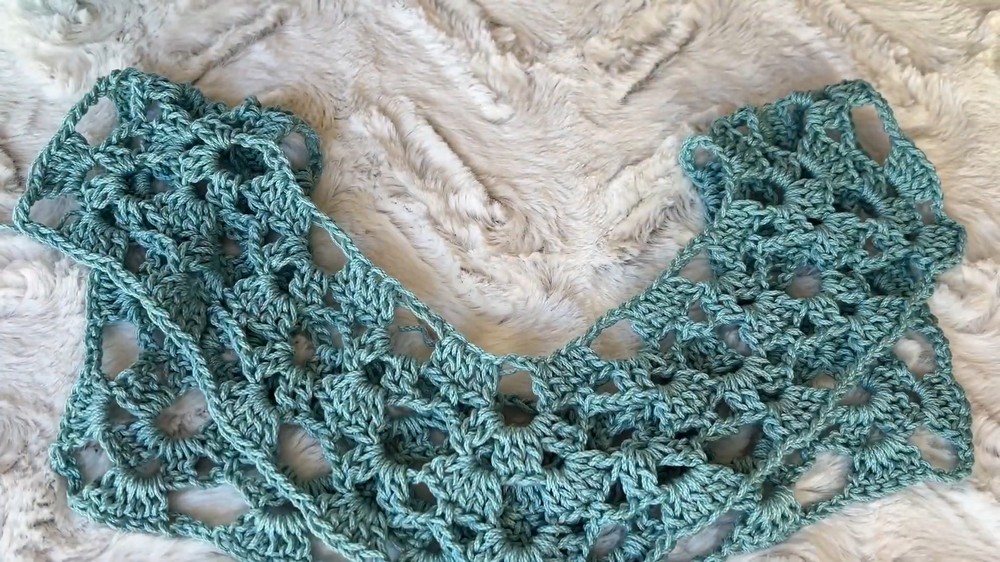
The design starts at the neck and grows into a unique pentagon shape with five sides and five corners. It's made by working simple crochet rounds until you reach the length you like. After that, the sides are joined to create openings for the arms and waist.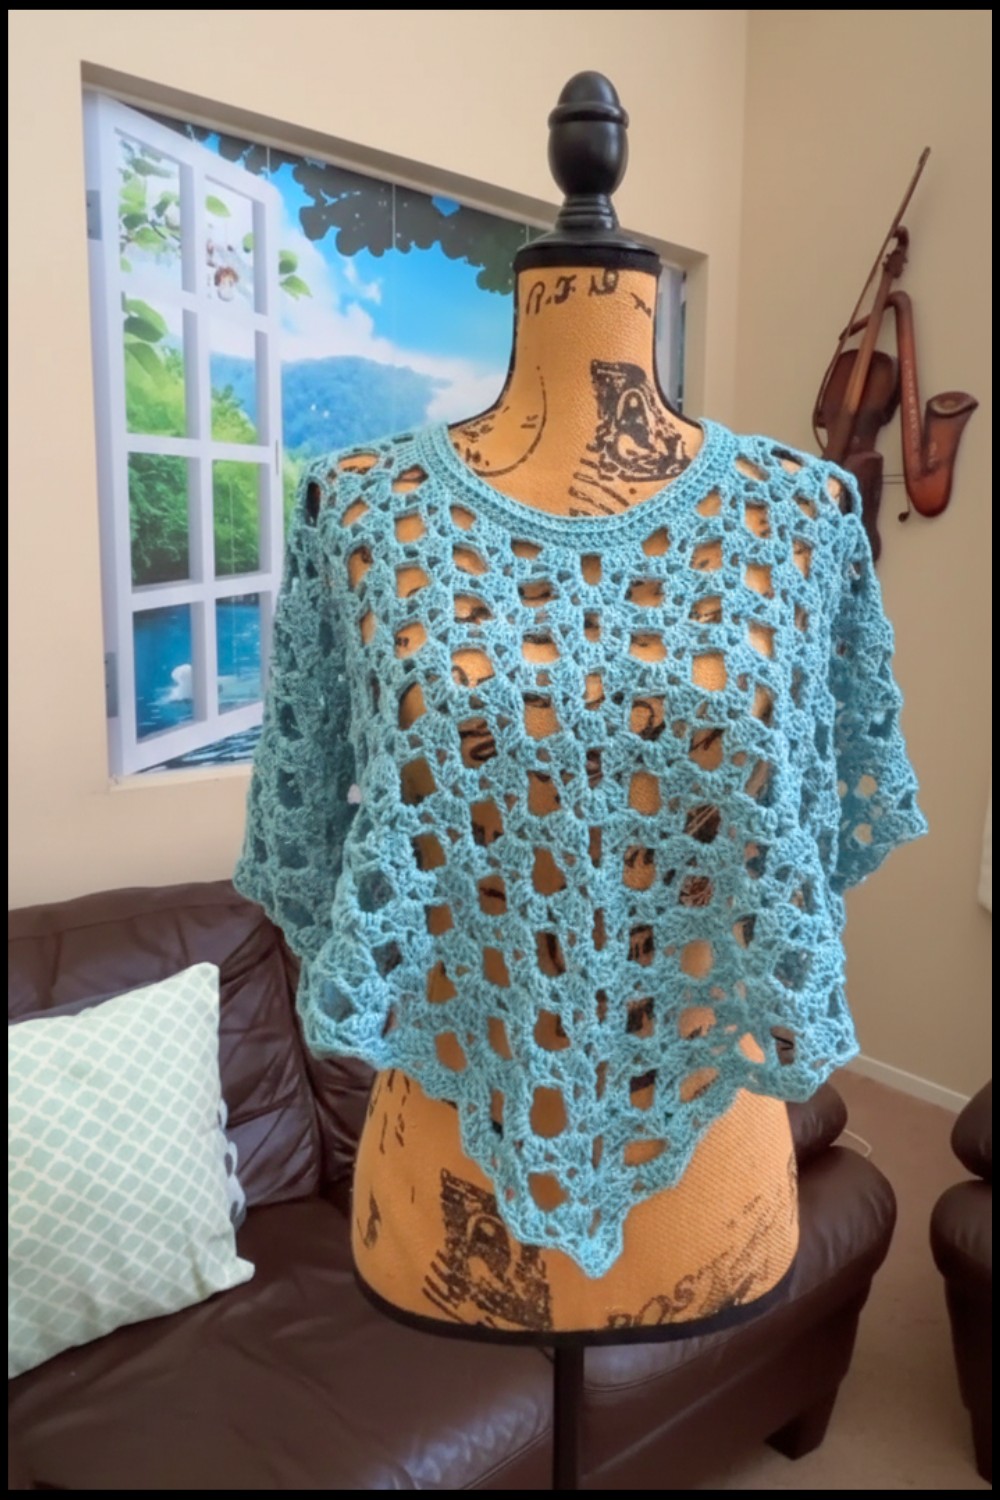 The back features a straight hem, giving it a neat and polished finish, while the front forms a beautiful V neck detail. Using 100% cotton yarn, it feels soft, durable, and comfortable to wear. You can even customize the size and length to fit perfectly.
Chic Crochet Summer Top Pattern
Materials Needed
- Yarn: 4 skeins of Lion Brand 24/7 cotton yarn (medium weight, size 4, 100% mercerized cotton, approximately 186 yards per skein).
- Crochet Hook: Size G (4 mm).
- Accessories:
- Pair of scissors.
- Blunt needle (for sewing edges and finishing).
- Stitch markers.
- Tape measure (optional for verifying measurements).
Special Techniques Used
- Slip Stitch: Used for joining rounds seamlessly.
- Single Crochet: Basic stitch used in Round 2 and finishing steps.
- Shell Stitch: A grouping of double crochets with chains in between, forming decorative shapes.
- Double Crochet: A versatile stitch forming the base of the pattern.
- Corner Creation: Method of increasing stitches at corners to maintain the pentagon shape.
Pattern Instructions
Step 1: Start with the Foundation Chain
- Begin with a slip knot and chain 102 stitches.
- Ensure the chain is multiples of 7 for the sides and multiples of 5 for the corners.
- Form a ring: Slip stitch into the first chain.
Step 2: Round 1
- Chain 3 (counts as the first double crochet).
- Work 2 double crochets into the next chain.
- You now have 3 double crochets.
- Chain 4, skip 4 chains, and work:
- 2 double crochets in the next chain.
- 1 double crochet in the next chain.
- 2 double crochets in the next chain.
- 2 double crochets in the next chain.
- Chain 5 (this marks the first corner). Skip 2 chains and start the next group of 5 double crochets.
- Continue the pattern:
- Chain 4, skip 4 chains, work 5 double crochets.
- Create a corner with chain 5, work 5 double crochets into the next section as described above.
- Repeat this around. Ensure there are 5 corners total to form a pentagon.
- End the round: Chain 4 and slip stitch into the starting third chain.
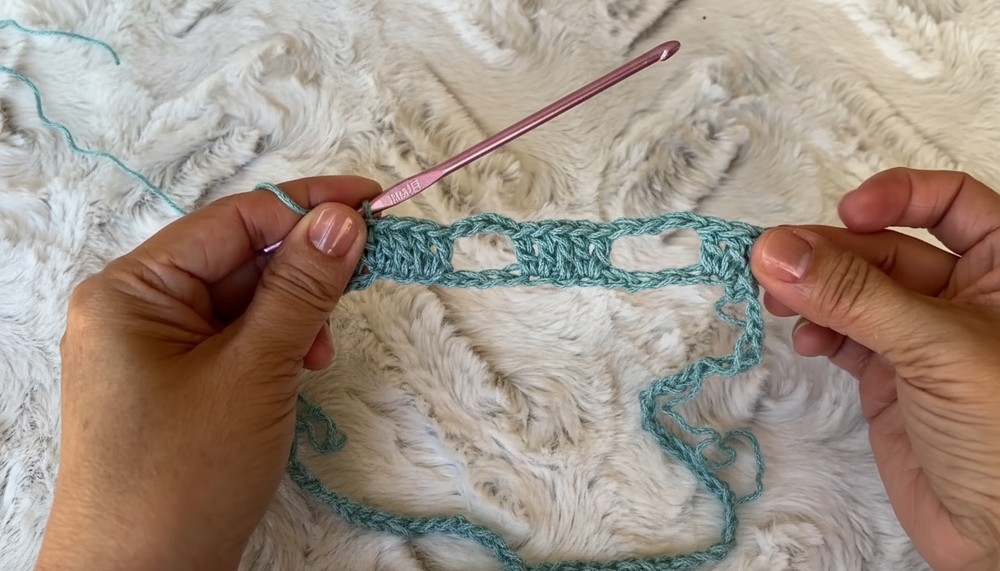
Step 3: Round 2
- Chain 1, single crochet in the same stitch, chain 2, and begin the shell:
- Shell Stitch: 2 double crochets, chain 2, 2 double crochets in the next chain-4 space.
- Chain 2, skip 2 stitches, and single crochet in the next stitch.
- Continue the pattern: Shell, chain 2, skip 2 stitches.
- At corners, work:
- Shell in chain 5 spaces with 2 chain spaces between each group of double crochets.
- Shell in chain 5 spaces with 2 chain spaces between each group of double crochets.
- At corners, work:
- Complete the round and slip stitch to end.
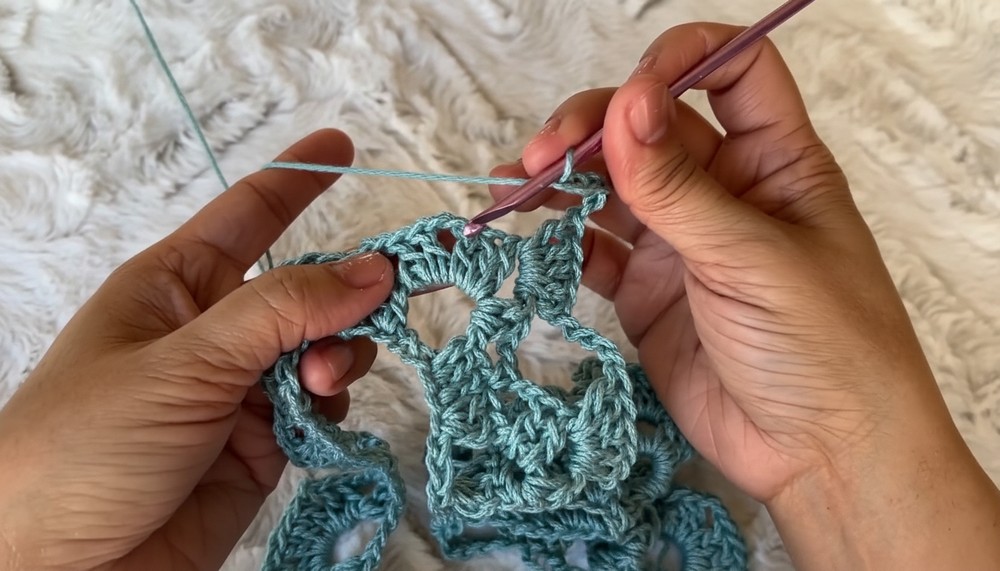
Step 4: Round 3
- Chain 6, work 5 double crochets into the chain 2 space of the shell.
- Chain 4 and skip 2 chain 2 spaces, then work 5 double crochets in the next shell chain 2 space.
- At corners:
- Chain 5, work 5 double crochets in the next chain space.
- Repeat the pattern around to finish the round. Slip stitch to join and end.
Step 5: Rounds 4 and 5
These rounds follow a similar concept:
- Alternate between chains and shells.
- Always maintain 5 corners and follow the established pattern for sides and increasing stitches at corners.
Step 6: Rounds 6–20
- Repeat Rounds 2–5 consecutively until the desired length is achieved.
- For reference: After 20 rounds, the approximate length measures 10.5 inches.
Finishing the Top
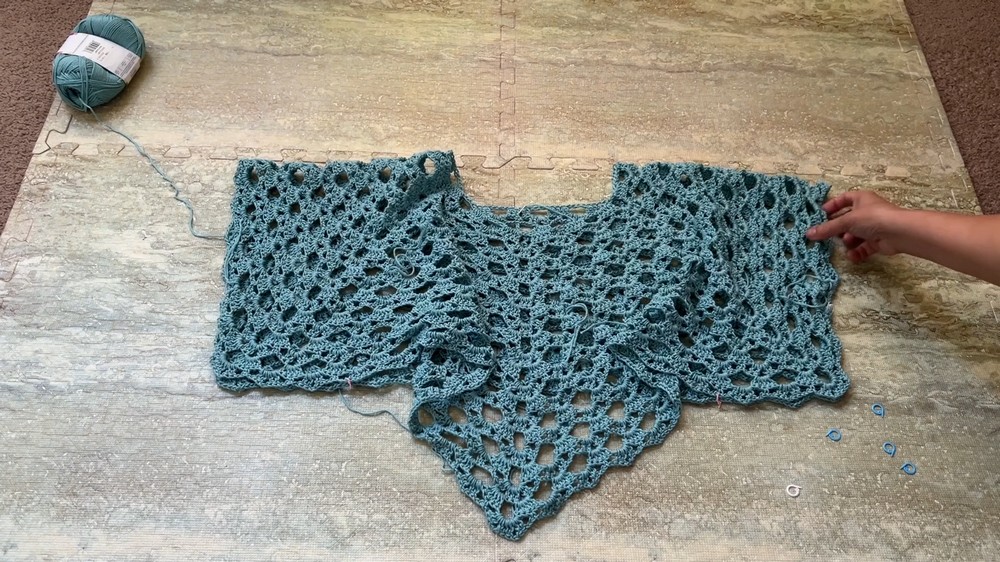
- Shape the Top: Lay the crocheted piece with the correct side facing up. Fold it halfway from the top, bringing the sides together.
- Mark the Edges for Sewing:
- Place markers about 8 inches from the top on both sides for arm openings.
- Place markers about 5 inches inward on the sides for the waist opening.
- Sew the Edges: Using the blunt needle, sew:
- Arm openings: Leave 8 inches open for arms.
- Waistline: Leave 5 inches open at the waist for the body opening.
- Neck Finishing:
- Work a round of single crochet around the neck opening.
- Add 2 rounds of half double crochet to give the neckline a clean, polished look.
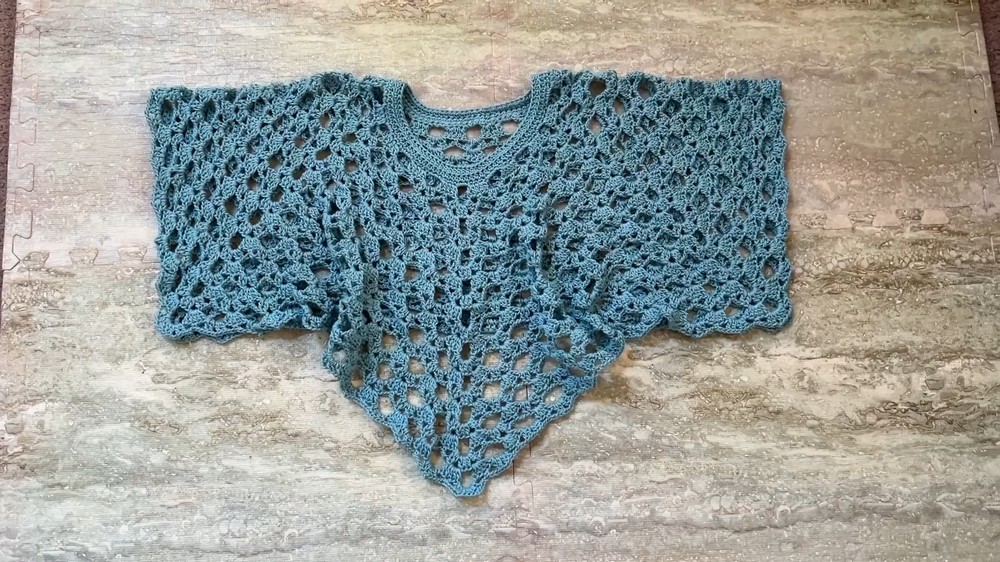
Final Measurements
- Shoulder to shoulder width: ~30.2 inches.
- Neck Opening: ~6.5 inches.
- Sleeve Opening: ~12 inches.
- Length from the neckline to tip: ~16 inches.

Final Words and Suggestions
Congratulations! You've successfully completed your crochet butterfly top. Here are a few tips to optimize its use and maintain the design:
- Customization: Adapt the arm and body openings based on your preferred fit. You can also modify the length by adding or subtracting rounds.

- Care Instructions: Wash gently in cold water to maintain the cotton yarn's quality. Lay flat to dry.
- Experimentation: Feel free to enhance the design by adding decorative rounds or contrasting borders.
Thank you for exploring this pattern, I hope this top adds color and style to your wardrobe.
