Free Crochet Smiley Face Granny Square Bag Pattern For a Stylish Look
Carry a happy vibe with this free crochet smiley face granny square bag pattern that is easy to make and perfect for adding color and joy to your day.
Add Fun to Your Style with a Free Crochet Smiley Bag Pattern
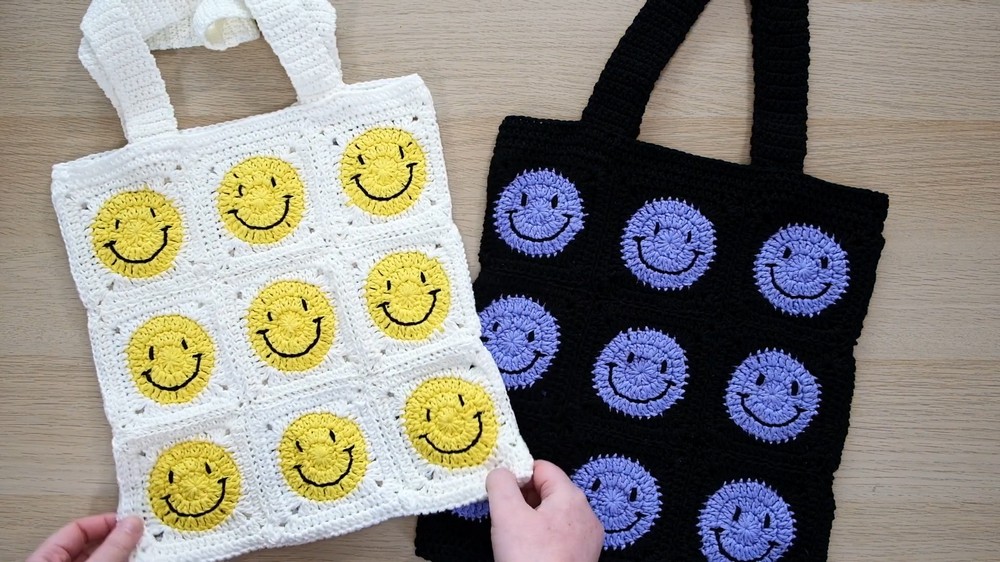
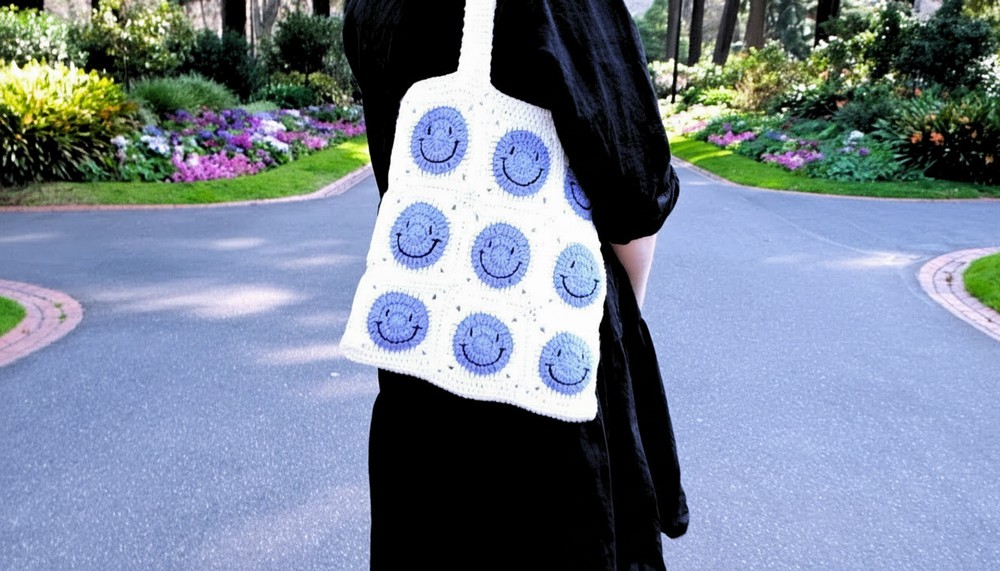
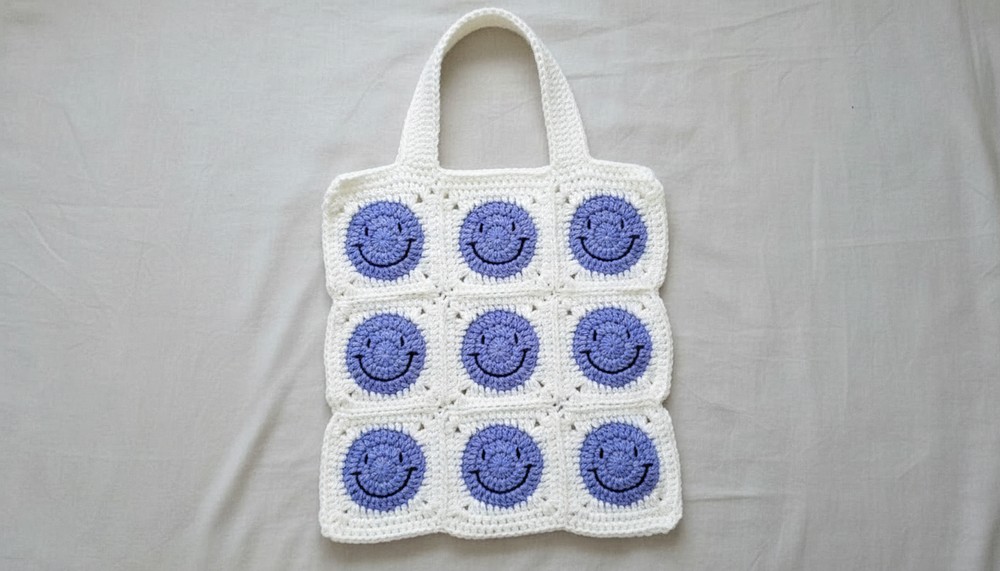
Looking for something fun and cheerful to make? The Free Crochet Cute Smiley Face Granny Square Bag Pattern is a delightful project that brings smiles to everyone. This bag is covered with 18 happy smiley face squares in bright colors, making it a joyful accessory to carry around. Each side bursts with vibrant colors you choose, giving it a playful and unique look.
The bag isn’t just adorable—it’s sturdy and practical too. With strong straps, a flat bottom, and secure stitching, you can use it for groceries, books, or your daily essentials.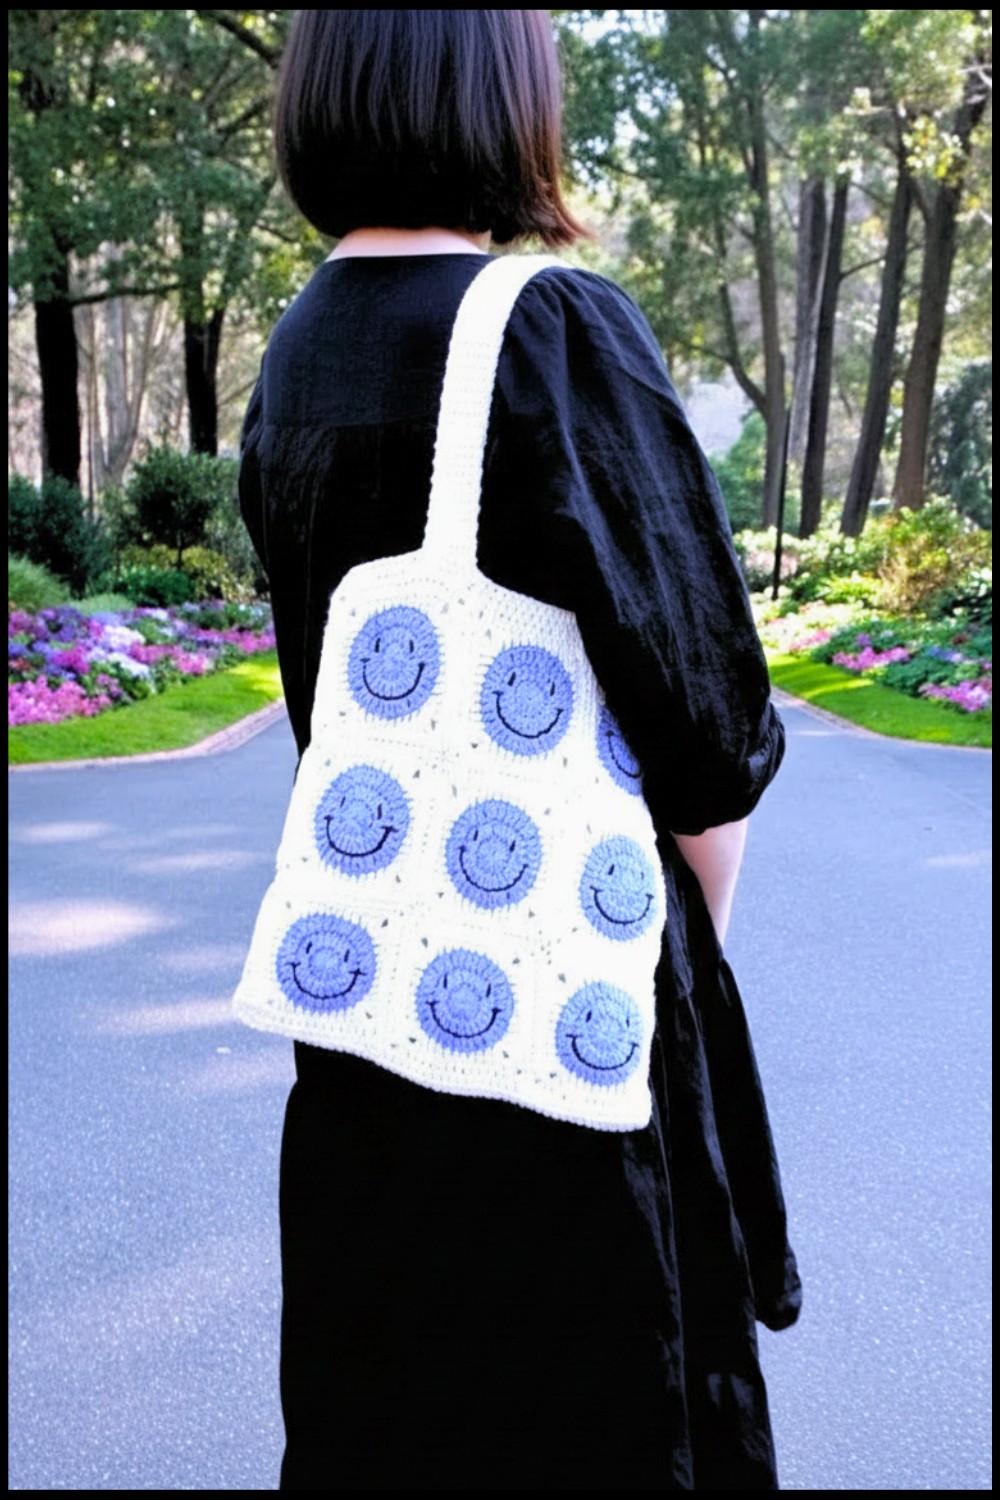 It’s simple to make and perfect for adding a touch of happiness to your day. Whether for yourself or as a handmade gift, this smiley face bag will spread joy wherever it goes.
Crochet Smiley Face Granny Square Bag Pattern
Materials Required
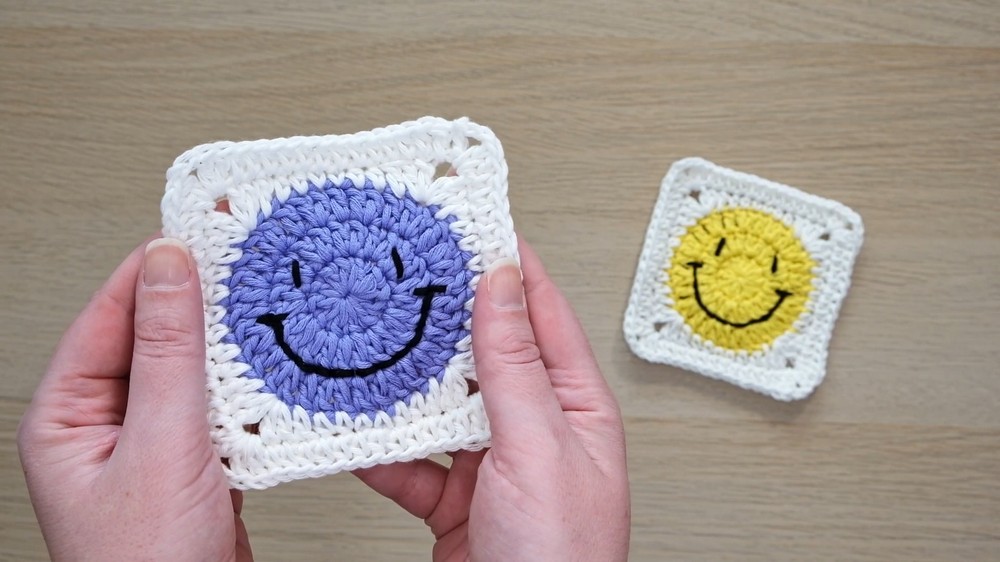
- Yarn: Choose several colors as per your preference for the smiley faces and the background. Two contrasting colors (e.g., yellow and purple) are used in the tutorial.
- Crochet Hook: Use a crochet hook that matches your yarn (recommended size is indicated on your yarn label).
- Scissors: For cutting the yarn.
- Darning Needle: For sewing granny squares together and weaving in ends.
- Optional: Additional yarn in a contrasting color for clear seam stitching during assembly.
Special Techniques
- Granny Squares: Smiley face granny squares form the base design.
- Mattress Stitch: Used for connecting granny squares together seamlessly.
- Standing Half Double Crochet: Used during border row addition.
- Single Crochet: Used for creating straps.
- Seaming: Used for assembling bag sides and base.
Pattern Instructions
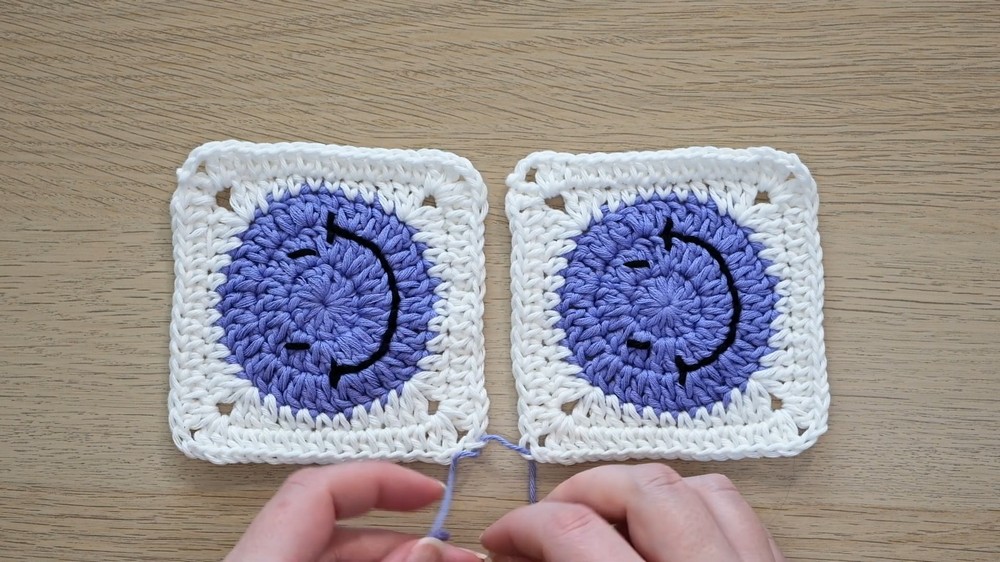
1. Creating Smiley Face Granny Squares
- Follow the smiley face granny square tutorial linked in the video description to make 18 squares total.
- Use yellow yarn for nine squares and purple yarn for the other nine squares.
- Adjust yarn color or pattern for customization.
- Once completed, you will have a total of 18 squares (9 for each side of the bag).
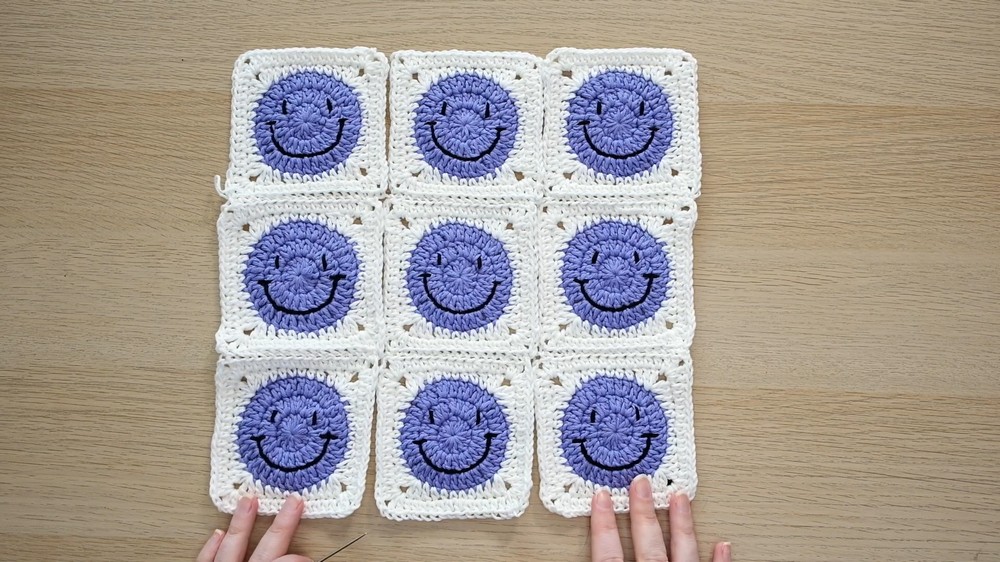
2. Sewing Granny Squares Together
- Arrange 9 granny squares in a 3x3 grid for the front of the bag. Repeat the same for the back.
- Use the mattress stitch for sewing squares together:
- Insert the darning needle through the back loop of the second chain in the corner stitches of two adjoining squares.
- Tie the thread into a double knot to secure. Alternate stitching down into the back loops of each square.
- Insert the darning needle through the back loop of the second chain in the corner stitches of two adjoining squares.
- Assemble all squares into two panels (front and back) by first sewing horizontal seams, then working on vertical seams.
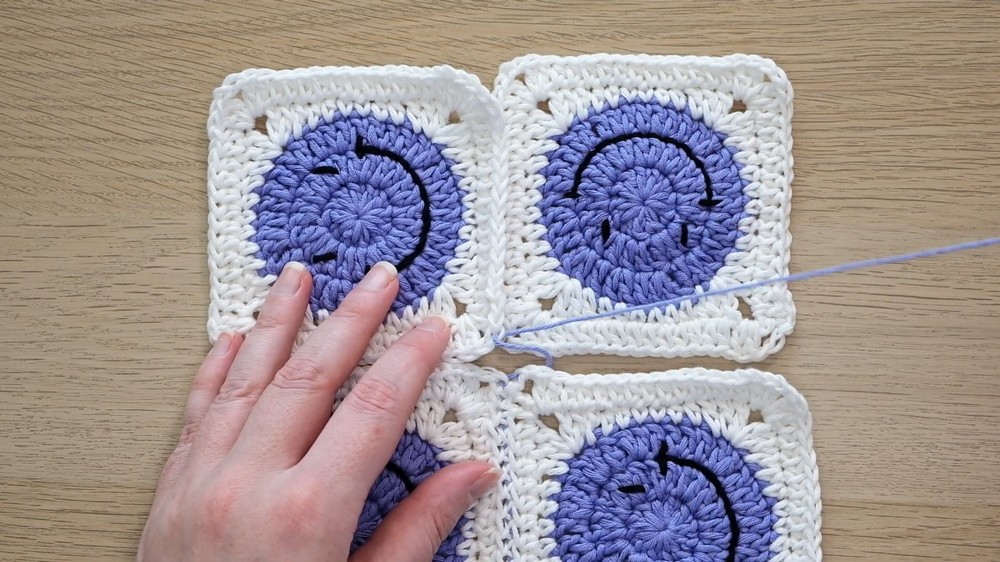
- When joining squares at the corners (where four squares meet), pay extra attention to stitching securely around knots for a neat finish.
3. Assembling the Bag
- Once both panels are complete, join the sides together using the same mattress stitch technique.
- Create a tube by stitching along each side of the bag, ensuring edges align correctly.
- Before sewing the bottom closed, add additional rows of crochet for stabilization and shape (see next section).
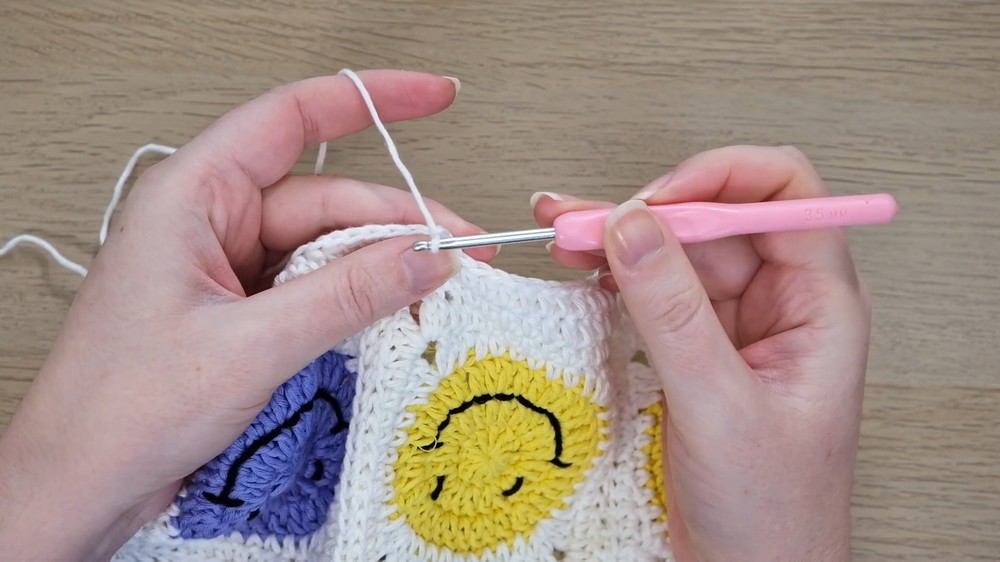
4. Adding Rows to the Bag Bottom
- Begin on the side seam near the corner using a slip knot.
- Work a standing half double crochet into the stitch just before the corner.
- Decrease stitches at joins between squares for evenness:
- Yarn over and crochet together the last stitch before corner, the seam between squares, and the corner of the next square.
- Decrease stitches at joins between squares for evenness:
- Continue with half double crochets around the bottom edge, repeating the decrease technique at every join between squares.
- Repeat this process for two rows to create a more rectangular base.

5. Sewing the Bottom Closed
- Using your darning needle, stitch the bottom of the bag closed.
- Unlike previous seams, this time you will stitch under the vertical stems of each side of the bottom edge.
- Alternate stitching through stems on either side, creating a neat and strong seam.
- Tighten stitches evenly to avoid puckering.
6. Making and Attaching Straps
- To create straps:
- Start with a slip knot and chain a number for the strap width plus one chain for turning. Example: Chain 8 stitches.
- Single crochet into the bumps on the back of the chain for the first row.
- Turn work, and single crochet into the V shape stitches at the top of each row for all subsequent rows.
- Continue crocheting until the desired strap length is achieved. Remember the straps will stretch slightly over time.
- Repeat to make a second strap.
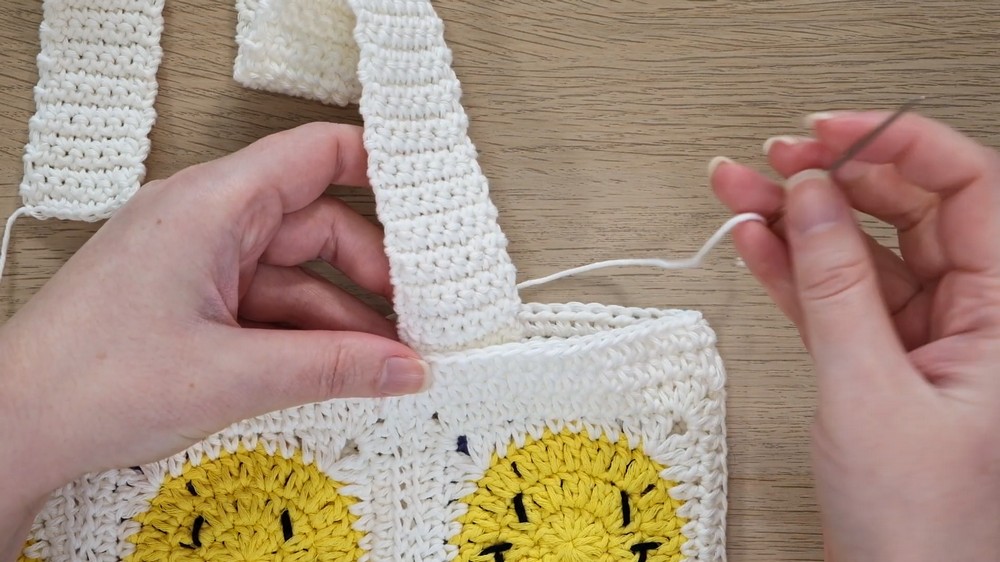
- To attach straps:
- Place the end of the strap inside the bag panel (between rows) and use a needle to sew securely:
- Insert the needle between two rows.
- Stitch through the strap and bag layers evenly.
- Repeat along the length of the strap, fasten off, and weave in ends.
- Place the end of the strap inside the bag panel (between rows) and use a needle to sew securely:
Finishing the Bag
- Double check all seams and ensure they are secure.
- Weave in all loose ends with the darning needle.
- Flatten the bag and adjust shape as needed. If necessary, lightly steam block for a polished look.
- Add embellishments, such as pom poms or additional decorative stitching, if desired.
Final Words
Congratulations on completing your Smiley Face Bag! The combination of vibrant granny squares, neat seams, and sturdy straps makes this bag perfect for everyday use. The cheerful smiley faces add charm and a fun vibe, making this project ideal for gifting or personal use.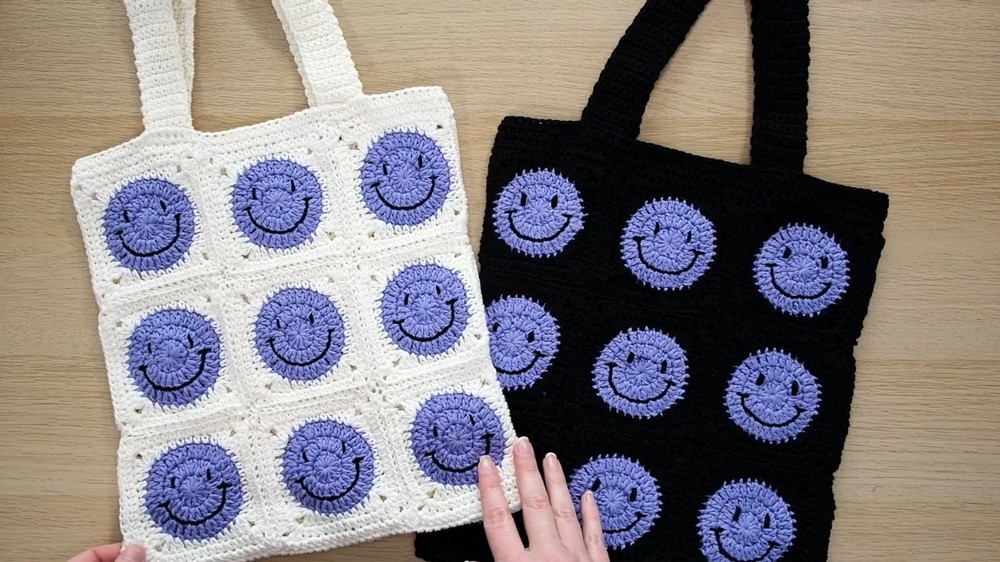
Tips to Maintain the Bag
- Washing: Hand wash gently in cold water to retain shape and prevent damage.
- Storage: Store flat or lightly stuffed to maintain its rectangular form.
- Customization: Experiment with colors, square sizes, or additional rows to make your bag unique.
With this step by step guide, you’re ready to crochet your own smiley face bag that’s stylish, practical, and delightful.