
Simple Free Crochet Christmas Tree Pattern with Instructions
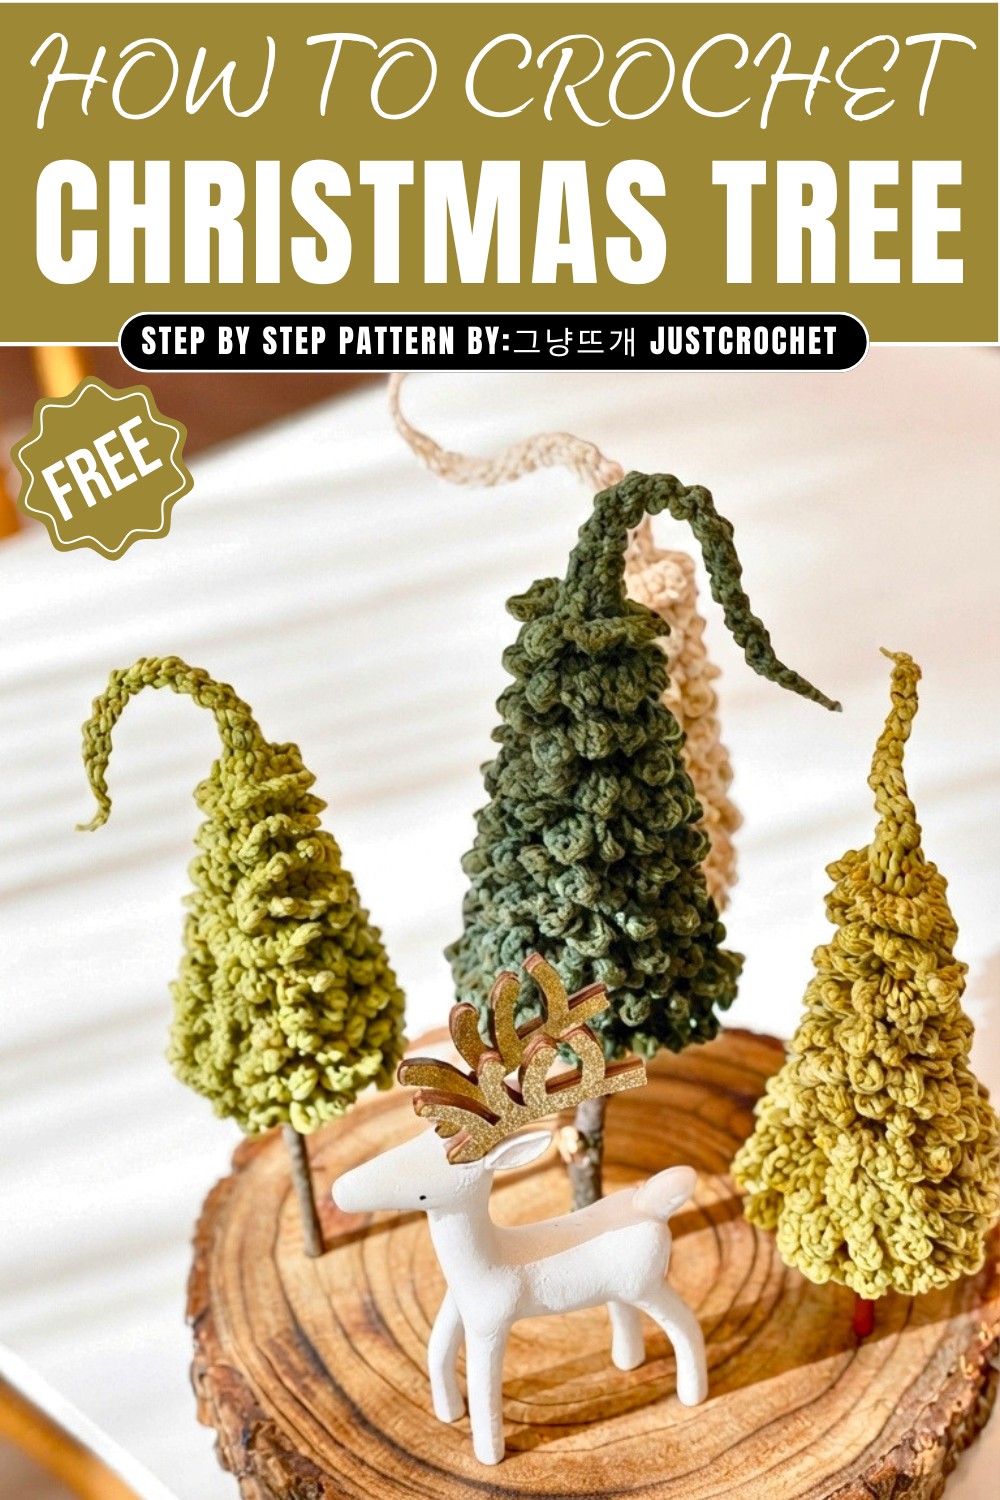
Crochet a festive Christmas tree with this free pattern, adding a handmade touch to your holiday decorations while spreading warmth and joy this season.
As the holiday season approaches, I’m always on the lookout for simple yet charming crochets to brighten up my home. The free crochet Christmas Tree pattern is one such find that immediately caught my attention. This delightful project, shared on the channel 그냥뜨개 justcrochet, offers a cozy and charming way to bring festive spirit into any space.
Quick Free Crochet Christmas Tree Pattern for Holiday Decorating
This adorable crochet tree features a small, soft design with gently layered branches that beautifully mimic the look of a classic fir. Its textured pattern and inviting feel make it a perfect decoration for shelves, tabletops, or mantels. The tree’s understated charm brings a sense of warmth and nostalgia, instantly adding to the holiday atmosphere.

What I love most is how this pattern transforms simple yarn scraps into a beautiful holiday accent. Beyond decorating your own space, this handcrocheted tree makes a thoughtful and unique gift. Its compact size is perfect for stocking stuffers or as an extra special touch on wrapped presents.
The versatility of this little tree is impressive, it can easily serve as an ornament, a tabletop focal point, or a heartfelt keepsake for friends and family. Wherever placed, it adds a sweet homemade flair to any festive setting.
If you’re looking to create a cozy, handmade decoration this Christmas, I warmly invite you to check out the free crochet Christmas Tree pattern. It’s a wonderful way to add a personal and festive touch to your holiday celebrations.

Witch Tree Crochet Pattern
This step-by-step crochet pattern guide walks you through making the Witch Tree, a unique and decorative project perfect for Halloween displays or whimsical woodland scenes. Using simple leftovers of yarn and a 5mm or 6mm crochet hook, you’ll create a spiky tree with layered leaves and a pointed, witch-hat-style top, all in one seamless piece. The detailed instructions matched to each video timestamp ensure every technique and transition is clearly explained.
Key Features
- Seamless 3D Construction: Tree worked in the round from base up, reducing stitches for cone shaping.
- Two-Part Shaping: Core cone for structure, pointy witch-hat tip with loop-specific stitchwork.
- Decorative Leaf Layers: Leaves are crocheted into back-loop-only rows, creating dimension and texture at every tier.
- Adjustable Height: Continue ‘leaf’ sections for your desired tree height.
- Great for Stash-Busting: Uses small amounts of leftover yarn in any color for a customizable finish.
Notes
- Pattern uses US crochet terminology.
- This Witch Tree is worked in continuous spirals unless otherwise noted (no joining at the end of most rounds – use a stitch marker if needed).
- Leaves are made after the cone is complete, using loops left from previous rounds.
- For a firm tree, keep your tension tight.
- Optional: Stuff lightly for extra firmness or leave hollow for collapsibility.
- You may change hook size for slightly different finished sizes or to match your preference with leftover yarn.
- Fasten off all ends securely and weave in well.
- All increases and decreases are worked as instructed; do not skip any round or technique.
Skill Level
Easy/Beginner to Intermediate
- Basic familiarity with single crochet, working in the round, and making increases/decreases.
- Experience with crochet in the back loop only (BLO) and front loop only (FLO) recommended, but not required (instructions included).
Materials
- Worsted or aran weight yarn in green, brown, or any color you like for the tree body/leaves (can use various colors for leaf layers)
- 5mm or 6mm crochet hook (as per desired tree size and yarn thickness)
- Scissors
- Yarn or tapestry needle
- Stitch marker (helpful for keeping track of rounds)
- Fiberfill (optional, for stuffing if you want a firmer tree)
Measurements / Sizing
- Height: Approx. 6–8 inches (15–20 cm) depending on yarn/hook and leaf tier count
- Base diameter: Approx. 2–3 inches (5–8 cm) after blocking
- Width: Expands due to leaf clusters
Gauge & Stitch Pattern
Gauge: Not critical for this decorative item.
Stitch Pattern: Single crochet in the round, back loop for body, front loop for tip, with decorative chains for leaf effect.
Stitch Abbreviations
| Abbreviation | Stitch |
|---|---|
| ch | Chain |
| sc | Single crochet |
| sl st | Slip stitch |
| BLO | Back loop only |
| FLO | Front loop only |
| st(s) | Stitch(es) |
| dec | Decrease (sc two together: sc2tog) |
Special Stitches
- Back loop only (BLO): Insert hook under only the back loop of the stitch (furthest from you).
- Front loop only (FLO): Insert hook under only the front loop of the stitch (closest to you).
- sc2tog: Single crochet two stitches together to decrease.
Written Pattern
Phase 1: The Main Body (The Cone)
- Begin the Base
- Make 24 double chain stitches (use the creator’s preferred method: create one chain, then in the bottom bump, make a second chain for each; or simply chain 24).
- Join with a slip stitch to the first chain to form a ring. (24 sts)

- Foundation Rounds
- Rounds 1-2: Work 1 sc in each stitch around (24 sc per round). Do 2 rounds in total.
- Decrease Rounds: Shaping the Cone
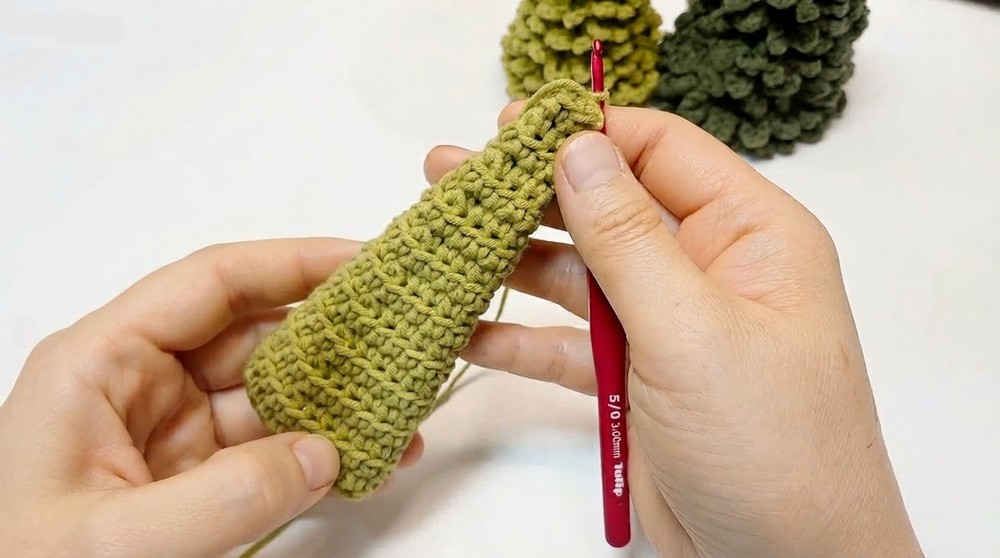
- Round 3: BLO ROUND – sc in BLO around, but decrease by 2 stitches evenly spaced (for example, sc in 10 sts, sc2tog, sc in 10 sts, sc2tog). (22 sc)
- Round 4: Regular round – sc in both loops around. (22 sc)
- Round 5: BLO ROUND – sc in BLO, decrease by 2 more stitches. (20 sc)
- Round 6: sc in each st. (20 sc)
- Continue the pattern:
- BLO round with 2 decreases (18, 16, 14, 12, 10, 8 sc)
- Regular round with new stitch count after each decrease round.
- Continue until only 6 sts remain after a pair of BLO and regular rounds.
- Final Decrease
- One last decrease round: Decrease from 6 to 4 sc.
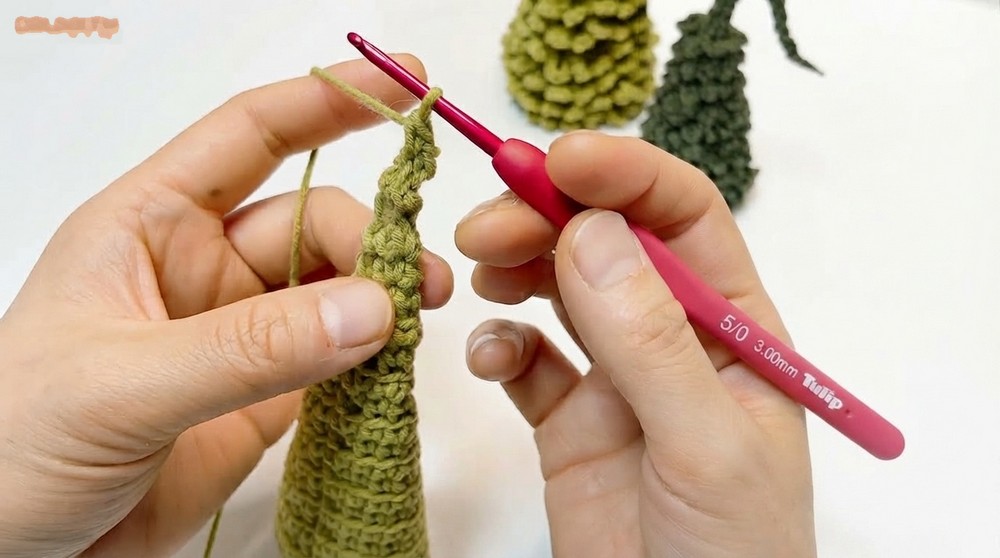
- One last decrease round: Decrease from 6 to 4 sc.
Phase 2: The Witch's Hat Point
- Create the Tip
- Switch to working only in the front loop.
- With 4 stitches, work 3 rounds of 1 sc in each stitch (4 sc per round).
- Narrow to a Point
- Decrease to 3 stitches (use sc2tog once somewhere in the round):
- Rounds 1-3: 1 sc in each st (3 sc per round).
- Decrease to 3 stitches (use sc2tog once somewhere in the round):
- Final Mini Rounds
- Decrease to 2 stitches:
- Rounds 1-3: 1 sc in each st (2 sc per round).
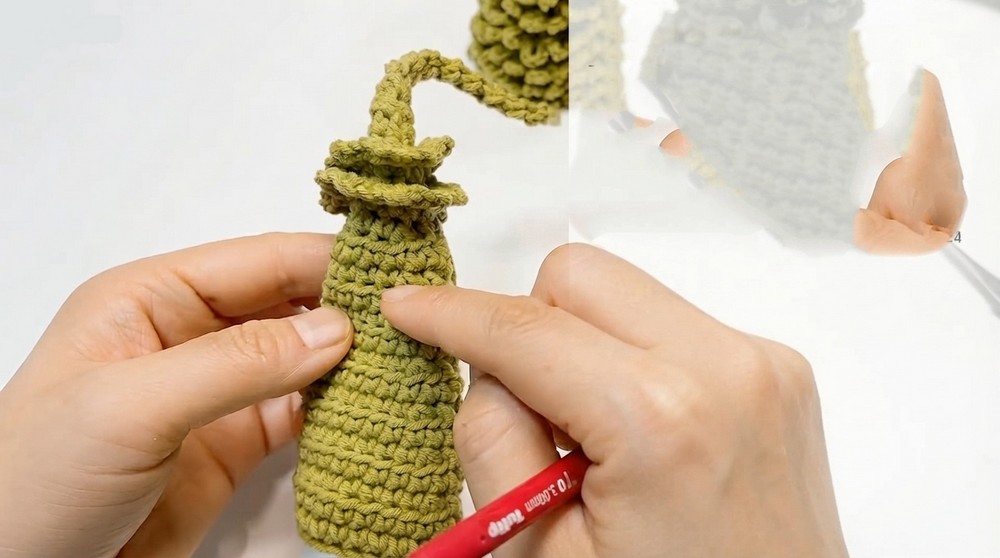
- Rounds 1-3: 1 sc in each st (2 sc per round).
- Decrease to 2 stitches:
- Finish Off
- Chain 1; cut the yarn and pull through the last stitch.
- Weave in the end securely.
Phase 3: The Decorative Leaves
- Work Into Unused BLOs
- Turn tree so the base is facing you.
- Identify the remaining back loops (BLOs) from the earlier cone rounds—these form rings/rows where leaves will be added.
- Upper Tier of Leaves
- Start with topmost BLO row:
- In each BLO around (there will be 8 for this row), work:
- 1 sc, ch 2, 1 sc in the same stitch.
- Repeat in each stitch of the round (8 times).
- Connecting Rows
- At the end of the round, sl st into the space between the first and last stitches of the previous round to anchor your work.
- Repeat for each leaf round/tier as you move lower down the tree.

- Building More Leaf Tiers
- For each lower BLO row:
- Increase the chain part in the leaf cluster.
- Second tier: ch 3 between single crochets (1 sc, ch 3, 1 sc in each st).
- Third tier: ch 4 in each leaf.
- Continue increasing—fourth tier: ch 5, bottom tier: ch 6, etc.
- Increase the chain part in the leaf cluster.
- Each round creates a wider set of ‘leaves,’ giving the tree its full, fringed skirt.
- For each lower BLO row:
- Finishing Off
- When all tiers are complete, fasten off and use your yarn/tapestry needle to weave in all ends on the inside or back of the work.
Assembly & Finished Size
- No stuffing is required; the tree stands on its own.
- Adjust the number of leaf layers/tiers for a taller or wider tree as you like.
- Finished height: 6–8 inches (15–20 cm) with a lively, spiky leaf texture and pointed witch hat top.
- Sturdy and self-contained: ready for display!
Conclusion
You’ve now completed your whimsical Witch Tree—a wonderful blend of simple spiral crochet, clever shaping, and decorative texture. This pattern is perfect for using up yarn scraps and producing a festive autumn or Halloween decoration. Every stitch, decrease, and leaf creates depth and delight, resulting in a tree with magical character and flair. Thank you for following each step in this guide—display your Witch Tree with pride, or use this technique to inspire even more creative forest friends!