Gorgeous Free Crochet Flower Hair Claw Clip Pattern Everyone Wants
Enjoy practical hair accessories with a Free Crochet Flower Hair Claw Clip Pattern where tiny flowers bring life and neatness to daily hair.
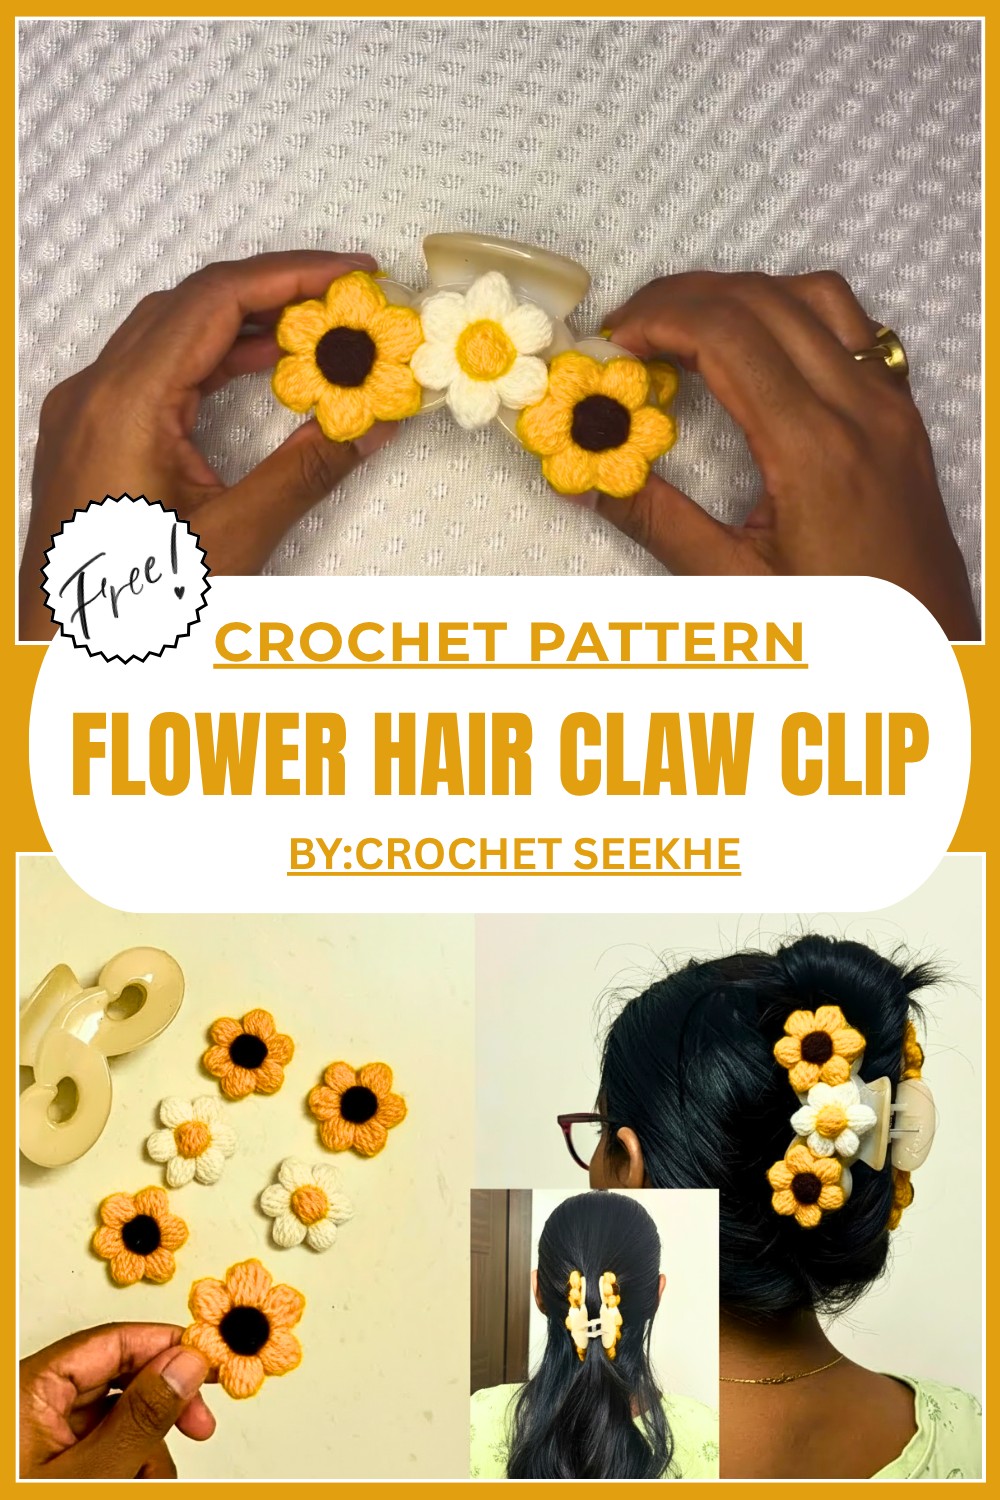
Adorn Your Hairstyle With Free Crochet Flower Hair Claw Clip Pattern
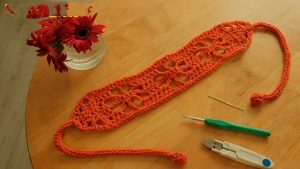
Bring a touch of creativity and charm to your hair with a crochet flower hair claw clip pattern. This handmade accessory is a beautiful and unique way to style your hair for everyday outings or special occasions. Using a free crochet flower pattern, you can create a colorful and soft flower that looks elegant and playful. The claw clip keeps the flower secure and comfortable in your hair all day.  With its fluffy petals and vibrant center, this lightweight design adds beauty and uniqueness to your look. It can also be a lovely gift or a stylish decoration for bags, hats, or clothes, making it an adorable and versatile accessory.
Cute Crochet Flower Hair Claw Clip Pattern
Materials Required
- Crochet Yarn:
- Choose two contrasting colors (e.g., yellow, white, or brown) for petals and the center.
- Medium weight yarn or lightweight acrylic yarn is ideal.
- Crochet Hook:
- Use the recommended hook size for your chosen yarn (e.g., 2mm–4mm for medium weight yarn).
- Scissors:
- Sharp scissors for cutting excess yarn.
- Tapestry Needle:
- For threading and attaching the flower center to the petals.
- Glue:
- Strong crafting adhesive for fixing the completed flowers to clips or other objects.
- Hair Clips (optional):
- To transform your crochet flower into a stylish accessory.

- To transform your crochet flower into a stylish accessory.
Step 1: Making the Puff Flower Base
- Start with a Magic Circle:
- Take your yarn and wrap it into a circle. Insert your hook into the circle, loop the yarn, and pull through to form a base.
- Chain One:
- Make a single chain to secure the circle.

- Make a single chain to secure the circle.
- Make 12 Single Crochets in the Magic Circle:
- Insert the hook into the circle, loop the yarn, pull, and complete a single crochet.
- Repeat the process until you have 12 single crochet stitches inside the circle.
- Close the Magic Circle:
- Pull the remaining yarn tail tightly to close the center of the circle.
- Slip Stitch to Join:
- Insert the hook into the first stitch of the round, loop the yarn, pull through the loop, and complete a slip stitch.
At this point, the base of the flower is complete.
Step 2: Creating the Petals
- Start Round 2 by Chaining Three:
- After slip stitching, chain three as the starting point for your first petal.
- Make Three Unfinished Double Crochet Stitches in the Same Stitch:
- Yarn over, insert your hook into the next stitch, pull the yarn through, and leave the loops unfinished without completing the double crochet. Repeat three times to have multiple loops on your hook.
- Repeat Unfinished Double Crochet in the Next Stitch:
- Continue making three unfinished double crochet stitches in the next stitch. At this stage, there should be 7 loops on your hook.

- Continue making three unfinished double crochet stitches in the next stitch. At this stage, there should be 7 loops on your hook.
- Complete the Puff Petal:
- Yarn over, pull through all seven loops, and chain three to secure the puff petal.
- Attach the Petal with Slip Stitch:
- Use a slip stitch to anchor the petal securely to the flower base.
- Repeat for Other Petals:
- Repeat these steps (chain three, unfinished double crochets, and slip stitch) around the circle to form six petals.

- Repeat these steps (chain three, unfinished double crochets, and slip stitch) around the circle to form six petals.
Step 3: Adding the Center
- Create the Magic Circle for the Center:
- Form a new magic circle using a contrasting yarn color.
- Chain Three:
- To begin, chain three to make the foundation for the center.
- Make Five Unfinished Double Crochet Stitches:
- Similar to the petals, crochet 5 unfinished double crochets onto the magic circle.
- Pull Through All Loops:
- Yarn over and pull through all 6 loops to complete the puff center.
- Secure with Chain Three and Slip Stitch:
- Chain three and slip stitch to tie the puff center into place.
- Finish the Center:
- Pull the magic circle’s yarn tightly to close the center.

- Pull the magic circle’s yarn tightly to close the center.
Step 4: Attaching the Center to Petals
- Thread Both Yarns:
- Use a tapestry needle to thread the remaining tails of the center yarn.
- Align the Center:
- Place the center neatly on top of the flower’s petals.
- Secure with Knots:
- Tie multiple knots securely on the back of the flower.
- Trim Excess Yarn:
- Trim any leftover yarn, keeping everything neat.

- Trim any leftover yarn, keeping everything neat.
Step 5: Finishing the Pattern
- Transform into Accessories:
- Take your completed flower and use glue or stitching to attach it to a hair clip. Alternatively, you can keep it as an embellishment for bags, dresses, or blankets.

- Take your completed flower and use glue or stitching to attach it to a hair clip. Alternatively, you can keep it as an embellishment for bags, dresses, or blankets.
- Final Touches:
- Check your flower for loose yarn ends or uneven edges. Adjust any minor details for a polished look.

- Check your flower for loose yarn ends or uneven edges. Adjust any minor details for a polished look.
Final Words
Congratulations, You’ve completed your puff flower. This pattern is creative, beginner friendly, and ideal for crafting unique handmade decorations or gifts. Experiment with different yarn colors and sizes for a personalized touch. Whether as a hair clip, table décor, or embellishment, this puff flower is sure to impress.
Tips to Maintain the Pattern
- Yarn Care:
- Use high quality yarn to ensure longevity and vibrant colors. Wash gently if needed.

- Use high quality yarn to ensure longevity and vibrant colors. Wash gently if needed.
- Accurate Stitching:
- Count stitches carefully during each round to maintain symmetry.
- Practice Before Creating Sets:
- Start with a sample flower to refine your skills before making multiple.
- Use Suitable Glue:
- If attaching to accessories, use a glue that won’t damage the yarn.

- If attaching to accessories, use a glue that won’t damage the yarn.