Quick Free Crochet Flower Coaster Pattern That’s as Fun as It Looks
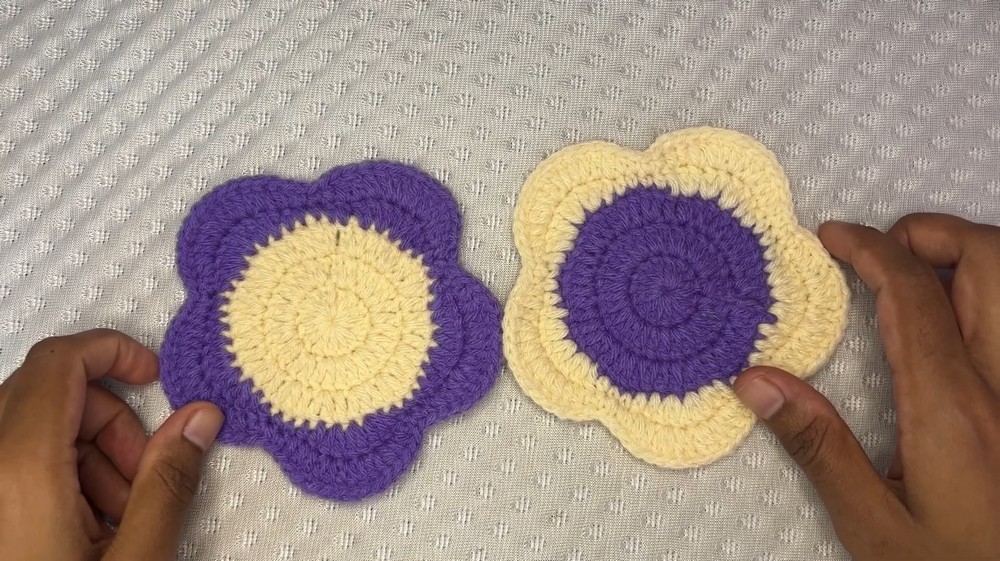
Let your table look pretty with a Free Crochet Flower Coaster Pattern and enjoy flower coasters that work well for mugs and daily home use.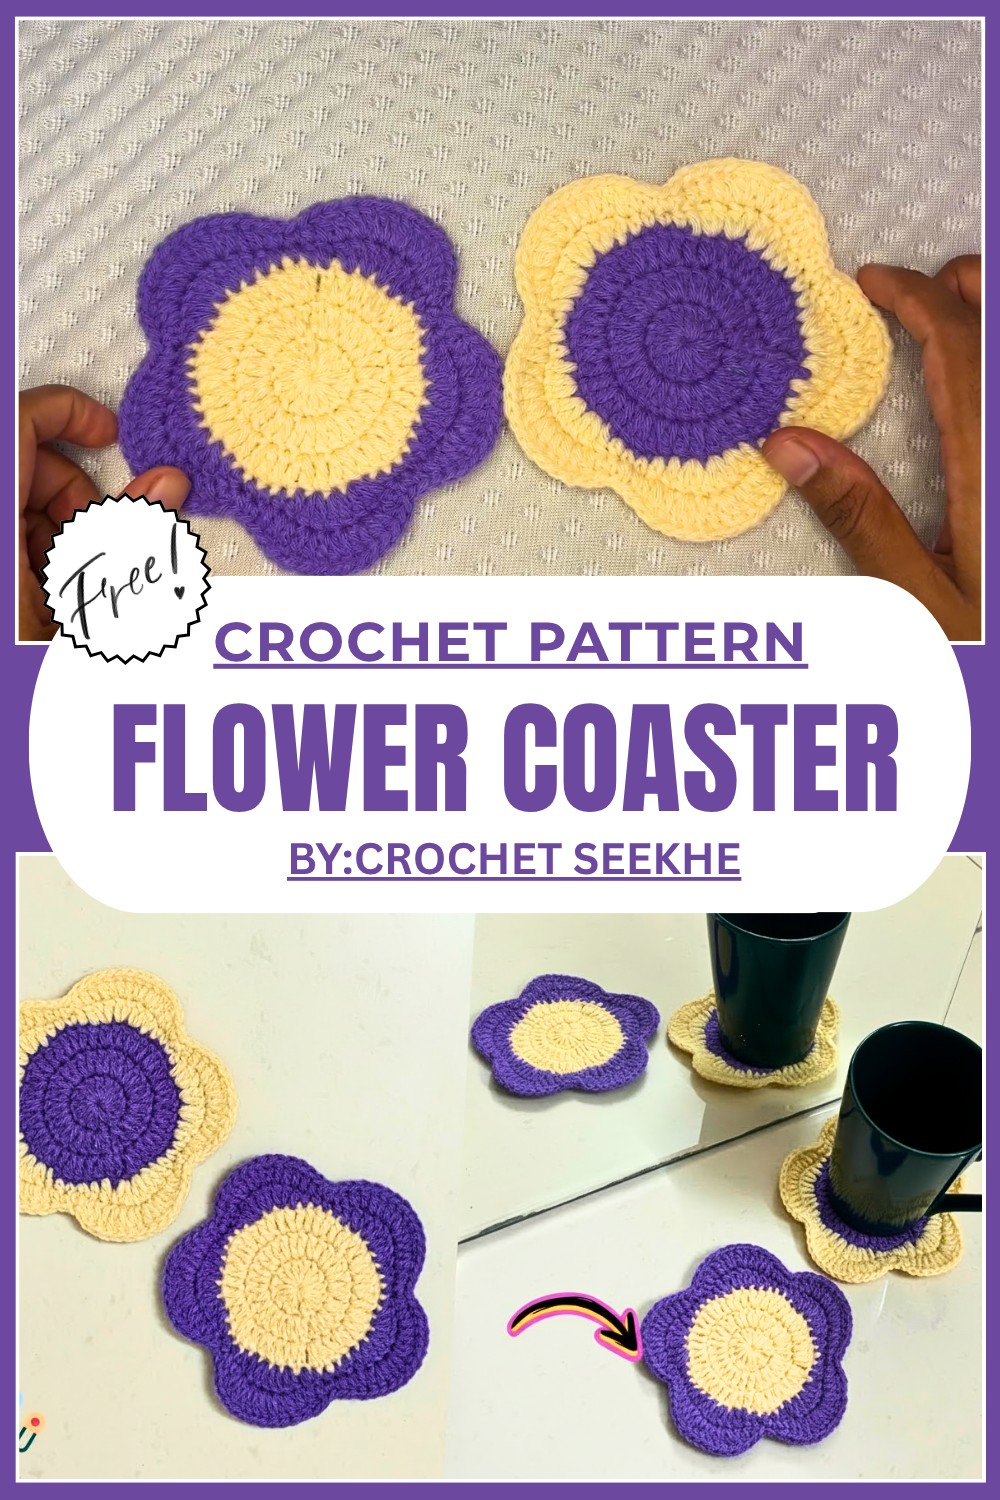
The Most Adorable Free Crochet Flower Coaster Pattern
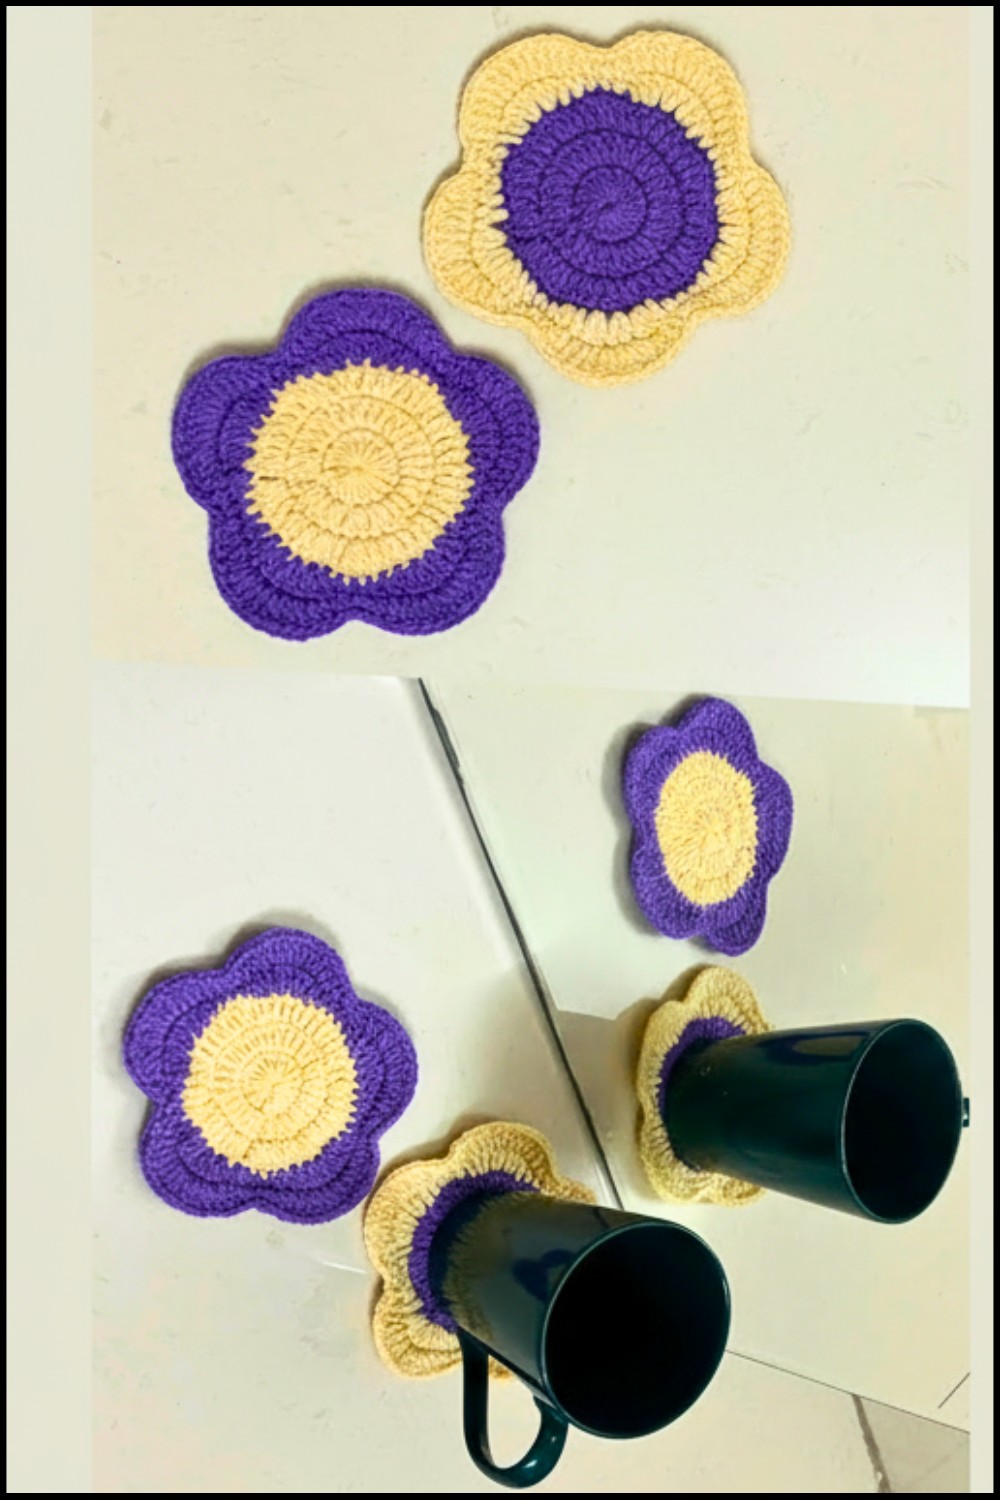
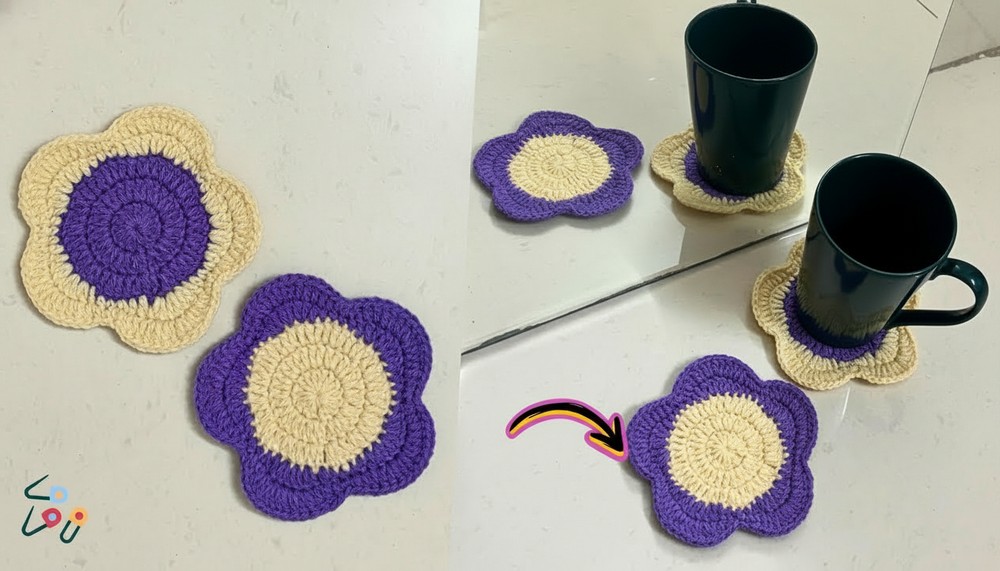
With its lovely flower shape, this coaster brightens up any room. It also makes a great gift for family and friends. Simple, and fun, this crochet flower coaster Pattern is perfect for anyone who loves crochet.
It looks like a colorful flower, which makes it perfect for adding beauty to your table. This coaster is soft, lightweight, and very easy to crochet. You can use it to protect your table from cups or glasses, and it makes your home look nice and pretty.
This free crochet flower coaster pattern is great for beginners because it uses easy stitches like single crochet, double crochet, and half double crochet. You can also use leftover yarn from other projects, which is a smart way to save yarn and create something useful.
Vibrant Crochet Flower Coaster Pattern
Materials Needed
- Yarn: Leftover yarn of your choice (works well with 4 ply or worsted weight yarn).
- Crochet Hook: Recommended hook size for the yarn (4mm or 5mm is ideal).
- Scissors: To cut the yarn.
- Tapestry Needle: For weaving in ends.
- Optional: Stitch markers for accuracy in rounds.
Gauge
Although gauge isn’t critical for this project, you can aim for:
- 4 double crochets and 2 rows for a 1 inch square (using 4mm hook and worsted weight yarn).
Adjust the hook size if necessary for a tighter or looser weave.
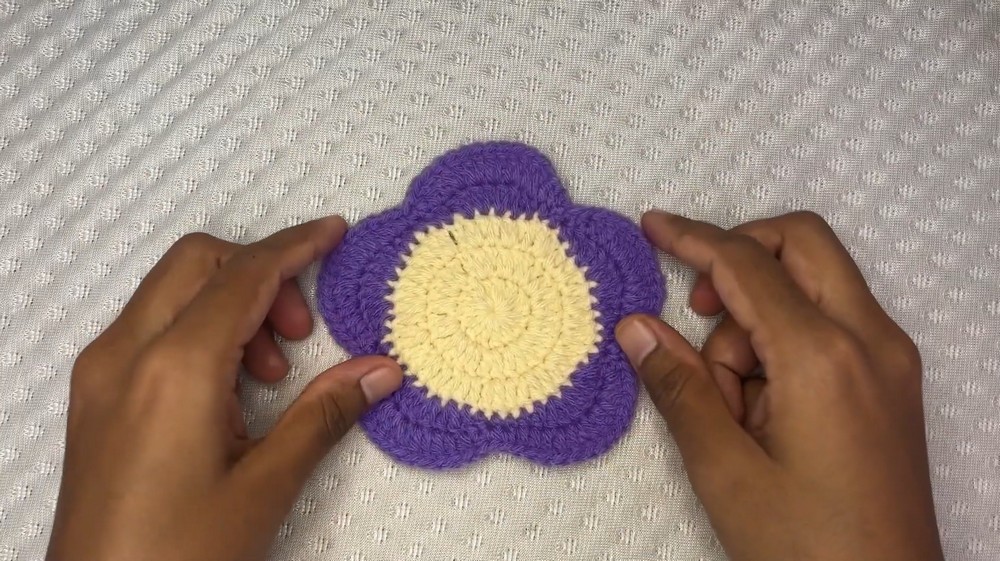
Finished Size
- The coaster will measure approximately 4 to 5 inches in diameter depending on the yarn and hook used.
Pattern Instructions
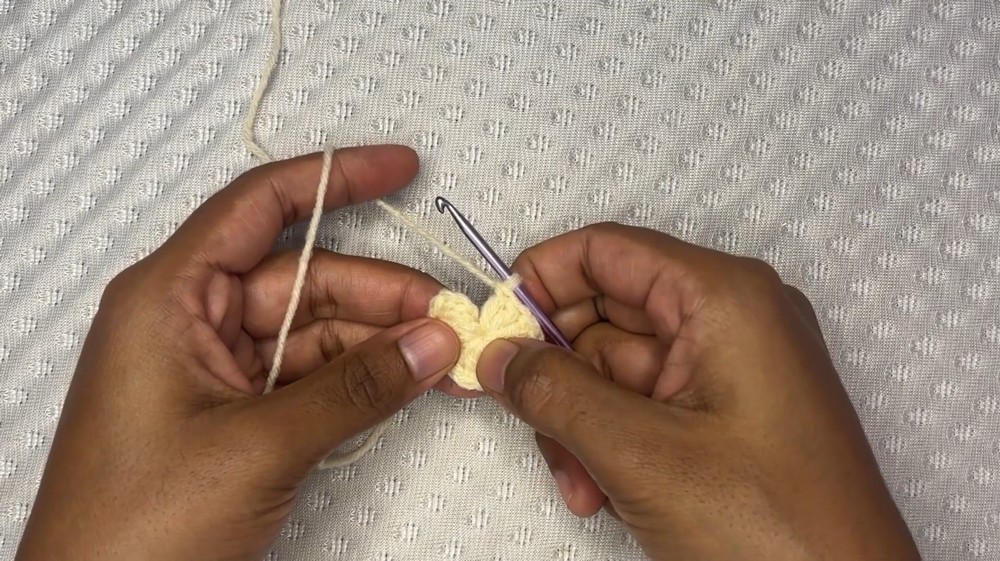
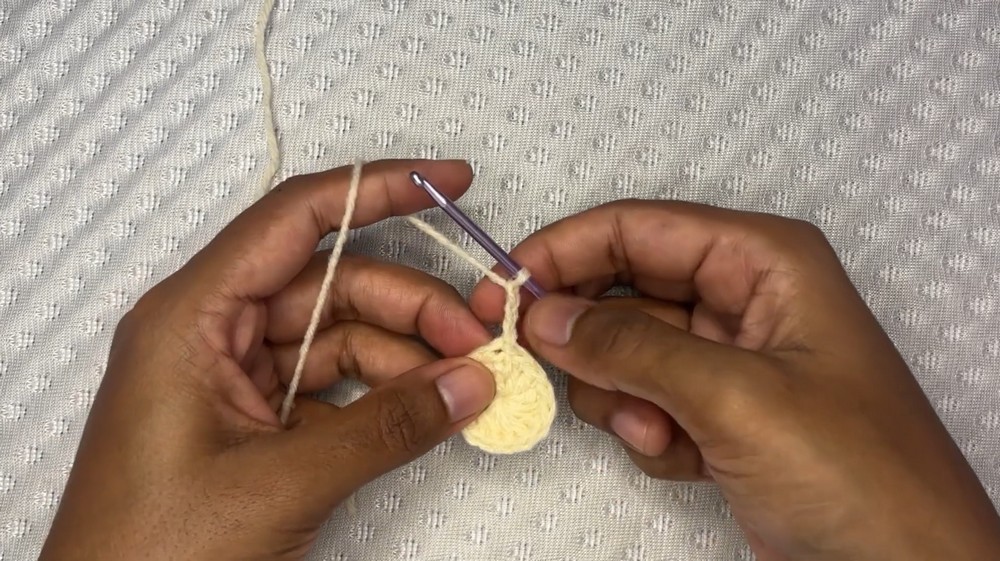
Step 1: Magic Ring and Round 1
- Begin with a Magic Ring: Wrap the yarn around two fingers to create a magic ring. This technique ensures there’s no hole in the center of your coaster.
- Chain 3 (acts as the first double crochet).
- Make 15 double crochets into the magic ring (including the starting chain as a double crochet, you’ll have 16 stitches in total).
- Pull the magic ring tight to close the center hole.
- Slip stitch into the top of the starting chain to close the round.
Tip: Ensure the center hole is tightly closed as it creates a neat and professional look.
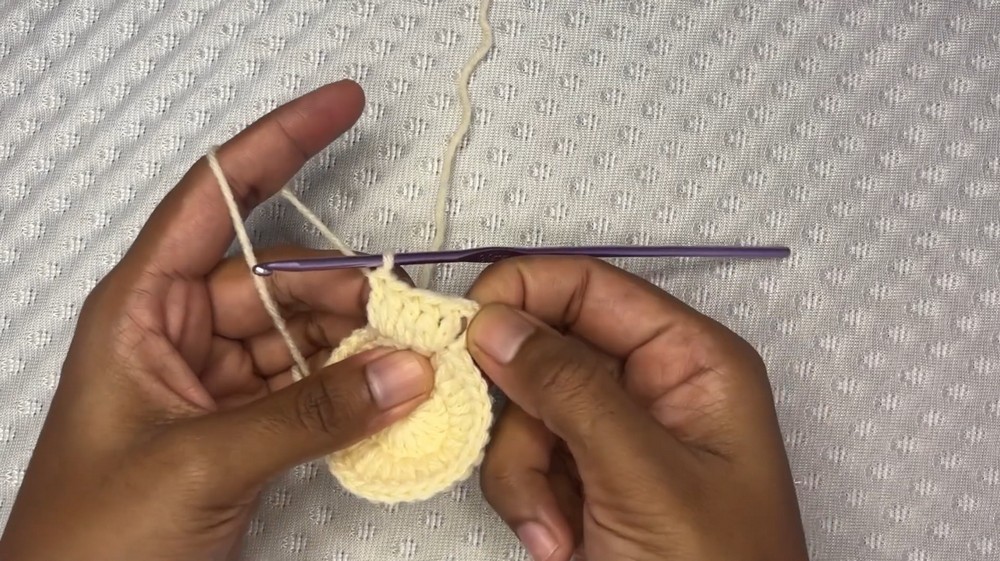
Step 2: Round 2
- Chain 3 (counts as the first double crochet).
- Make 2 double crochets in each stitch around.
- You’ll work 2 double crochets into each of the 16 stitches from the previous round.
- At the end of this round, you should have 32 stitches.
- Slip stitch into the top of the starting chain to close the round.
Step 3: Round 3
- Chain 3 (counts as the first double crochet).
- Create the "1to 2 Pattern":
- Make 1 double crochet in the first stitch.
- In the next stitch, work 2 double crochets (increase).
- Continue this pattern around the round (1 DC in one stitch, 2 DC in the next stitch).
- By the end of the round, you’ll have 48 stitches in total.
- Slip stitch into the starting chain to close the round.
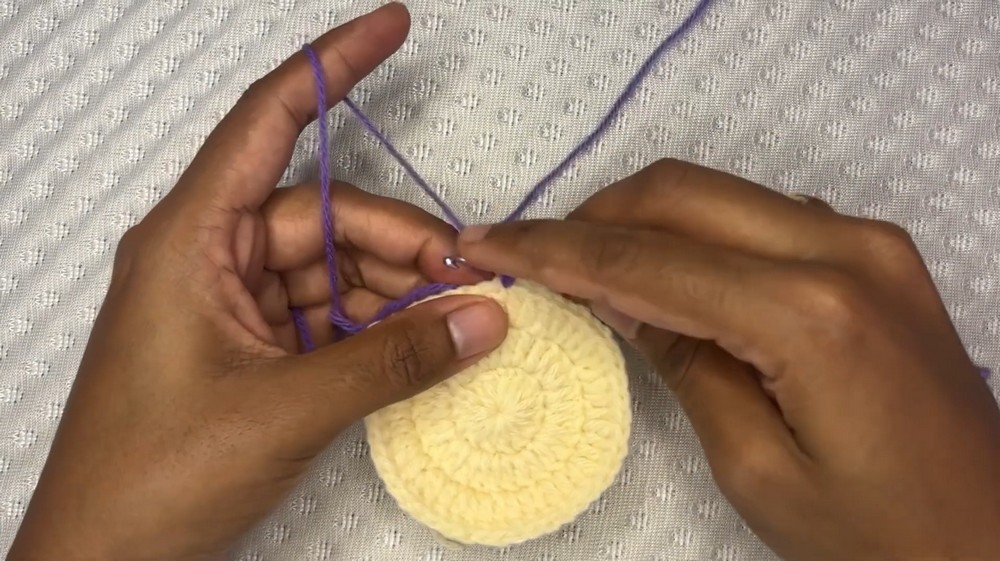
Step 4: Round 4 (Optional Color Change)
- Add a new yarn color for a more decorative look.
- Attach the new yarn to any stitch using a slip knot.
- Chain 1 to secure the new yarn color.
- Personalize by creating petals:
- Work the following stitches consecutively in one segment:
- 1 single crochet into the next stitch.

- 1 half double crochet into the next stitch.
- 1 double crochet into the next stitch.
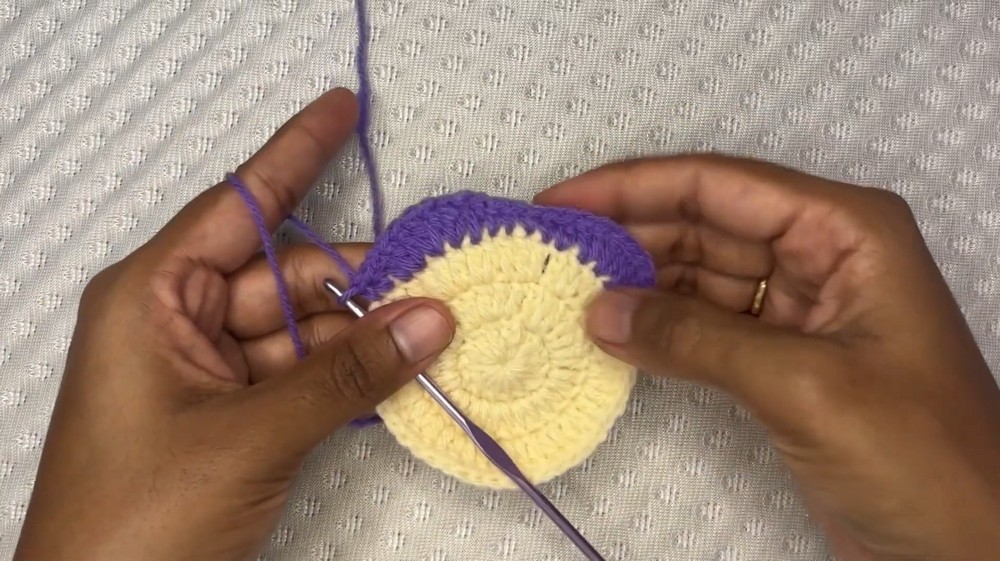
- 2 double crochets into the next 3 consecutive stitches (these create the wider petal portion).
- Work down the petal by making 1 double crochet, 1 half double crochet, and 1 single crochet into the next consecutive stitches.
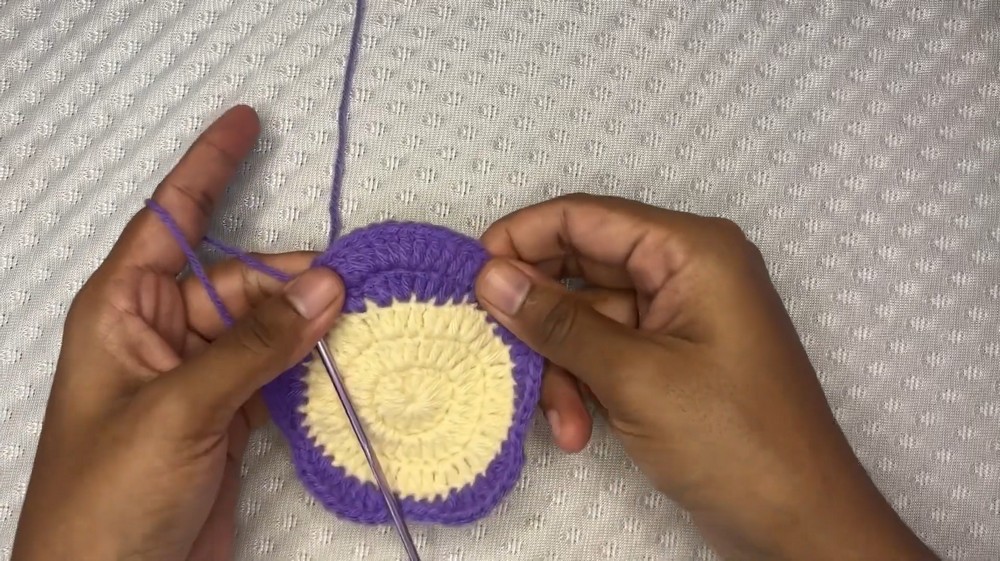
- 1 single crochet into the next stitch.
- Repeat the petal pattern for 5 petals in total, evenly spaced around the coaster.
- Work the following stitches consecutively in one segment:
Special Techniques
- Magic Ring Technique: This prevents the center hole from being visible and ensures the coaster looks neat. Practice this technique for seamless results.
- Changing Colors: To create a decorative effect, switch yarn colors between rounds or use a gradient yarn for a blended color look.
- Slip Stitching: Always finish a round with a slip stitch to create a seamless join.
Tips for Customization
- Color Patterns: Use different colors for each round or alternate between two colors for a striped effect.
- Size Variations: Add more rounds following a similar increasing pattern to make larger coasters or placemats.
- Textured Look: Experiment with front post or back post double crochets in one or more rounds for added dimension.
Final Touches and Finishing
- After completing the last round, make a chain 1, leave about 2 to 3 inches of yarn, and cut it with scissors.
- Pull the yarn tail through the final loop and tighten it to secure.
- Use a tapestry needle to weave in all loose ends by threading them through the back of the stitches.
- Block the coaster lightly using a damp cloth and pin it to shape if needed (optional but recommended for perfect circles).
Conclusion
The finished crochet coaster is a versatile, circular piece measuring roughly 4 to 5 inches in diameter, perfect for protecting your furniture or gifting to loved ones. Its neat center, vibrant colors, and optional textured petals make it a standout accessory for your home. Plus, it’s a beginner friendly project that can be customized in size and design as per your preference. It’s not only functional but also adds a handmade charm to any space.
Important Remarks
- Final Look: The coaster should lie flat with a neat circular shape and minimal gaps.
- Gift Idea: Bundle a set of coasters together in different colors for a thoughtful, handmade gift.
- Practice: If you are a beginner, this project is great for practicing basic stitches and working in rounds.
This crochet coaster pattern offers both practicality and beauty, making it an enjoyable experience for crocheters of all skill levels.