
Free Crochet Mini Aeroplane Keychain Pattern For Tiny Keepsakes
Soar into creativity with this Free Crochet Mini Aeroplane Keychain Pattern and make tiny accessories that add charm to your keys or bag.
Free Crochet Mini Aeroplane Keychain Pattern for Cute Accessorie
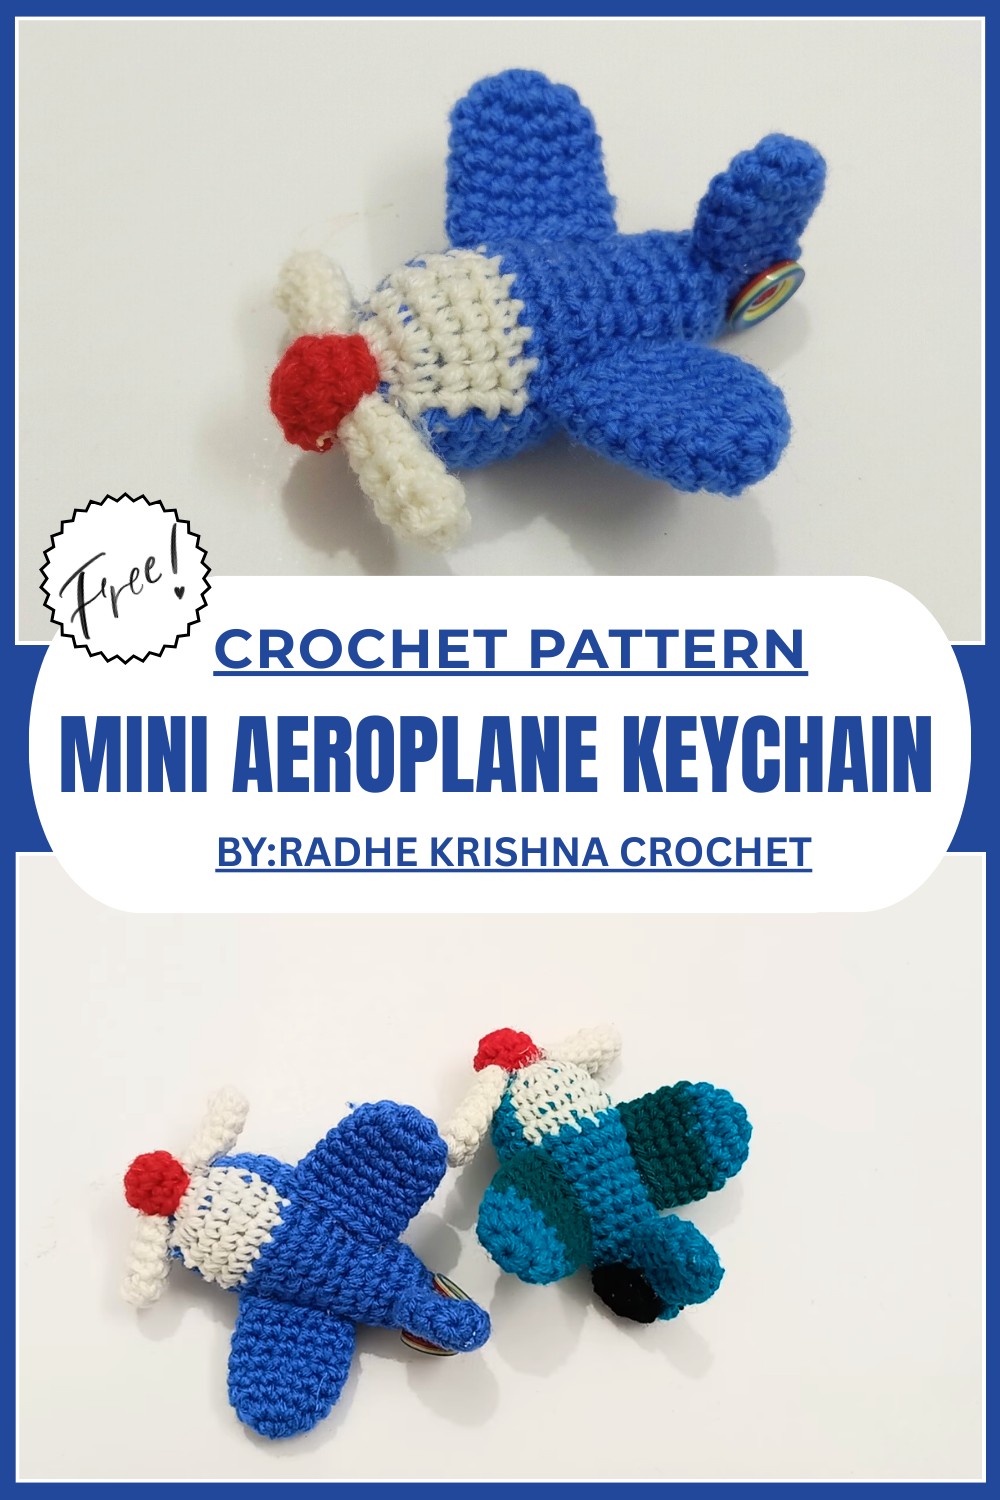
Losing keys or having a plain keychain can feel frustrating and dull. That’s why a crochet mini aeroplane keychain stands out as a fun and creative solution. Using a free crochet mini aeroplane keychain pattern, you can craft a tiny, handmade piece of art that is as functional as it is charming. Its small, intricate design with adorable wings and playful details makes it a delightful accessory to carry around.
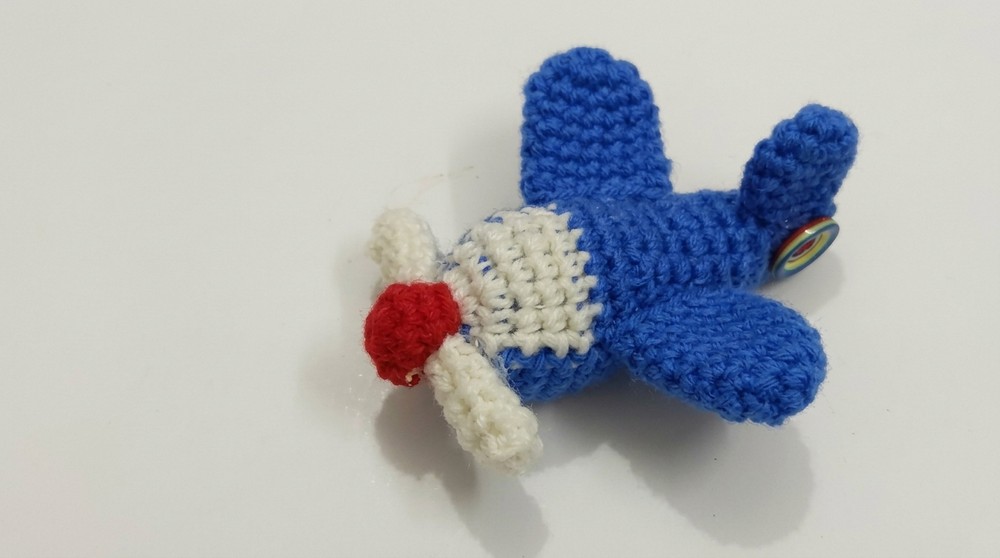
The bright colors and unique shape of the mini aeroplane not only make it easy to find your keys but also add a personal and stylish touch to your everyday items. It’s lightweight, easy to attach, and makes a perfect gift for children, travel lovers, or anyone who appreciates thoughtful handmade creations. Cute and practical, this crochet keychain is a wonderful way to bring smiles while keeping track of your essentials in a creative way.
Crochet Airplane Pattern (Step-by-Step)
Materials Required
- Yarn: Four-ply yarn in white, purple, and red (or any colors of your choice). Leftover yarn can also be used.
- Crochet Hook: Size 3 mm.
- Tapestry Needle: For weaving in ends and attaching parts.
- Stitch Marker: To mark the end of each round.
- Cotton Filling: For stuffing the airplane body and wings.
- Scissors: To cut threads.
- Glue (optional): For securing small parts if you prefer not to sew.
Gauge
- Gauge: Not critical for this project. Ensure that your stitches are tight to avoid gaps when stuffing.
Finished Size
- Length: Approximately 3.5 inches long and appropriately proportioned when completed.
Pattern Notes
- This project is worked in rounds.
- Use a stitch marker to mark the beginning of each round.
- When switching colors, carry the unused yarn along and crochet over it for a neater finish.
- All parts are made separately (body, tires, wings) and then attached together.
Special Techniques
- Magic Ring: Used for forming a tight center at the beginning of the rounds.
- Invisible Decrease: Used to tighten the edges when shaping the body.
Pattern Instructions
Step 1: Airplane Body
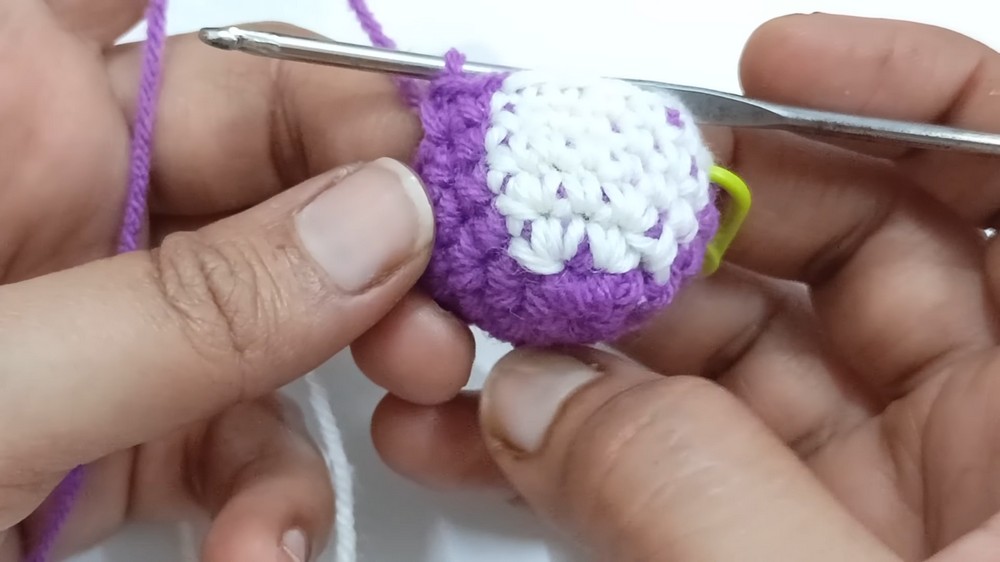
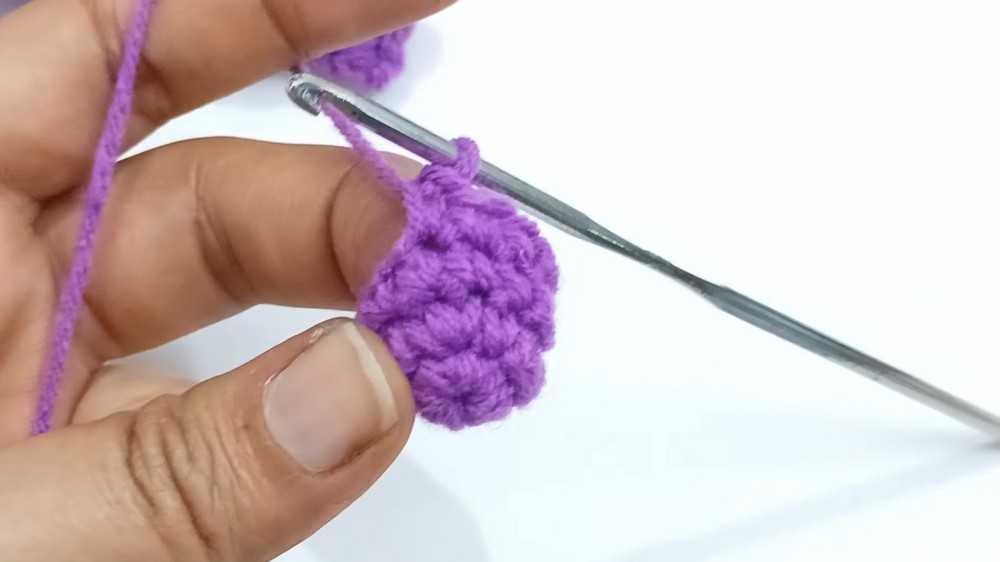
- Round 1: Use purple yarn. Begin with a magic ring, work 6 single crochets (sc) into the ring. Close the ring tightly. (6 sts)
- Round 2: Work 2 sc in each stitch around. (12 sts)
- Round 3: 1 sc in the first stitch, 2 sc in the next stitch. Repeat around. (18 sts)
- Rounds 4-6: Work 1 sc in each st around (no increases or decreases). (18 sts for 3 rounds)
- Round 7: Switch to white. Work 1 sc in each st around, maintaining 18 sts.
- Rounds 8-10: Continue with white, working 1 sc in each st (18 sts).
- Round 11: Begin decreasing. 1 sc in the first st, invisible decrease in the next two stitches. Repeat around. (12 sts)
- Rounds 12-14: Work 1 sc in each st (12 sts for 3 rounds).
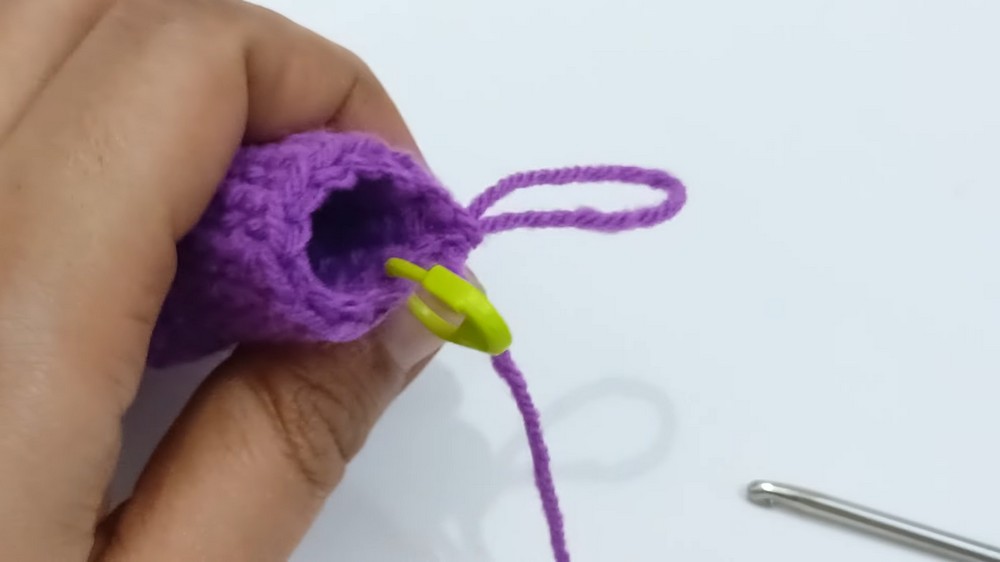
- Stuff the body with cotton. Press firmly to give it shape. Ensure it's evenly distributed.
- Round 15: Continue decreasing. Work 1 sc in the first st, invisible decrease in the next two sts. Repeat around. (9 sts)
- Rounds 16-17: Work 1 sc in each st (9 sts per round).
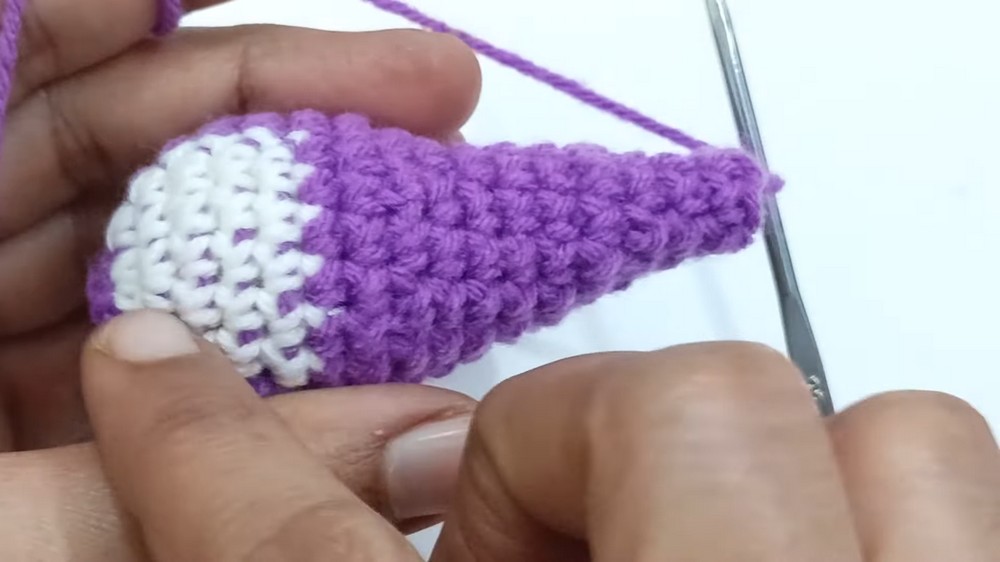
- Bind off, leaving a long tail. Close the remaining hole using a tapestry needle and fasten securely.
Step 2: Front Propeller (White)
- Round 1: Work a magic ring and make 6 sc inside it.
- Round 2: Work 2 sc in each st around. (12 sts)
- Rounds 3-5: Work 1 sc in each st (12 sts for 3 rounds).
- Finish off, leaving a long tail for attaching. Place a small amount of stuffing inside for firmness.
Step 3: Side Wings (2 Pieces)
- Round 1: Begin with a magic ring and work 6 sc inside it.
- Round 2: Work 2 sc in each st around. (12 sts)
- Rounds 3-7: Work 1 sc in each st (12 sts).
- Finish off, leaving a long tail. These will be the airplane's side wings.
Step 4: Tail (Red)
- Round 1: Work a magic ring and make 6 sc inside the ring.
- Round 2: Work 1 sc, 2 sc in the next st. Repeat. (9 sts)
- Rounds 3-5: Work 1 sc in each st (9 sts).
- Bind off, leaving a long tail. Use this for attaching the tail to the back of the airplane.
Step 5: Tires (3 Pieces)
- Round 1: With black yarn, create a magic ring. Work 6 sc into the magic ring.
- Round 2: Work 1 sc, 2 sc in the next st. Repeat around. (9 sts)
- Rounds 3-5: Work 1 sc in each st (9 sts).
- Finish off, weave in ends, and slightly flatten the pieces.
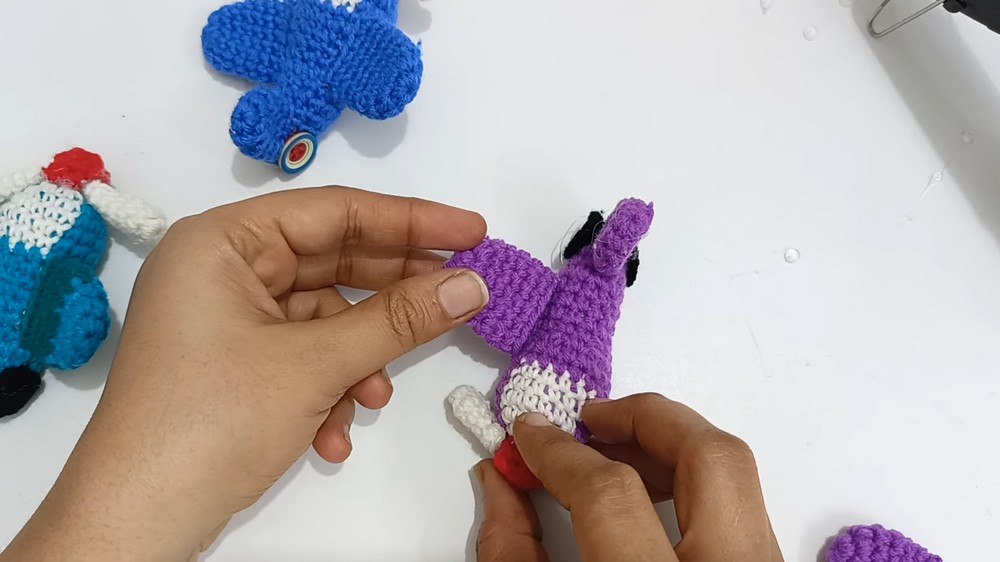
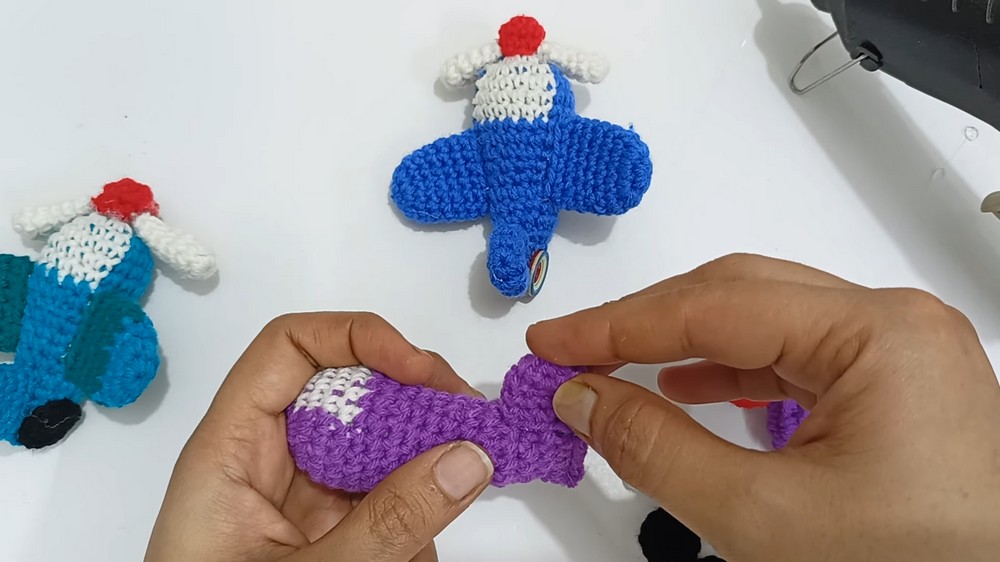
Assembly
- Attach the Propeller: Sew or glue the small white piece to the front of the airplane body.
- Attach the Wings: Place the side wings symmetrically on either side of the body. Sew them securely.
- Attach the Tail: Place the red piece at the back of the airplane and sew it securely.
- Attach the Tires: Sew or glue two tires at the bottom of the body (one for each side) and one at the back for balance.
- Finish Touches: Weave in all loose ends and ensure all parts are securely fastened.
Customization Ideas
- Colors: Choose fun, bright colors to match your theme (e.g., pastel shades for a softer look or bold primary colors).
- Details: Add patterns like stripes or small embroidered stars to the airplane body.
- Hanging Option: Leave a loop of yarn on top of the airplane to hang it as a mobile or decoration.
Important Remarks
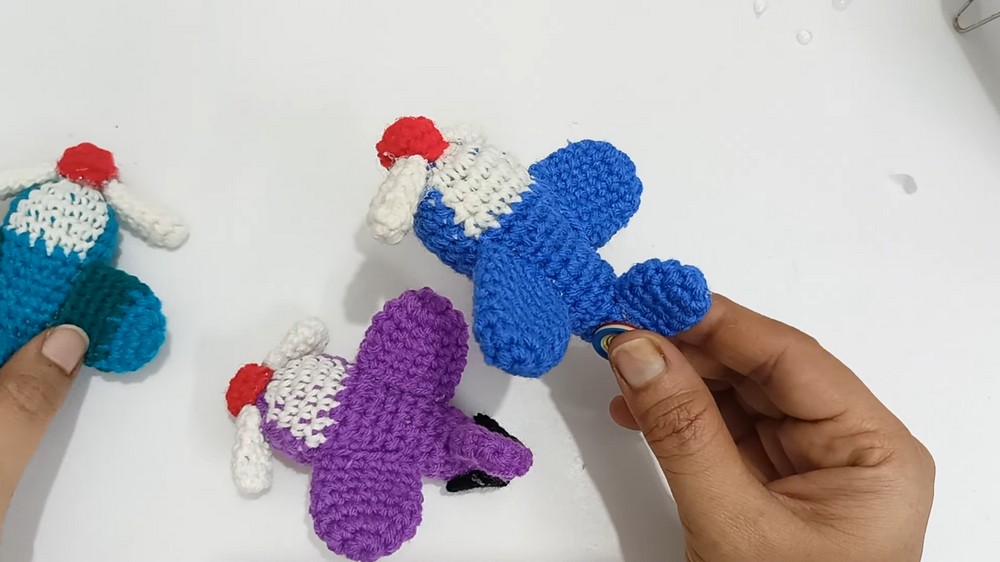
- Finished Look: The airplane should be colorful, with distinct details on its body, wings, and tires. Adding slight stuffing ensures it holds its shape well.
- Durability: Ensure all parts are sewn securely, especially when gifting to a child or using it as a decoration in a baby crib.
Conclusion
This crochet airplane pattern is simple and versatile, perfect for using up leftover yarn and creating a delightful handmade gift or decoration. Its compact size makes it ideal for baby mobiles, children’s play, or as a thoughtful addition to a nursery. With room for customization and a fun crafting process, this project is sure to bring smiles to both creators and recipients alike!