
Cozy Crochet Handbag Pattern For a Unique Touch
Carry elegance with a crochet handbag pattern that’s simple to make, highly versatile, and allows you to showcase your creativity with every stitch.
Modern Crochet Handbag Pattern for Any Outfit
Heading out to a casual brunch or the local market becomes more exciting with a bag that’s both functional and effortlessly stylish, crocheted by your own hands. With a free crochet handbag pattern, you can create a customized accessory that suits your personality and daily needs. Crochet handbags are not only versatile but also perfect for carrying essentials like your wallet, phone, and small extras, while showcasing a handmade touch that stands out.

Whether you’re aiming for a minimal look, vibrant colors, or a unique shape, this pattern allow complete creative freedom. Crocheting your own handbag is budget-friendly, sustainable, and rewarding, giving you a chic, durable accessory that fits seamlessly into everyday outings or special occasions.
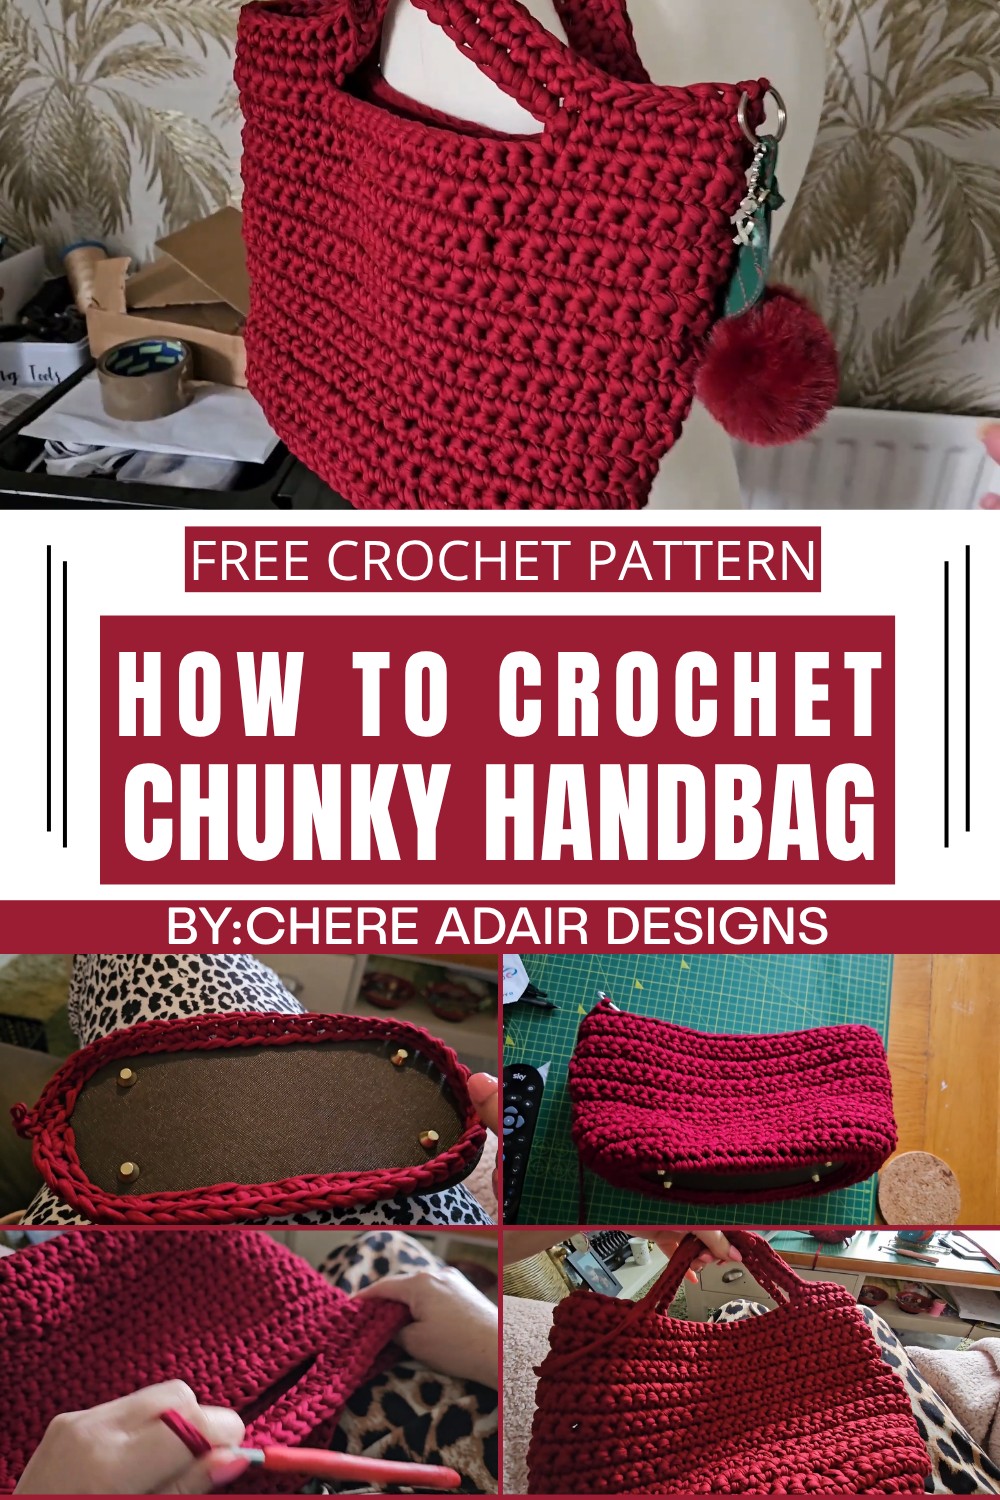
Step-by-Step Crochet Chunky Handbag
Materials List
To create your chunky t-shirt yarn bag, you will need:
- T-Shirt Yarn: Thick and chunky yarn; select colors of your choice.
- Crochet Hooks:
- 4.5 mm hook (for the foundation round).
- 5.5 mm hook (for subsequent rows).
- 6 mm hook (for larger rows and handles).
- Bag Bottom Base: Optional base with pre-drilled holes for stability.
- Stitch Markers: To mark handle placement.
- Scissors: For trimming yarn ends.
- Tapestry Needle: For weaving in ends.
- Optional Items: Bag charms, studs, or pom-poms for decoration.
Skill Level
- Intermediate to Advanced: Includes increasing techniques, single crochet stitches, and slip stitching.
Key Abbreviations
- SC: Single Crochet.
- CH: Chain.
- SL ST: Slip Stitch.
- INC: Increase (two SCs worked into one stitch).
- ST: Stitch.
Pattern Notes
- Work loosely to avoid tightness in the stitches.
- Adjust hook sizes as needed for comfort.
- Handles placement and size can be customized.
- Always check the tension when increasing or switching hooks.
Detailed Pattern
Step 1: Attaching Yarn to Bag Bottom
- Insert your 4.5 mm hook through one of the pre-drilled holes in the base.
- Create a slip knot, ensuring the knot remains on the inside of the bag to hide it.
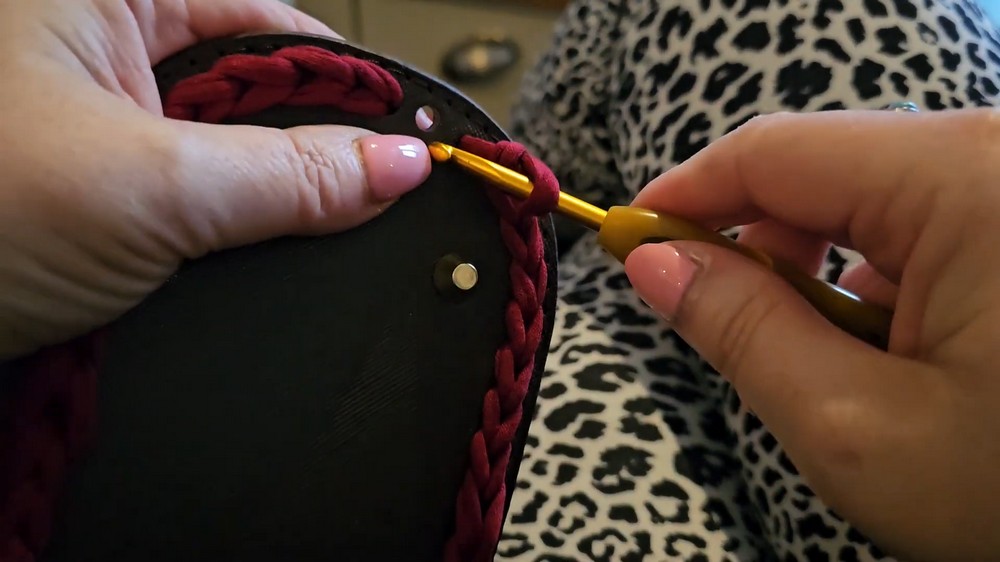
- SC through each hole around the edge of the bottom base.
- Keep your stitches relaxed to prevent tightness on the first round.
- After completing the first round, switch to your 5.5 mm hook for subsequent rounds.
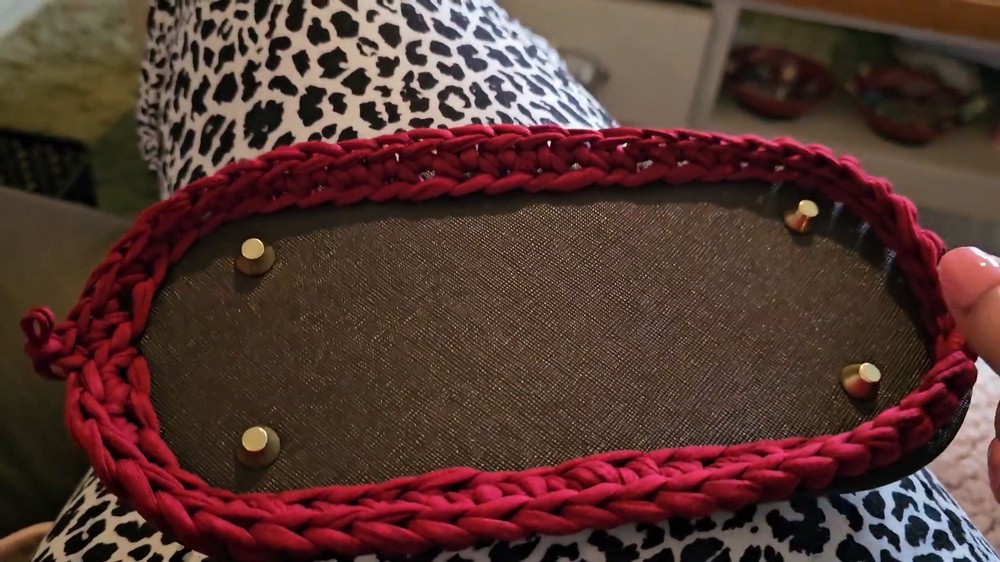
Step 2: Building the Base
- Chain 1 to start the next round.
- SC into each stitch around.
- Carefully increase near the corners to add stability and prevent shrinking:
- INC every 6 stitches for the corners.
- Continue this pattern for several rounds until the base achieves the desired size.
- Switch to the 6 mm hook to prepare for flipping the work.
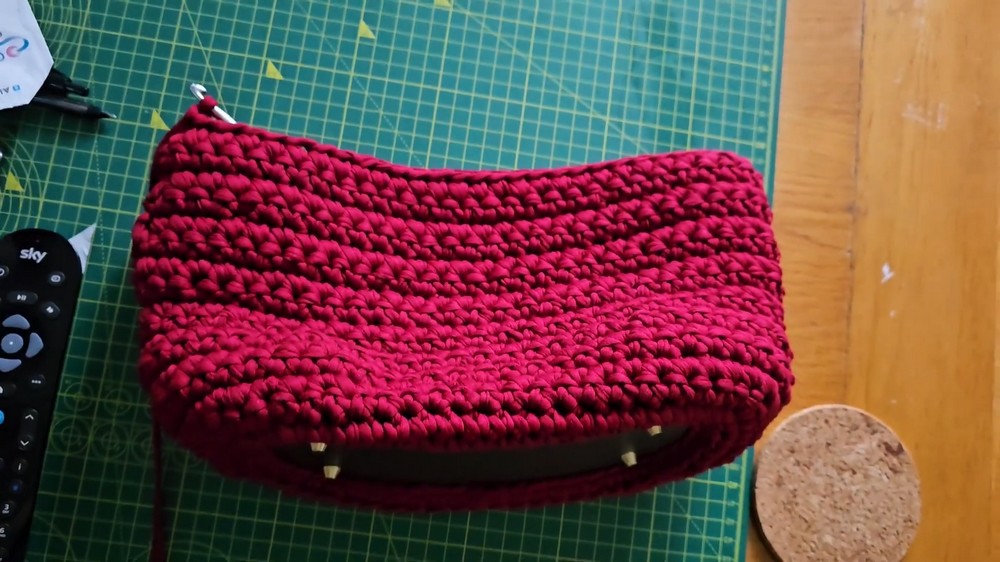
Step 3: Flipping the Base
- Turn the base inside out to create a neat bottom side and the start of the bag's upward rows.
- Ensure the hooks and yarn flow smoothly as you flip.
Step 4: Creating the Body
- Using the 6 mm hook, SC in every stitch continuously around the edge.
- Crochet as many rounds as needed to achieve the height you prefer for the bag (24 rows recommended).
- Maintain a relaxed grip and tension throughout your stitches to keep the structure consistent.
Step 5: Adding Handles
- Flatten the bag, aligning the corners properly.
- Mark the placement of the handles using your stitch markers:
- Count 9 stitches inward from the edge for handle placement.
- Repeat on the opposite side, ensuring symmetry.
- Chain 20 for the first handle:
- Begin at the stitch marker, chain 20, then attach to the next stitch marker via SC.
- Work SC around the remaining stitches until the next handle location.
- Repeat the process for the second handle.
Step 6: Reinforcing Handles
- Crochet rounds of SCs directly into the handle chains for strength and neatness (recommended: 2 rounds).
- Add a final round of SL ST around the handle and body edges to create a polished finish.
Step 7: Finishing
- Weave in any loose ends using a tapestry needle.
- Trim excess yarn and secure knots for durability.
- Flatten and block the bag using stuffing (e.g., carrier bags) and lightly dampening the surface to achieve a clean shape.
Conclusion
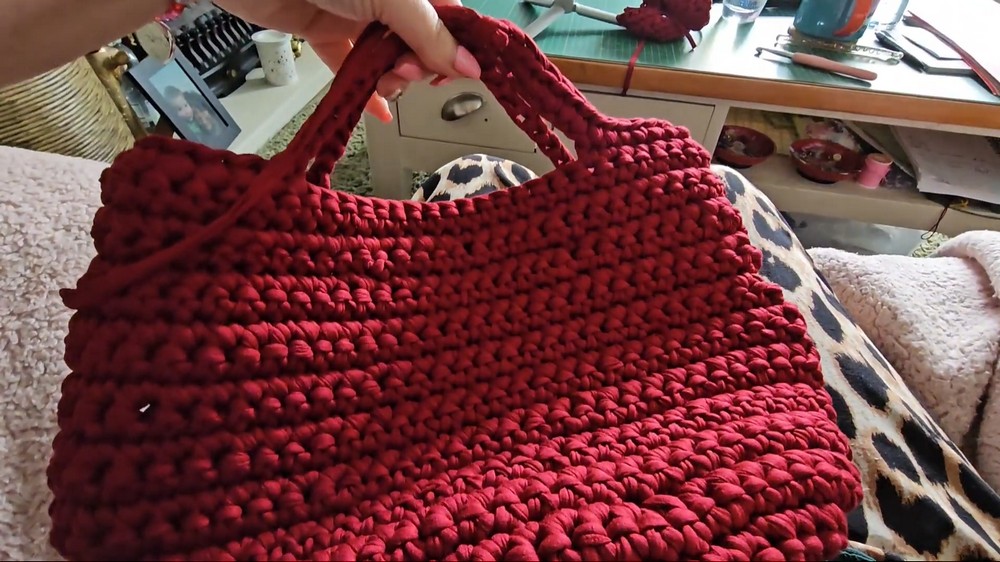
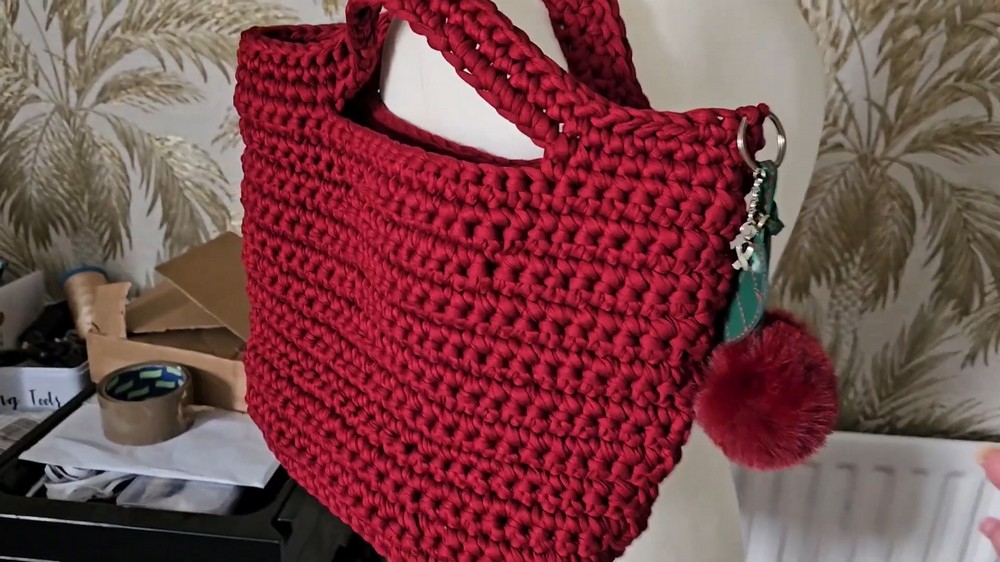
This sturdy, chunky t-shirt yarn bag is perfect for everyday use or gifting. The reinforced handles and slip-stitch edging add both durability and professional polish to the overall design. With chunky yarn, vibrant colors, and optional charms or pom-poms, this pattern offers creative versatility while maintaining structural integrity.
Pattern Correction
During the handle creation process, always chain more loops if the handle feels too tight when testing. You can adjust the number of chains to 22 or more for a comfortable grip.
Tips for Success
- Tension Control: Relax your hands to avoid overly tight stitches, especially when using thicker yarns.
- Hook Management: Switch hooks as needed for cleaner transitions and smoother crocheting.
- Customization: Add charms, buttons, or decorative studs for additional flair.