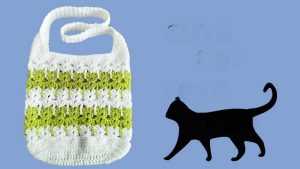
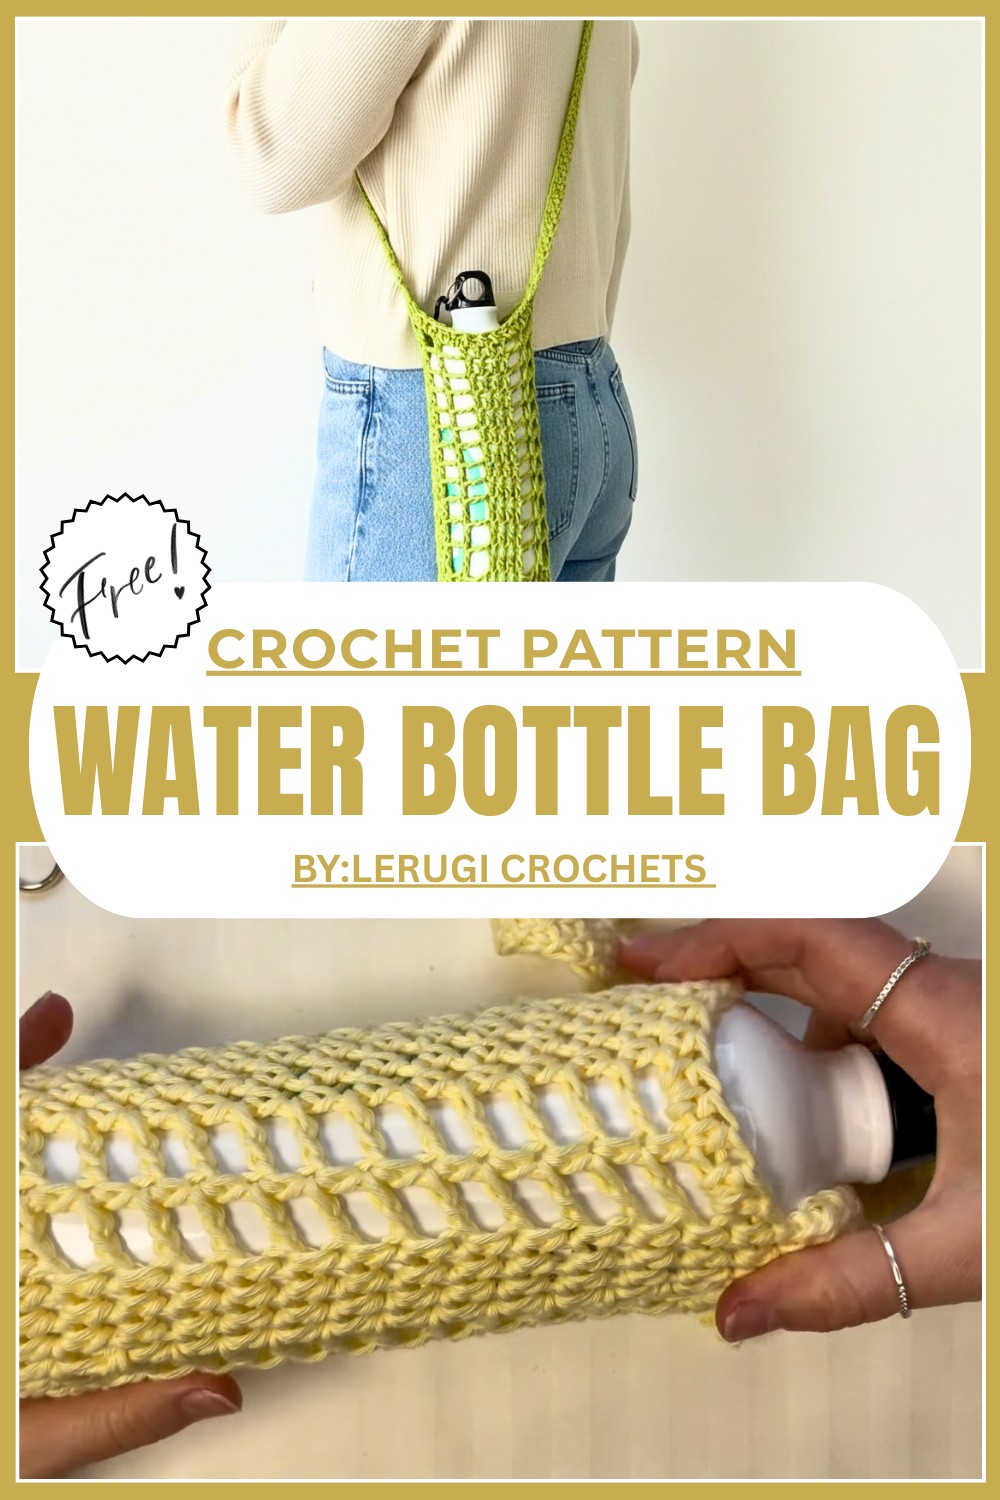
Easy & Fun Crochet Water Bottle Bag Pattern To Keep You Refreshed
Carry your water bottle bag with charm & ease using this fun crochet bag that’s perfect for adding color & comfort to your daily routine.
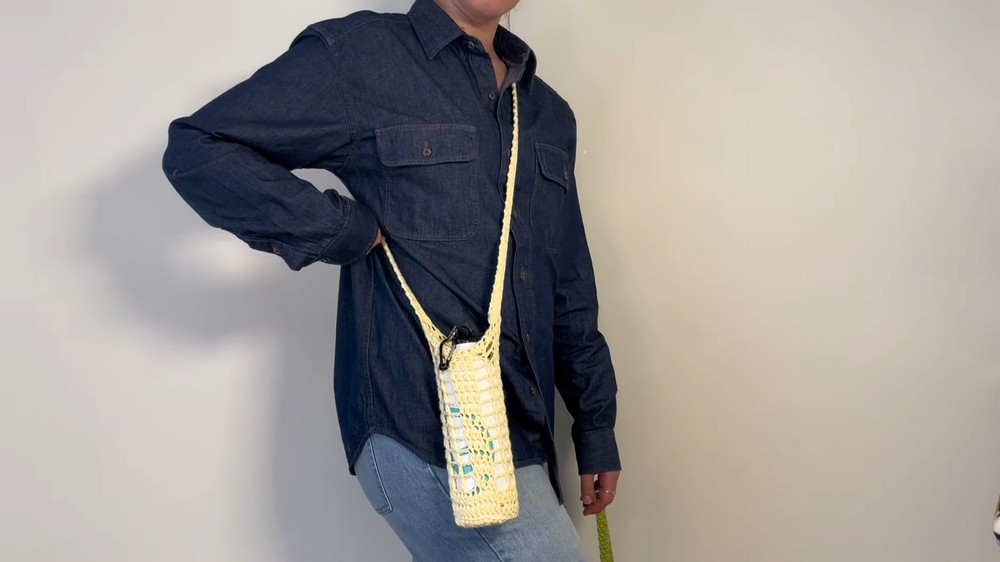
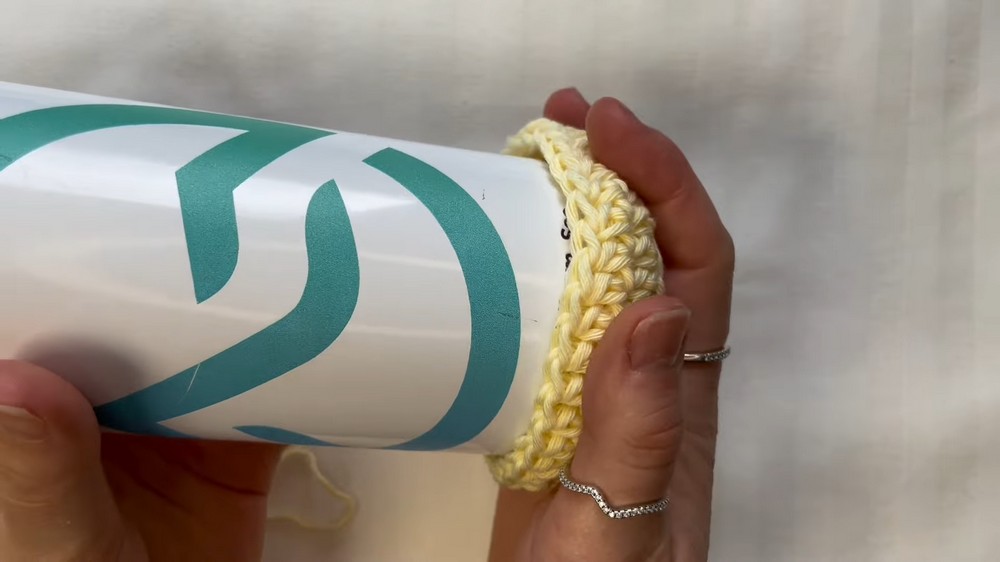
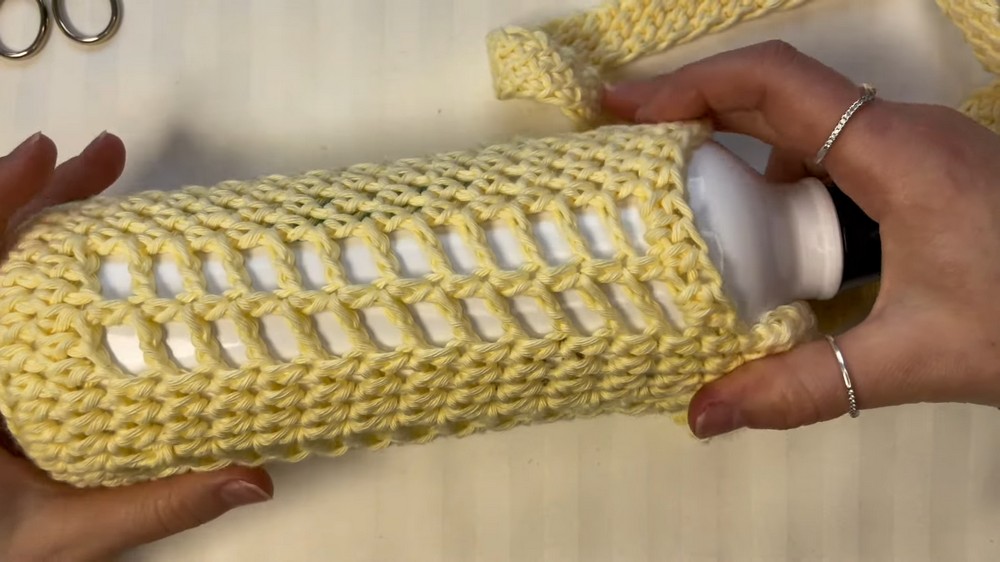
A water bottle bag provides a handy way to carry and protect your bottle wherever you go. This charming little bag is perfect for keeping your water bottle safe and easy to find. Its soft, sturdy design not only feels nice to hold but also looks great with bright colors and neat stitches. The bag fits snugly over your bottle, protecting it from bumps or spills.
Unique Crochet Water Bottle Bag to Carry On Every Outing
It includes a convenient strap, so you can carry it by hand or wear it over your shoulder, ideal for walks, markets, or trips. The simple yet eye-catching pattern makes the bag stand out while staying practical. Whether you’re heading out for a day of fun or just want your bottle close at home, this water bottle bag adds style and convenience. Its handmade feel brings warmth and charm to an everyday item, turning something ordinary into something special and useful.
Beginner Friendly Water Bottle Bag Crochet Pattern
Skill Level: Beginner to Intermediate
Materials:
- About 50g medium weight cotton yarn (recommended for durability and low stretch)
- Crochet hook size 5 mm (or size suitable for your yarn)
- Scissors
- Darning needle
- Stitch markers
- Measuring tape
Special Features
- Circle base with seamless magic ring start
- Half double crochet (hdc) stitches for a nice texture
- Back loop only stitches to create defined edges
- Mesh-style stitch pattern for stretchy sides
- Tunisian crochet handle for durability
- Easy to adjust length and width
- Compact project using minimal yarn
Step-by-Step Pattern
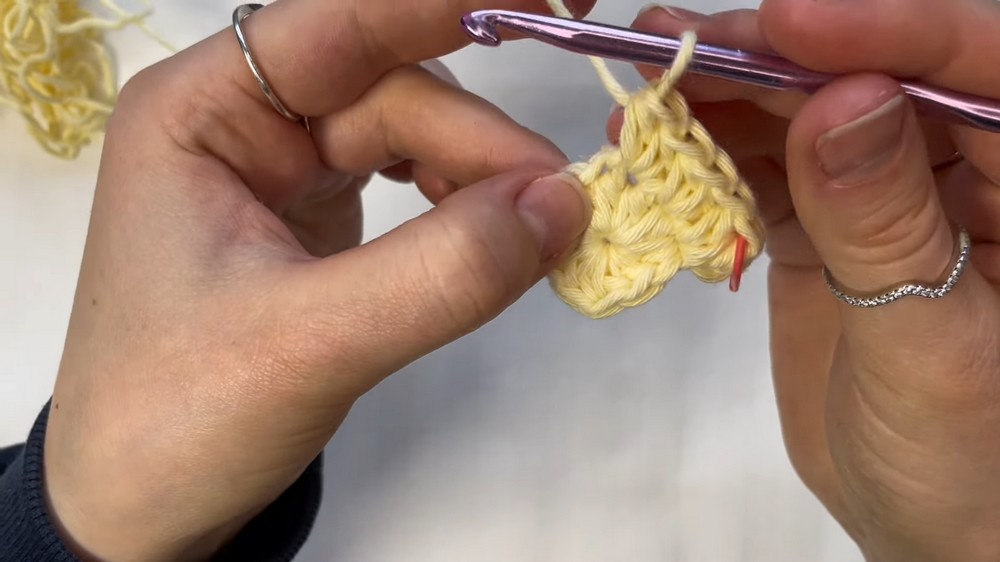
Step 1: Circle Base – Magic Ring
- Start with a magic ring: Wrap yarn in a crisscross around your fingers, insert hook under first loop and grab second loop, pull a loop, chain 1 to secure.
- Make 12 half double crochets (hdc) inside the magic ring.
- Pull yarn tail tightly to close ring.
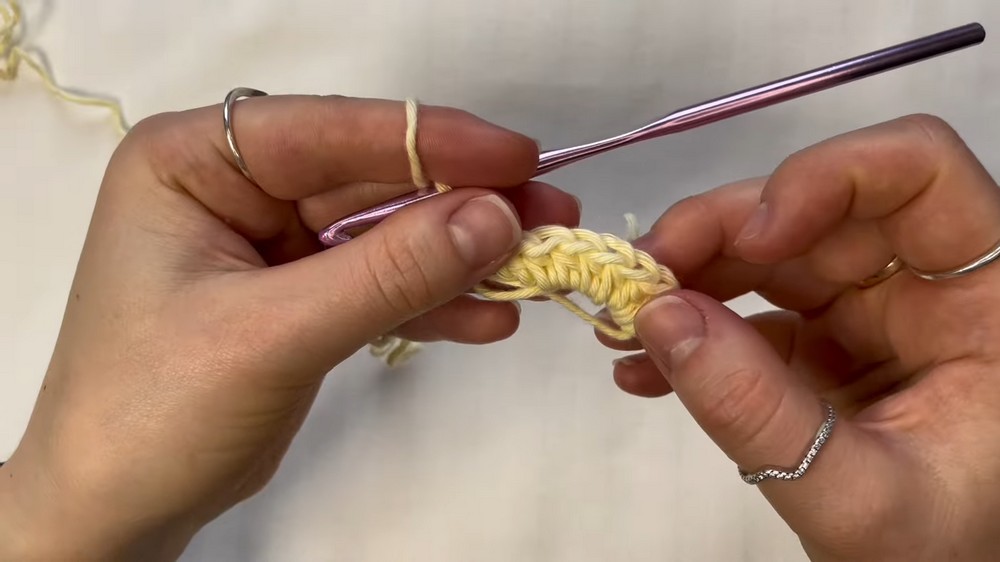
- Join with a slip stitch in the top of the first half double crochet.
- Pull the loop on the joining stitch to the wrong side to create a seamless finish (this happens after every round).
(12 hdc)
Step 2: Round 2 – Double Increases
- Chain 1.
- Place 2 hdc in every stitch around (increase in every stitch).
- Mark the first stitch with a stitch marker to track rounds.
- Join with slip stitch to the first stitch.
(24 hdc)
Step 3: Round 3 – Increase Pattern
- Chain 1.
- 1 hdc in next stitch, 2 hdc in next stitch — repeat around.
- Join.
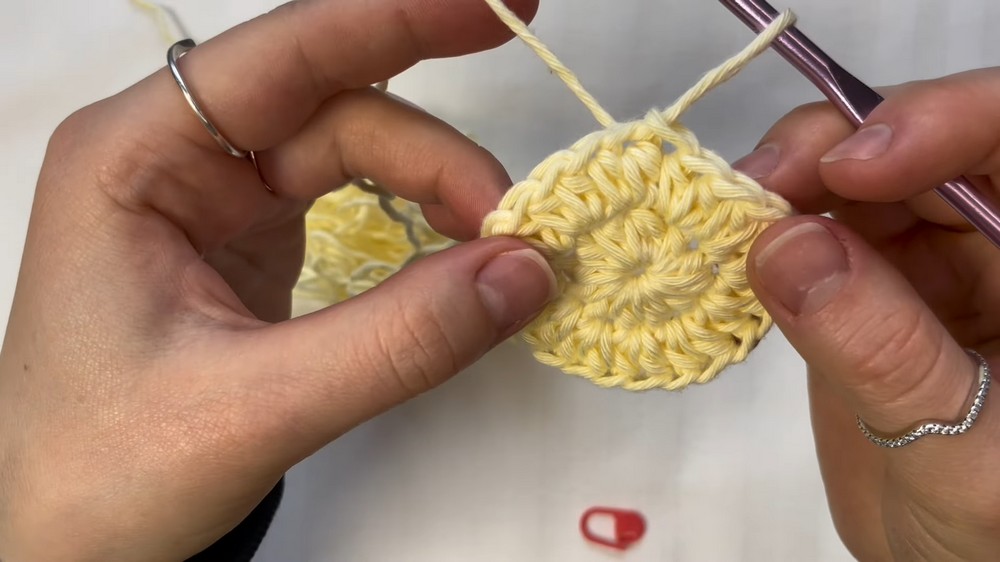
(36 hdc)
Check diameter (~8 cm / 3 inches) to fit your bottle base.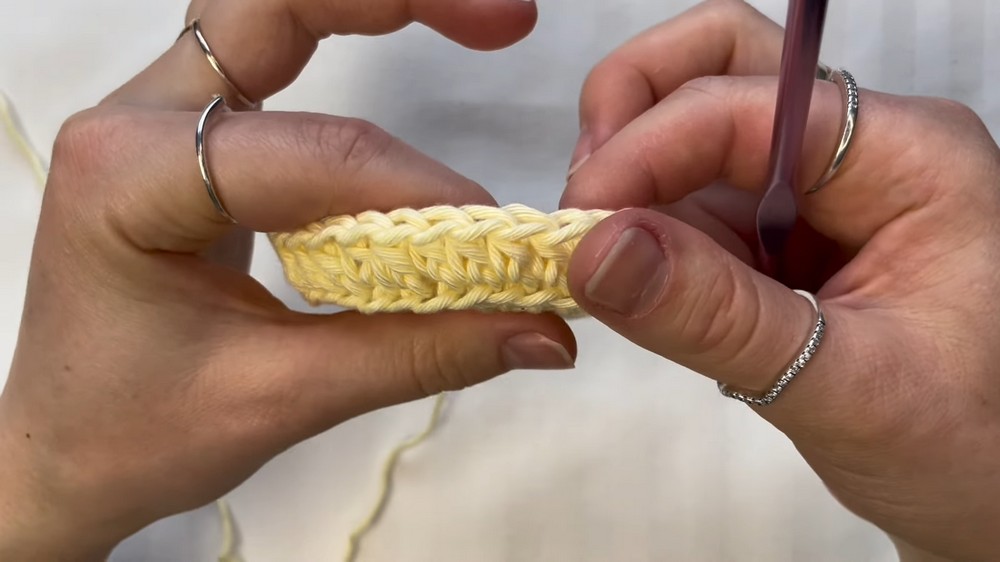
Step 4: Round 4 – Transition Round (Back Loop Only)
- Chain 1.
- Work 1 hdc in the back loop only of each stitch to form a 90° edge separating base and sides.
- Join with slip stitch.
Step 5: Round 5 – Begin Sides
- Chain 1.
- Work 1 hdc in each stitch around in the usual way (both loops).
- Join.
(36 hdc)
Check work fits around bottle base.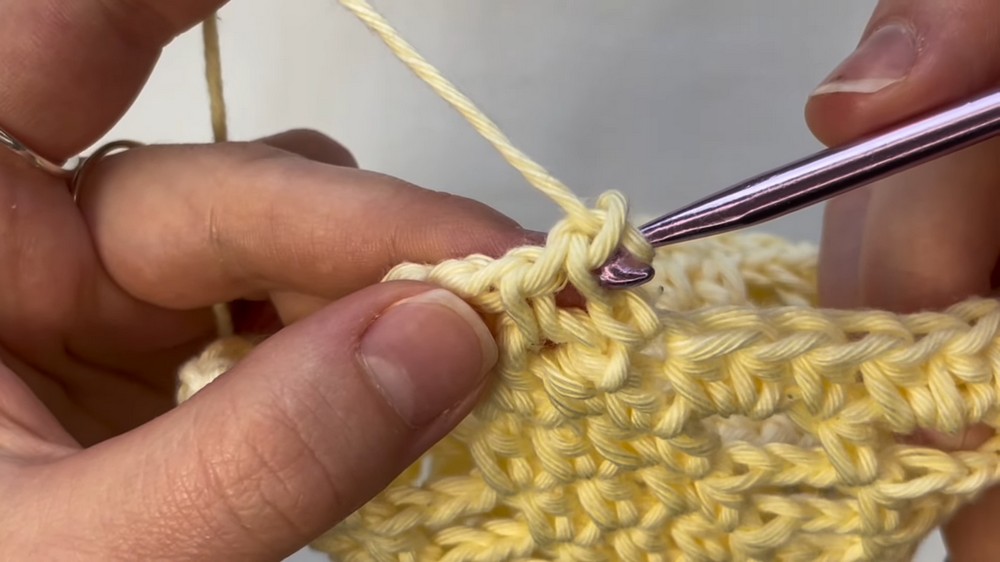
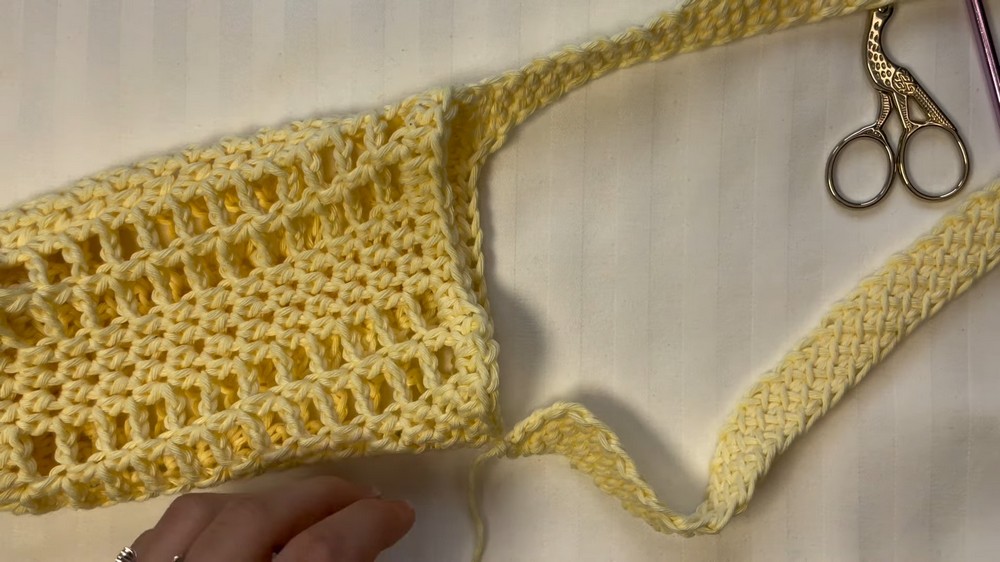
Step 6: Rounds 6 to 17 – Lattice Stitch Body
- Chain 1 to start.
- hdc in next 3 stitches, chain 2, skip 2 stitches — repeat.
- After every two chain-2 spaces, work 4 hdc in a row to create block textures.
- Continue this pattern around (total 12 blocks of 4 hdc stitches per round).
- Join rounds, placing stitch marker on first hdc for tracking.
Check progress; after 17 rounds height should be around 7 inches (18 cm), leaving neck stretch room.
Step 7: Round 18 – Strengthen Edges
- Chain 1.
- Work 1 hdc in each stitch, but in chain-2 spaces, place 2 hdc to maintain shape.
- Join with slip stitch.
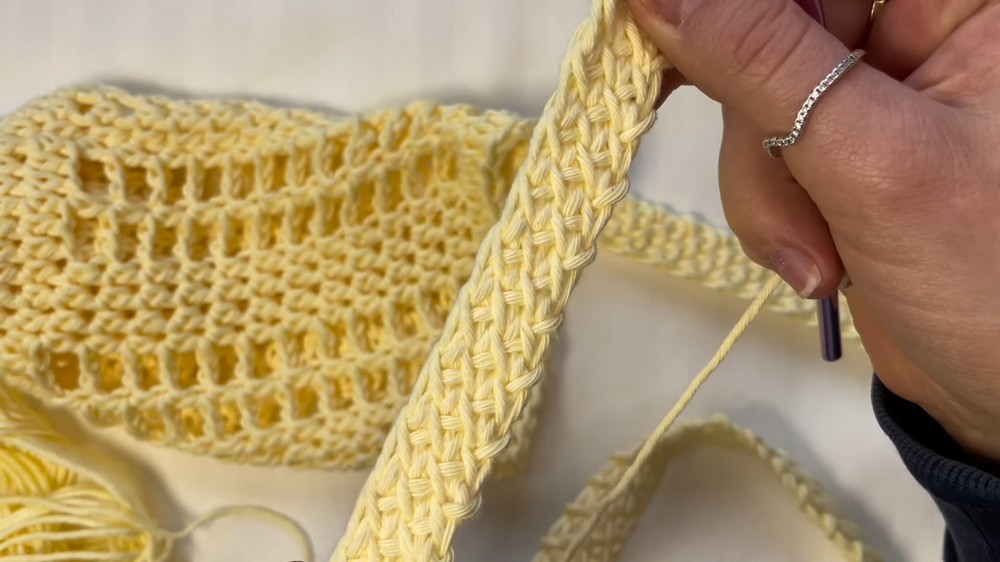
Step 8: Handle – Tunisian Crochet
- Pull loop to correct side; chain 1.
- Insert hook into next 4 stitches, pulling loops out (5 loops on hook).
- Yarn over and pull through 2 loops repeatedly to finish the row (4 times).
- Chain 1, turn.
- For following rows: work under vertical bar and next horizontal bar working loops on hook same as previous row with 5 loops, yarn over and pull through 2 loops sequentially.
- Repeat this for desired length (~100 cm recommended).
Handles are sturdy and handle weight well.
Step 9: Attach Handle to Bag
- Sew one end of the handle to the third block of hdc stitches on one side of the bag, skipping one block (centered).
- Use darning needle and yarn.
- Sew firmly by stitching through handle’s tunisian crochet stitches and bag’s hdc stitches.
- Repeat on the opposite side.
- Secure with a few knots and weave in ends.
Tutor’s Suggestions
- Use stitch markers to keep track of rounds, especially during increases.
- Measure frequently to ensure the bag will fit your bottle snugly, but with some stretch.
- Don’t pull handles too tight when sewing to allow some flexibility.
- Consider cotton yarn for durability and to avoid stretch.
- Practice the Tunisian stitch on scrap to get comfortable.
Tip
Pulling the loop to the back side after each round helps create a neat round edge and keeps a clean look. Don’t skip this step!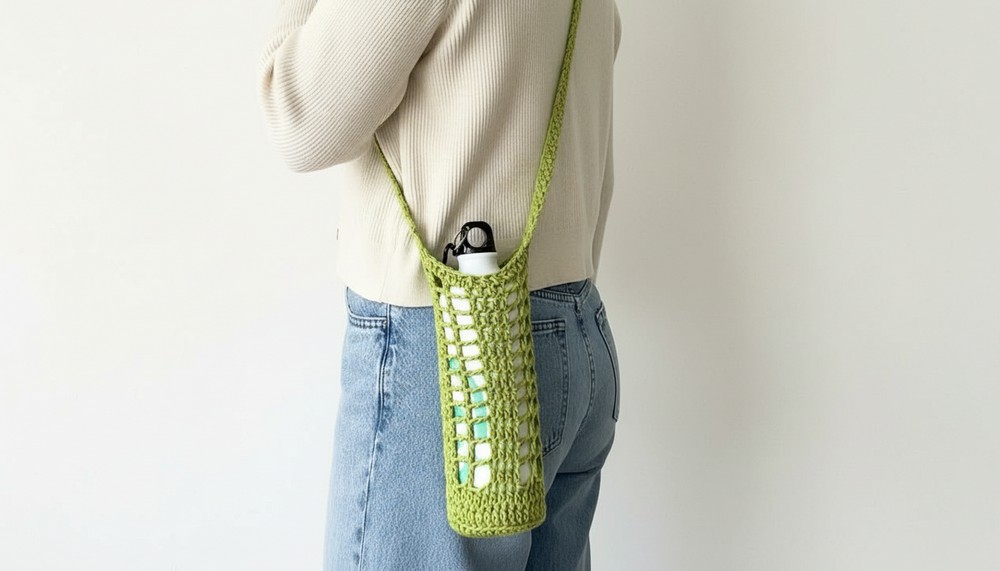
Conclusion
Your comfy, functional Water Bottle Bag is now ready to use! Perfect for hands-free carrying on busy days. Customize yarn colors and handle lengths for personal style or gifts.