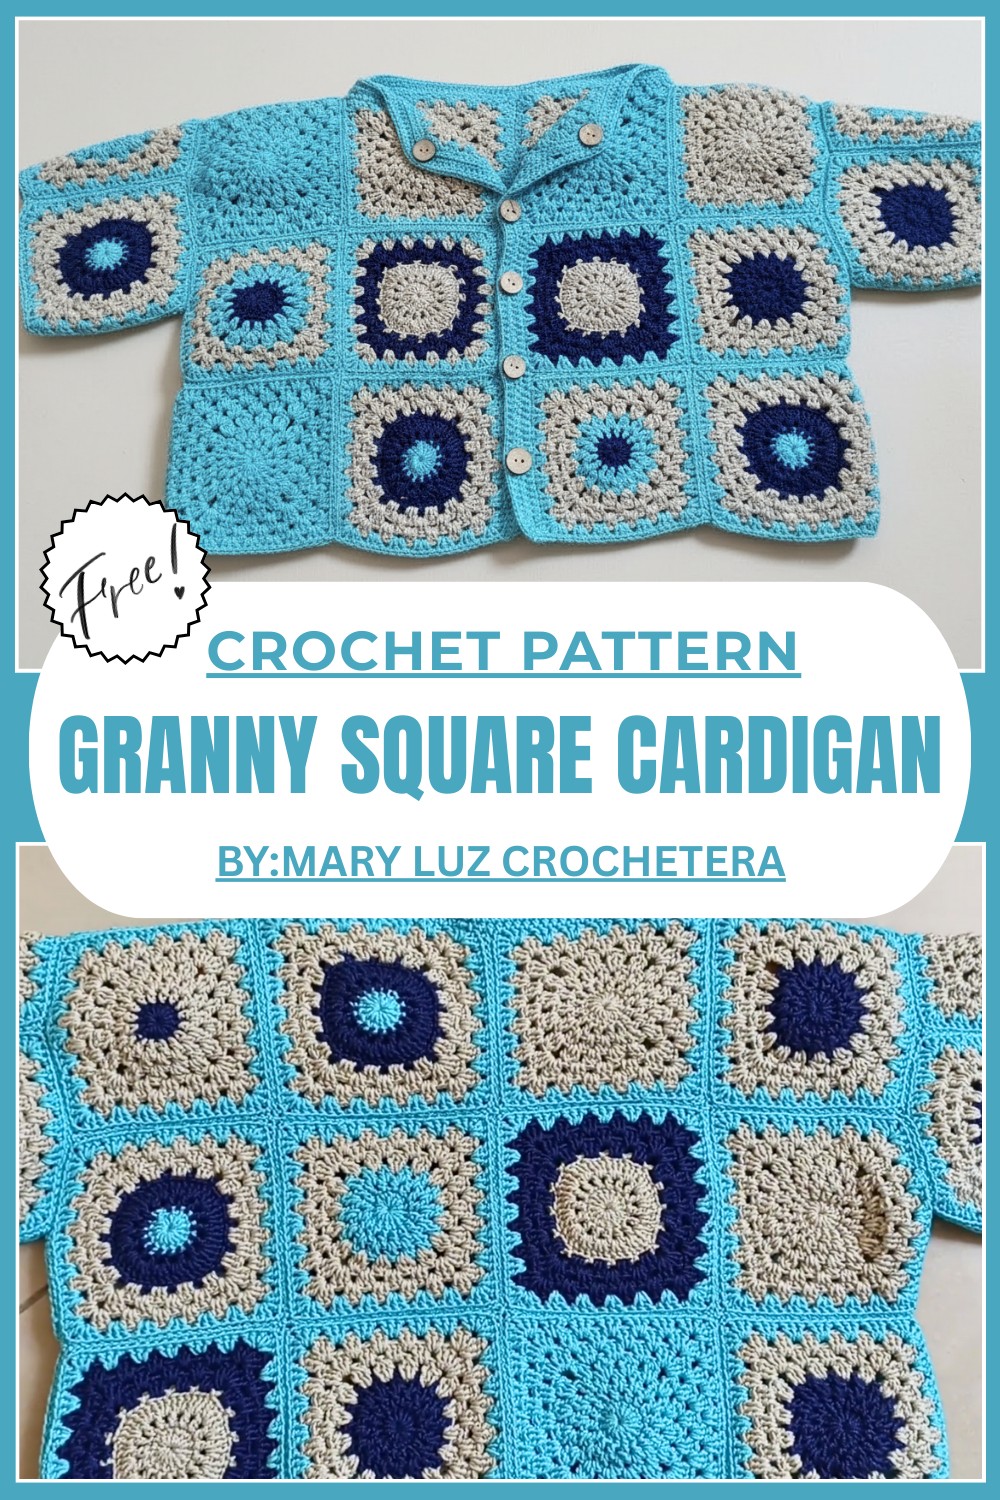
Vibrant Granny Square Cardigan Pattern To Warm Your Style
Wrap yourself in colorful coziness with this easy granny square cardigan pattern that adds charm and warmth to any outfit effortlessly.
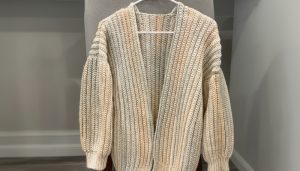
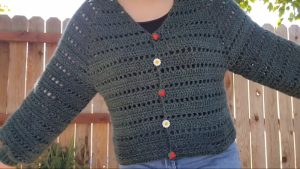
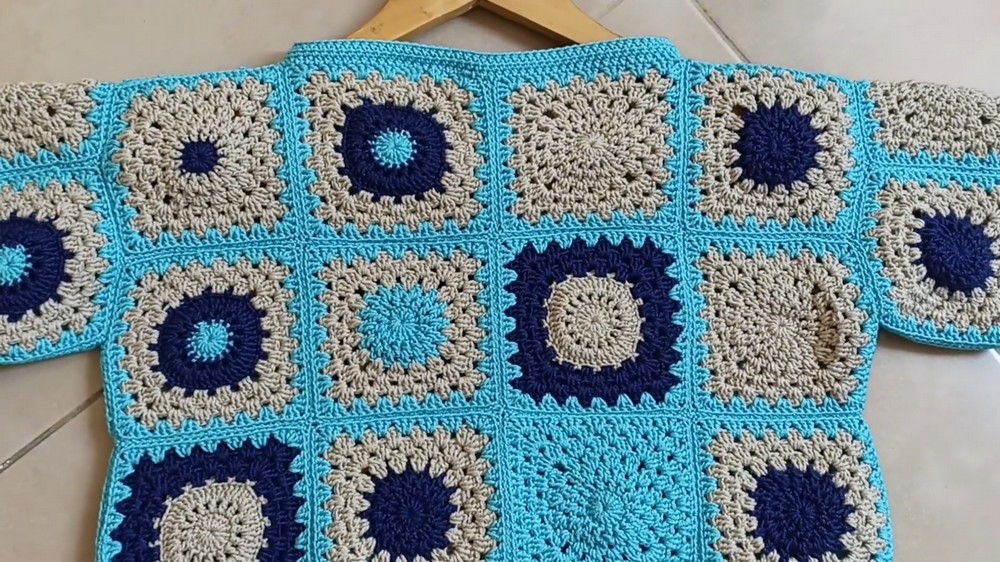
Bursting with vibrant colors and timeless charm, this cozy cardigan instantly brightens up any outfit and mood. Each little granny square is a delightful splash of warmth and personality, lovingly joined to create a piece that feels like a warm hug on chilly days. Its relaxed fit invites comfort, making it perfect for lounging at home, casual outings, or layered style on cooler evenings.
Handmade Granny Square Cardigan Perfect for Every Outfit
The soft texture and eye-catching patterns bring a handcrafted touch that stands out effortlessly, adding creativity and joy to everyday wear. Whether paired with jeans or dresses, this cardigan transforms simple looks into something special and full of life.
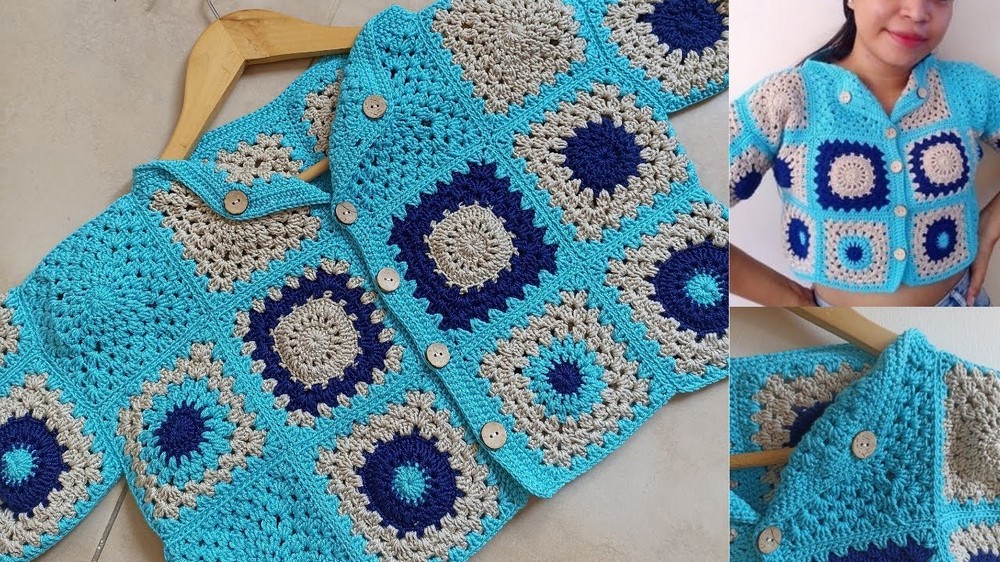
A true celebration of color and comfort, it’s designed to make anyone feel happy, stylish, and unique with every wear. Perfect for those who appreciate beauty in simplicity, this handmade gem is sure to become a favorite in your wardrobe.
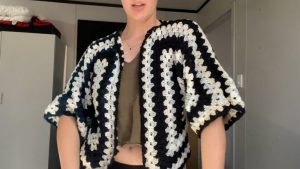
Crochet Ladies’ Granny Square Shirt Pattern
Special Features
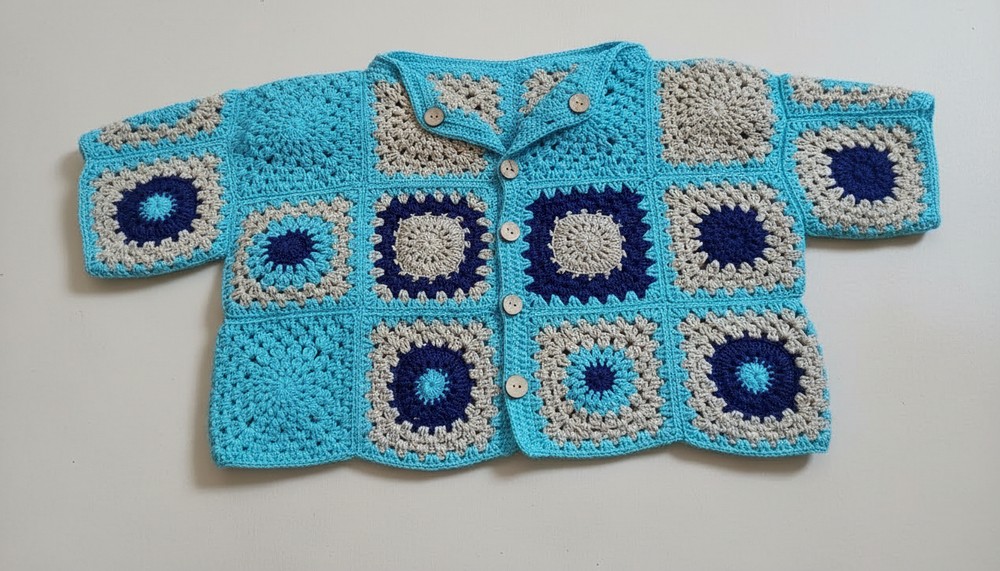
- Made entirely from classic granny squares with two variations in stitch and color patterns
- Functional button closures on the neckline and back allowing easy adjustment
- Uses lightweight, durable 2 mm macramé yarn ideal for warm weather wear
- Customizable sizing based on the number and size of granny squares
- Decorative fan stitches at granny square corners for a polished look
- Versatile and trendy, perfect for summer layering or casual wear
Level of Difficulty
Intermediate:
- Requires knowledge of magic circle, double crochet (dc), half double crochet (hdc), and slip stitch (sl st) techniques
- Experience with color changes, forming and assembling granny squares, and joining motifs
- Managing buttonholes and button placement
- Basic skills in measuring and adjusting fit
Materials Needed
- Macramé yarn, 2 mm thickness, in at least three shades/colors
- 2.5 mm crochet hook (recommended)
- 5 buttons matching your buttonholes
- Scissors
- Yarn needle for weaving ends and sewing buttons
- Stitch markers (optional)
- Measuring tape
Step-by-Step Crochet Pattern
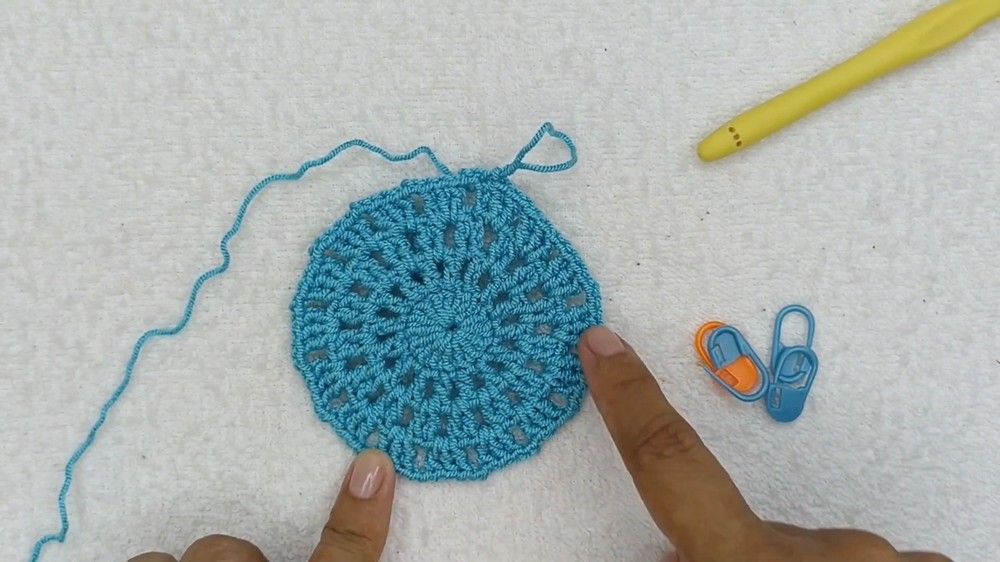
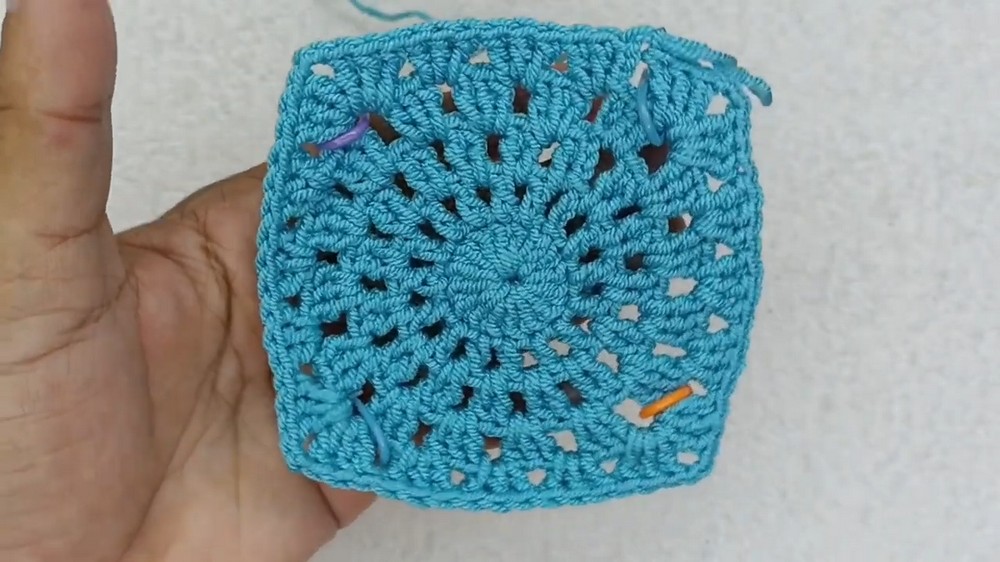
Step 1: Granny Square Design 1 – Round 1
- Make a magic circle.
- Chain 2 (counts as first dc).
- Work 16 double crochets (dc) inside the circle (including the first counted chain).
- Tighten the circle, knot to secure.
Step 2: Granny Square Design 1 – Round 2
- Chain 3 (counts as 1st dc).
- Chain 1.
- In every dc of previous round, work: 1 dc, chain 1 (do not skip stitches).
- Total of 16 dc separated by chain 1 spaces.
- Close round with slip stitch in 3rd chain of starting chain.
Step 3: Granny Square Design 1 – Round 3
- Chain 3 (counts as 1st dc).
- Make 2 dc in the same chain-1 space.
- Chain 1.
- Repeat 2 dc, chain 1 in each chain-1 space all around.
- End with slip stitch to third chain of starting chain.
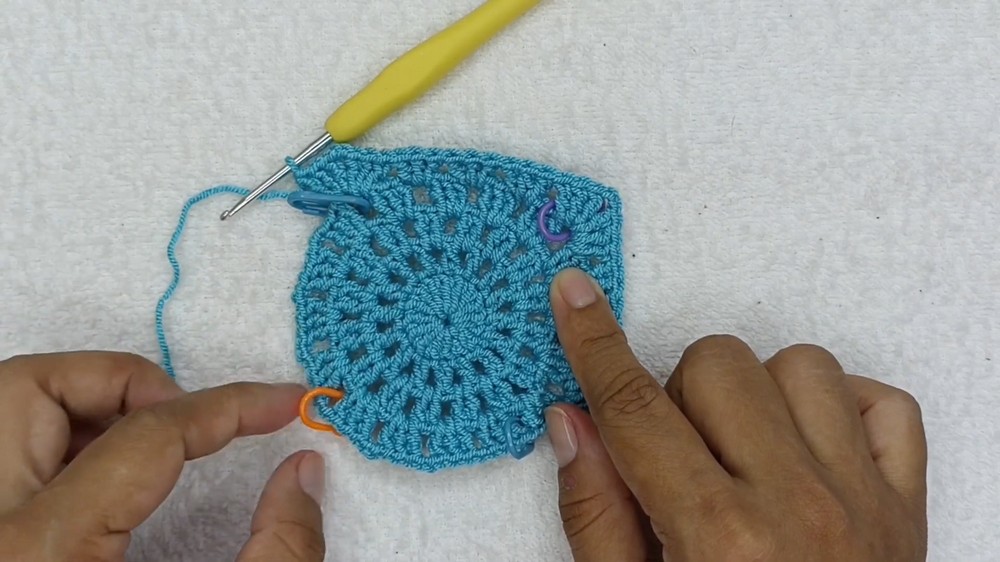
Step 4: Granny Square Design 1 – Round 4
- Chain 3 (counts as 1st dc).
- Chain 2.
- In next chain-1 space, make 3 dc.
- Chain 2.
- Repeat 3 dc, chain 2 around the square for fan-stitches at corners.
- Close round with slip stitch to starting chain.
Step 5: Adding Fans at Edges (Ends)
- Count 16 spaces on Round 4. Using stitch markers, mark every 4th space for fan placement (total 4).
- In marked spaces, make a fan: 3 dc, 2 chains, 3 dc fan stitch.
- In other spaces, make 3 dc with no chains.
Step 6: Continue Granny Square Rounds
- Crochet 2 more rounds maintaining fan stitch pattern (3 dc fans separated by 2 chains at fans, 3 dc elsewhere).
- Total rounds for the granny squares: 7 rounds (adjust size by adding or skipping rounds).
Step 7: Fasten Off & Weave in Ends
- Fasten off.
- Tighten the loop and weave ends securely on the wrong side.
Step 8: Granny Square Design 2 (Variation) – Round 1
- Repeat Round 1 from Design 1 (magic circle + 16 dc).
Step 9: Granny Square Design 2 – Round 2
- Chain 3 (counts as 1st dc), chain 1.
- Work 1 dc, chain 1 in each stitch all around (16 dc separated by chain 1).
- Close with slip stitch.
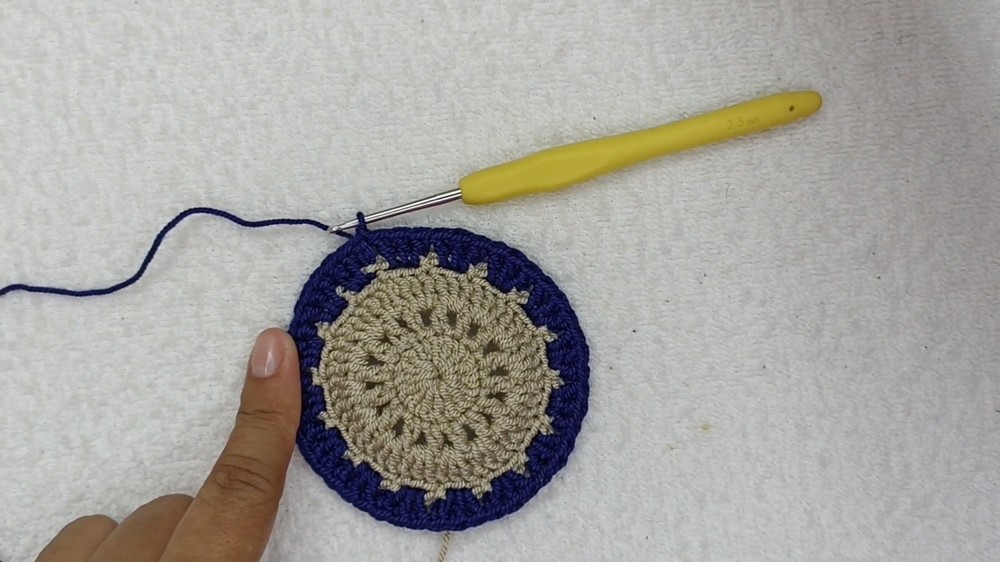
Step 10: Granny Square Design 2 – Round 3
- Chain 3.
- Work 3 dc in each chain-1 space without chains between groups.
- Continue around.
- Slip stitch to join.
Step 11: Granny Square Design 2 – Round 4
- Change color.
- Chain 3.
- Work 3 dc in each space, separated by 2 chains at fans.
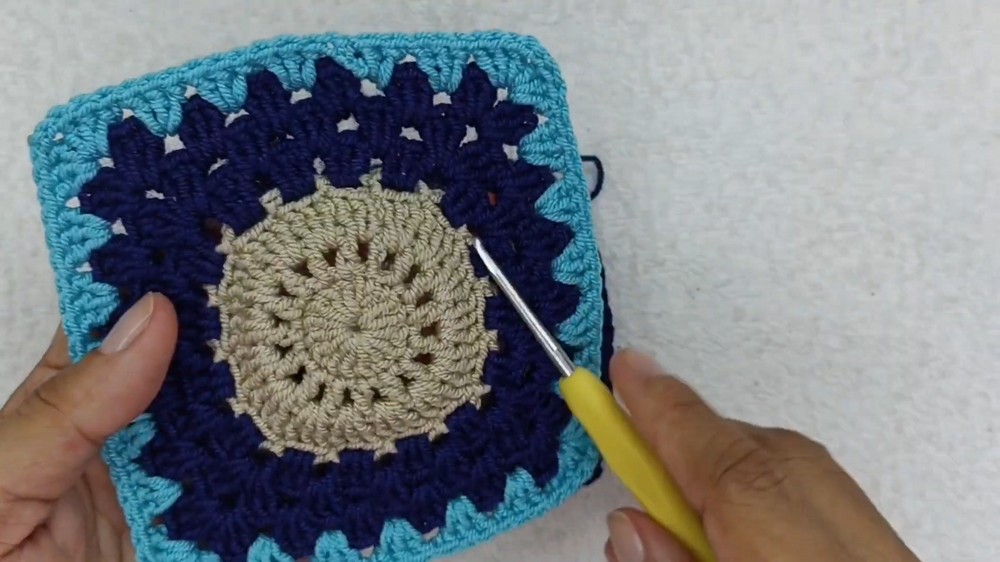
Step 12: Follow Fans & Continue Rounds
- Repeat fan edge stitch pattern with 3 dc groups, separated by 2 chains at corners.
- Keep adding rounds up to 7 total rounds or desired size.
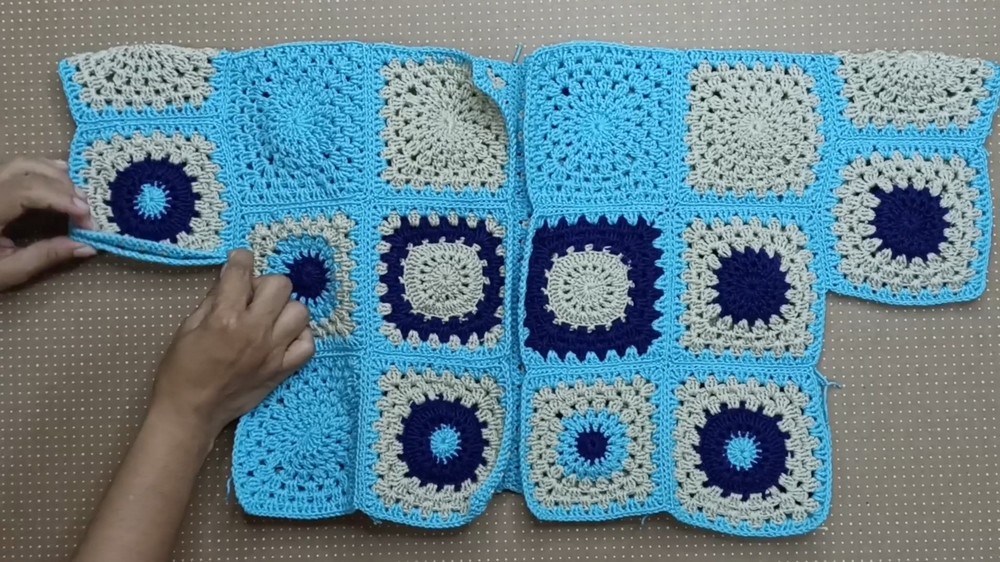
Step 13: Construct Shirt Layout
- Measure bust circumference.
- Calculate number of granny squares per row based on square size (~11.5–12 cm).
- For size S (~87 cm bust), use 8 granny squares per row.
- Total granny squares: 30 (24 for shirt body, 6 for sleeves).
- Lay out granny squares per schematic for front, back, and sleeves.
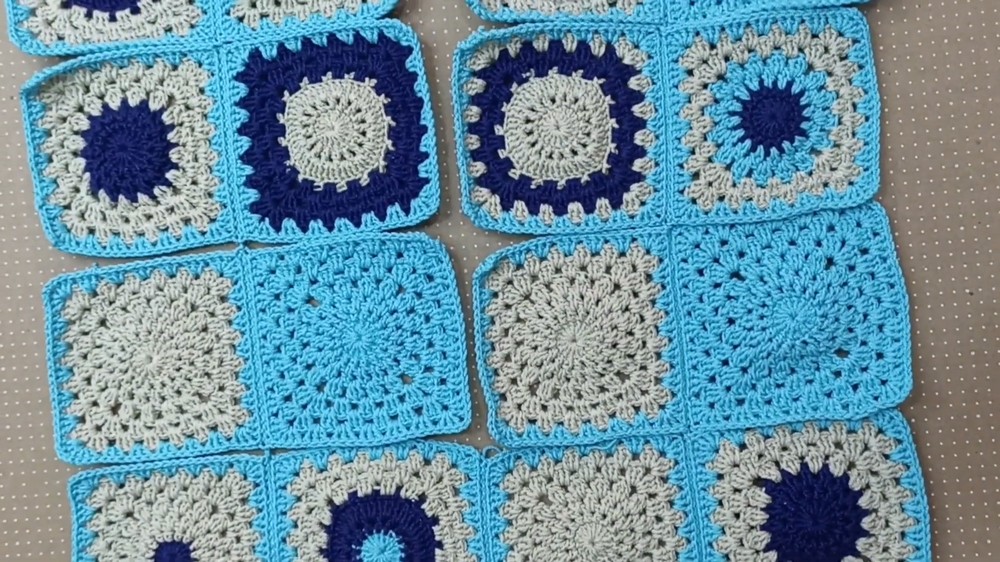
Step 14: Joining Granny Squares Vertically
- Place squares face to face.
- Use single crochet (sc) stitches through matching chain spaces to join vertically.
- Join from bottom to top aligning fans.
Step 15: Joining Granny Squares Horizontally
- Join horizontally similarly with single crochet.
- Leave gaps/openings as per pattern schematic to place buttons (do not join in those spots).
Step 16: Joining Sleeves & Side Seams
- Attach sleeves to body by joining corresponding granny squares vertically first.
- Join sleeve seams and side seams using sc or slip stitches; work from inside for neatness.
Step 17: Neck and Buttonhole Edging
- Use yarn matching main shirt color.
- Round entire neckline with half double crochet (hdc) stitches.
- On one side, create buttonholes by skipping stitches and chaining the width of buttons (about 5 cm length with several buttonholes).
- Crochet 3 rounds of hdc around buttonhole side for stability.
Step 18: Attach Buttons
- Sew buttons opposite buttonholes securely.
- Weave in all loose ends.
Final Touches
- Fasten off and weave any remaining yarn tails.
- Block shirt lightly to even out stitches and shape if desired.
Conclusion
Congratulations! You’ve crafted a vibrant, comfortable granny square shirt with beautiful functional details. This project blends timeless granny motifs with modern fashion elements, ideal for spring and summer. With its customizable size and colorful versatility, it’s a perfect addition to your wardrobe or a thoughtful handmade gift.
Tutor’s Suggestions
- Use stitch markers for accurate buttonhole and fan stitch placements.
- Measure frequently to customize fit perfectly.
- When joining squares, avoid over-tightening to maintain fabric flexibility.
- Practice color changes and weaving in ends neatly for a professional look.
Tip
For invisible joins between granny squares, use slip stitches on the garment’s inside with matching yarn color after initial joining. It hides seams and keeps the front clean.