
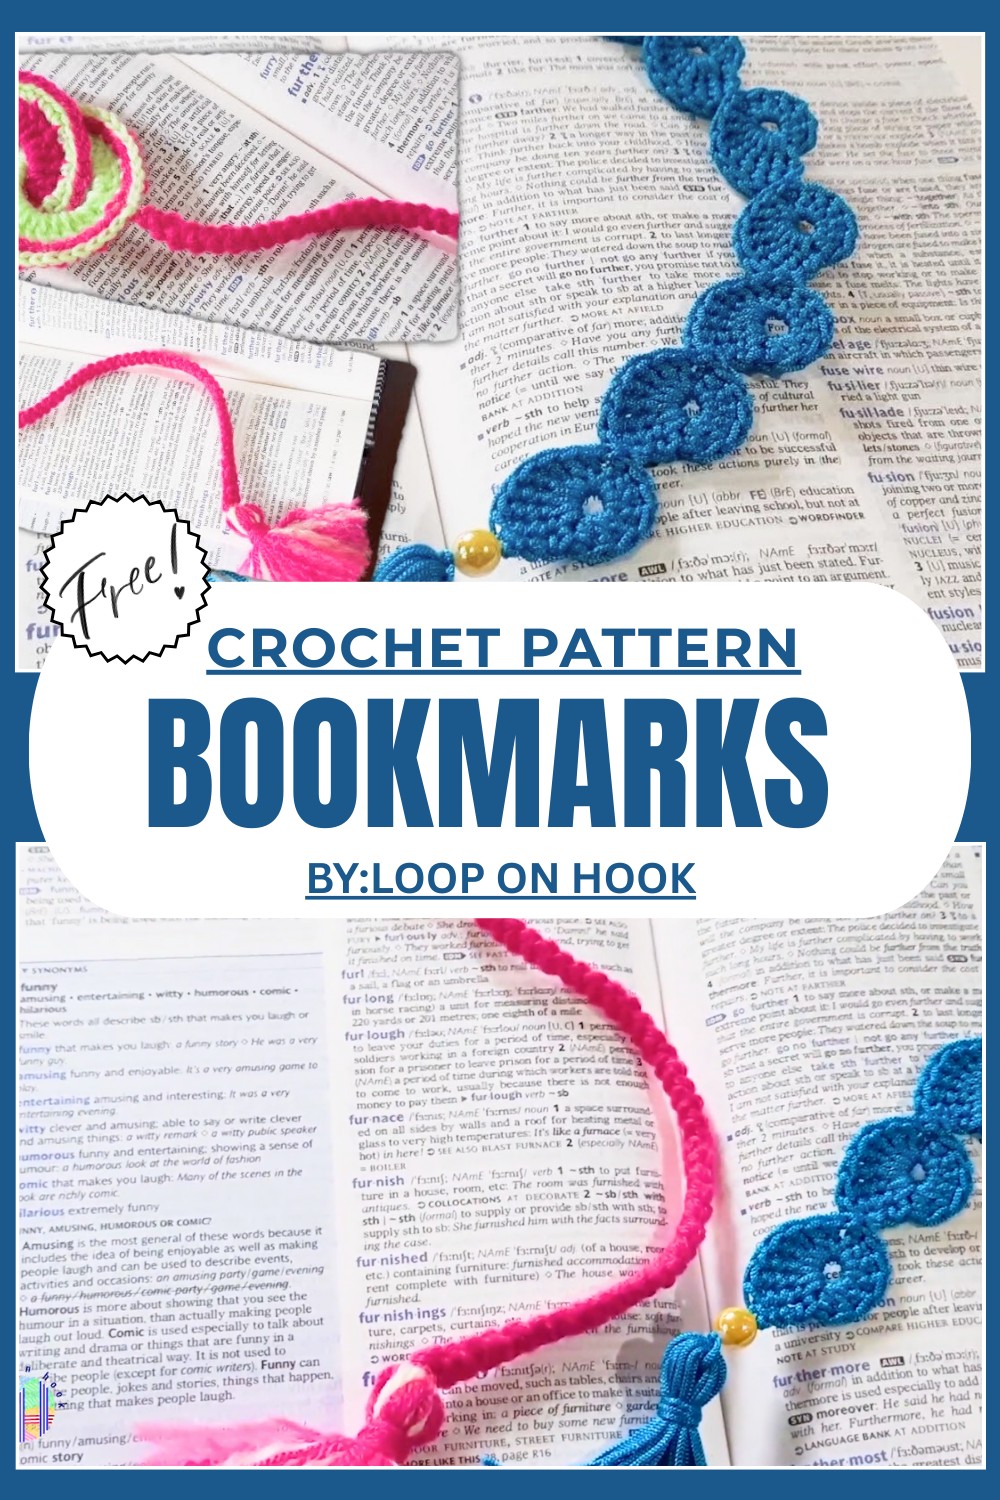
Easy Crochet Bookmarks Pattern For Cozy Reading Time
Brighten your reading moments with crochet bookmarks that bring color and warmth to every page that's for seasoned yarn lovers alike.
Opening your favorite book and finding a small, beautiful piece of art keeping your page safe. This little treasure can make reading even more special. Using a crochet bookmarks pattern, you can create charming, colorful markers made from soft yarn. These bookmarks don’t just hold your place—they add a handmade touch full of warmth and care.
Quick Crochet Bookmarks Pattern to Save Your Spot Fast
Their delicate stitches and unique designs can be simple or fancy, fitting every style. They are perfect gifts for friends, family, or anyone who loves books. The soft texture feels nice between the pages, unlike paper which can tear or bend. Making a crochet bookmark is a fun and calming project that anyone can enjoy, whether new to experienced. It’s a small creation with a big heart that makes every reading moment more joyful and memorable.

Crochet Two Unique Bookmark Patterns
Difficulty Level:
Easy to Intermediate
Special Features:
- Two bookmark styles: simple and intricate
- Use of color changes for detail
- Inclusion of tassels and cords for a professional finish
- Uses basic to intermediate crochet stitches
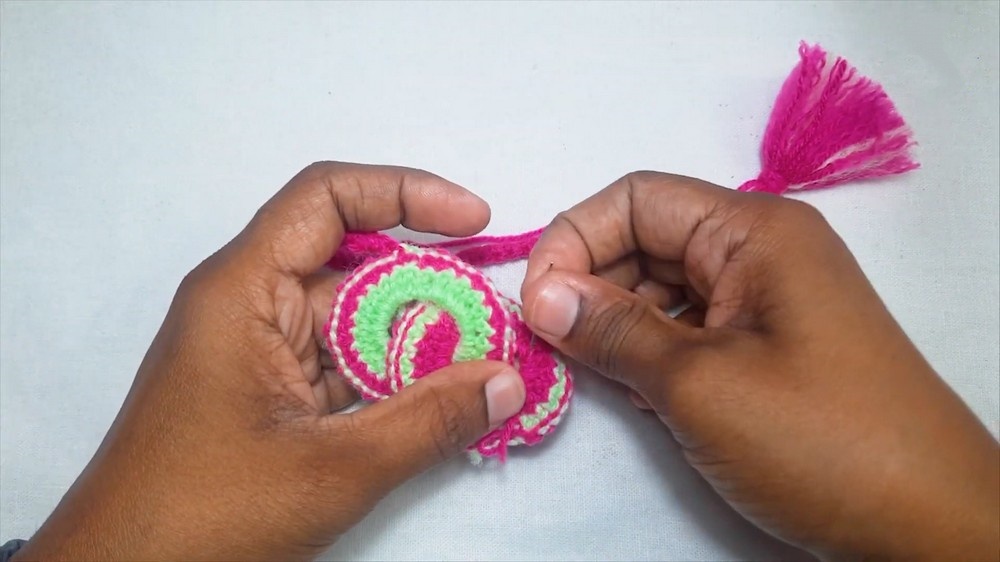
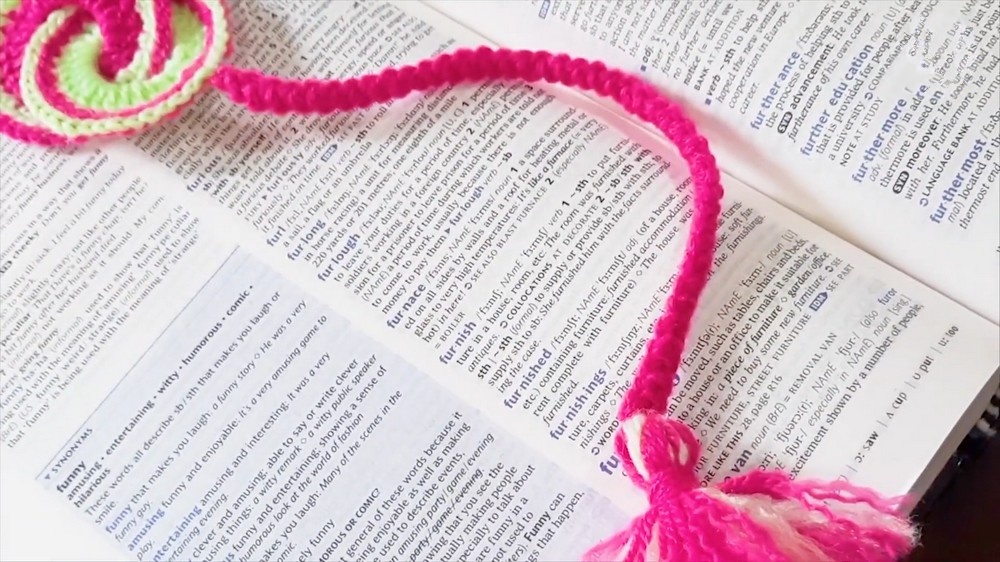
Bookmark 1: Simple Crochet Bookmark with Tassel
Step 1: Create a Base Circle
- Begin with a completed circle base (if desired, make using a magic ring and stitches).
- Alternatively, proceed directly to the chain foundation for the bookmark.
Step 2: Foundation Chain
- Make a slip knot.
- Chain 15. This forms the length of your bookmark.
Step 3: Join Chain to Form Loop
- Slip stitch into the first chain to join, creating a loop or ring.
- This will be the base for the rectangular body of the bookmark.
Step 4: Chain 2 and Work Double Crochets
- Chain 2.
- Work 25 double crochets (dc) evenly around the ring/loop. This will create the main body of your bookmark that has a textured, loose feel.
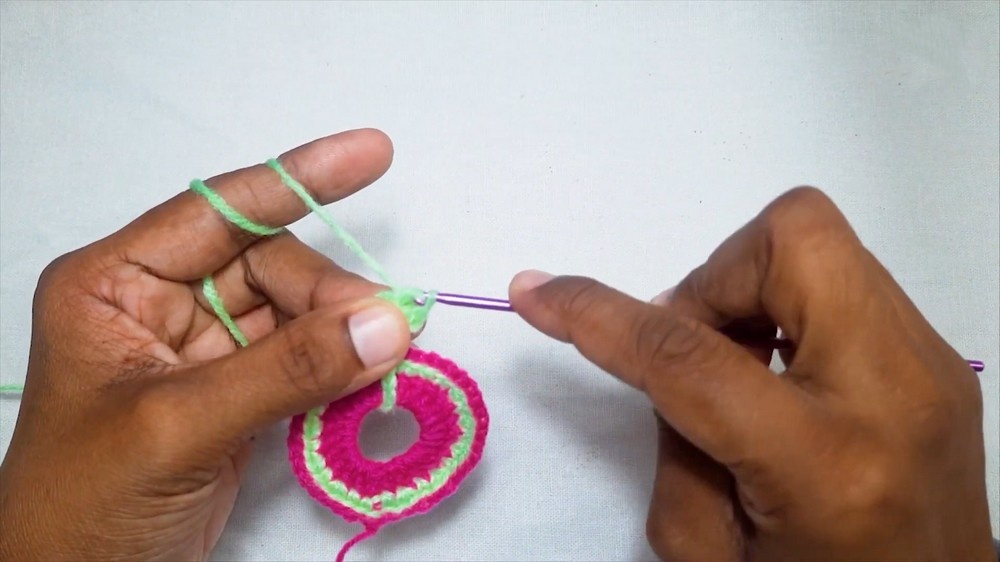
Step 5: Adding a New Color
- Change yarn to a second color.
- Insert hook into the stitch between the first chain and the first double crochet of the previous round.
- Slip stitch to join the new yarn color.
Step 6: Single Crochet Row with Increases
- Chain 1.
- Work 1 single crochet (sc) into the next stitch.
- Work 2 single crochets into the following stitch.
- Alternate between 1 sc and 2 sc all around for a ruffled edge effect.
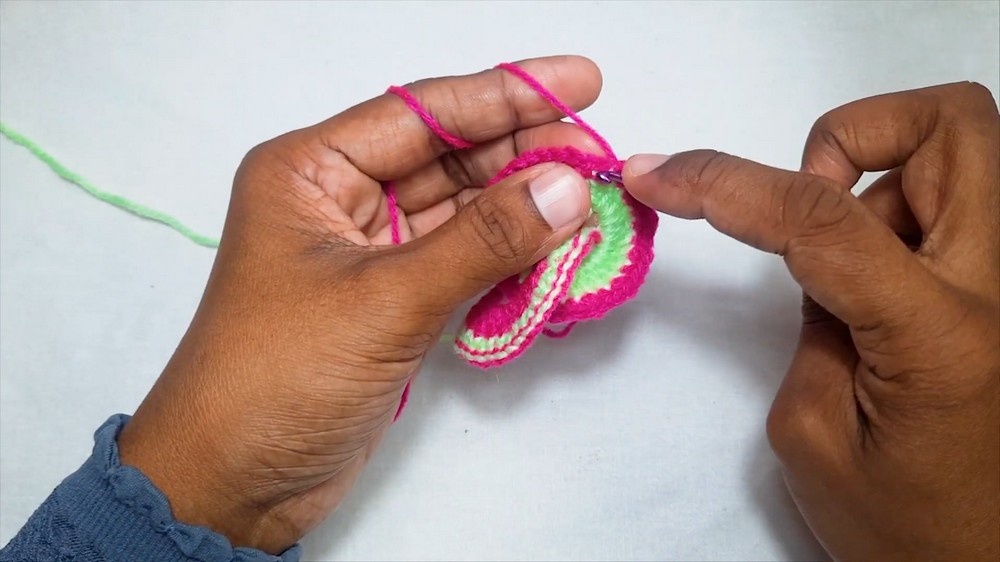
- Slip stitch to finish the round.
Step 7: Slip Stitch into Back Loop
- Change yarn if wanted.
- Insert the hook into the back loop of the next stitch.
- Slip stitch to create a subtle edge texture.
- Chain 1, then cut the yarn, fastening off neatly.
Step 8: Crochet the Cord
- Chain 2.
- Work slip stitches along the chain for a sturdy cord.
- When the cord length matches your desired bookmark size, fasten off with a long tail for attachment.
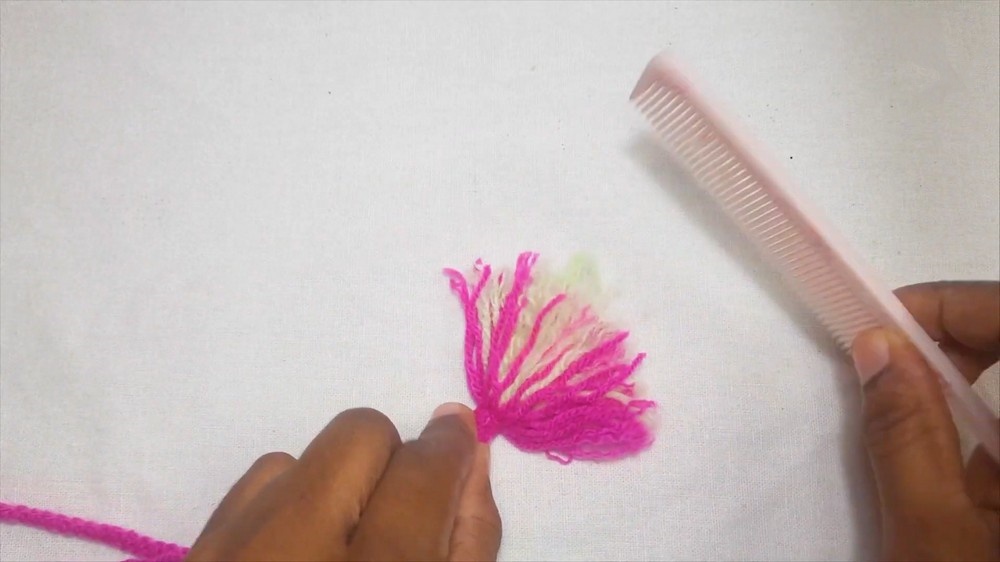
Step 9: Make a Tassel
- Wrap yarn around your fingers 10 times twice (total 20 wraps) to make a full tassel.
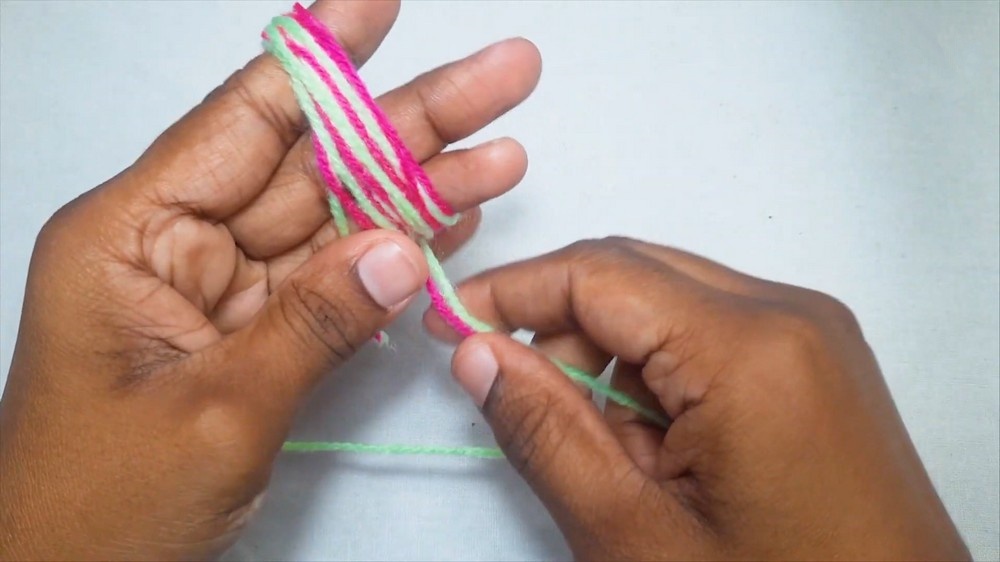
- Tie off at the top, trim the ends evenly, and sew or tie onto the end of the bookmark’s cord.
Bookmark 2: Elegant Lacy Bookmark with Treble Crochets
Step 1: Starting the Base
- Make a slip knot.
- Chain 6 for the foundation row.
Step 2: Crocheting the Body
- Skip the first two chains, and into the fourth chain from the hook, work a double crochet (dc).
- Work 5 more double crochets (dc) into the same chain to form a solid base cluster.
Step 3: Slip Stitch Foundation
- Go back to the third chain from the foundation chain.
- Insert hook and slip stitch (sl st).
Step 4: Work Tufts of Stitches
- In the next stitch, work 2 double crochets (dc).
- Follow with 3 treble crochets (tr).
- Then work 2 double treble crochets (dtr) to create elongated, elegant rows.
Step 5: Chain Spaces and Stitches
- Chain 5 to form a decorative loop.
- Crochet 6 double crochets (dc) in the base area to transition between levels of height in stitches.
- Work slip stitches strictly into the backside loops for a refined edge.
Step 6: Repeat Pattern
- Repeat clusters of 2 dc, 3 tr, and 2 dtr, interspersed with chain spaces and slip stitches following the pattern established to build an airy, elegant bookmark design.
Step 7: Finishing
- Chain 1, keep a long yarn tail, and cut off the yarn, weaving in ends.
Step 8: Add Tassel
- Create a tassel by wrapping yarn 20 times around fingers for thickness.
- Secure the top with a knot.
- Attach the tassel to the bookmark for a graceful finish.
Tutor’s Suggestions:
- Maintain consistent tension to ensure even stitches and flat fabric.
- Use stitch markers if necessary to track high stitch counts or rounds.
- Customize color swaps to match your style or gifting recipient.
- Experiment with yarn weight and hook size to make bookmarks of different thicknesses.
Uses:
- Elegant gift for readers and book lovers
- Unique handmade accessories for personal use or sales
- Decorative items for journals and planners
- Great for practicing various basic and advanced crochet stitches
Tip:
To keep your bookmark flat and prevent curling, block your finished piece by pinning it flat and spritzing lightly with water or steam. Allow to dry completely before use.
Conclusion:
These two crochet bookmark patterns combine the simplicity of basic stitches with charming decorative elements like ruffles and lacework. Easy enough for beginners yet customizable for others looking to refine their crochet skills, these bookmarks make beautiful and useful handmade treasures. Happy crocheting and enjoy your new bookmarks!
