
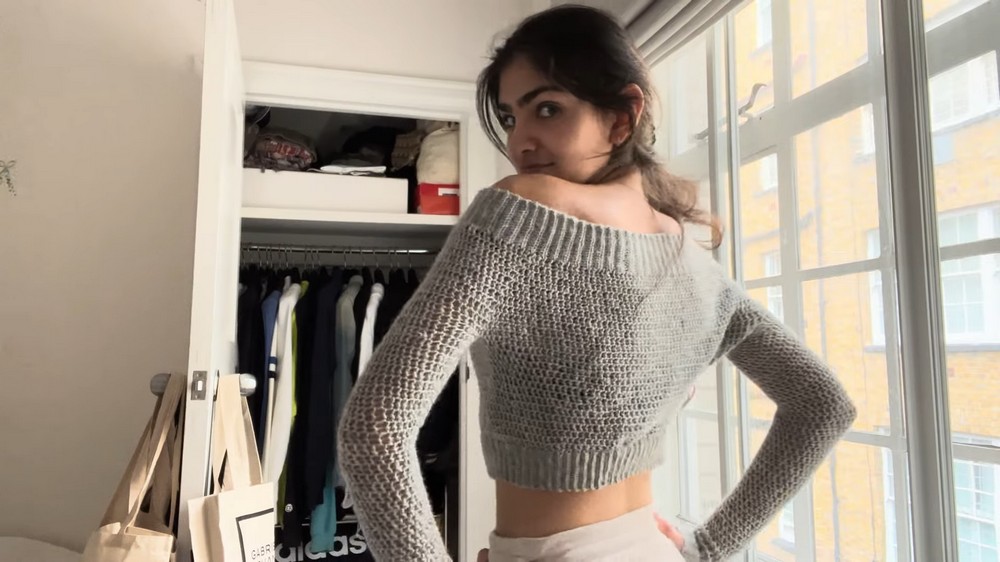
Lovely Crochet Off Shoulder Top Pattern For Sunny Days
Build a fresh and comfy style with this simple crochet off shoulder top pattern that brings charm and ease to your warm-weather wardrobe.
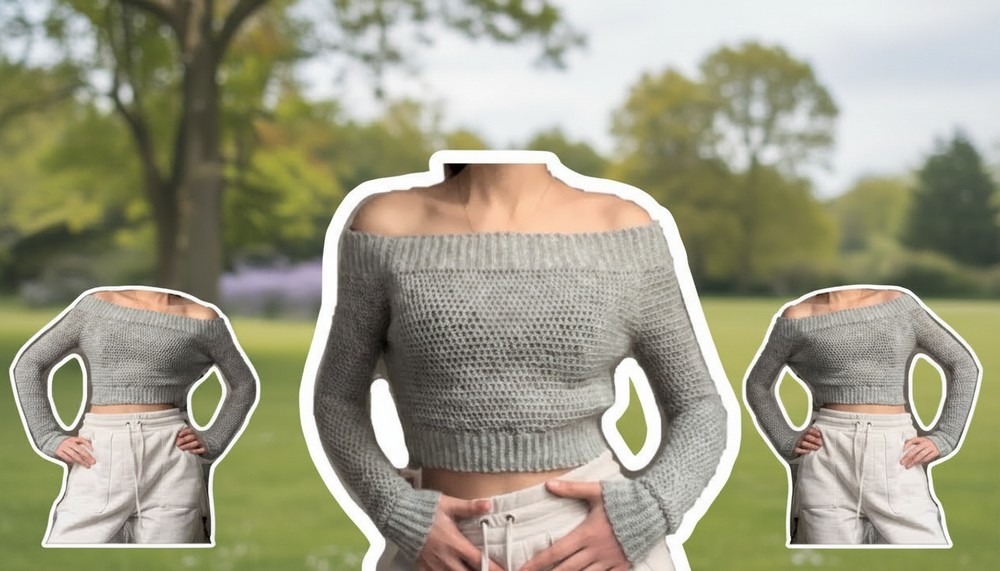
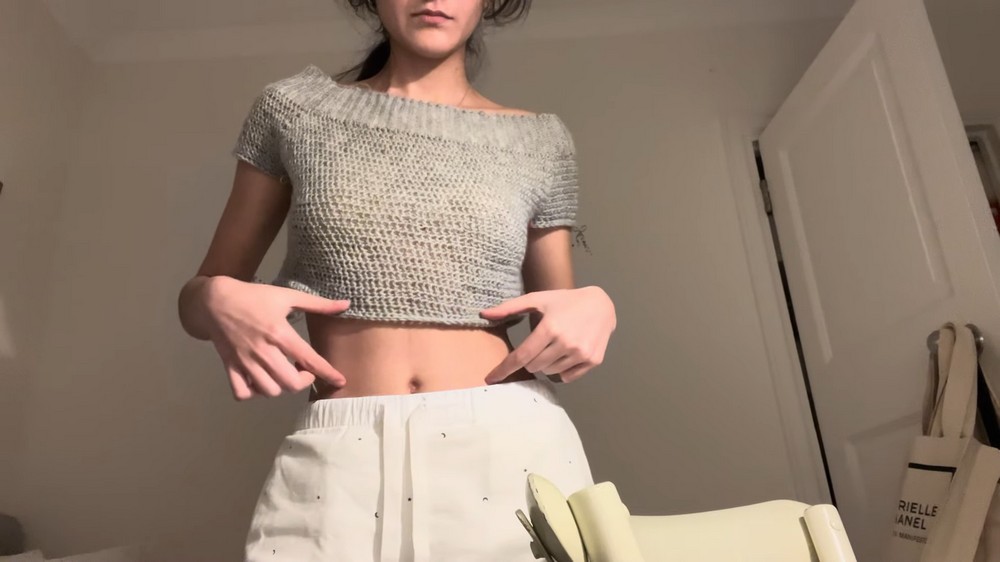
Warm days call for clothing that feels light and comfortable, yet looks stylish and fresh. A crochet off shoulder top fits this need perfectly. This top gently rests below the shoulders, showing a little skin in a simple and elegant way. The crochet off shoulder top pattern uses soft yarn and stitches that allow the fabric to stretch just right, making it easy to wear for all body shapes.

Crochet Off Shoulder Top Pattern Perfect for Summer Style
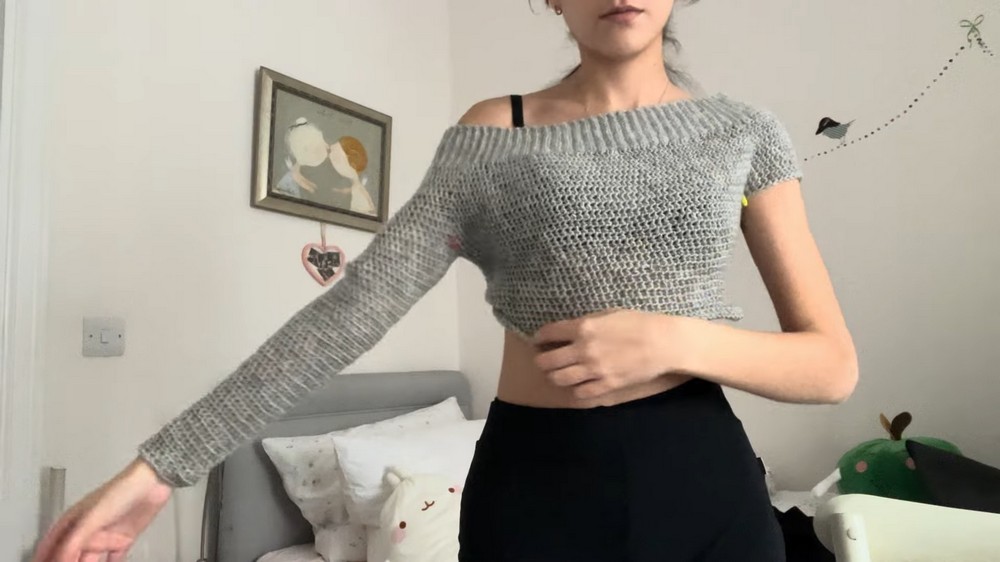
Its delicate texture and open shoulder style add a charming touch, making it suitable for many occasions, like casual outings, family gatherings, or relaxing weekends. The appearance is neat and graceful, with sleeves that flow softly and a fit that feels cozy without being tight.
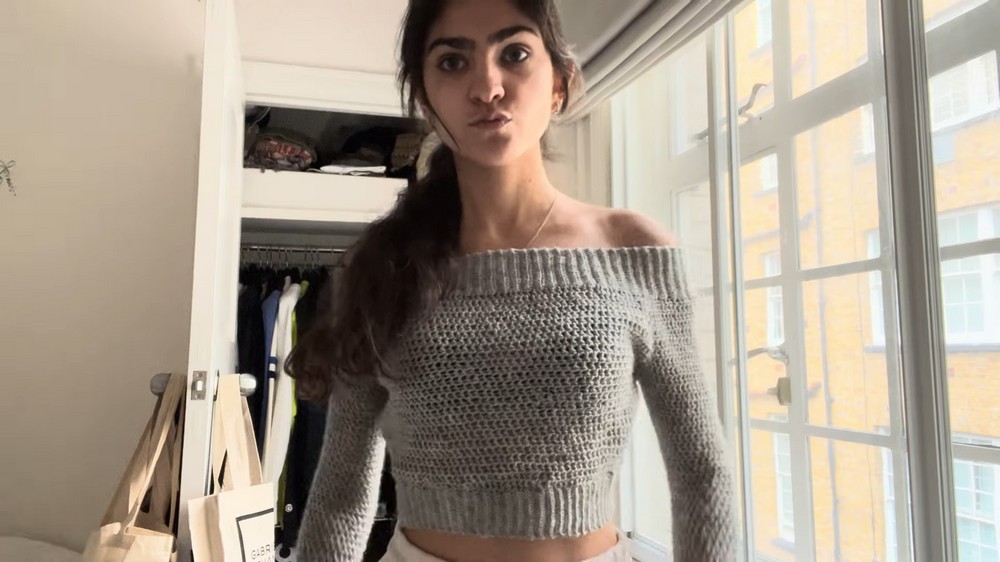
It pairs easily with jeans or skirts, creating an outfit that feels good both to wear and to see. This top brings together comfort and a touch of beauty, making it a favorite choice for sunny days.
Crochet Off-the-Shoulder Top Pattern
Materials
- Size 4 yarn
- 3.5 mm crochet hook
- Yarn needle
- Scissors
- Stitch markers or paper clips
- Tape measure (optional for sizing)
Special Features
- Off-the-shoulder ribbing created with back loop single crochets
- Raglan sleeve shaping with a clear stitch marker method for increases
- Seamless join of body and sleeves using slip stitches
- Customizable length for body and sleeves
- Comfortable, stretchy fit
Difficulty Level
Intermediate — requires familiarity with basic and back loop single crochet, double crochet, raglan shaping, and seaming.
Pattern Instructions
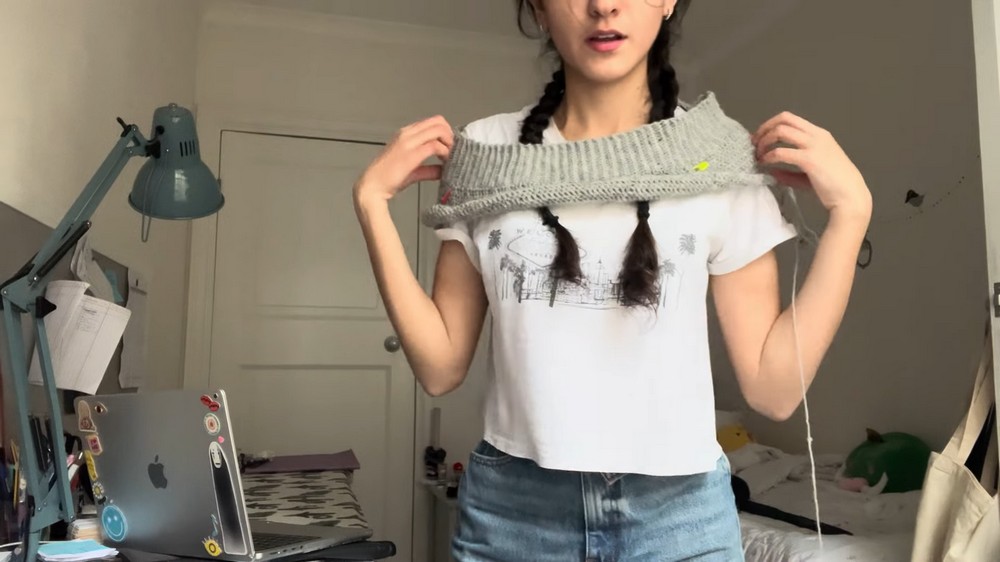
Ribbing (Neckline)
Step 1 — Foundation Chain
- Chain 20 chains (including a turning chain).
- To chain: yarn over, pull through loop, repeat.
Step 2 — Row 1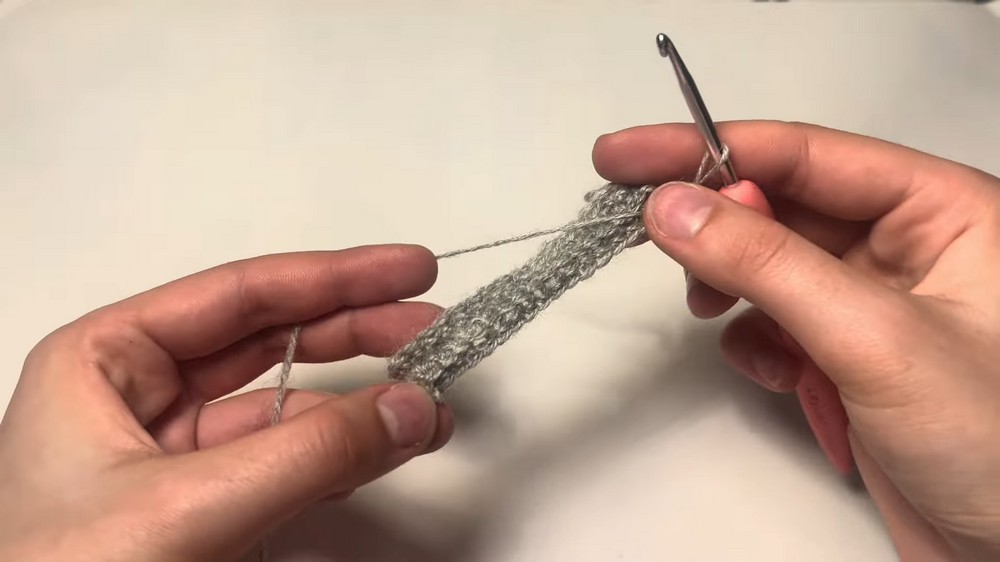
- Insert hook in the 3rd chain from hook, work a single crochet (sc).
- Continue working single crochet stitches in each chain across (work into both loops).
- Turn work.
Step 3 — Row 2
- Chain 1, turn.
- Work single crochet in back loops only (BLO) for the entire row.
- This creates a ribbing texture.
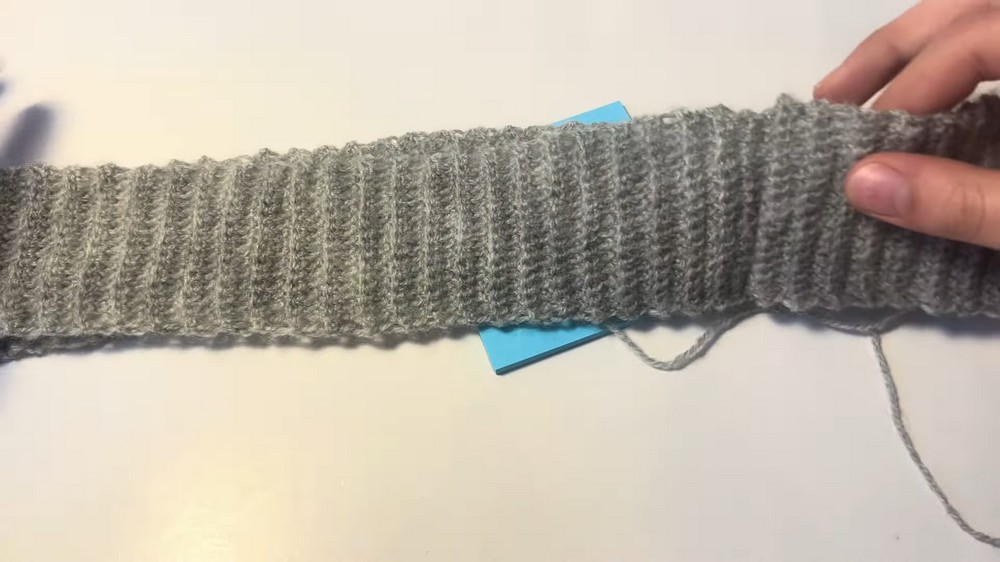
Step 4 — Rows 3 to 158 (or desired ribbing length)
- Repeat Row 2, working sc in back loops only every row.
- Try on the ribbing occasionally to check fit around shoulders (shouldn’t be too tight or loose).
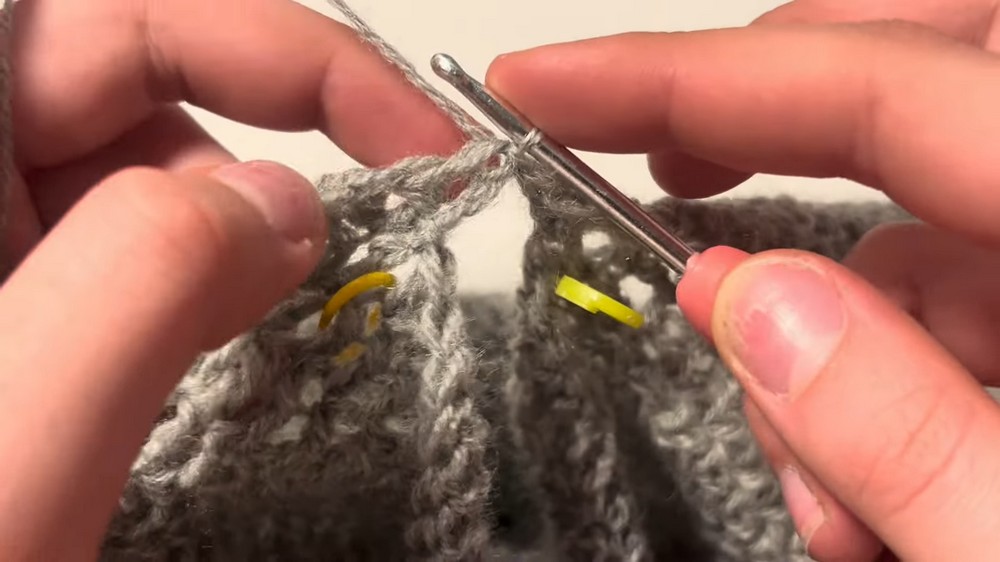
Step 5 — Join Ribbing
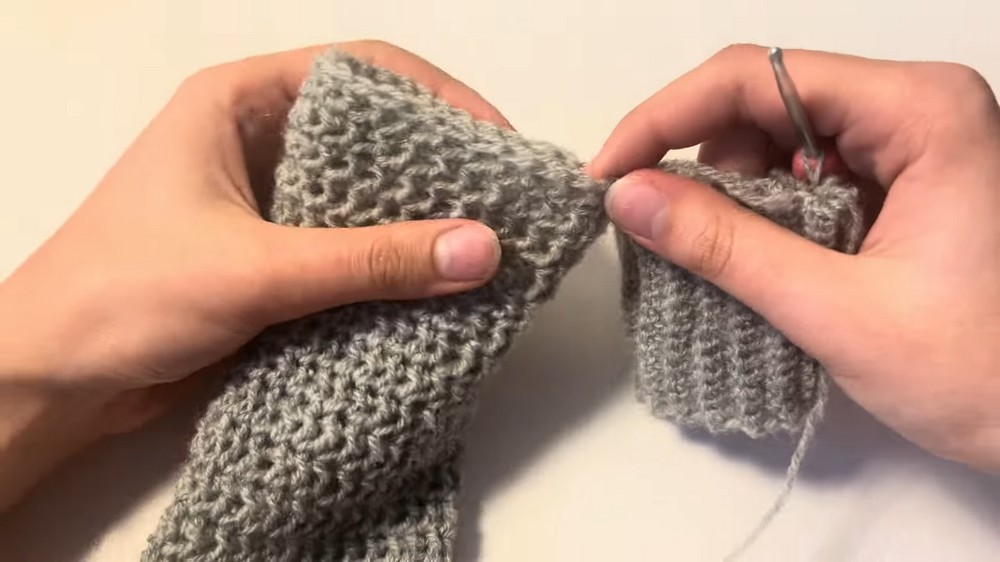
- Align ends and slip stitch (sl st) the two short sides together to form a ring.
- Insert hook through matching stitches on both ends, yarn over, pull through both loops, repeat for each stitch side-to-side.
Raglan Sleeve Shaping
Step 6 — Calculate Stitch Placement for Raglan
- Count total stitches across ribbing ring (e.g., 158 stitches).
- Subtract 4 from total stitches to find increase stitches.
- Divide remaining stitches into 3 parts: top (front), bottom (back), and sides (sleeves).
- For example: 158 - 4 = 154 / 3 ≈ 51 stitches per part.
Step 7 — Place Stitch Markers
- Place stitch markers at calculated intervals to mark raglan increase points:
- Top front (after 51 sts)
- Bottom back (51 sts later)
- Left and right sleeves (half of stitch count calculated per side).
Raglan Rows
Step 8 — First Raglan Row
- Chain 4 (counts as first dc + chain 1).
- Double crochet (dc) across until marker.
- Work 2 double crochets into the stitch marked with marker to increase.
- Move marker between these two new dcs to mark increase gap for next row.
- Repeat for all markers.
- Slip stitch into top of starting chain 4 to close row.
Step 9 — Subsequent Raglan Rows
- Repeat Step 8 for about 10 rows or until arm openings fit comfortably.
- Always work 2 dcs into each marker stitch and move marker accordingly.
Body
Step 10 — Work Body Panel
- After raglan shaping, chain 4,
- Work normal dc stitches between front and back stitch markers for the body panel.
- Join opposite body panels by slip stitching across stitches.
Step 11 — Continue Body
- Chain 2, turn.
- Work dc stitches evenly across body rows without increases or decreases.
- You may work for as many rows as desired (example: 14 cm length).
Sleeves
Step 12 — Attach Yarn to Armhole
- Fasten off body yarn leaving tail.
- Attach yarn at armhole seam.
- Chain 3 (counts as first dc).
Step 13 — Work around Sleeve
- Dc evenly around armhole stitches, joining at beginning with slip stitch.
- Chain 2, turn.
- Dc in each stitch around sleeve.
- Repeat for desired sleeve length, leaving space for cuff ribbing.
Sleeve Ribbing
Step 14 — Ribbed Cuff for Sleeve
- Finish sleeve with ribbing like neckline:
- Sc in back loops only for rows making ribbing cuff.
- Join edges with slip stitch to form cuff ring.
Bottom Ribbing
Step 15 — Ribbing at Waist
- Add ribbing at bottom of sweater as for neckline.
- Attach to body with slip stitches similar to sleeves.
Finishing
Step 16 — Weave in Ends
- Weave in all yarn tails securely with yarn needle.
- Turn sweater inside out for neatness if desired.
Tutor Suggestions
- Use stitch markers consistently for raglan shaping to maintain fit.
- Try garment on periodically for armhole and shoulder fit checks.
- Adjust sleeve length and body length as per personal preference.
- For a tighter fit ribbing, use smaller hook size.
Uses
- Perfect for warm weather or layered looks.
- Stylish casual wear for spring or summer.
- Handmade gift idea with customizable yarn colors.
Tips
- The back loop only stitch ribbing adds great texture and stretch—practice the technique before starting.
- Experiment with color changes on ribbing for a fashionable look.
- If raglan shaping is new to you, use the stitch marker method carefully to ensure even increases.
Conclusion
This off-the-shoulder crochet top combines simple stitches with clever raglan shaping for a flattering and trendy garment. With clear stitch placement and ribbed accents, it’s an enjoyable intermediate project that results in a stylish wardrobe staple.