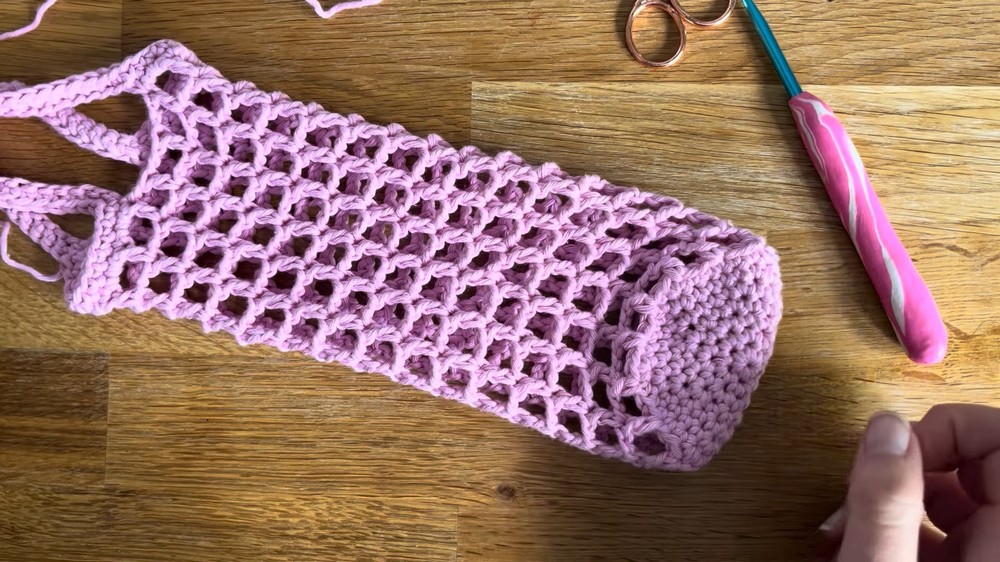
Adorable Free Crochet Bottle Gift Bag Pattern For Special Occasions
Build a beautiful and colorful sleeve for any tall bottle to give as a special handmade gift to your friends and family by following this very easy Crochet Bottle Gift Bag.
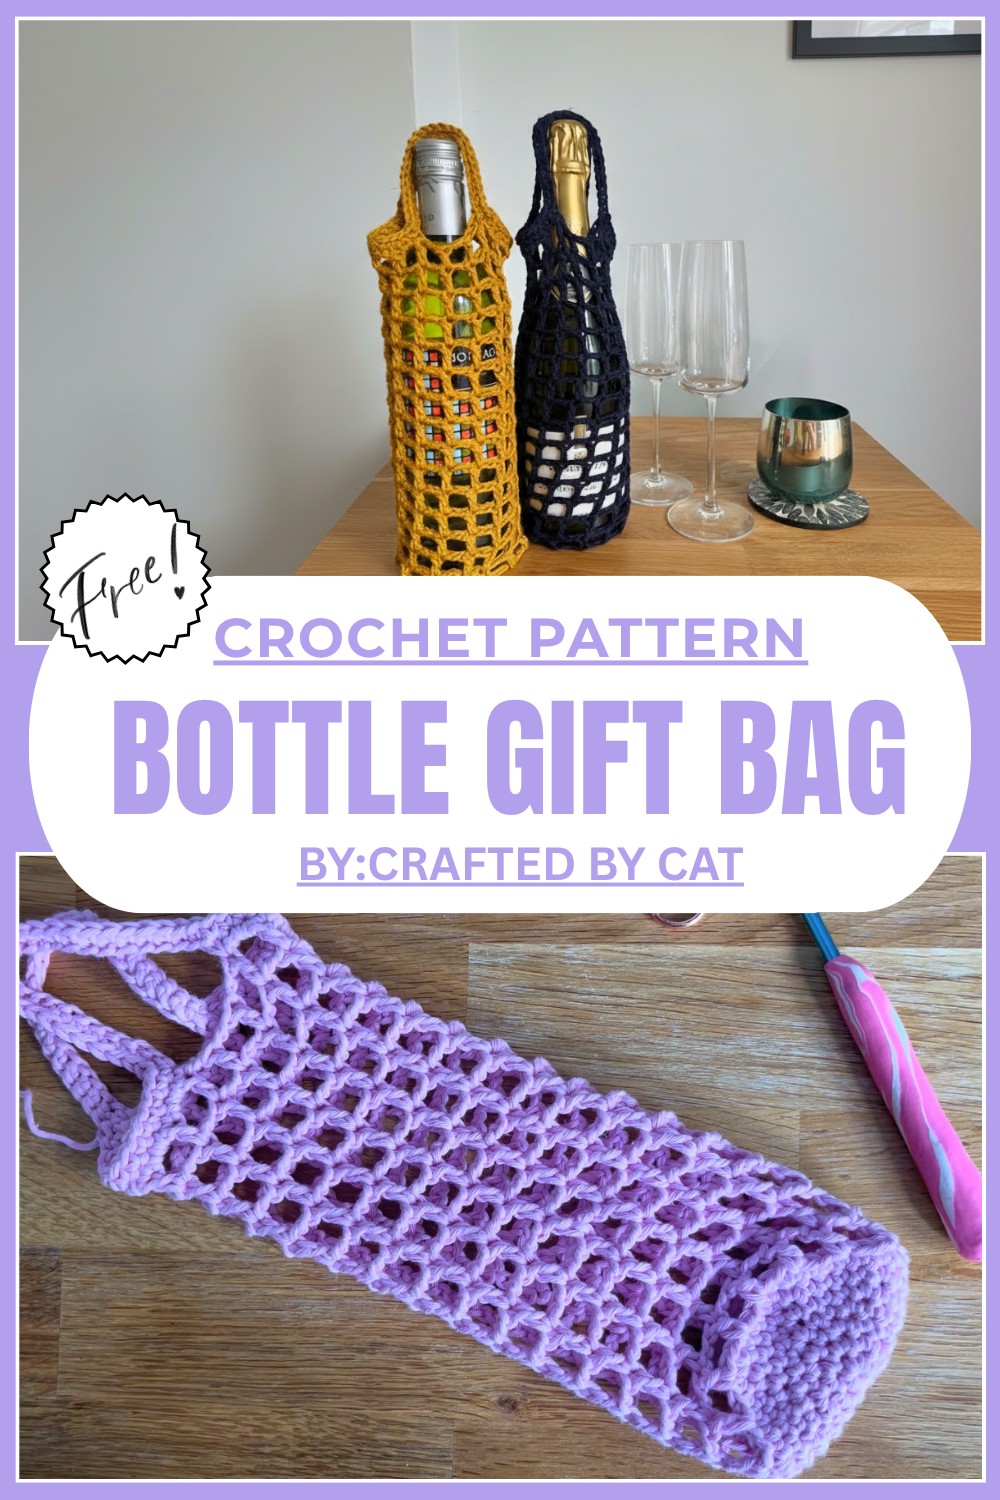
Upgrade Your Gift Game with This Free Crochet Bottle Bag Pattern
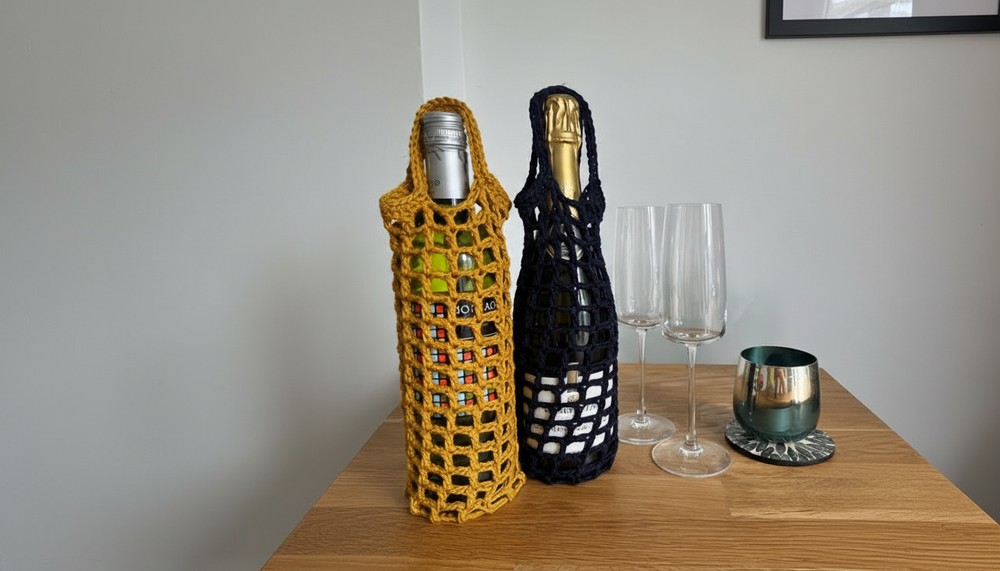
Change a plain bottle into a beautiful present for your friends using this Free Crochet Bottle Gift Bag Pattern. This lovely bag looks like a cozy and colorful sleeve that fits perfectly over any tall bottle to make it look very special. The beauty of this project lies in the pretty holes and open stitches that let the color of the bottle shine through the yarn.
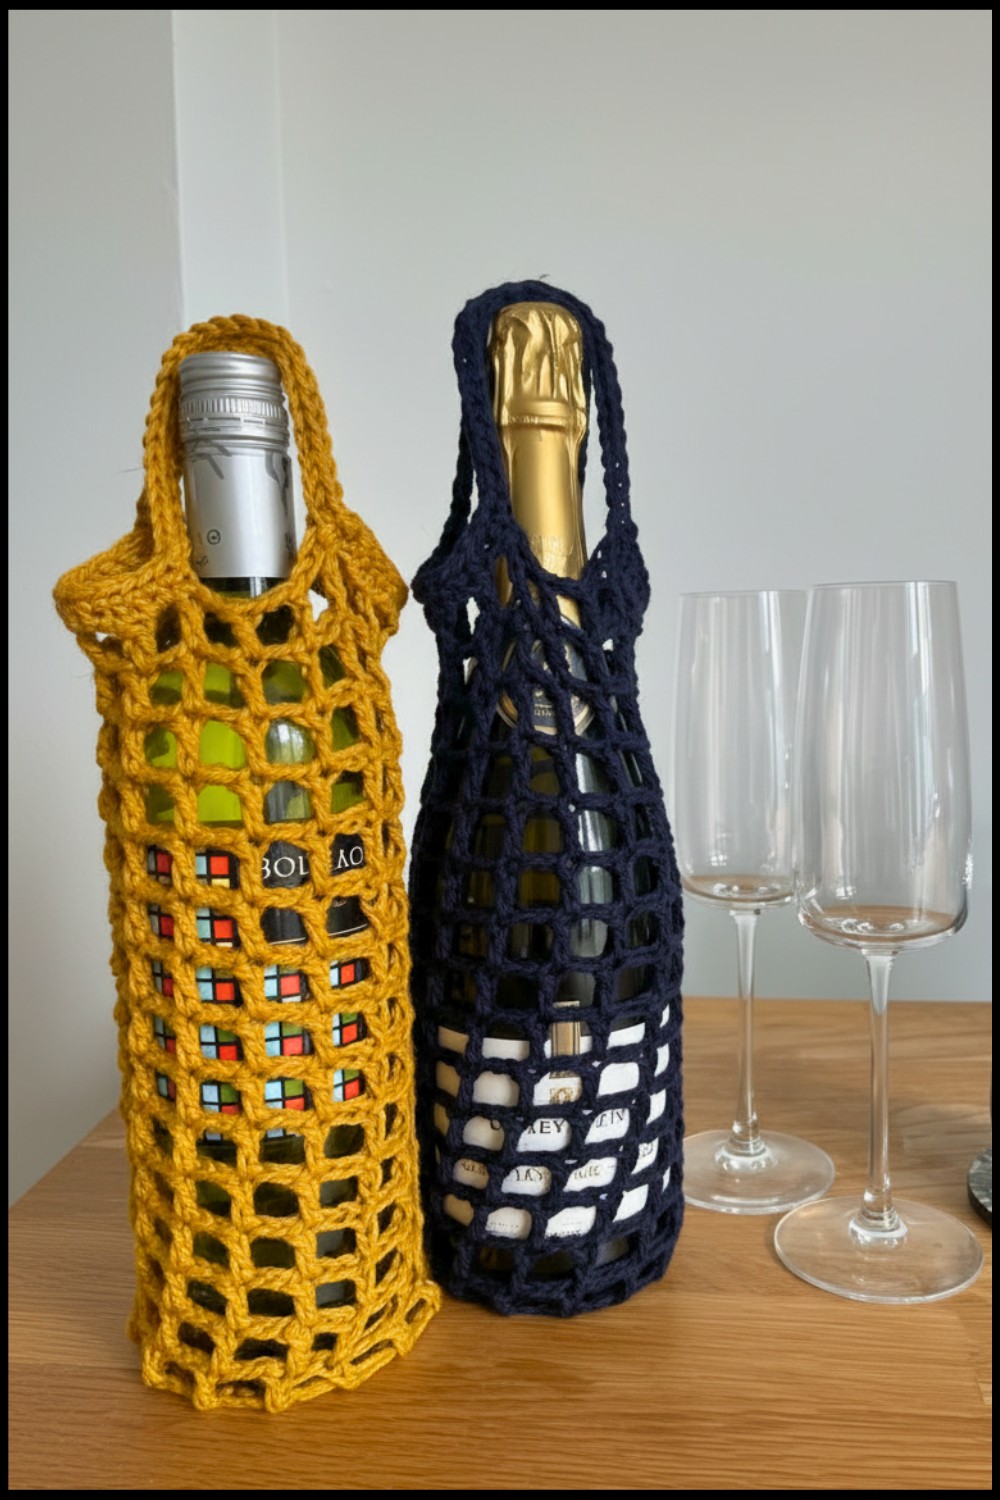 It features a sturdy bottom and a soft handle so you can carry your gift easily to a birthday party or a family dinner. You can use this handy bag to hold juice or water or even as a pretty vase for long flowers in your room. Even though you are just starting to learn the simple steps make it very fast to finish.
Crochet Bottle Gift Bag Pattern
Materials Required
- Yarn: Cotton Aran weight yarn (50g ball). Any Aran weight acrylic yarn can also be used, but cotton yarn will result in less stretch.
- Crochet Hook: 5mm crochet hook.
- Darning Needle: For weaving in the ends.
- Scissors: Sharp scissors for cutting yarn.
- Stitch Marker: Helps track the first stitch of each round (optional but recommended).
Special Techniques Used
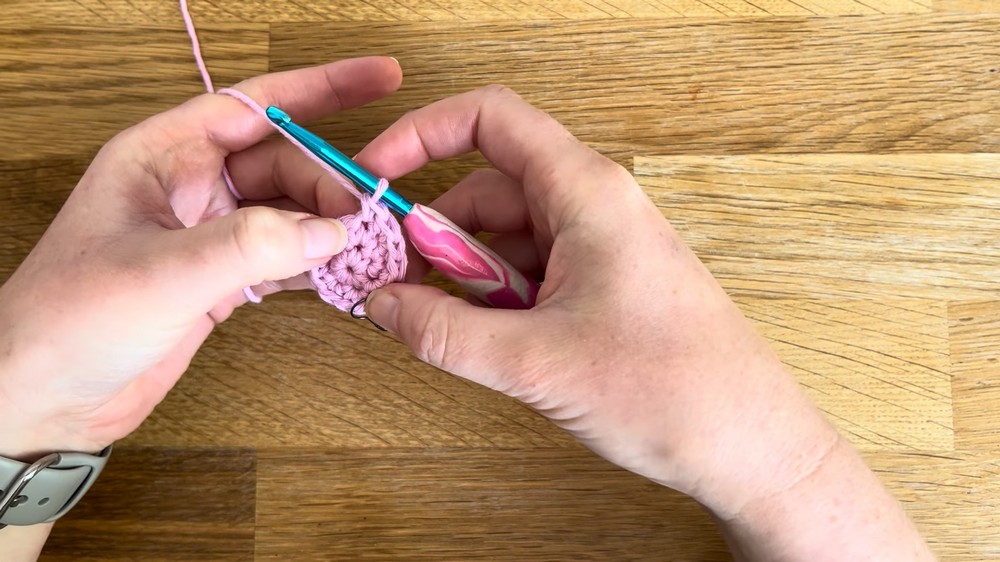
- Magic Circle: A method to start your work in the round.
- Single Crochet (sc): Insert the hook into the stitch, yarn over, pull loop through, yarn over again, pull through both loops.
- Double Crochet (dc): Yarn over, insert hook into stitch, yarn over, pull loop through, yarn over, pull through the first two loops, yarn over again, and pull through the remaining loops.
- Chain (ch): Yarn over, pull yarn through the loop on the hook.
- Slip Stitch (sl st): Insert the hook into the stitch, yarn over, and pull through all loops.
Pattern Instructions
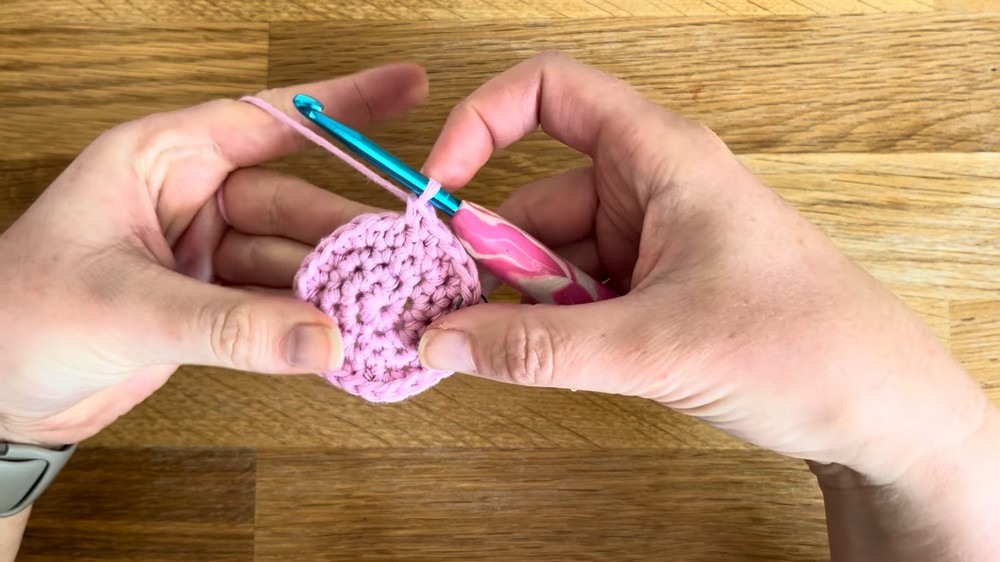
Base of the Bag
- Magic Circle:
- Drape the yarn over your fingers, wrap it around to form a cross, insert your hook under the first strand, pull the second strand through, and turn the hook.
- Chain 1 to finish the circle.
- Round 1: Single crochet 6 times into the magic circle. (6 sts)
- Tip: Tighten the circle by pulling the yarn tail gently.
- Round 2: Work 2 single crochets in each stitch from the previous round. Place a stitch marker in the first stitch to keep track of rounds. (12 sts)
- Round 3:
- Work 2 single crochets in the first stitch, then 1 single crochet in the next stitch. Repeat this pattern all the way around. (18 sts)
- Round 4:
- Work 2 single crochets in the first stitch, then 1 single crochet in each of the next 2 stitches. Repeat this pattern around. (24 sts)
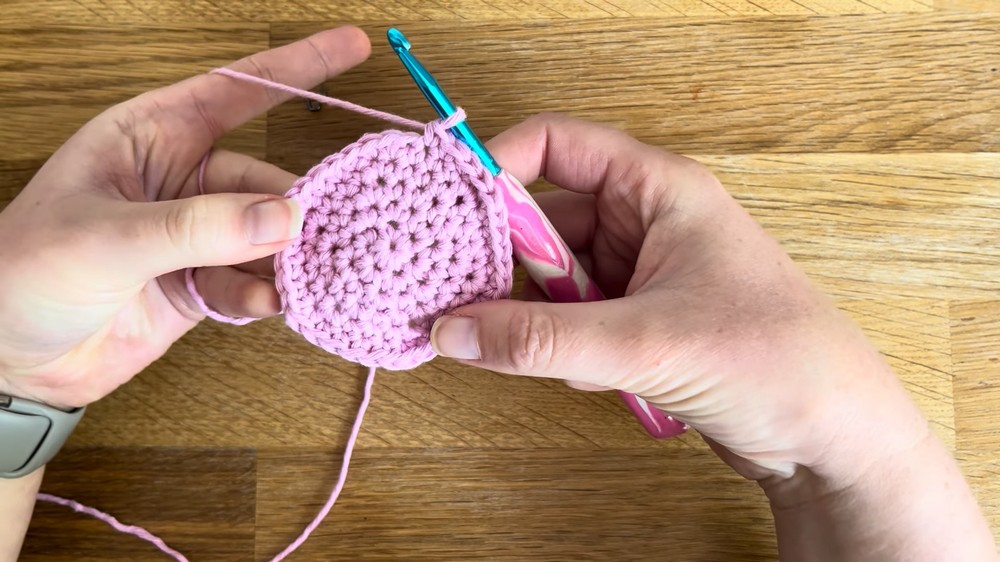
- Work 2 single crochets in the first stitch, then 1 single crochet in each of the next 2 stitches. Repeat this pattern around. (24 sts)
- Round 5:
- Work 2 single crochets in the first stitch, then 1 single crochet in each of the next 3 stitches. Repeat this pattern around. (30 sts)
- Round 6:
- Work 2 single crochets in the first stitch, then 1 single crochet in each of the next 4 stitches. Repeat this pattern around. (36 sts)
- Work 2 single crochets in the first stitch, then 1 single crochet in each of the next 4 stitches. Repeat this pattern around. (36 sts)
- Round 7 (Final Round of Base):
- Work 2 single crochets in the first stitch, then 1 single crochet in each of the next 5 stitches. Repeat this pattern around. (42 sts)
- Work 2 single crochets in the first stitch, then 1 single crochet in each of the next 5 stitches. Repeat this pattern around. (42 sts)
- Slip Stitch and Secure:
- Slip stitch into the first stitch to finish the round.
- This forms the flat circular base of the wine bottle bag.
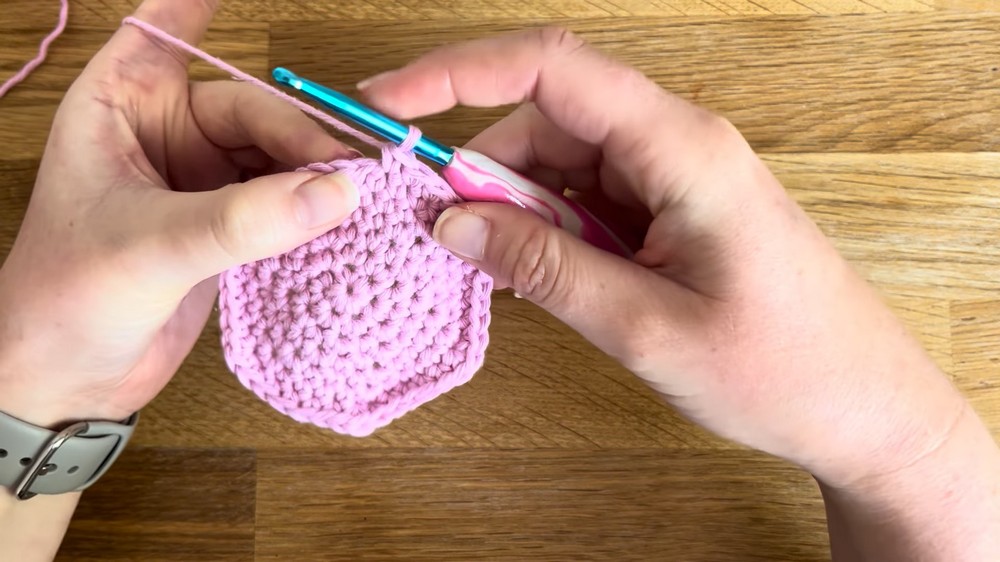
Body of the Bag (Mesh Section)
- Row 1:
- Chain 5 (counts as 1 double crochet and chain 2). Skip 2 stitches, double crochet into the third stitch.
- Repeat this pattern: chain 2, skip 2 stitches, double crochet in the next stitch.
- Continue working around until only 2 stitches remain. Chain 2, skip the last 2, and slip stitch into the 3rd chain of the beginning ch 5.
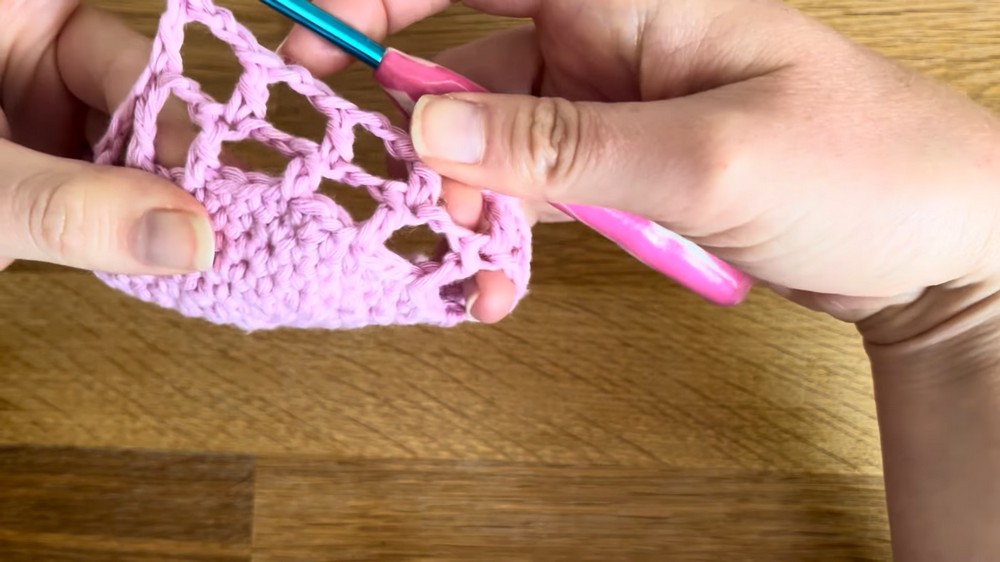
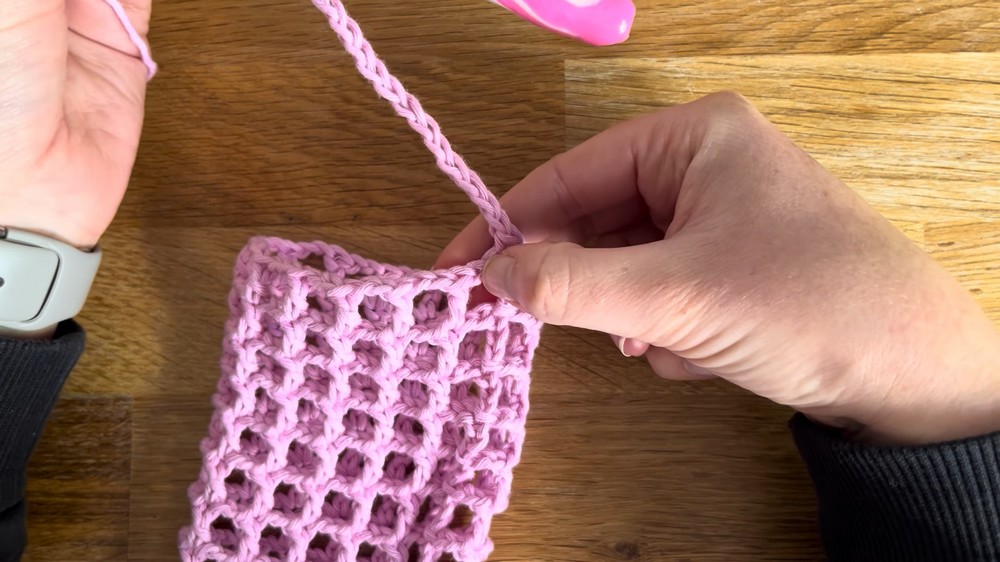
- Rows 2-22 (Mesh Round):
- Chain 5 (counts as 1 dc and chain 2). Double crochet into the double crochet of the previous round, chain 2, and repeat.
- Keep repeating this process around the entire bag until you complete 15 mesh rounds or until the desired height for the bag is reached.
Notes:
- If the bottle is taller, you may add more mesh rows. For shorter bottles, reduce the number of rows accordingly.
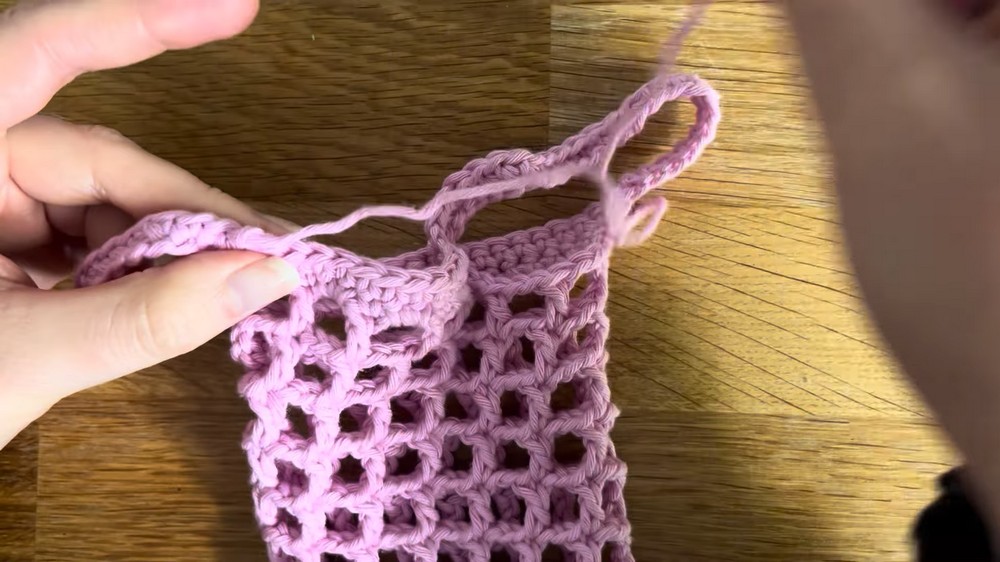
Handles
- Row 23 (Handle Formation):
- Chain 1 (does not count as a stitch), single crochet in the same stitch.
- Chain 25, then skip 2 double crochets and 2 chain spaces (in total, skip 4 spaces).
- Single crochet into the next stitch.
- Work 11 Single Crochets:
- Single crochet twice into the chain 2 space and once into the double crochet. Repeat this process to complete 11 single crochets.
- Second Handle:
- Chain 25, skip the next 2 double crochets and chain 2 spaces, and single crochet into the next stitch.
- Work 11 more single crochets using the same method as before.
- End Round 23: Slip stitch into the first single crochet.
Handle Edging
- Finish Handles:
- Chain 1 and single crochet all the way around the handle (chain) and in each stitch of the bag until you return to where you started.
- Repeat this process for both handles.
- Fasten Off:
- Slip stitch into the first single crochet at the end of the round. Cut the yarn, leaving a short tail, and weave in the ends securely with a darning needle.
Finishing
- Final Stretch: Gently stretch the bag to shape it. The cotton yarn provides good stretch and holds the bottle securely.
- Weaving in Ends: Use a darning needle to hide any loose ends in the bag and ensure neatness.
Final Words and Tips
- Customization: You can adjust the number of mesh rounds and handle length to fit different types of bottles or customize the bag for other purposes.
- Gifting Tip: Pair this wine bottle bag with a unique bottle of wine for a thoughtful and creative gift.
- Care Instructions: Handwash the bag in cool water and lay flat to dry for best results.
- Time to Complete: This project can be completed in about 1 to 1.5 hours, making it a great last minute gift idea.