
Chic Free Crochet Bouquet Shawl Pattern For Every Occasion
Learn how to crochet a beautiful Crochet Bouquet Shawl with this free pattern that is perfect for adding elegance and charm to your outfits.

Free Crochet Bouquet Shawl Pattern That’s Both Stylish and Easy
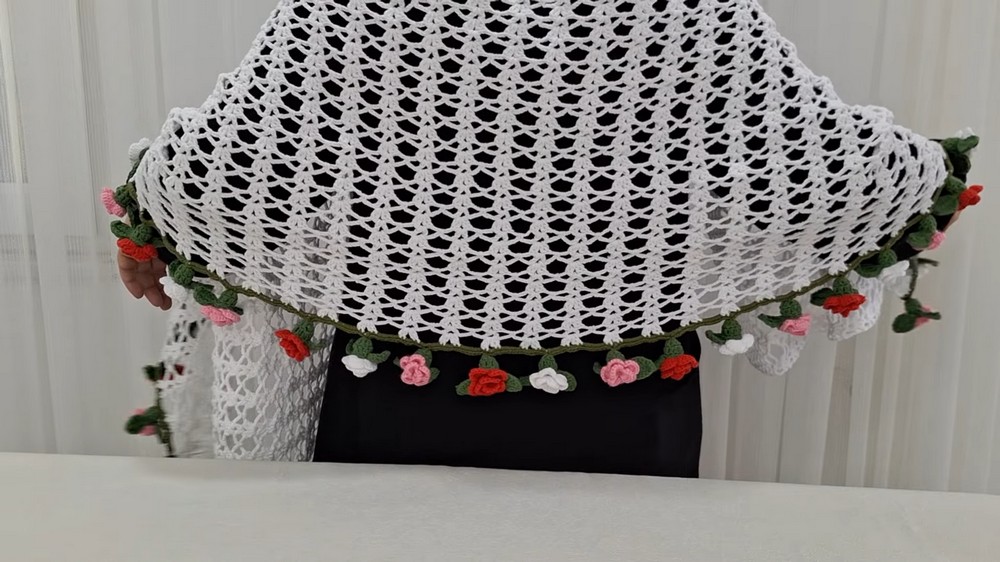
Made something beautiful and delightful with the Free Crochet Bouquet Shawl Pattern that anyone can enjoy making. This pattern is full of charm, featuring rows of cozy crochet stitches decorated with pretty roses and leaves. The shawl looks elegant and brings a warm, stylish touch to any outfit. It’s soft, comfortable, and perfect for adding extra beauty on special days or keeping you cozy at home.
You can choose your favorite colors to make it even more personal. Whether you’re making it for yourself or as a heartfelt gift, this shawl is an easy and fun project that you’ll love. Start creating your own masterpiece today you don’t need to be an expert to make something this stunning.
Chic Free Crochet Bouquet Shawl Pattern
Materials Needed:
- Yarn: Use colors of your choice (green for leaves, other colors for roses, and shawl). Cotton or acrylic yarn is recommended.
- Hook: Crochet hook suitable for your yarn. Recommended hook size: 3mm to 4mm.
- Scissors
- Tapestry needle: For sewing rose and leaf embellishments.
Finished Size:
The final shawl size is customizable depending on the desired length. The video demonstrates 166 rows for the main rectangular body and 36 rows for decorative mesh on top.

Gauge:
Gauge is not critical for this pattern. You may adjust the hook or yarn size to achieve the desired drape or texture.
Pattern Instructions:
Step 1: Beginning the Shawl
- Foundation Chain: Create 9 chains.
- Start with a slip knot: “‘Bismillahirrahmanirrahim,’” (Optional for Islamic blessings).
- Chain 9 stitches.
- Base Row: In the 4th chain from the hook, make 1 double crochet.
- Skip the next 3 chains and make 1 double crochet in the 4th chain. Continue to make another double crochet in the next chain until there are 5 double crochets in total.
- Chains & Turn: Chain 3 stitches, turn your work, and repeat the row by making 5 double crochets per row, aligning them in the "pores" of the previous row.
- Repeat this step for 166 rows to form the rectangular body.
Tip: Ensure your stitches are even for a neat look. Adjust the width or length by crocheting fewer or more rows depending on preference.
Step 2: Mesh Pattern Decor at Top
- Start Mesh: After completing 166 rows, begin the mesh pattern.
- Chain 5 stitches and make 1 double crochet between two rows of double crochet.
- Chain 3 stitches and make another double crochet in the same space.
- Chain 4 stitches, skip two rows of double crochet, and make 1 single crochet in the space just after two rows.
- Repeat: Continue this rhythm of double crochets, single crochets, chains across the row to finish the first mesh row.
- Build Mesh Rows: Turn your work and begin building rows using the above instructions. Repeat the process for 36 rows of decorative mesh.

Step 3: Single Crochet Border
- Attach Yarn: Introduce a green yarn for the border.
- Starting at the last row of mesh, pull the loop with green yarn, creating a connection.
- Single Crochet Stitch: Add 2 single crochets between all edge stitches and space created in mesh rows.
- Make 7 single crochets where there are chains of 7.
- Repeat: Continue across the edge to evenly crochet the border, ensuring the same stitch count for both ends.

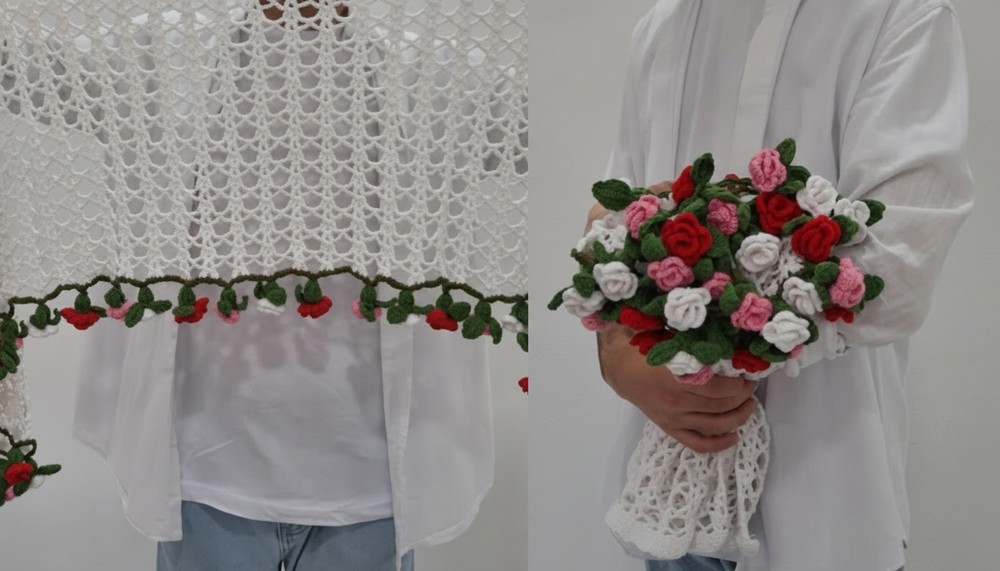
Step 4: Rose Pattern
- Foundation Chain: Begin rose shape with 23 chains in pink/red yarn (or any choice of color).
- Form Loops: Skip 7 chains, and in the 8th stitch, make a long double crochet by wrapping the yarn.
- Chain 4, skip 1 chain, and make another long double crochet. Complete 8 loops in total.

- Chain 4, skip 1 chain, and make another long double crochet. Complete 8 loops in total.
- Rows of Roses: Turn and make 6 double crochets within the first loop formed. Close it with 2 single chains. Continue adding 6 double crochets into each loop across all 8 loops.
- Shape Rose: Finish off and carefully roll the completed flower with the flat side inward (as demonstrated in video). This forms the rose shape. Use a tapestry needle to secure the rose tightly together, stitching it at the base.

Step 5: Leaf Pattern
- Foundation Ring: Begin with a small chain ring in green with 3 chains.
- Fill Center: Add 8 handrails (double crochets) inside the ring. Secure tightly.
- Leaf Shape:
- Begin single crochet at the base. Use following stitches sequentially: single crochet, half double crochet, and double crochet. Follow symmetry to create a sleek leaf like appearance.
- Frame Leaf: Slip stitch around the edge to give a defined structure, ensuring durability and neat shaping.

Step 6: Assembly and Customization
- Placement: Attach flowers and leaves along the edge of the shawl in a sequence. Use vibrant colors to give the shawl an ornamental finishing.
- Sew flowers tightly so they do not shift or unravel.
- Customization: For a personalized design, alter the length of mesh rows or embellishments. You may use beads or glitter thread for additional details.

Special Techniques:
- Slip Stitch: Used to frame leaves or secure embellishments. It creates neat, non bulky finishing edges.
- Floral Attachment: Sew flowers with a tapestry needle ensuring the base is secure and the shawl’s appearance is balanced.

Final Remarks:
Your crochet rectangular shawl is complete, The beautiful diamond mesh pattern combined with elegant roses and leaves makes this piece suitable for formal use or gifting. Its lightweight structure ensures elegance while maintaining versatility. With over 166 rows for the base, 36 rows for mesh, and delicate floral accents, this shawl is both functional and ornamental.
