
Easy Free Crochet Top Pattern That Looks Fabulous
Stitch a smooth and comfy top that feels like a dream by using Free Crochet Top Pattern to build a wonderful and very unique accessory for your summer holiday.
Gorgeous Free Crochet Top Pattern to Create a Cute Summer Look
Freshen your wardrobe with this free crochet top pattern, It’s a simple and fun way to make a stunning handmade top that looks amazing on everyone. This lightweight and stylish top is perfect for sunny days or as a layering piece for any outfit. You only need two balls of acrylic yarn, a crochet hook, and basic stitches like double crochet to create it. The step by step pattern lets you make two flat pieces that are easy to join together into a beautiful top.  Its clean edges and soft texture make it even more appealing. You’ll love how customizable it is—simply adjust the size and choose colors to match your style. This beginner friendly crochet project is not just practical but also elegant, offering comfort and charm all in one.
Elegant Free Crochet Top Pattern
Materials
- Yarn:
- Acrylic yarn, light weight (likely sport or light DK based on the hook size)
- Approx. 200 g total (two balls of 100 g each, as stated in the transcription)
- Crochet Hooks:
- 2.5 mm hook (for main body of the top)
- 3.5 mm hook (for string ties)
- Notions:
- Stitch markers (at least 6–8)
- Yarn needle for weaving in ends
- Scissors
- Measuring tape
Gauge
The video does not provide an explicit gauge. The following is a suggested gauge to help you obtain a similar fabric. Make a small swatch in double crochet using the 2.5 mm hook:
- Work a swatch at least 20 stitches wide and 10 rows high in double crochet (US terms).
- Measure the center (avoiding edges):
- Target (approximate) gauge:
- 20–22 double crochet stitches = 10 cm (4 in)
- 10–11 rows = 10 cm (4 in)
- Target (approximate) gauge:
This is only an estimate. Adjust your hook size to get a fabric you like:
- If the fabric feels too stiff, go up to a 3.0 mm hook.
- If the fabric feels too loose, go down to a 2.25 mm hook.
Finished Size (Approximate)
The instructor uses a 30 cm neck to neck measurement (front width from one shoulder edge to the other). The length is built by working:
- 20 rows with increases, plus
- 20 rows without increases,
for a total of about 40 rows.
Because the video is demonstration based and exact numbers (bust, length) are not clearly given, treat this as a small to medium size. You should:
- Measure your own shoulder width (neck to neck) and adjust the starting chain.
- Measure desired top length from shoulder to hem and adjust row counts.
At the end of the pattern, there is a section on customization to help you adapt it to your size.
Construction Summary
- Make two identical rectangular panels:
- Start with a chain that matches your neck to neck measurement (front width).
- Work 20 rows with light increases at one side.
- Then work 20 rows straight.
- Edge each panel with single crochet all around.
- Join panels at the shoulders with slip stitches.
- Mark armholes and side openings with stitch markers.
- Add string ties at the marked positions with a thicker yarn (doubled) and a 3.5 mm hook.
Abbreviations (US Terms)
- ch = chain
- st(s) = stitch(es)
- sl st = slip stitch
- sc = single crochet
- dc = double crochet
- RS = right side
- WS = wrong side
- rep = repeat
Measurements and Starting Chain
- Use a measuring tape to measure from one shoulder edge to the other at the base of your neck (front neck to neck).
- The instructor uses 30 cm.
- With the 2.5 mm hook, make a foundation chain that equals this measurement:
- For 30 cm, the video uses a chain of 70.
- This is a reference: your chain count may be different depending on your yarn and tension.
- Lay the chain flat and measure it.
- It should be approximately your neck to neck measurement (within 1 cm is fine).
- If it is too short, add a few chains; if too long, remove a few chains.
Panel 1 – Body
You will make two identical panels.
Foundation Chain
- With 2.5 mm hook, ch 70 (or your own adjusted number to match your measurement).
- Ensure the chain is not twisted and lies flat for measuring.
Row 1: Set Up in Double Crochet
From the transcription:
“Now you're going to chain one skip the first two loops into the first loop and make a double crochet…”
The spoken instructions are slightly unclear, but the visible method is standard:
- Ch 1 or ch 2 after your foundation chain to bring the yarn up to height.
- For consistency, we will use ch 2 as a turning chain for double crochet, not counting it as a stitch.
- Turn your work.
- Row 1 (DC across):
- Dc in the first chain from the hook (skipping the turning chain).
- Dc in each chain across.
You should have one dc in every chain.
- At the end of the row, you should have 70 dc (if you started with 70 chains and are not counting the turning chain as a stitch).

Rows 2–20: Slight Increase at One End
From the transcription:
“We are now going to work an increase… But from this row and going forward we are going to be doing an increase at the end of the row until we have a total of 20 rows…”
You will work very minimal shaping by placing two dc in the last stitch of every row.
Row 2
- Ch 2, turn.
- Dc in the very first stitch (the stitch at the base of the turning chain).
- Dc in each stitch across, until you reach the last stitch of the row.
- Increase at end: Work 2 dc in the last stitch.This completes Row 2.
Row 3
From the transcription:
“Row three chain two turn your work start from the very first loop with a double crochet… put no increase since we have it at the end of the row work a double crochet until the end of the row… Again you're going to work two double crochet in the end for our increase.”
Despite the word “no increase,” the very next sentences confirm we still place 2 dc in the last stitch for the increase.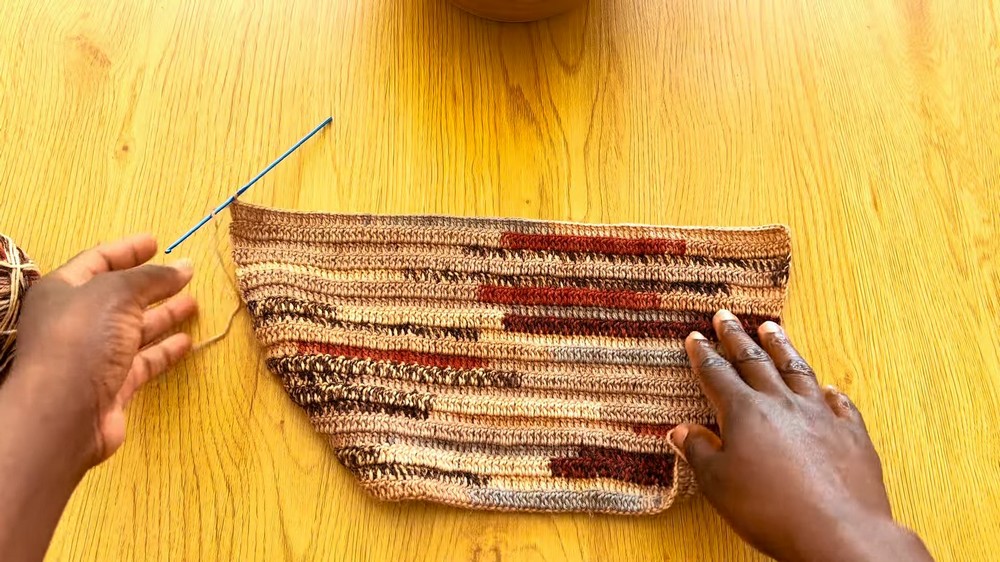
So Row 3 is:
- Ch 2, turn.
- Dc in the first stitch.
- Dc in each stitch across, until the last stitch.
- 2 dc in the last stitch (increase).
Rows 4–20
- Repeat the process from Row 3, always:
- Ch 2, turn.
- Dc in the first stitch.
- Dc in each stitch across.
- 2 dc in the last stitch.
Continue until you have 20 rows total (Row 1 through Row 20). The shaping remains subtle because you are only adding one extra stitch per row.
At the end of Row 20, you should see a gentle diagonal edge at the side where you added the increases.
Rows 21–40: Straight Rows (No Increases)
From the transcription:
“And now we are going to work 20 rows of double crochets without any increase at the end of the row which makes a total of 20 rows… I am getting done with my 40th row of double crochet.”
Now you will just work straight to build length.
For Row 21:
- Ch 2, turn.
- Dc in the first st and in each st across.
- Do not place any increases; work exactly one dc in each stitch.
Repeat Row 21 for Rows 22–40:
- Ch 2, turn. Dc in each stitch across, no increases.
At the end of Row 40, you have one completed panel.
Panel 2 – Make a Second Identical Piece
- Repeat the entire process from the Foundation Chain through Row 40 to create the second panel.
- Ensure both pieces have the same number of rows and stitches, and that they are similar in shape and size.
Edging Both Panels in Single Crochet
From the transcription:
“You are going to chain one and work a single crochet in each double crochet. You put two single crochets to clean up the edges of our piece… all around the entire piece neck arm waist below all over.”
You will now tidy the edges of each panel with single crochet.
Edging Round (Work on Each Panel Separately)
- Attach yarn in any corner of the panel (with the 2.5 mm hook).
- Ch 1.
- Work sc evenly around the entire rectangle:
- Along the top and bottom edges (row ends with dc stitches):
- Place 1 sc in each dc.
- Along the sides (the row edges):
- Place 2 sc per row edge (as stated: “two single crochets on each double crochet”) to fill in the gaps and create a smooth edge.
- Along the top and bottom edges (row ends with dc stitches):
- When you get back to the starting point, join with a sl st to the first sc.
- Fasten off and weave in ends.
Repeat for both panels.
Assembly – Joining the Shoulders
From the transcription:
“And you need two pieces of these… get your stitch markers and put on the shoulders. I counted 10 10 loops for each from shoulder to neck towards neck 10 loops… I'm going to use a slip stitch to join the two pieces together.”
Step 1: Align Panels
- Lay the two panels with right sides facing each other (RS to RS).
- Align the top edges (the edges that will become your shoulders and neckline).
Step 2: Mark Shoulder Seams
- On the top edges, count in from each outer edge toward the center:
- Mark 10 stitches from each side with stitch markers to define where the shoulder seam will end toward the neck.
- This leaves an opening in the middle for the neck.
- Place stitch markers through both panels at these points so they line up exactly.
Step 3: Join Shoulders with Slip Stitch
You will join from the outer shoulder edge inward until you reach the marker.
- Attach yarn at the outer edge of one shoulder (through both layers).
- Sl st through both layers, stitch by stitch, until you reach the stitch marker (the “10th loop toward the neck”).
- Fasten off and weave in ends.
Repeat on the other side:
- Attach yarn at the opposite shoulder outer edge.
- Sl st through both layers until the second marker.
- Fasten off and weave in ends.
Now your shoulders are joined, forming a neckline in the center.
Marking Armholes and Side Openings
From the transcription:
“I have attached my stitch markers I went on the row 20 I attached my stitch marker I skipped 10 rows and I attached the next… The same on the other side.”
You will create side openings with ties instead of fully seamed sides.
Step 1: Lay the Top Flat
- Lay your assembled piece flat with RS facing up.
- The joined shoulders are at the top.
Step 2: Place Stitch Markers for Side Openings
- Starting from the top shoulder seam and going down the side seam:
- Locate Row 20 on the side edge (this is where the increase section ends and straight section begins).
- Place a stitch marker at that point on both front and back panels.
- From that marker, count 10 rows downward toward the hem and place another marker.
- This defines a vertical segment where the ties will later be attached.
- Repeat on both sides of the top, so you have matching marker pairs front and back.
These markers will be the anchor points for your side strings. The area between markers will remain open and be held together by the ties.
Adding Side Strings (Ties)
From the transcription:
“And now I switch to a 3.5 mm hook. So I doubled my yarn because I want the strings to be thicker… I'm going to do strings as usual a chain on all the stitch markers and then our piece is ready.”
Step 1: Prepare Yarn for Strings
- Double the yarn strand (use two strands held together) for each string.
- Use the 3.5 mm hook.

Step 2: Attach and Chain Strings
You can make the ties as long as you prefer. A starting suggestion is 40–60 chains per tie, but adjust to your taste.
At each stitch marker:
- Insert the 3.5 mm hook into the stitch where the marker is placed (through one layer – front or back, depending on where you want the tie to attach).
- Attach your doubled yarn and ch 40–60 (or desired length).
- Fasten off and pull tight to secure.
Repeat at all stitch marker positions:
- Typically, you will place at least one tie per marker; common arrangements:
- One tie at the front marker, one at the corresponding back marker, so they can be tied together.
- Or, if preferred, attach ties directly across from each other and simply knot them.
The pattern suggests tying at multiple levels for decorative purposes, but you may use your own style.
Special Techniques Used
- Simple Increase at Row End:
- Placing two double crochets into the last stitch of a row to increase width gradually.
- Even Side Edging:
- Working 2 sc into each row edge along the sides to create clean edges and stabilize the fabric.
- Joining with Slip Stitch:
- Holding two layers together and inserting hook through both, then making a sl st in each matching stitch to seam the shoulders.
- Doubled-Yarn Chains:
- Holding two strands of yarn together to make stronger, thicker chains for ties.

- Holding two strands of yarn together to make stronger, thicker chains for ties.
Customization Ideas
- Width Adjustments:
- Increase or decrease the starting chain to suit your shoulder/neck width.
- Always work a foundation chain that measures your desired neck-to-neck distance.
- Length Adjustments:
- Add more rows after Row 40 for a longer top.
- Work fewer rows if you prefer a crop top.
- Bust and Hip Fit:
- For a looser fit, consider:
- Adding more initial stitches and/or
- Increasing for more than 20 rows, or increasing more often (e.g., 2 increases every other row).
- For a more fitted top, keep the current increase scheme and adjust only the length.
- For a looser fit, consider:
- Sleeve Options:
- You can extend short sleeves by working additional rows of dc or sc around the armhole after seaming, forming cap sleeves or short sleeves.
- Neckline Shape:
- To make a deeper front neckline, leave more stitches un-joined at the front shoulder area when seaming.
- Decorative Edging:
- Replace the plain sc edging with a simple shell stitch or picot edge for a more decorative look.
- Color Play:
- Use different colors for each panel, or alternate colors every few rows.
- The video mentions the colors blending beautifully; you can use variegated yarn for a similar effect.
Tips for Success
- Measure Often:
Check width and length as you go, especially before committing to all 40 rows. - Keep Tension Even:
Consistent tension will keep both panels the same size and ensure a neat seam. - Count Rows:
Make sure both panels have exactly the same number of rows (40) to match up perfectly. - Mark the Increase Side:
Use a stitch marker or safety pin on the side where you are increasing so you do not accidentally switch sides. - Try On Before Finalizing Strings:
After seaming the shoulders and edging, try the garment on. Adjust marker placement for armholes and side openings before adding ties.
Final Look and Important Remarks
When completed, this top will:
- Have a simple, elegant shape built from two rectangles.
- Show a slight flare or gentle shaping due to the minimal increases up to Row 20.
- Have clean, smooth edges from the single crochet border around all sides.
- Feature open sides with chain ties, giving a modern, adjustable, and slightly boho appearance.
- Be suitable for beginners yet stylish enough to wear casually or layered over other clothes.
The instructor describes it as:
- “Beginners friendly”
- “Absolutely beautiful”
- “I love the color blends”
With just two 100 g balls of acrylic yarn, a 2.5 mm hook, and very basic stitches, you can recreate this light, attractive top. Adjust the measurements and details as needed, and consider the suggestions above for personalization.