
Simple Free Crochet Cushion Cover Pattern That Adds Charm To Any Room
Keep your room neat and comfy with this Free Crochet Cushion Cover Pattern that helps you make a soft pillow cover for sofa, chairs and bed use.

Upgrade Your Room Decor with Free Crochet Cover Pattern
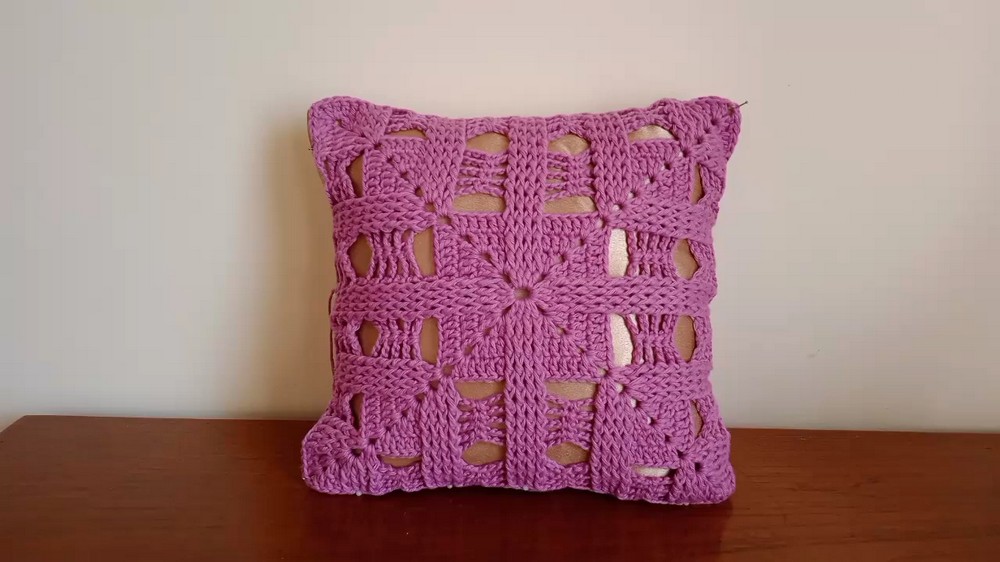
Turn simple yarn into a stunning crochet cushion cover that adds both charm and comfort to your space. This free crochet cushion cover pattern is made with soft cotton yarn and features an eye catching square geometric style. The raised textures with front post double crochets give it a unique and stylish look, perfect for your living room or bedroom.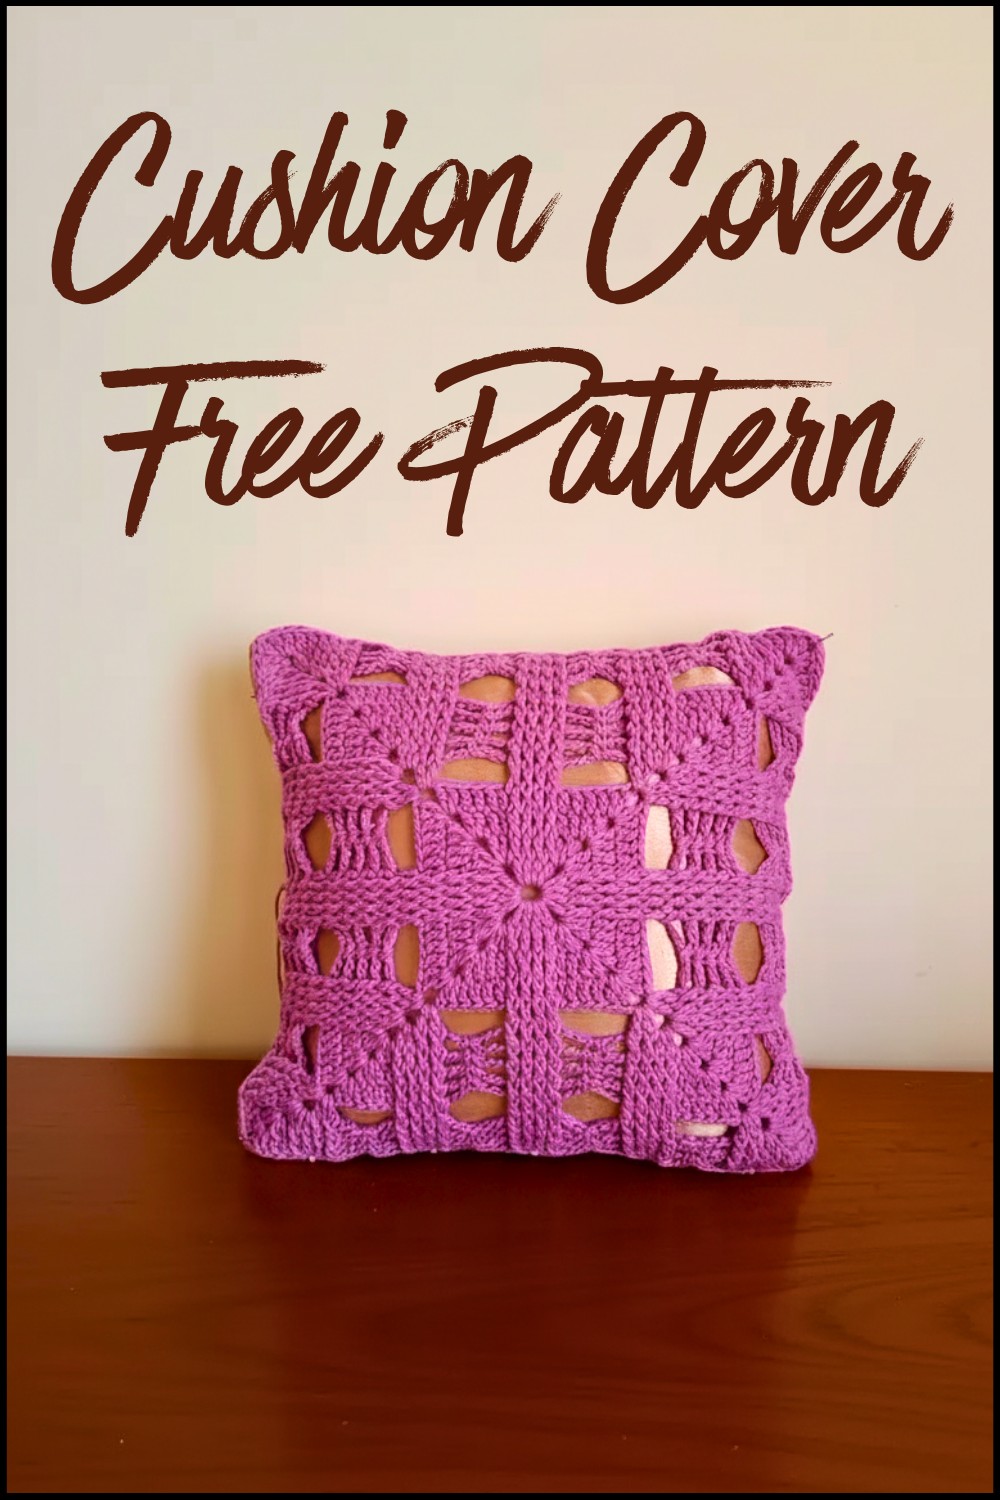 It’s easy to adjust the size, so it works for all types of cushions. The soft and modern appearance makes this piece a favorite for both beginners and experienced crocheters. Whether you want to refresh your home or add a cozy touch, this cushion cover is as practical as it is beautiful.
Crochet Cushion Cover Pattern
Materials Needed
- Yarn: 100% cotton yarn (thicker cotton recommended). Choose your favorite colors; a solid color or contrasting shades can work beautifully for the geometric effect.
- Hook: 4.5 mm crochet hook.
- Tapestry Needle: For weaving in the ends and attaching the panel to the cushion cover.
- Scissors: For cutting yarn as needed.
- Cushion Insert: Ensure it matches the size of your finished piece or customize the size accordingly.
- Sewing Machine or Needle and Thread: For assembling the final cushion cover.
Gauge
To achieve the desired size:
- Gauge: 8 double crochets × 4 rows = 2 inches (or adjust based on your tension and yarn weight).
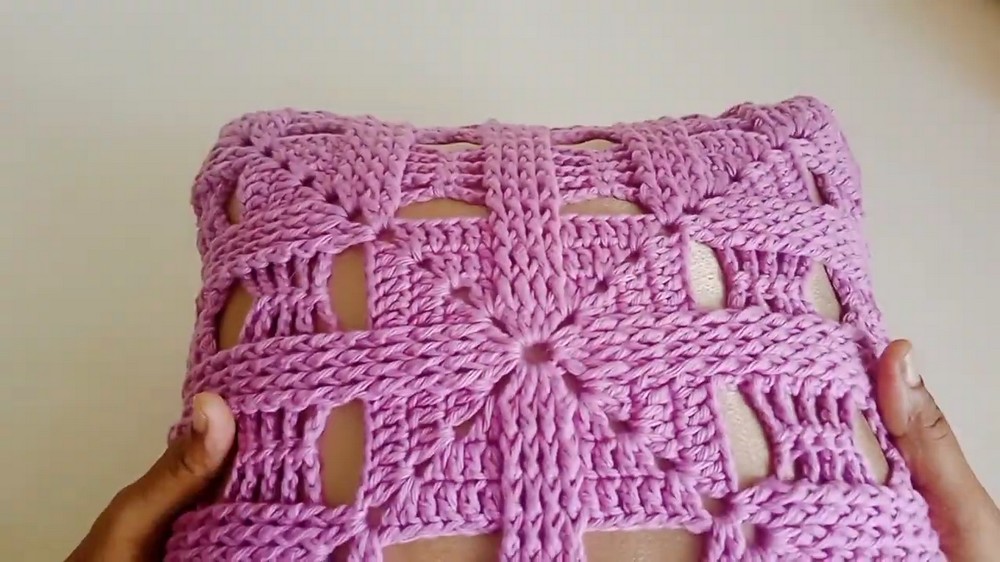
Finished Size
- Approximately 12 x 12 inches after completing 15 rows. Add more rows for a larger size or stop earlier for smaller covers.
Special Stitches
- Front Post Double Crochet (FPDC):
- Yarn over, insert hook from front to back around the post of the stitch indicated.
- Yarn over again, pull through, yarn over, and complete as a double crochet.
- Slip Stitch (sl st):
- Insert hook into the stitch, yarn over, pull through the loop on the hook.
Pattern Notes
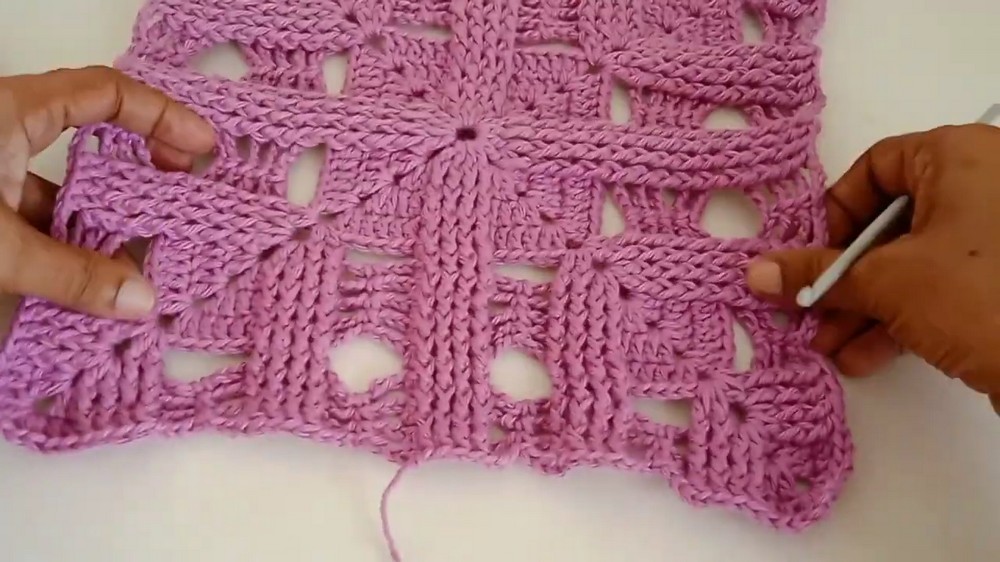
- The pattern is worked in rounds, creating a square motif with a geometric design.
- Corners are formed by adding 2 double crochets, chain 2, and 2 more double crochets within the corner spaces.
- The stitch count increases with each row as additional double crochets are added.
- Front post stitches create the raised texture and geometric effect.
- Chains between double crochet clusters allow for spacing and structural definition.
Pattern Instructions
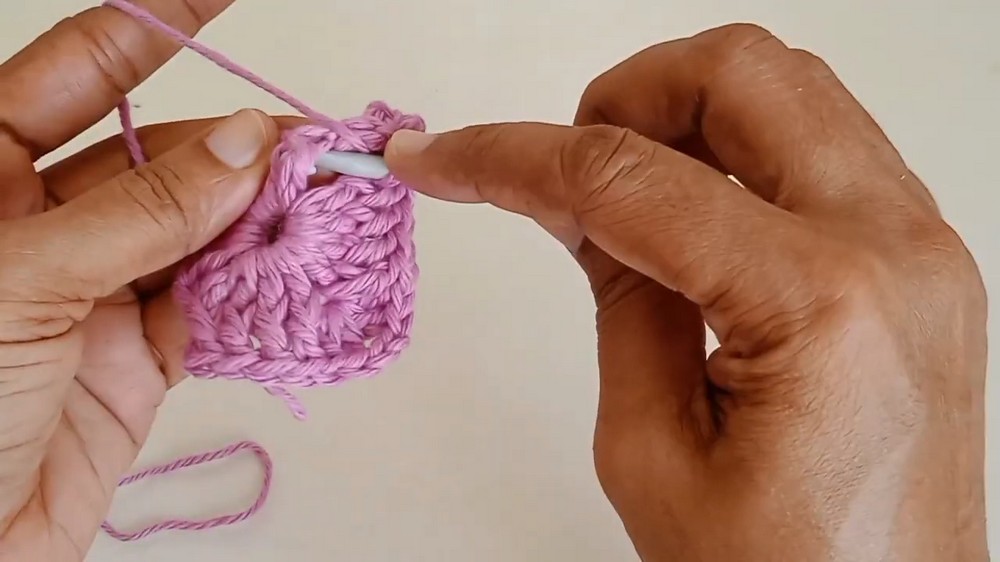
Step 1: Foundation Chain & Ring
- Chain 8, then slip stitch (sl st) to the first chain to form a ring.
Step 2: Round 1
- Chain 3 (counts as the first double crochet).
- Make 16 double crochets (dc) into the ring, working in a circular motion.
- Slip stitch to the top of the starting chain to close the round.
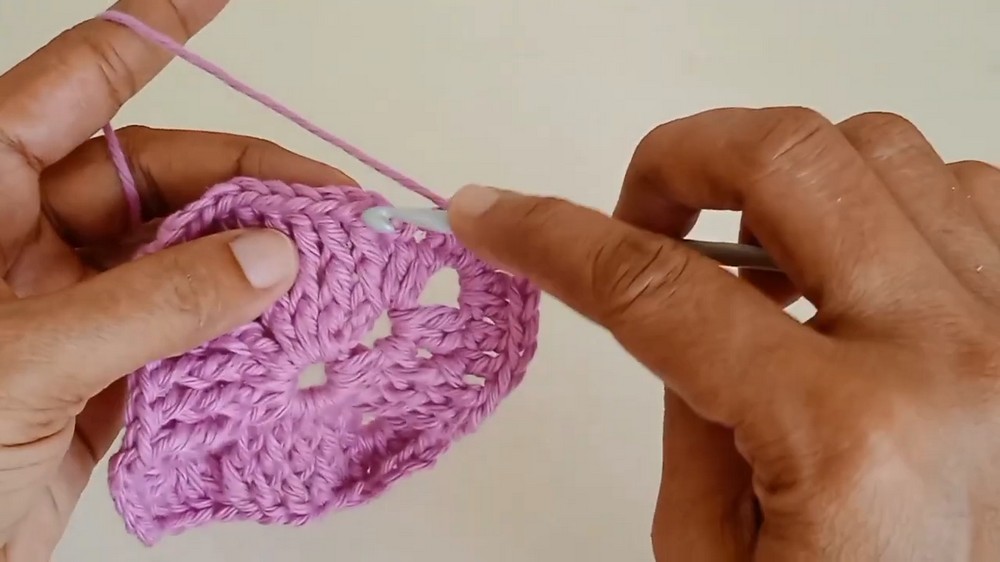
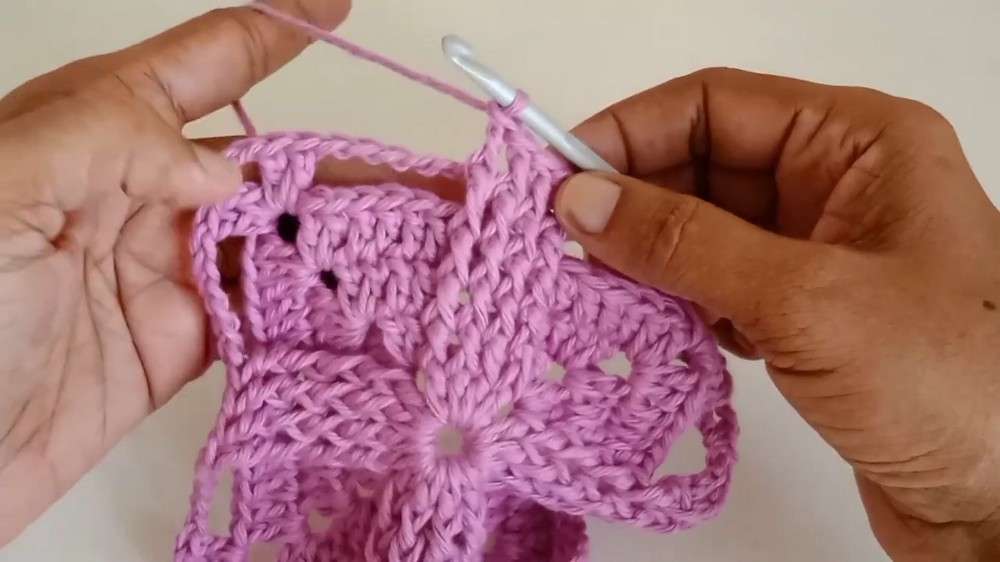
Step 3: Round 2
- Chain 2 (counts as the first front post stitch).
- Work 4 front post double crochets (FPDC) over the next 4 posts.
- To form a corner: Chain 2, then work 4 double crochets (dc) into the next set. Repeat the 4 front post double crochets along each side.
- Continue this pattern: 4 FPDC, followed by 4 dc, and complete 4 sides. Corners are formed by chain 2 between sets of 4 dc.
- Slip stitch to the base of the first front post to close the round.
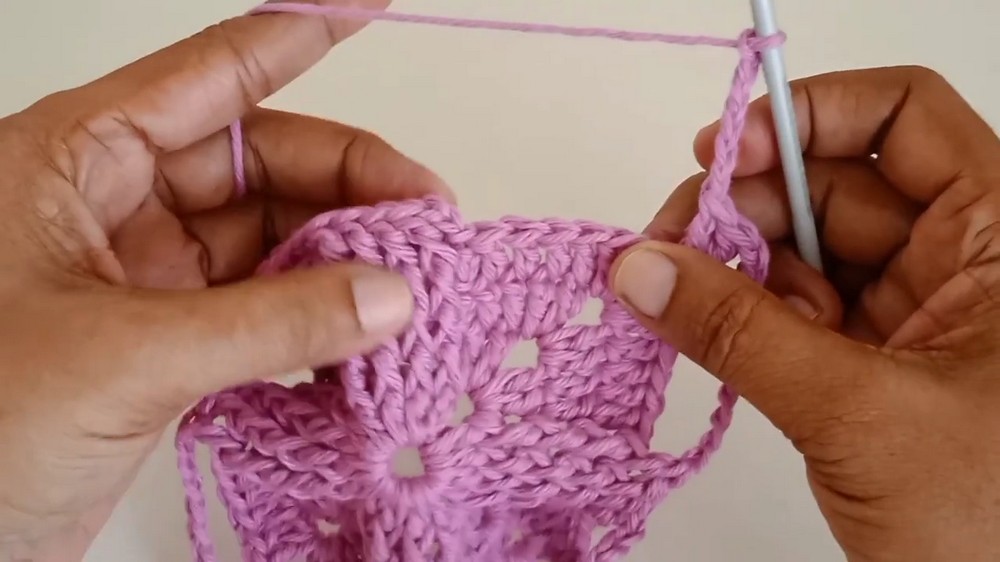
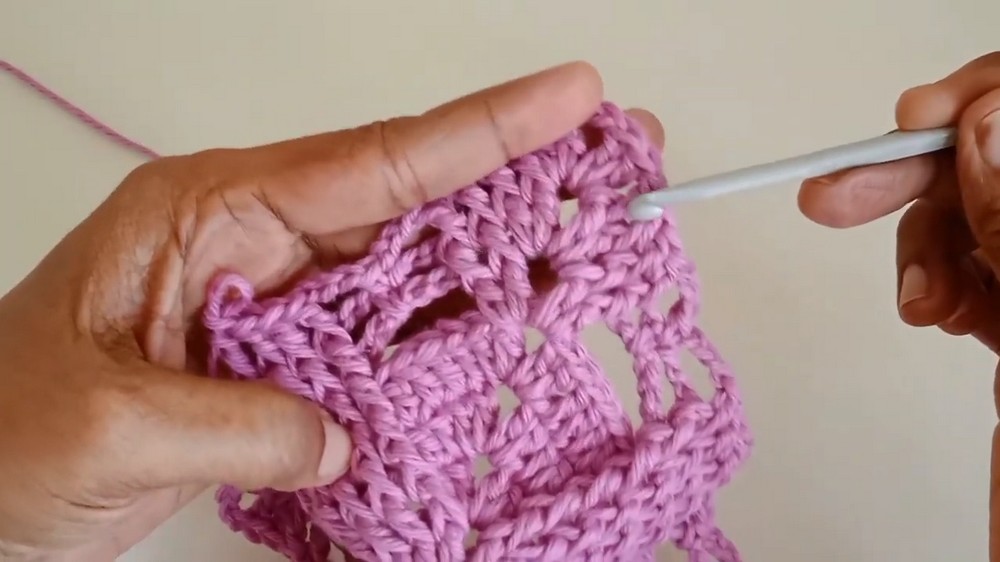
Step 4: Round 3
- Start by chaining 2 and repeat the front post stitches (FPDC) over all the 4 double crochets of the previous round along the sides.
- In corner chain 2 spaces, work: 2 double crochets, chain 2, 2 double crochets.
- Continue working 4 FPDC along the sides and forming corners as described. Close with a slip stitch.

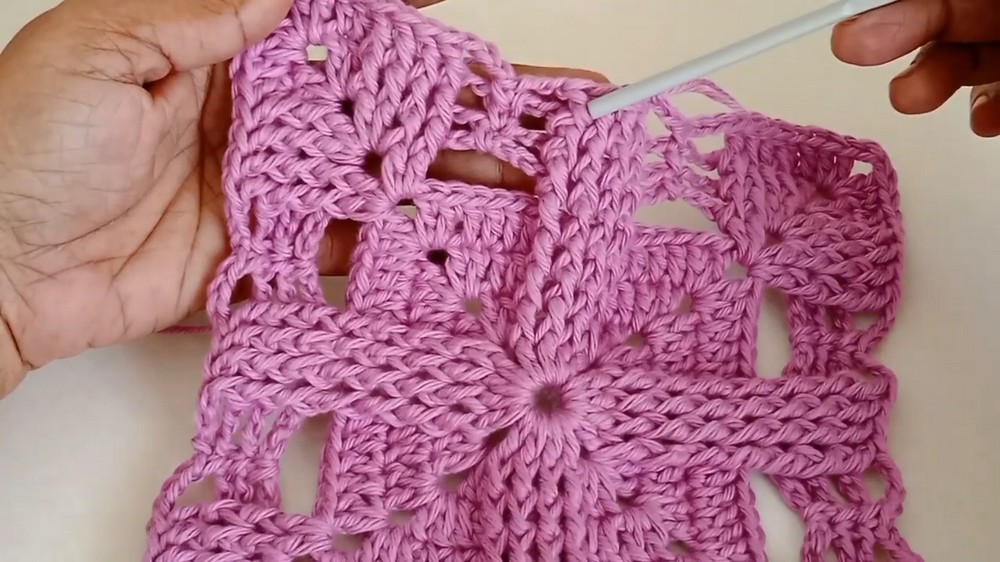
Step 5: Round 4 & Beyond
- Repeat the FPDC stitches along the sides and add 2 double crochets, chain 2, 2 double crochets at each corner.
- Ensure that the number of double crochets along each side increases with each round.
- Maintain the geometric pattern as follows:
- Front posts for raised texture along the sides.
- Corners worked into chain space with 2 dc, ch 2, 2 dc.
- Chains and gaps appear as the cushion expands. In later rows, spaces between double crochets are replaced with chain 6 skips, allowing the pattern to open up.
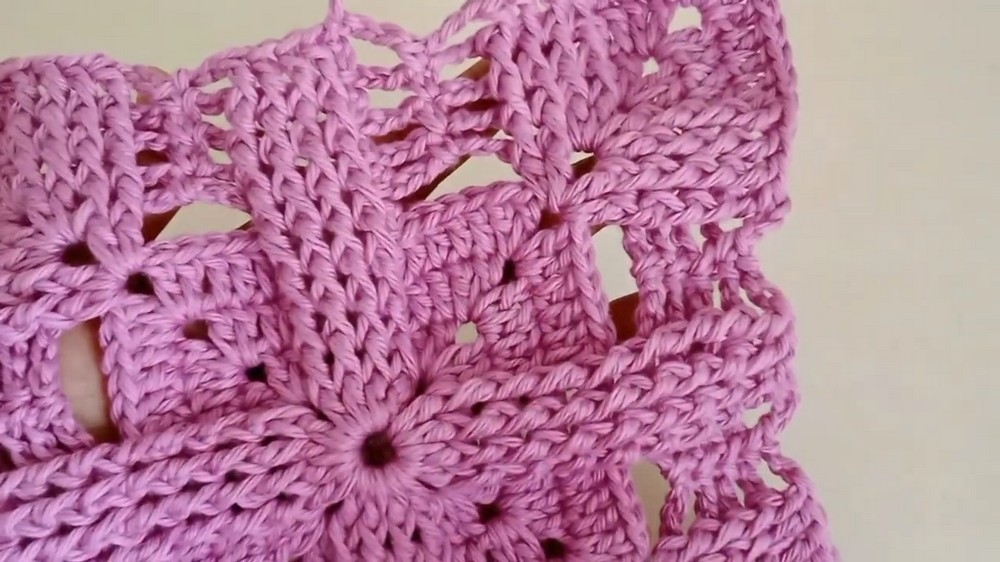
Step 6: Final Rows
- As you approach the desired size (15 rows or larger), introduce chain spaces as separators for a more intricate geometric design.
- Consistently maintain 4 FPDC across the sides and complete corners as specified.
Finishing the Cushion Cover
- Attach Panel:
- Lay the completed crochet square over the cushion insert or fabric cover.
- Sew along the edges using a sewing machine or neat hand stitching.
- Tip: Use a thread that matches the yarn color for a seamless finish.
- Lay the completed crochet square over the cushion insert or fabric cover.
- Weave In Ends:
- Use a tapestry needle to tuck in all loose ends neatly to prevent unraveling.
- Use a tapestry needle to tuck in all loose ends neatly to prevent unraveling.
Tips for Success
- Gauge Matters: Start with a test swatch to ensure the correct size.
- Customize the Size: Add or subtract rows as needed to fit your chosen cushion insert, keeping the geometric pattern intact.
- Play with Colors: Use multiple colors for a vibrant design, or keep it monochromatic for a modern aesthetic.
- Keep a Consistent Tension: Ensure uniform stitches to maintain a neat, structured look.
Customization Ideas
- Color Blocking: Change colors every few rows to create bold stripes or sections.
- Border Design: Add a decorative edge (e.g., picot or scallop) for a more detailed finish.
- Combine Motifs: Crochet multiple geometric squares to create a blanket or larger piece.
Conclusion
This Geometric Crochet Cushion Cover provides a simple yet stylish design fit for every level of crocheter. The repetitive nature of the pattern makes it easy to follow and meditative, while the front post stitches add texture and depth. Whether you're a beginner or experienced, this project offers endless possibilities for creativity and customization. Your finished piece will be a stunning addition to your home décor, showcasing your style.
Final Remarks
- This project uses achievable techniques, making it beginner-friendly. Focus on maintaining even edges and uniform stitches for a professional finish.
- Enjoy the flexibility to transform this pattern into cushion covers, blankets, or other home décor accessories.
- Don't forget to relax, enjoy the process, and marvel at your beautiful handmade creation.