
Stylish Crochet Ruffled Sweater Pattern That Radiates Comfort
Feel cozy and stylish with a charming crochet ruffled sweater pattern that adds warmth and playful flair to your everyday wardrobe effortlessly.
Soft yarn and playful ruffles come together to create a sweater full of charm and warmth. The ruffles add gentle movement, giving a lively and unique look that stands out without being too much. Perfect for cooler days, this cozy sweater offers comfort while bringing a fun and stylish touch to any outfit.

Free Crochet Ruffled Sweater Patern for Everyday Warmth
Layers of flowing ruffles catch the eye and add texture, making the sweater feel special and full of personality. Ideal for casual wear or relaxed outings, it brightens up the wardrobe with its cheerful and snug design. This sweater is a lovely way to enjoy both comfort and style in one piece.

Crochet Spring Sweater with Ruffles Pattern
Materials Needed
- Thin soft acrylic yarn (e.g., Madame Tropic Kitty Baby, 100% acrylic)
- 3.5 mm crochet hook
- Scissors
- Stitch markers
- Yarn needle for weaving ends
- Measuring tape
Special Features
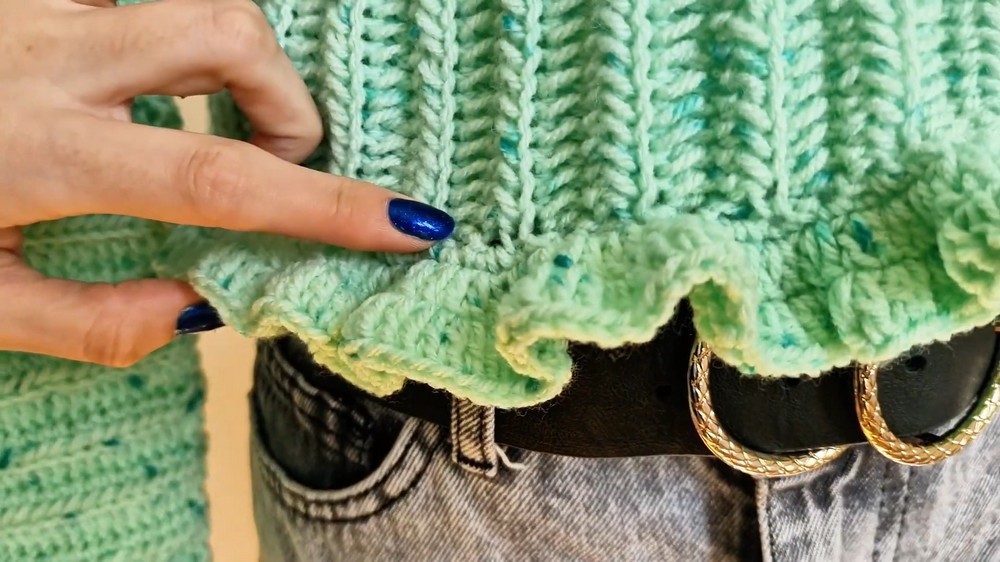
- Half double crochet (hdc) worked into back loops for texture
- Creative raised seam on neckline
- Ruffles on sleeves and waist created by stitches with yarn overs (yNOA)
- Comfortable fit with customizable measurements
- Worked in panels, sewn together
Difficulty Level
Intermediate — understanding of hdc, working into back loops, stitch markers, turning chains, and sewing are essential.
Pattern Steps
Panel (Front and Back)
Step 1: Chain for Desired Height
- Measure from shoulder to start of waist ruffles (example: 17 inches).
- Chain number of stitches equivalent to this length (example: chain to get 17 in relaxed).
Step 2: First Row
- Make 2 slip stitches to rise.
- Half double crochet (hdc) into the 3rd chain from hook.
- Continue working pattern: hdc stitches with yarn over (yNOA) worked over last stitch only, creating a raised effect.
- Mark the first stitch of the row with a stitch marker to keep track.
- Finish row with a regular hdc on last stitch.
Step 3: Subsequent Rows
- Chain 2 to rise.
- Work hdc into the back loops only in each stitch across.
- Continue with yNOA technique to make raised stitches.
- Keep stitch markers on the first and last stitches each row.
- Repeat until panel reaches desired bust width.

Calculating Width (Bust) of Panels
Step 4: Measurement and Calculation
- Measure bust circumference, divide by 2, then subtract 2 inches for snug fit.
- Crochet panel width accordingly (example: 15 inches wide).

Step 5: Crochet Two Panels
- Repeat panel pattern to make front and back panels identical in size and pattern.
Joining Panels at Neckline
Step 6: Positioning for Neck Opening
- Decide neck opening width (example: 5 inches both front and back).
- Subtract neck openings from total width. Divide remainder to get shoulder widths.
- Mark shoulder joins on panels with stitch markers accordingly.

Step 7: Sew Panels
- Place wrong sides out, and join shoulder seams by slip stitching through marked spots, inserting hook under loops from both panels.
- Make joining loops evenly spaced, creating flat seam.
- Do the same for the other shoulder.
Sleeve Preparation
Step 8: Measuring Armhole
- Measure upper arm circumference, divide by 2 for half-armhole opening.
- Mark opening on side seams of joined panels.
Step 9: Crochet Side Seams Up to Sleeve O pening
- From bottom hem up, slip stitch along side edges up to marked sleeve opening point.
- Secure yarn and fasten off.
Sleeve Construction
Step 10: Attach Yarn and Begin Sleeves
- Attach yarn at marked armhole opening on wrong side.
- Chain to rise as per pattern.
- Work half double crochet with yNOA on back loops, continuing panel pattern around armhole.
Step 11: Work in the Round
- Alternate crochet directions each row (clockwise, counterclockwise) to build sleeve length.
- Mark first and last stitch of each row to avoid confusion.
Step 12: Sleeve Shaping (Ruffles)
- To taper sleeves, skip first stitch every multiple rows, and single crochet with yNOA into next two stitches.
- This creates a subtle decrease, followed by expansion for ruffled effect at cuff.
Ruffles on Sleeves and Waist
Step 13: Making Ruffles
- Crochet two stitches with one yNOA into each stitch around for ruffle effect.
- On alternate rows, vary between one and two stitches per stitch to maintain flared texture.
- Work at least 2-3 rows of ruffles on sleeves and waist.
Neckline Decorative Seam
Step 14: Secure Yarn and Begin Neckline Seam
- Attach yarn at edge of neck opening.
- Work slip stitches and chain loops evenly around neckline edge to create joining loops.
- Crochet decorative seam by pulling loops counterclockwise in rhythm with the loops and pull through yarn overs, creating a structured yet soft neckline.
Step 15: Finish Neckline
- Fasten off securely and weave in ends.

Final Touches
Step 16: Weave In Ends
- Use yarn needle to neatly weave in all loose ends on inside.
Step 17: Block Sweater (optional)
- Lightly steam or block to set shape and smooth stitches.
Tutor Suggestions
- Use stitch markers liberally to keep track of first and last stitches in rows.
- Work loosely but evenly to maintain garment softness and stretchiness.
- Try on panels and sleeves as you go to ensure fit before joining and adding ruffles.
- Customize length and width measurements to suit your size.
Uses
- Ideal lightweight spring garment.
- Stylish top with unique texture and ruffle details.
- Versatile layering piece for various outfits.
Tip
To maintain softness and flexibility, avoid tight tension especially when working yarn overs and back loops—this ensures comfortable wear and beautiful drape.
Conclusion
This spring sweater combines elegant structural seams with playful ruffles for a distinct handmade garment. With careful measurement and attention to stitch detail, you’ll create a lightweight top perfect for the season.
