Unbelievably Free Crochet Baby Cardigan Pattern That’s Perfect For Gifting
Make your own charming cardigan with this Free Crochet Baby Cardigan Pattern that is perfect for keeping little ones comfortable and looking adorable.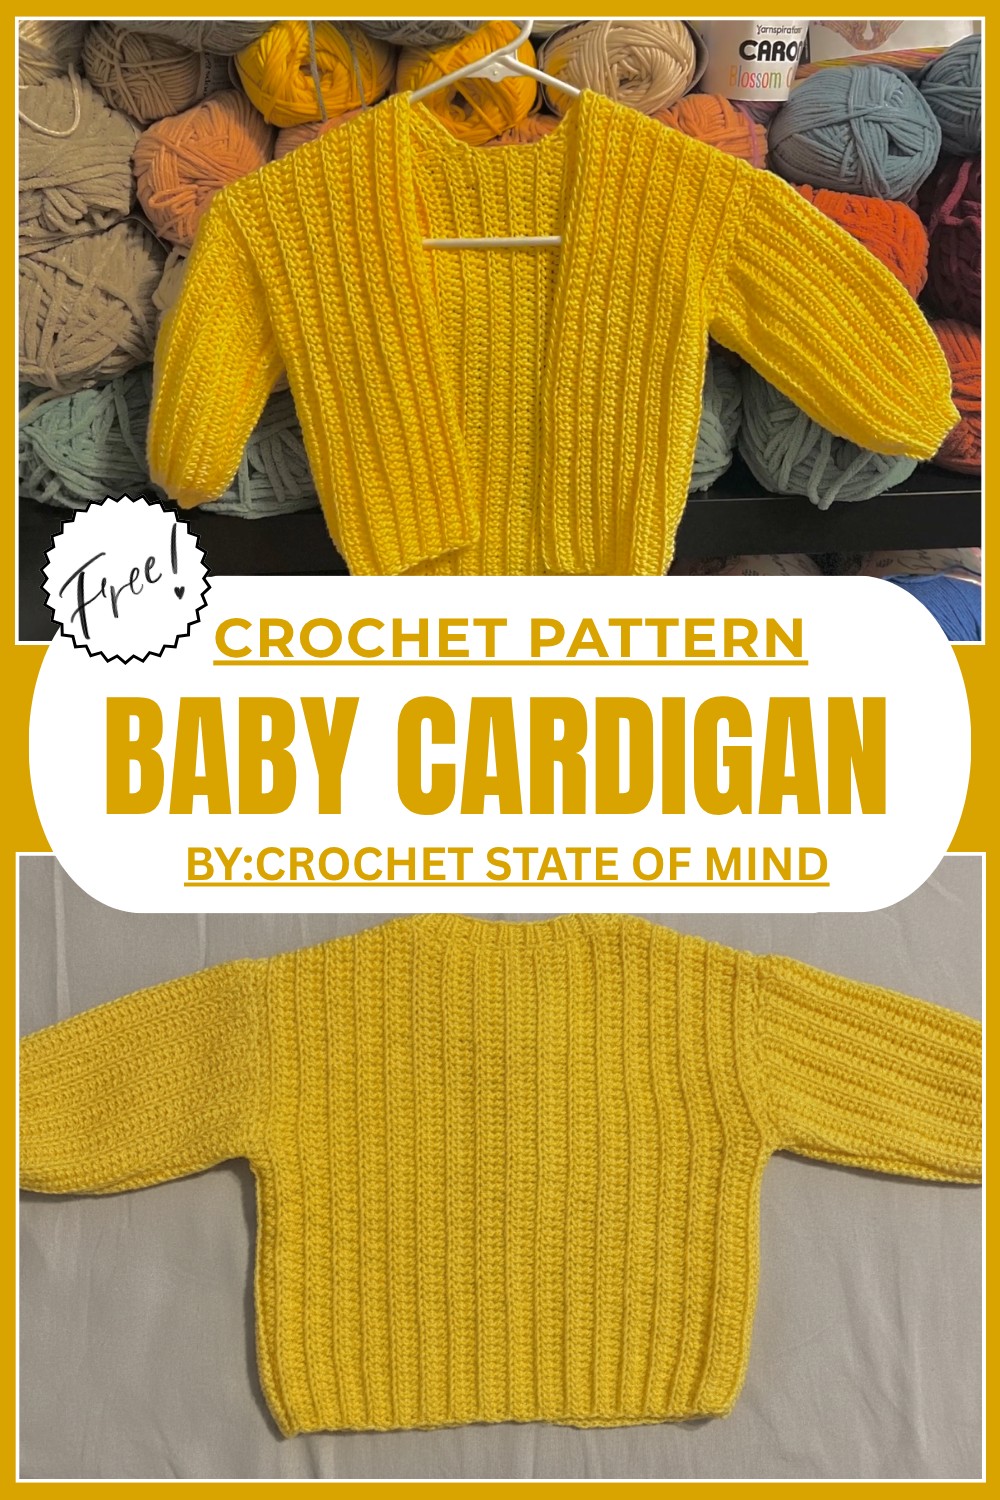
Free Crochet Baby Cardigan Pattern for Your Little Bundle of Joy
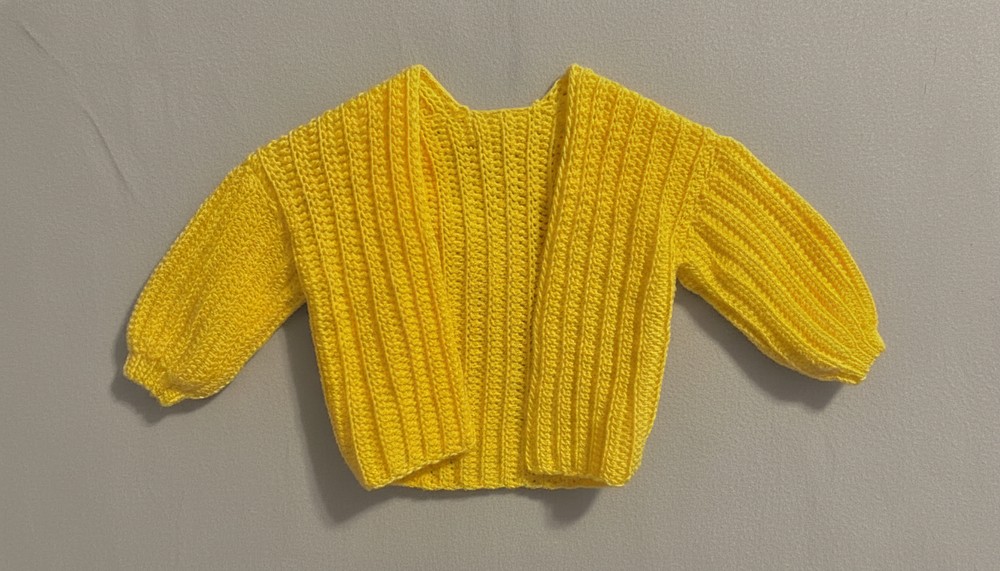
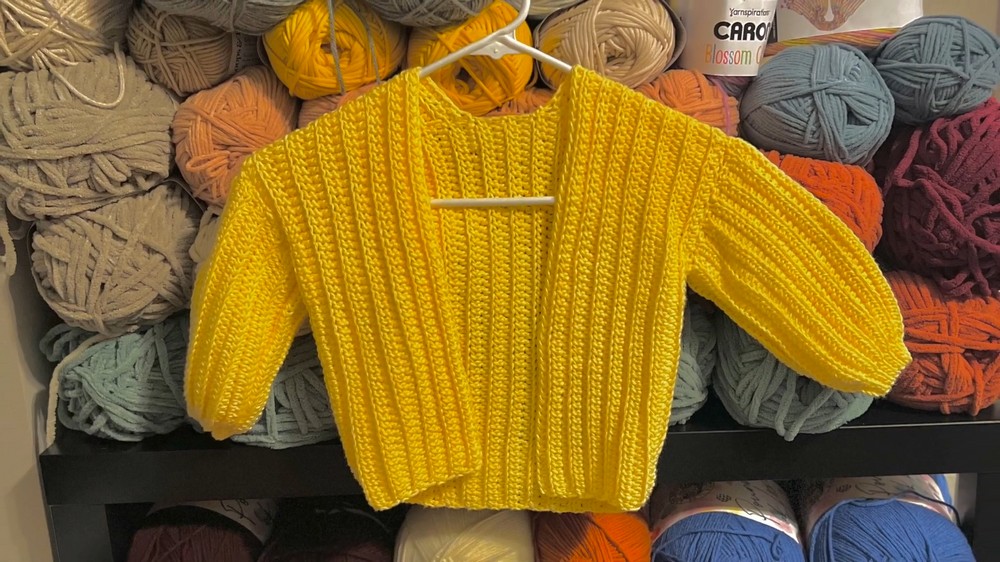
Keep your little one cozy and happy by crafting an adorable sweater with your own hands using this Free Crochet Baby Cardigan Pattern. Imagine wrapping your baby in a soft, fluffy hug—this cardigan is just that. It’s designed to keep babies warm and comfy during those chilly days while looking absolutely charming.
The delicate stitches and the gentle cotton yarn feel perfect against a baby’s sensitive skin. This cardigan features a classic button front and long sleeves, giving it a smart, stylish look that’s perfect for any occasion, from family gatherings to adorable photo sessions. 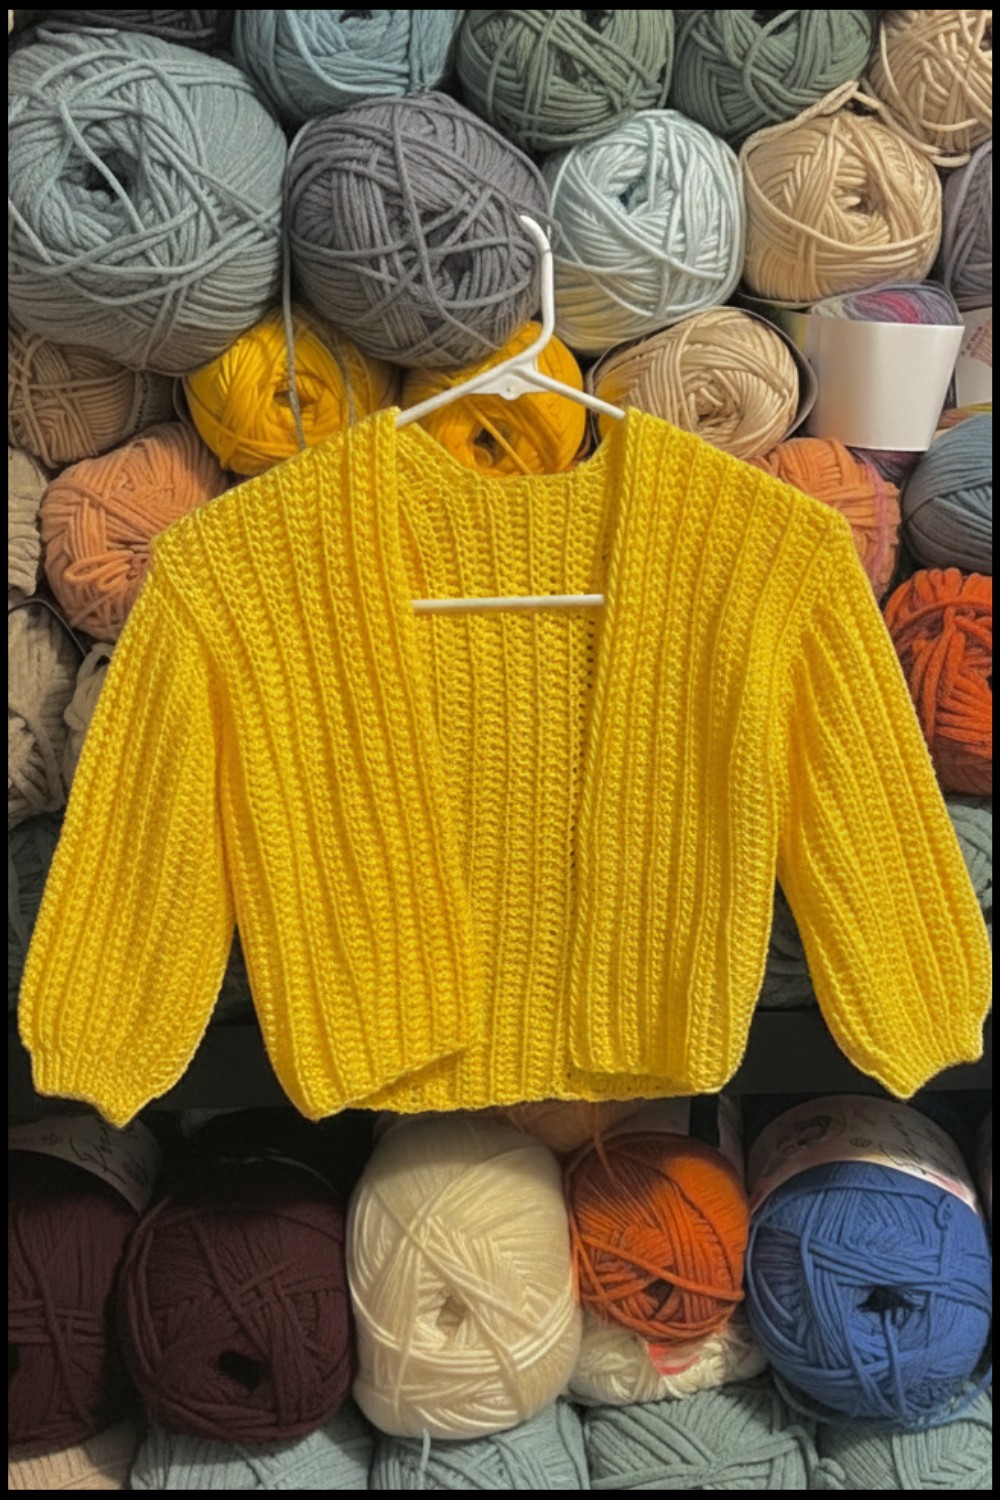 The ribbed edges add a touch of elegance, and you can personalize it with bright or pastel colors, making it as unique as your little one.
Whether for daily naps or as a heartfelt handmade gift for a new baby, this cardigan is a joy to create. Even beginners will find it quick and easy to complete. Turn your love into something warm and beautiful today.
Crochet Baby Cardigan Pattern
Materials Required
- Yarn: “I Love This Cotton” yarn from Hobby Lobby in the color Buttercup (12). It is 100% cotton and has 180 yards per skein.
- Crochet Hook: Size 5.5 mm is recommended, but a 5.0 mm hook was used for this project.
- Darning Needle: To join the panels and sew seams.
- Stitch Markers: Essential for marking the beginning and end of rows to avoid misalignment during the crocheting process.
Special Techniques and Tips
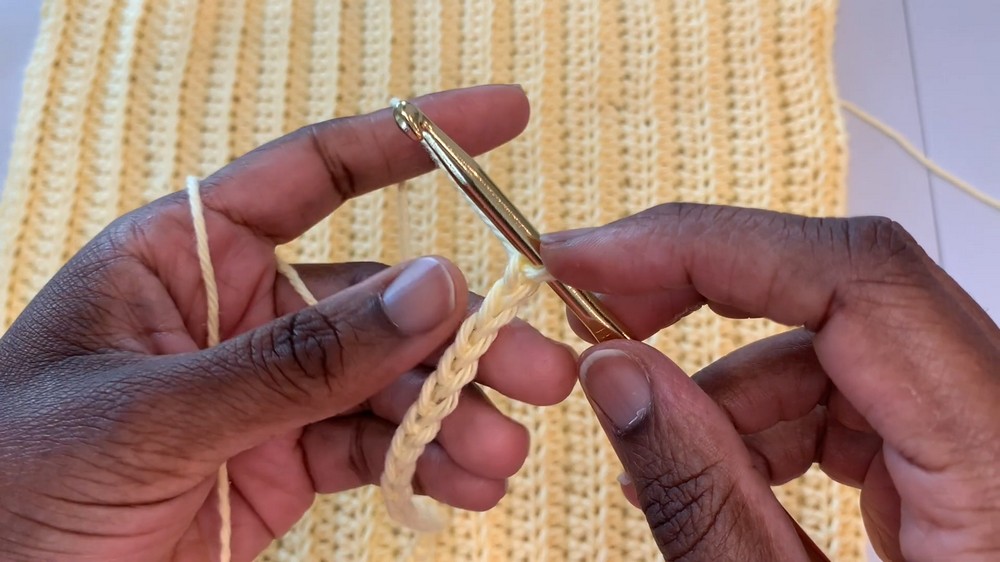
- Half Double Crochet (hdc): This is the main stitch used throughout the project.
- Back Loop Only (BLO): Adds texture to the cardigan and is used after the first stitch in rows.
- Slip Stitch (sl st): Used for a tighter fit at the cuff of the sleeves.
- Back Bump Foundation Chain: All stitches in the foundation chain are worked into the back bumps for a neat edge.
- Measuring Tip: Customize the cardigan size by measuring the child’s:
- Shoulder to hip (length of the back and front panels).
- Shoulder to wrist (length of sleeves).
- Chest/bicep circumference (width of panels/sleeves).
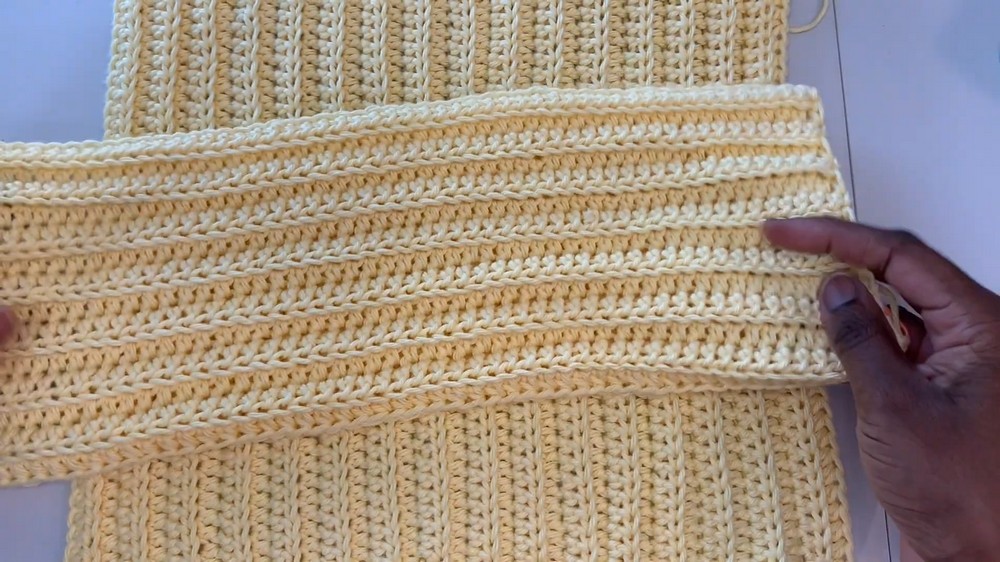
Cardigan Construction
The cardigan is worked in 5 separate pieces:
- 1 Back Panel
- 2 Front Panels
- 2 Sleeves
Each piece is worked in length, not width.
Step 1: Back Panel
- Chain Foundation
- Chain the number of stitches required for the cardigan’s length (shoulder to hip). For example, the transcription suggests 54 chains + 1 turning chain.
- Row 1
- Skip the first chain and work 1 half double crochet (hdc) into the back bump of the second chain from the hook. Continue working 1 hdc in every chain across.
- Mark the first and last stitches with stitch markers to maintain alignment.
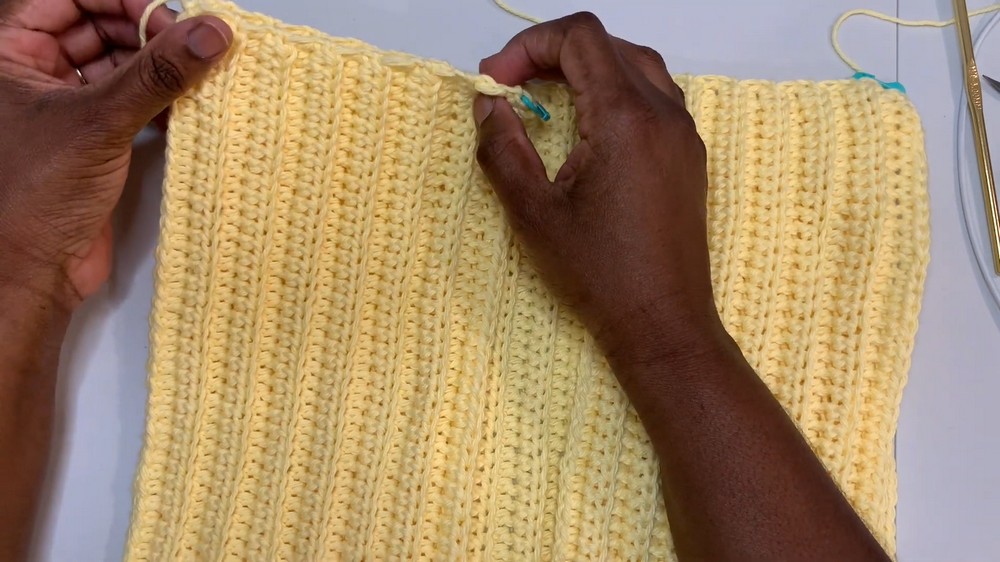
- Subsequent Rows
- Chain 1, turn your work. Insert a hdc under both loops of the first stitch.
- Work hdc in the back loop only (BLO) across the row except for the last stitch, which is worked under both loops.
- Repeat this process until the panel reaches the desired width (equal to the child’s chest/base circumference).
Step 2: Front Panels (Make 2)
Each front panel is worked in a similar manner to the back panel but is half the width.
- Chain Foundation
- Chain the same number of stitches as the back panel for the length (shoulder to hip). For example, 54 chains + 1 turning chain.
- Crochet Rows
- Follow the same row instructions as for the back panel: 1 hdc under both loops at the start and end, and hdc in the back loop only for all middle stitches.
- Repeat until the desired panel width is achieved (half of the back panel’s width).
Step 3: Sleeves (Make 2)
- Chain Foundation
- Chain the number of stitches needed for the child’s sleeve length (shoulder to wrist). For example, 35 chains + 1 turning chain.
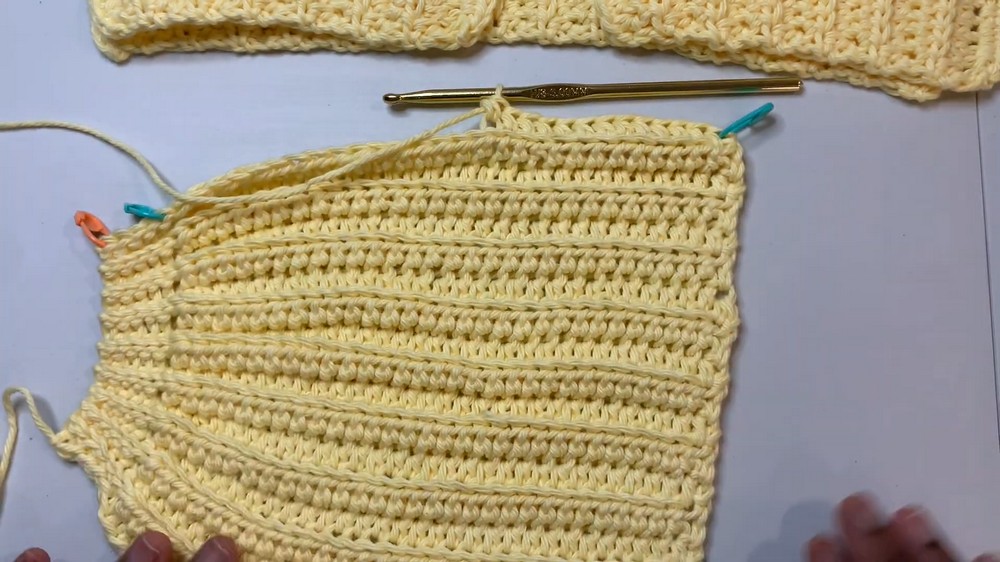
- Chain the number of stitches needed for the child’s sleeve length (shoulder to wrist). For example, 35 chains + 1 turning chain.
- Rows
- Row 1: Work hdc into the back bump of each chain across, except for the last 5 to 6 chains where you will work slip stitches (sl st). This creates a tighter, ribbed cuff.
- Chain 1, turn your work. Work sl st in the back loop of each cuff stitch until you reach the hdc section. Switch back to hdc in BLO for the remaining stitches.
- Row 1: Work hdc into the back bump of each chain across, except for the last 5 to 6 chains where you will work slip stitches (sl st). This creates a tighter, ribbed cuff.
- Repeat Rows
- Continue this process until the panel width matches the child’s upper arm circumference (bicep measurement).
- Continue this process until the panel width matches the child’s upper arm circumference (bicep measurement).
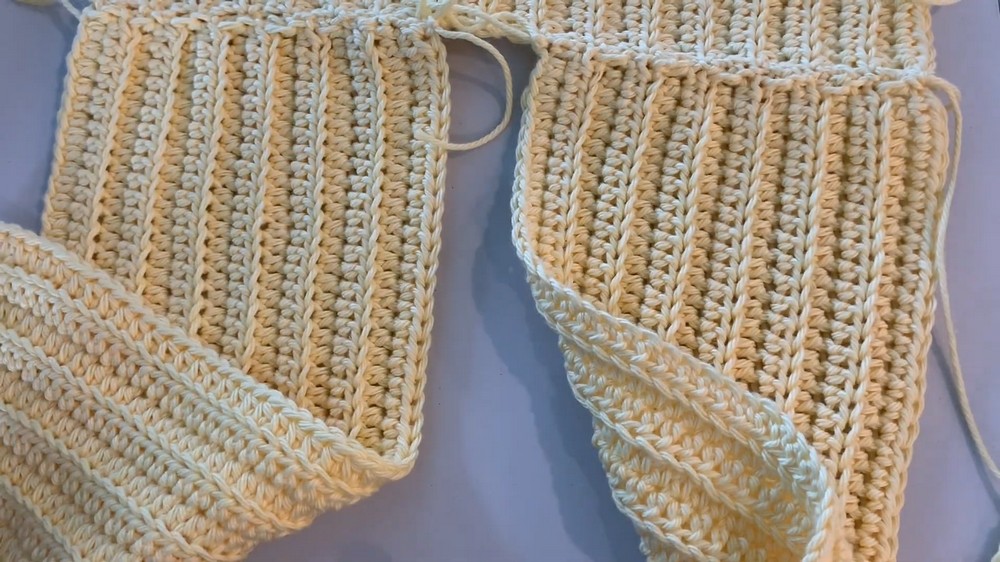
Step 4: Assembly
The pieces are joined together with a whip stitch or mattress stitch, using a darning needle for durability.
- Attach the Front Panels to the Back Panel
- Lay the back panel flat. Align the front panels on top with their edges matching the back panel’s edges.
- Use stitch markers to align rows properly and maintain symmetry.
- Whip stitch across the shoulder seams to attach the front panels to the back.
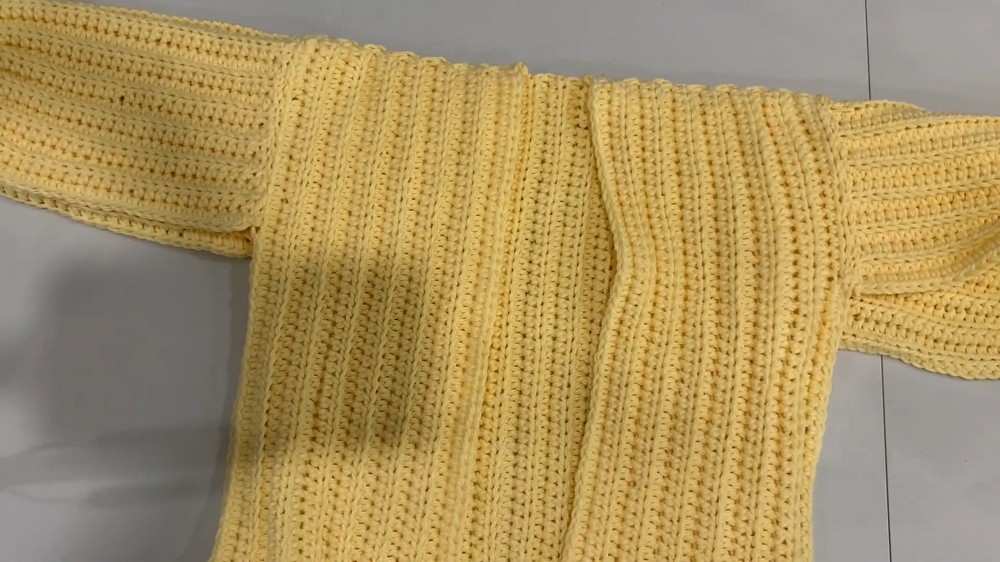
- Attach the Sleeves
- Fold the sleeves in half lengthwise and use stitch markers to attach the sleeve center to the shoulder seam (on the back and front panels).
- Whip stitch or mattress stitch around the edges to join the sleeves to the body.
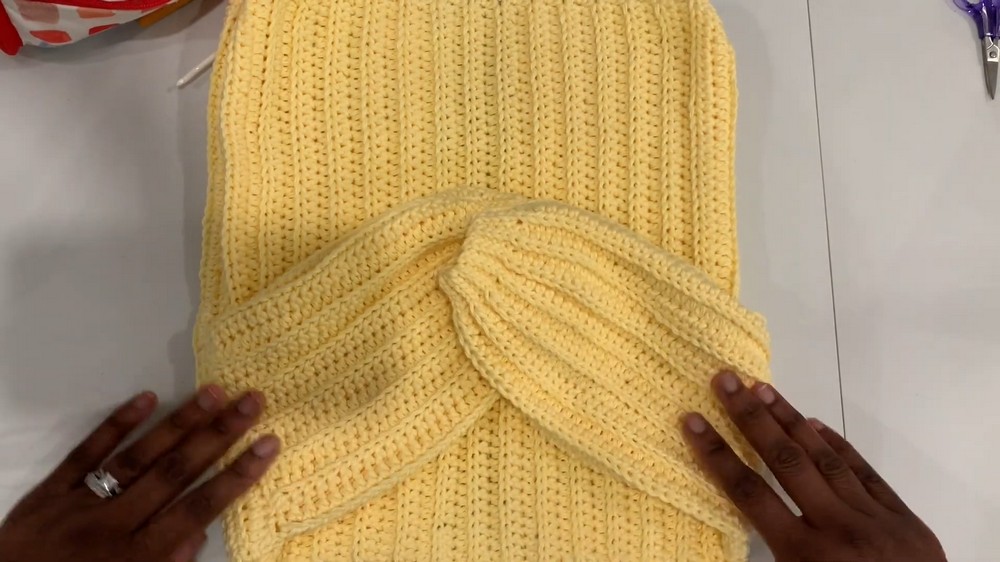
- Seam the Sides
- Fold the cardigan so the front and back panels’ edges are aligned.
- Seam the sides of the cardigan and the sleeves, starting from the cuff and moving toward the hem.
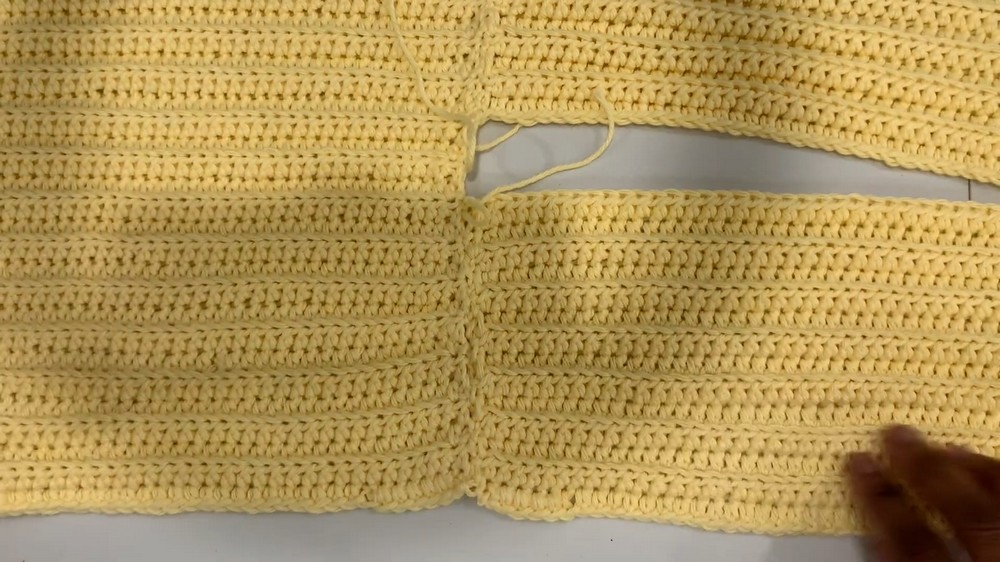
Step 5: Finishing Touches
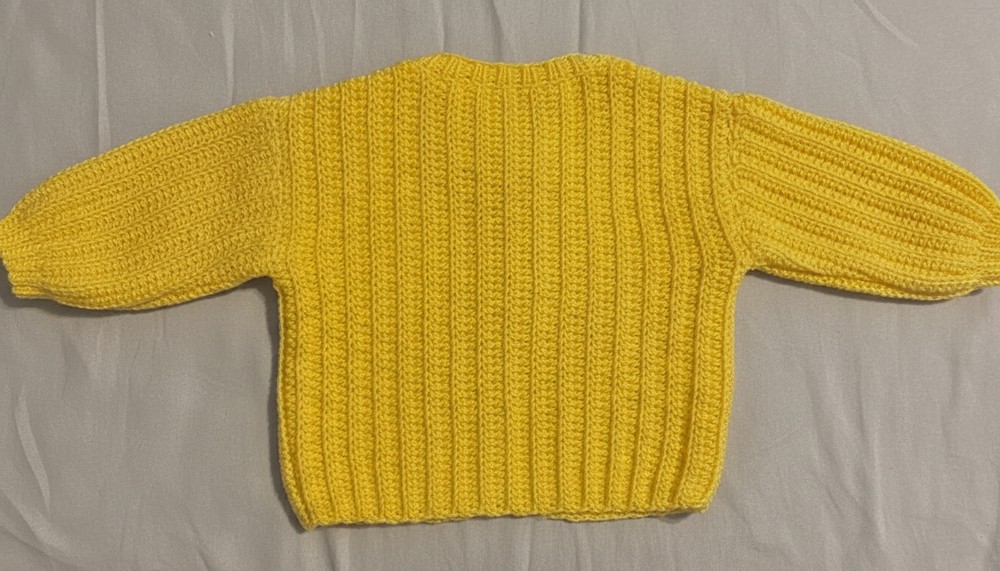
- Turn the Cardigan Right Side Out
- Since all seams were created inside, flipping it right side out ensures the cardigan looks neat and polished.
- Optional Additions
- Buttons: Add buttons down the front if desired. Ensure the front panels overlap slightly to create buttonholes.
- Pockets: Customize by crocheting small rectangles to add as functional pockets on the front panels.
Final Words and Maintenance Tips
Congratulations on completing your crochet baby cardigan, Here are some final suggestions to keep your project looking its best:
- Washing: Always follow yarn care instructions. Hand wash with cold water and lay flat to dry for the best results.
- Storing: Keep the cardigan in a cool, dry place to preserve the cotton yarn’s quality.
- General Maintenance: If any stitches loosen over time, use your darning needle and leftover yarn to repair them easily.
This small, cozy cardigan can be further personalized with color changes, patterns, or other embellishments to make it unique. It is perfect for toddlers and can be adapted for different sizes by adjusting the number of chains in the foundation rows.