Fun Free Crochet Minion Amigurumi Pattern To Delight Any Crochet Fan
Let your creativity shine as you make a cheerful Minion with this Free Crochet Minion Amigurumi Pattern that’s perfect for everyone who loves handmade fun.
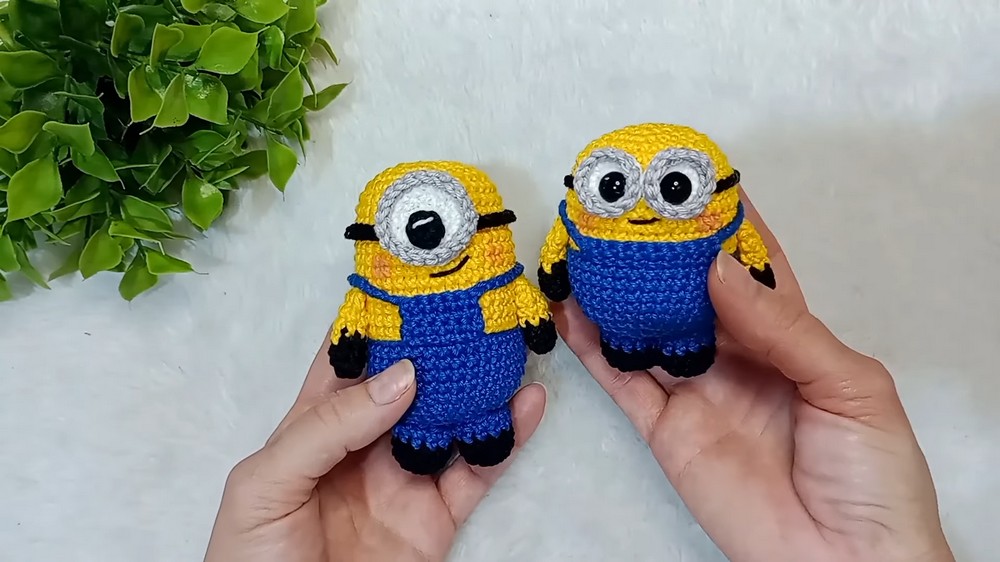
Cute Free Crochet Minion Pattern That Everyone Will Adore
Bring a world of fun and laughter into your home by making your very own yellow friend with this Free Crochet Minion Amigurumi Pattern. This cute toy looks just like the funny characters from the movies with its bright yellow body and tiny blue overalls.
The beauty of this little guy lies in his round shape and the soft yarn that makes him very huggable for people of all ages. He features big silver goggles and a happy smile that makes everyone feel cheerful just by looking at him. His small black boots and gloves make him look ready for a grand adventure. You can use this soft toy as a decoration for your bedroom or give it as a special handmade gift to a friend who loves movies.
 Even for those just starting to learn the simple steps make it very fast and easy to finish. Completing this fun project is a great way to show your skills and have a unique toy that looks amazing.
Free Crochet Minion Amigurumi Pattern
1. Materials
- Yarn (amigurumi / DK or light worsted weight recommended):
- Yellow (body, head, arms)
- Blue (overalls)
- Black (shoes, hands, goggles strap, hair)
- Grey (goggles)
- White (eyes)
- Crochet hook: 2.5 mm (as in the video) or size appropriate for your yarn
- Stitch marker (to mark the first stitch of each round)
- Tapestry needle (large eyed needle for sewing parts)
- Fiberfill stuffing
- Optional:
- Safety eyes (for eyes)
- Felt (white, black, possibly brown) for eyes if not crocheting them
- Fabric glue or hot glue (if attaching felt or safety eyes that will be glued)
All instructions are worked in continuous rounds (spirals) unless otherwise stated.
2. Abbreviations (US Terms)
- MR: Magic Ring (Magic Circle)
- ch: chain
- sc: single crochet
- sl st: slip stitch
- inc: increase (2 sc in the same stitch)
- dec: decrease (single crochet two stitches together)
- st(s): stitch(es)
3. Special Techniques
Magic Ring (MR)
- Wrap yarn around two fingers to form a loop.
- Insert hook into the loop, yarn over, pull up a loop.
- Chain 1 (or directly start your sc, depending on your method).
- Work the required number of sc into the loop.
- Pull the yarn tail to close the ring tightly.
Invisible Decrease (optional, recommended for a neat finish)
Insert hook in front loops only of next two stitches, yarn over, pull up through both front loops, yarn over and pull through both loops on hook.
Working in Back Loop Only (BLO)
Insert hook only under the loop of the stitch that is farther from you (the “back” loop) and work the stitch as usual.
Working in Front Loop Only (FLO)
Insert hook only under the loop of the stitch that is closer to you (the “front” loop) and work the stitch as usual.
4. Pattern Instructions
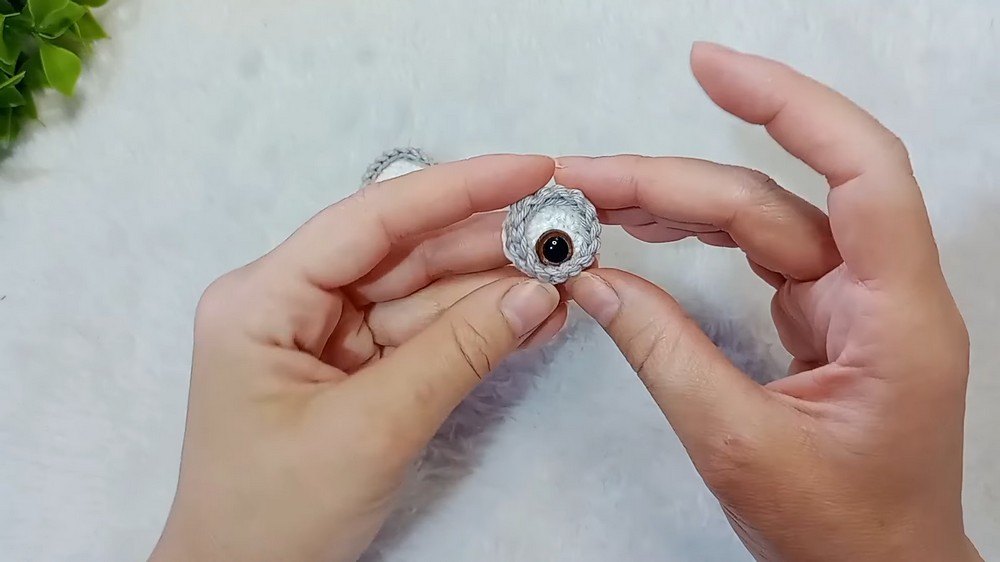
4.1. Goggles (Eye Ring in Grey/Black)
The teacher starts with a base ring (the eye) and then adds a grey ring on the front loop to form the edge of the goggles.
A) Eye Base Circle (for one large single eye)
Use black (or dark brown) for the pupil, then change to white if desired.
- Round 1: 7 sc in MR. (7)
- Round 2: inc in each st around. (7 inc) (14)
- Round 3: 1 sc, inc around, repeat 7 times. (21)
Fasten off and weave in the tail. This round gives you a disc of 21 stitches.
You can embroider a small white “light reflection” dot with white yarn or sewing thread on the pupil area.
If you want a smaller eye (for two eye Minions), use:
Round 1: 5 sc in MR (5)
Round 2: 5 inc (10)
Round 3: 1 sc, inc x5 (15)
B) Goggles Edge in Grey
Attach grey yarn to the front loop of any stitch of Round 3 of the eye base.
Round 1: 21 sc in FLO around the disc. (21)
- Work all stitches in the front loop only of the 21 stitches of the eye base.
- Sl st to the first sc if you want a perfectly closed round (or continue in spiral, then sew the gap neatly).
Fasten off and make a neat invisible join with a tapestry needle.
You now have a flat eye with a raised grey ring (goggle frame) around it.
4.2. Legs (Make 2)
The video says the leg pattern will appear on screen and is simple. A standard leg for this size Minion is:
Use black for shoes, then blue for pants.
- Round 1: With black, 6 sc in MR. (6)
- Round 2: 6 inc. (12)
- Round 3: 1 sc, inc around. (18)
- Round 4: 18 sc. (18)
- Round 5: 6 sc, 3 dec, 6 sc. (15)
- Round 6: 15 sc. (15) – change to blue at the last stitch of this round.
- Rounds 7–9: With blue, 15 sc each round. (15)
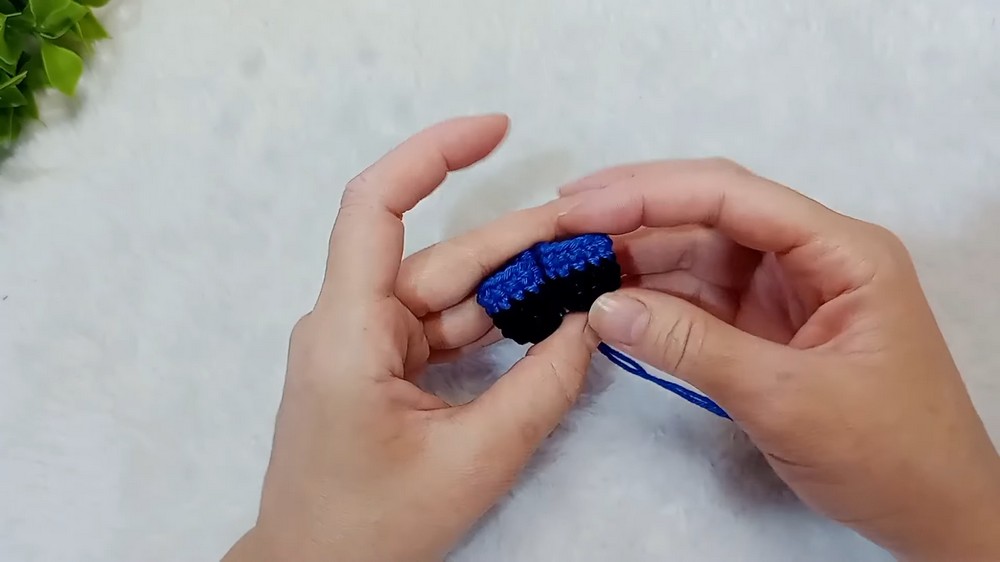
Lightly stuff the shoe part (black section) and a little into the blue part. Fasten off, leaving a long tail for sewing.
Note: The exact leg count may differ slightly from the video, but this is a standard small leg that fits the given body size. You can adjust height by adding/removing one or two rounds of 15 sc.
4.3. Arms (Make 2)
From the video: 3 rows in black, 3 in yellow, then close by joining the two sides with sc, with little or no stuffing.
Use black for the hand, then yellow for the arm.
- Round 1: With black, 6 sc in MR. (6)
- Rounds 2–3: 6 sc. (6)
- Round 4: Change to yellow, 6 sc. (6)
- Rounds 5–6: 6 sc. (6)
Do not stuff heavily (or at all). You may put a small amount of stuffing only at the black “hand” area if desired.
Flatten and Close the Arm
- Flatten the open end so two sides are aligned.
- Work 3 sc through both layers across to close.

Fasten off, leaving a long tail for sewing.
4.4. Body and Head (One Piece)
From the transcription, the body is worked from the bottom (blue) upward, then color changes to yellow, then decreases to close at the top.
A) Lower Body (Blue – Overalls Base)
Use blue yarn.
- Round 1: 6 sc in MR. (6)
- Round 2: 6 inc. (12)
- Round 3: 1 sc, inc around x6. (18)
- Round 4: 2 sc, inc around x6. (24)
- Round 5: 3 sc, inc around x6. (30)
- Round 6: 4 sc, inc around x6. (36)
From Round 7 to Round 11:
7–11. 36 sc each round. (36)
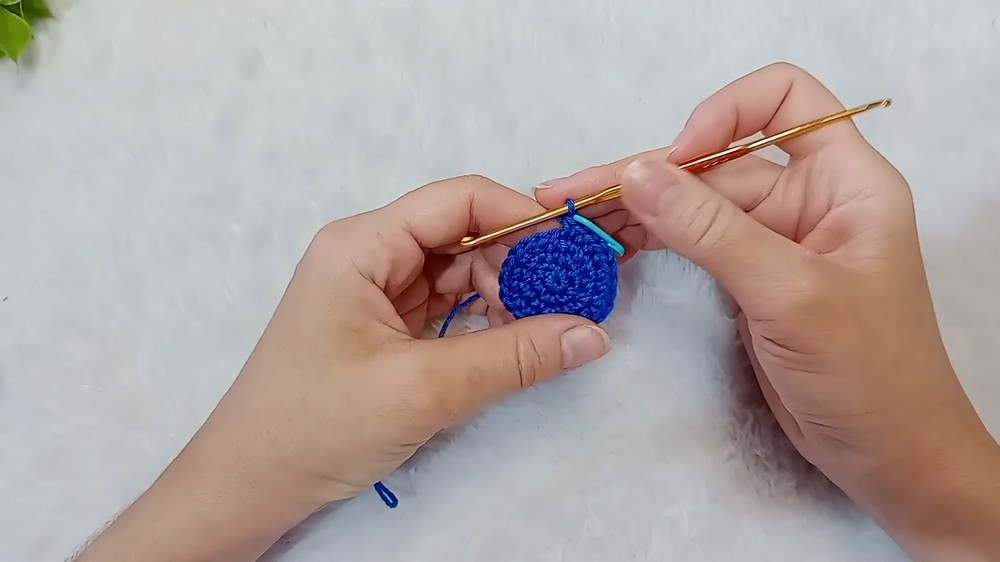
This forms a blue cylinder, which is the lower body and overalls area.
B) Color Change to Yellow
Round 12 is a decorative round in sl st, worked in back loops.
- Cut the blue yarn, leaving enough tail to weave in.
- Attach yellow yarn.
Round 12: 36 sl st in BLO around. (36)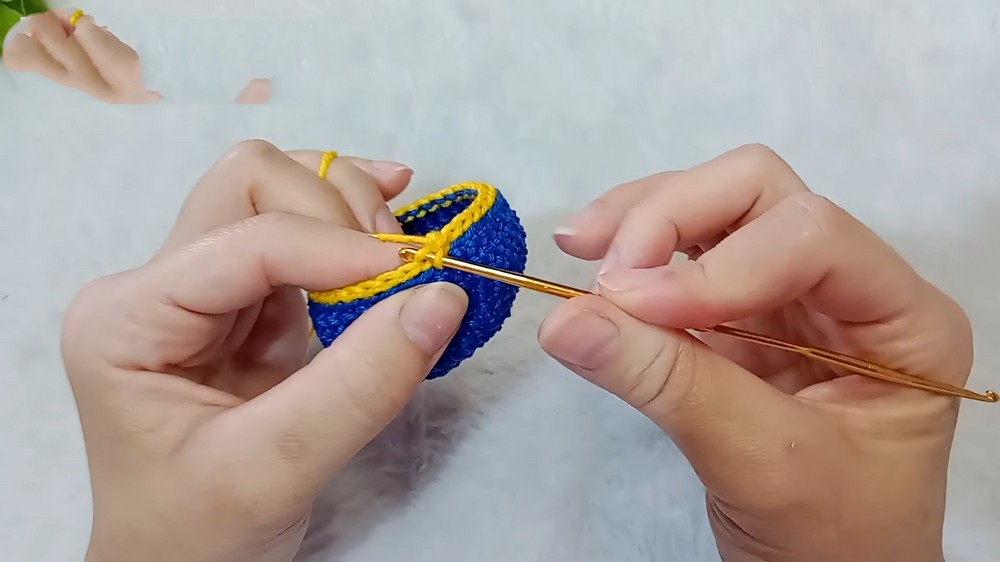
This creates a neat color transition line and a ridge.
Round 13: 36 sc in BLO again. (36)
The video says: “Carreira 13: sigo fazendo 36 pontos também, pegando na alça de trás novamente, só que agora é ponto baixo.”
From Round 14 onward, you work normally (through both loops).
From Round 14 to Round 24:
14–24. 36 sc each round. (36)

This builds the yellow cylinder that forms the main body and head.
Height variations noted in the video:
- Medium Minion (the one in the lesson): Rounds 14–24 = 11 rounds straight.
- Short Minion: Rounds 14–20 (7 rounds straight).
- Tall Minion: Rounds 14–28 (15 rounds straight).
You change only this straight section to alter height.
C) Decreasing the Head
Stuff the body firmly as you go, especially before the opening becomes too small.
Round 25: 4 sc, dec around x6. (30)
- Place safety eyes or prepare to attach crocheted eyes around this stage.
- The video says: after Round 25 the back is where the color change is, so the front is opposite the join. The eyes are placed about one round below Round 25.
Round 26: 3 sc, dec around x6. (24)
Round 27: 2 sc, dec around x6. (18)
Round 28: 1 sc, dec around x6. (12)
Finish stuffing firmly, especially at the neck area so the head keeps its shape.

To close:
- You may do one more round: Round 29: 6 dec (6).
- Cut yarn, leaving a tail.
- Use the tail to pass through the front loops of the last 6 stitches and pull tight to close.
- Secure with a knot and weave in the tail inside.
4.5. Overalls Front Bib and Strap
The overalls bib is worked on the free front loops left from the color change area (around Round 12).
Find the front side: opposite where the color change is visible (that is the back seam).
Attach blue yarn to a front-loop stitch in the center front area where the free loops remain.
A) Front Bib
- Row 1: Work 6 sc across the free front loops (FL). (6)
- Use the loops that are left visible at the color change.
- Row 2–4: ch 1, turn, 6 sc. (6)
You now have a small rectangular bib (approximately 4 rows tall in the video).
Fasten off and weave in the tail on the inside.
B) Overall Strap
The strap is formed with a long chain that goes around the body and is attached to the top of the bib.
- Attach blue yarn to the top left corner of the bib OR simply chain from separate yarn and sew both ends.
- ch 30–35 (the video says she needed 35 chains; you should check it around your Minion so it is not tight).
- Wrap the chain around the body to check length. It should sit smoothly without pulling.
- When length is correct, fasten off leaving a tail.
- Sew one end of the chain to one top corner of the bib and the other end to the other top corner (or to the back, depending on desired design).
- Optionally, work one row of sc back along the chain to thicken the strap if you want.
Weave in all ends.
4.6. Goggle Strap (Headband)
You will need a strap to hold the goggles around the head.
- With black yarn, ch enough to wrap around the head where the goggles sit.
- The video indicates she makes a chain long enough to go around the head, then works back in sc.
- Row 1: starting in 2nd ch from hook, sc in each ch to the end.
- Fasten off, leaving tails at both ends for sewing.

With the Minion in front of you:
- Position the goggles (eye piece) in the middle of the face.
- Pin the strap so it lines up with both sides of the goggles.
- Sew the strap securely to the sides of the goggles and to the head so it does not slide.
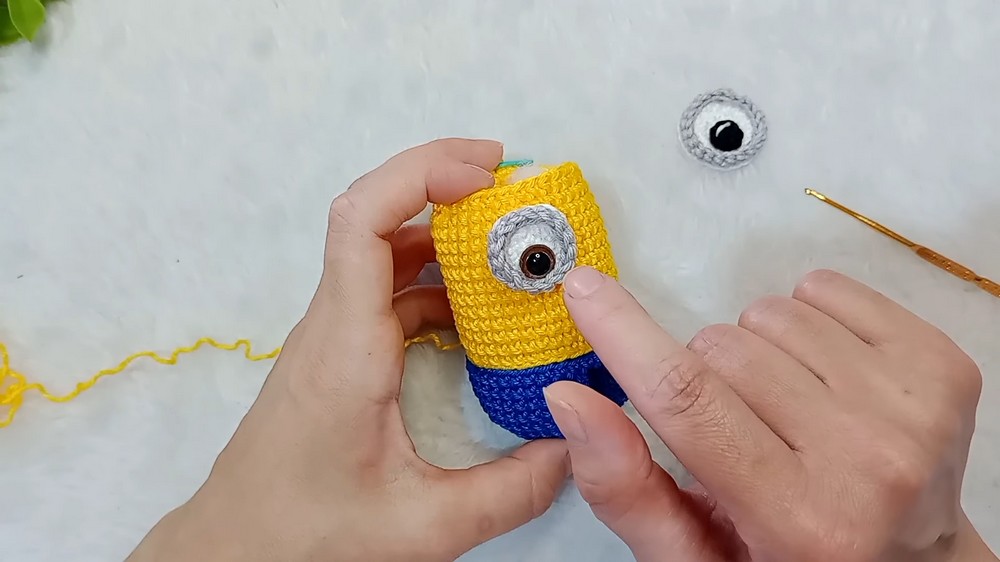
4.7. Placing the Eyes/Goggles
You may choose one of three methods, as mentioned in the video:
- Crocheted Eyes (as we wrote above)
- Use the 21 stitch eye if making a single large eye.
- Use the 15 stitch eye if making two smaller eyes.
- Sew or glue a white “light” highlight with yarn or embroidery thread.
- Attach the finished eye(s) to the face 1 round below Round 25, centered.
- Safety Eyes (Eyes with Safety Backs)
- Insert safety eyes through crocheted white circles or directly into yellow head.
- Place the eyes before closing the head, around the indicated round (the video suggests adding them when you have about 24–30 stitches at the top).
- Felt Eyes
- Cut white circles, smaller black circles (pupils), and optional brown circles (irises).
- Glue or sew them onto the head, then place the grey goggle ring around them visually, and secure the ring if you have made one.
When using the large single goggle, place it centered.
When using two goggles, use the smaller (15 stitch) version and sew them side by side, spaced slightly apart.
4.8. Attaching Arms and Legs
Legs
- Position the legs at the bottom of the body, on each side of the front bib.
- Align them so the Minion stands stable.
- Sew around the top of each leg securely to the body.
Arms
From the video:
- She “joined the arms and left four stitches,” and positioned them about “1, 2, 3 rounds” down from the top.
- This generally means arms are attached around the upper section of the body, slightly below the midpoint of the yellow part.
Suggested placement:
- Count 3 rounds down from the top (closed) of the head.
- Place arms on the sides, symmetrically, with the flattened part against the body.
- Pin in place, then sew around the edges to secure.
4.9. Hair and Facial Variations
The teacher mentions different expressions and hair styles:
Hair
- With black yarn, cut several short strands.
- Use a tapestry needle to pull each strand through a stitch on top of the head.
- Tie a knot and trim to desired length.
- You can make straight spikes, a tuft, or more hair depending on the Minion you want to imitate.
Mouth and Expression
- With black yarn or embroidery thread, embroider a small smile, straight line, or slightly curved mouth.
- Place it below the goggles, centered.
Eye and Goggle Variations
The video shows at least three heights and several eye expressions:
- Short Minion: fewer straight rounds (14–20).
- Medium Minion: standard pattern (14–24).
- Tall Minion: more straight rounds (14–28).
- Single large goggle at center for one eyed Minion.
- Two smaller goggles for two eyed Minion.
- Eyes “looking up,” “to the side,” or “straight ahead” by slightly shifting pupil position or placement.
You can change only the eyes and hair to give each Minion a different personality.
5. Finishing
- Check all parts are firmly sewn: arms, legs, goggles, strap, overalls strap.
- Add any final embroidery:
- Mouth
- Eyebrows (with thin strands of black yarn)
- Buttons or pockets on the overalls (using small stitches or French knots).
- Secure all yarn tails by weaving them into the body.
- Shape:
- Gently roll and press the body to get a smooth cylindrical shape.
- Adjust stuffing if necessary by massaging and redistributing.
Your Minion is now complete.
6. Suggestions and Pattern Tips
- Adjusting Size
- To make taller Minions, add more straight rounds in the yellow section (after Round 13 and before Round 25).
- To make shorter Minions, reduce these rounds.
- Keep the base circle (up to 36 stitches) the same so legs and overalls still match well.
- Matching Yarn and Hook
- If your stitches are too loose (stuffing shows through), use a smaller hook.
- If your work curls heavily, you might be pulling too tight; relax your tension slightly.
- Stuffing
- Stuff gradually as you go. Overstuffing can distort the shape, under stuffing makes the doll floppy.
- Pay special attention around the neck (transition from body to head) to keep the head firm and upright.
- Color Changes
- Always change colors before the last yarn-over of the last stitch of the previous color.
- For a cleaner look at the back, keep the color change in the same vertical line.
- Safety Considerations
- If the toy is for small children, avoid small removable pieces and glue.
- Use securely attached safety eyes or embroidered eyes instead of glued felt.
- Customization
- You can vary the overalls details: add a front pocket, straps crossing in the back, or small black buttons.
- Try different mouth shapes to show different emotions (smile, smirk, surprised).

7. Care and Maintenance Tips
- Hand wash gently in cool water with mild soap.
- Avoid soaking safety eyes and glued parts for a long time.
- Press out excess water with a towel; do not wring.
- Shape the Minion while damp and let it air dry fully.
- Keep out of direct sun for long periods to prevent colors from fading.
- If yarn starts to fuzz, lightly trim the fuzz with small scissors; do not pull loose fibers.
Final Words
This pattern is a written reconstruction based strictly on the video transcription you provided, expanded into a full, formal, step-by-step pattern. It is intended to be easy to follow even for someone with basic amigurumi experience. You can create multiple Minions in different sizes and expressions simply by varying the number of body rounds, the eye type (single or double goggles), and the hair and facial embroidery.