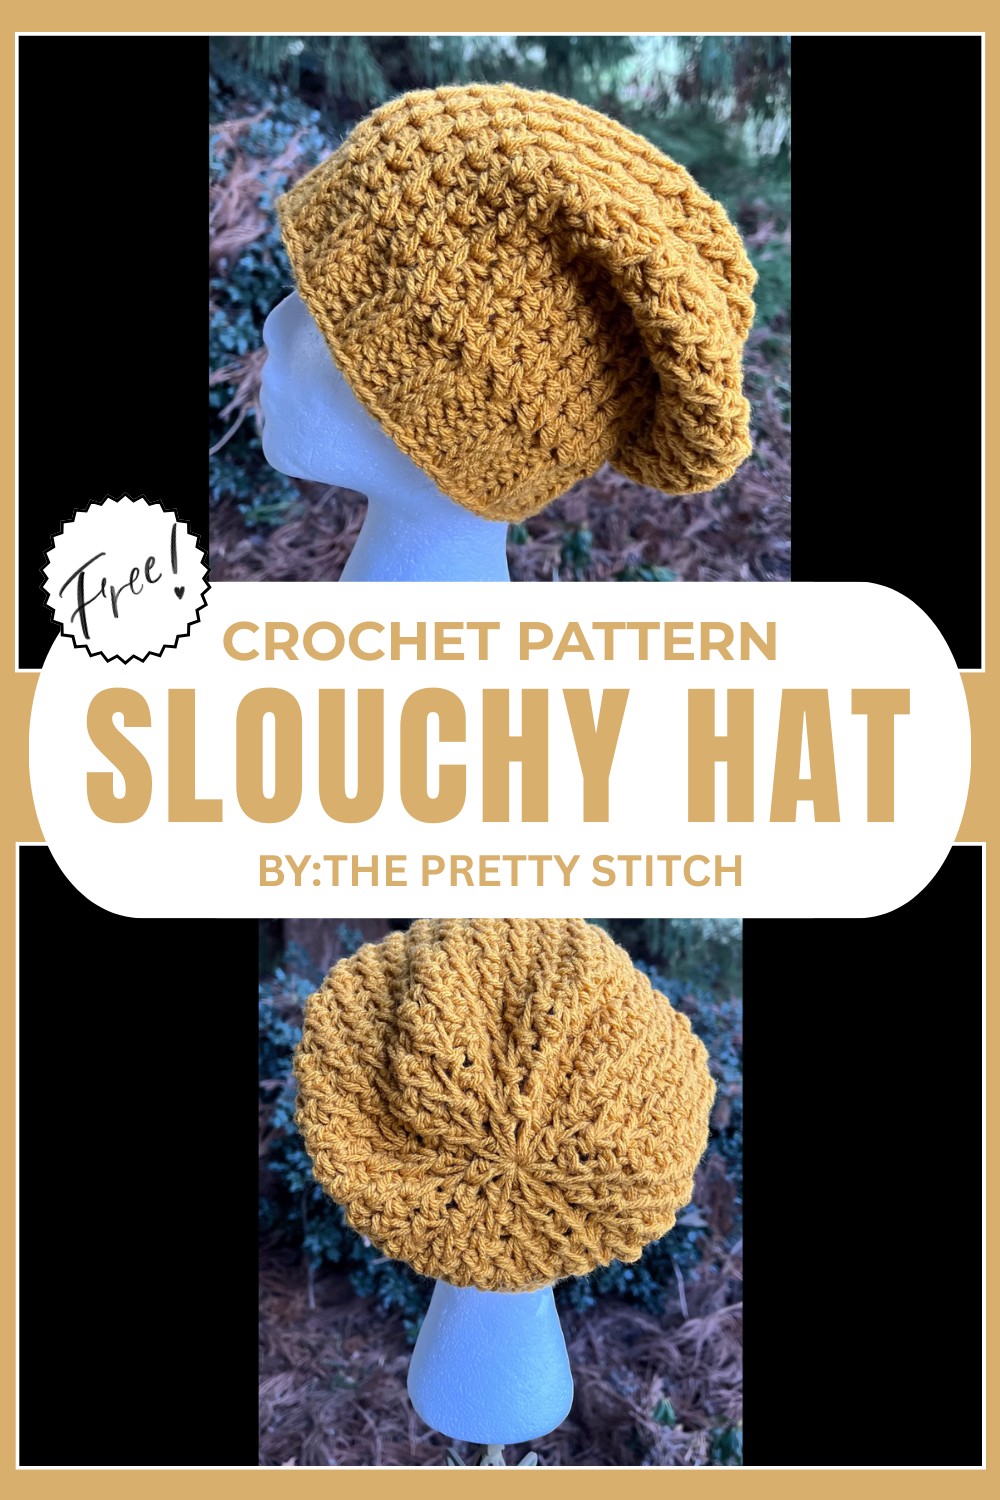
Cozy Crochet Slouchy Hat Pattern Perfect For Chilly Days
Grab cozy vibes with this playful Crochet Slouchy Hat Pattern, perfect for staying warm in style while adding a cute handmade touch to your outfits.
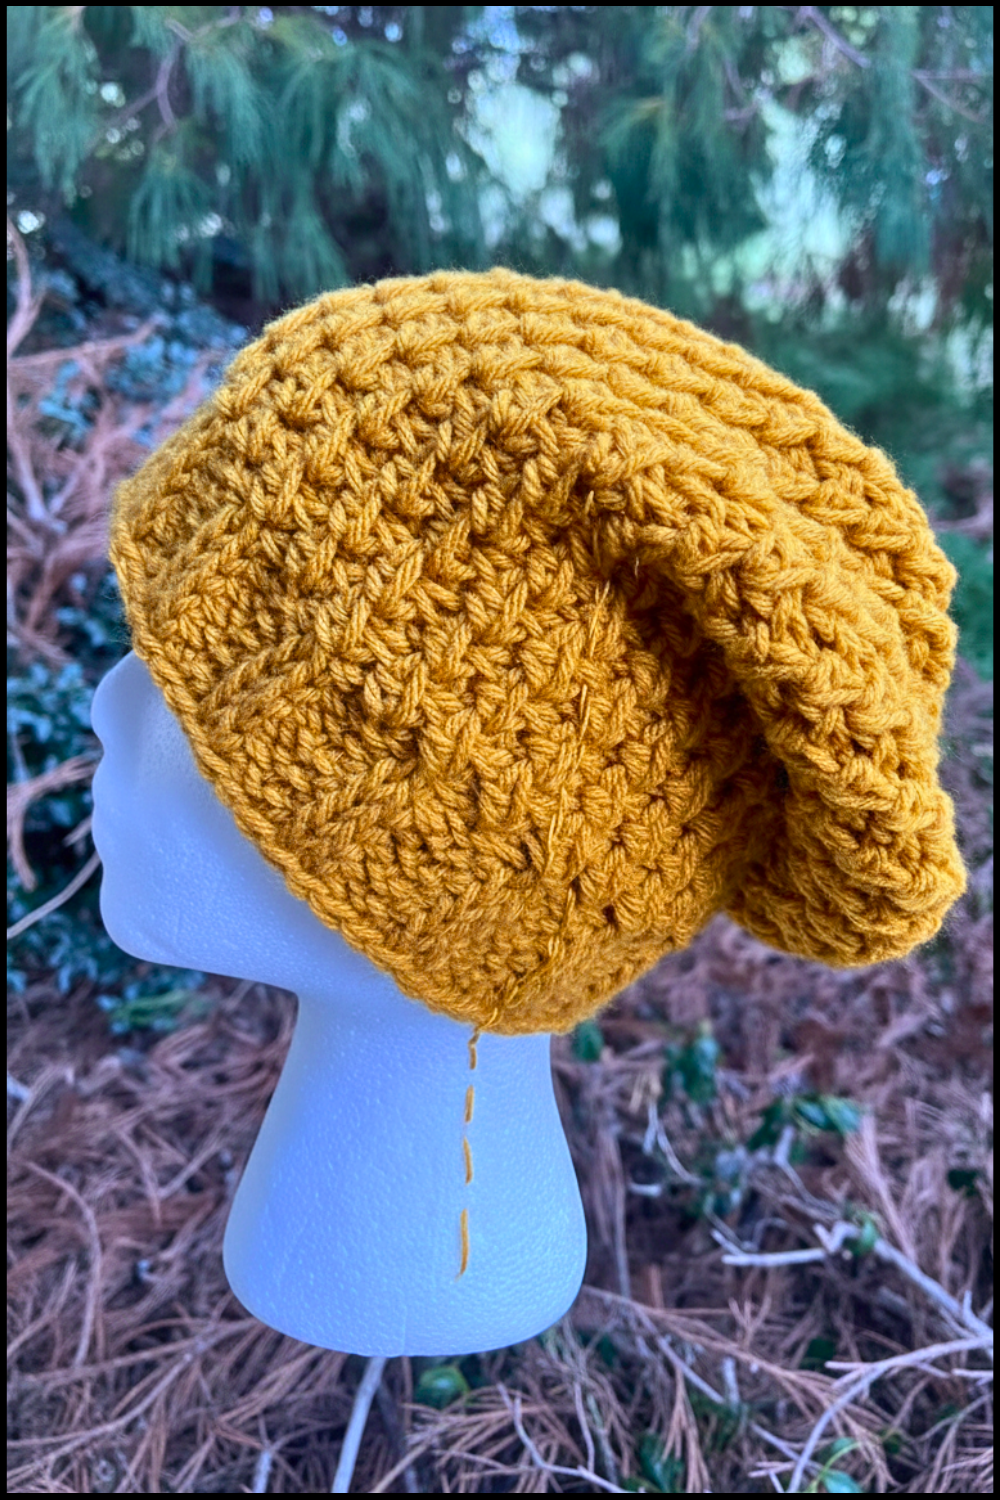
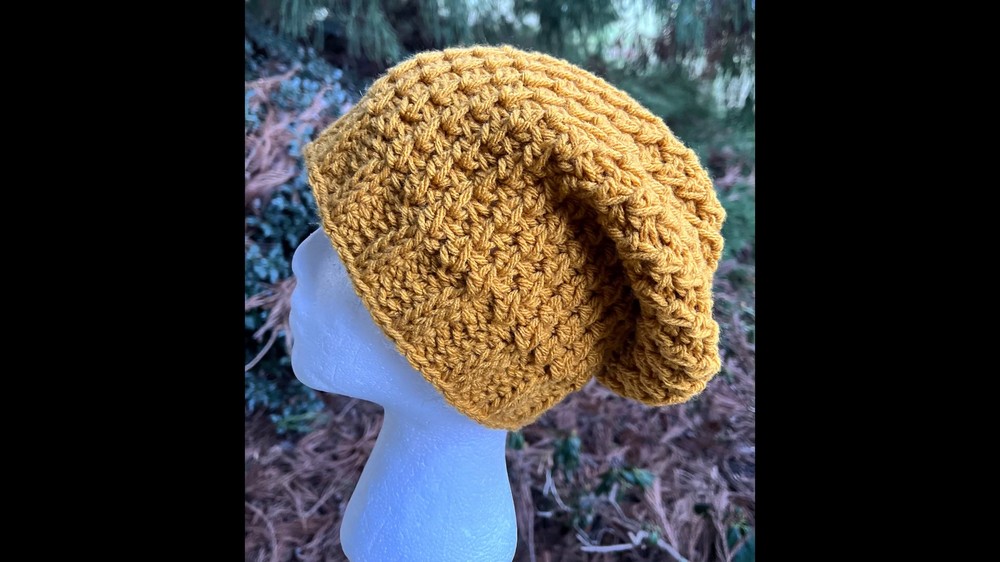
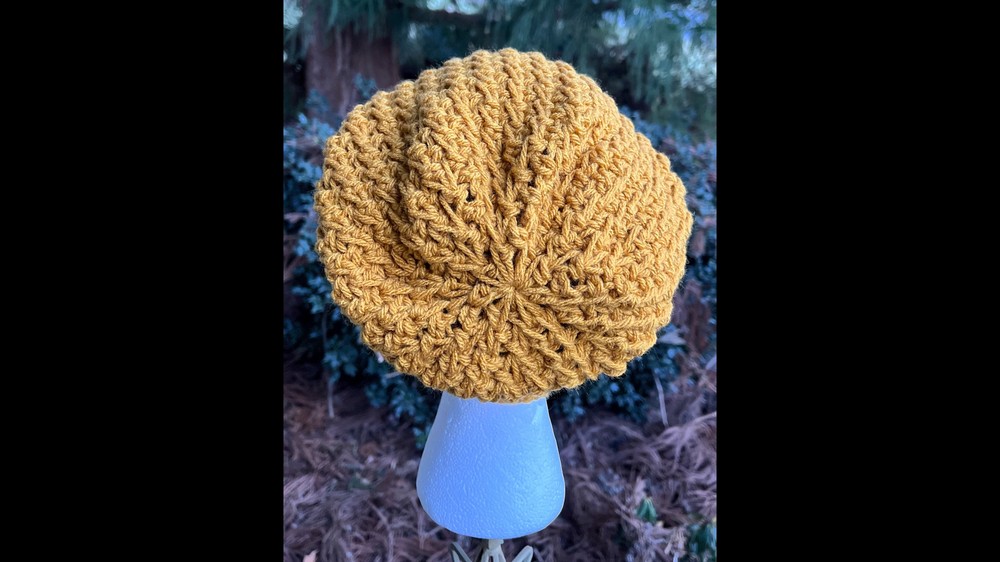
A hat that’s more than just an accessory, it’s a fashion statement! This crochet slouchy hat is designed to add elegance and personality to your look. Its loose, relaxed fit gives it a modern and comfortable style, making it perfect for daily wear or special outings. The hand-crocheted pattern makes each piece unique, showing off its soft texture and charming design.
Stay Warm and Stylish
Not only does this hat look amazing, but it also keeps you cozy during chilly days. It’s a wonderful way to stay warm while staying fashionable. Pair it with almost any outfit, whether jeans and a jacket or a long coat and it instantly adds a trendy flair. With endless color options, this hat lets you show your personal style effortlessly. Perfect for gifting or enjoying yourself, this slouchy hat combines beauty with comfort in the most delightful way.
Materials Required:
- Yarn: Worsted weight yarn (#4), approximately 200g (yarn used: Yarn Lane Impeccable).
- Hook: 7 mm Tunisian hook with a cord attached (size K).
- Notions: Regular crochet hook for finishing, scissors, yarn needle (for weaving ends).
- Optional: Pom-pom for decoration.
Difficulty Rating:
Intermediate
Key Abbreviations (US Terminology):
- Ch: Chain
- TSS: Tunisian Simple Stitch
- TPS: Tunisian Purl Stitch
- Knit Stitch: Tunisian Knit Stitch (insert hook between two vertical bars).
- YO: Yarn Over
- St(s): Stitch(es)
- Sl St: Slip Stitch
Important Remarks:
- Tunisian crochet is worked in two parts: the Forward Pass (FP) (picking up loops) and the Return Pass (RP) (working loops off the hook). Together, they count as one round.
- Ensure that the starting chain and stitches are not twisted when joining to work in the round.
- Adjust the length of the hat to achieve a non-slouchy or slouchy style as desired.
Pattern Instructions:
Step 1: Foundation Chain
- Make a slip knot, place it on the hook, and chain 65 loosely.
- Work into the back bump of the chain, starting with the second chain from the hook. Pull up loops in each chain for a total of 65 loops on the hook. (This is your first Forward Pass).
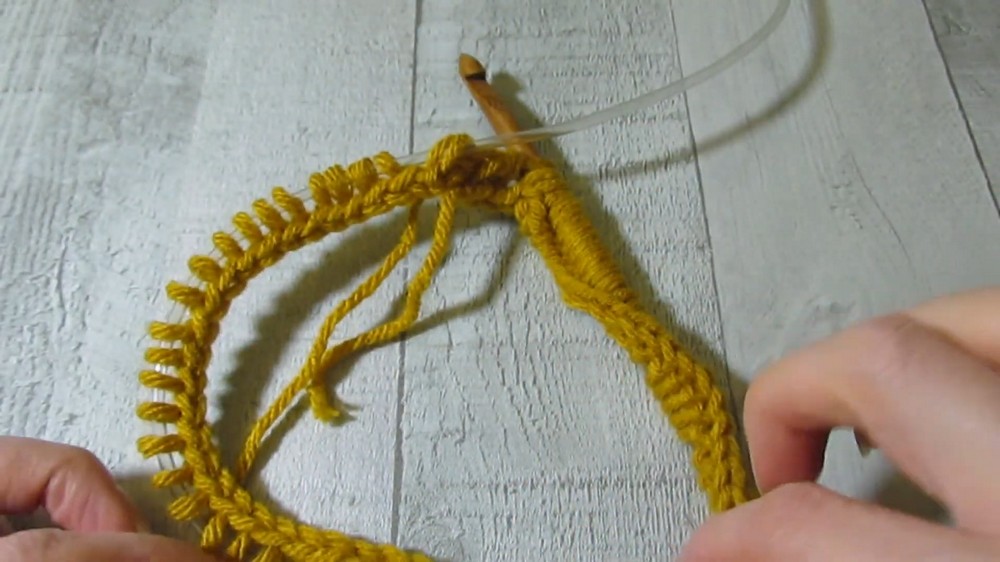
Step 2: Join to Work in the Round
- Without twisting the foundation chain, bring the ends together. Insert the hook into the two loops of the first stitch, yarn over, and pull through to connect into a circle.
- Begin the Return Pass: Yarn over, pull through two loops at a time until only one loop remains on the hook. (Round 1 complete).
Step 3: Hatband
- Begin the second round with the following ribbing pattern:
- Work 2 Tunisian Knit Stitches (TKS) (insert hook between the two vertical bars of the stitch).
- Follow with 2 Tunisian Purl Stitches (TPS) (yarn in front, insert hook under the front vertical bar, yarn over, and pull up a loop).
- Repeat 2 Knit Stitches and 2 Purl Stitches around for the Forward Pass.
- Join the round by inserting the hook into the first two loops, yarn over, and pull through.
- Work the Return Pass as before: Yarn over, pull through two loops at a time until one loop remains on the hook.
- Repeat this ribbing pattern for 6 total rounds (or desired height of the hatband).
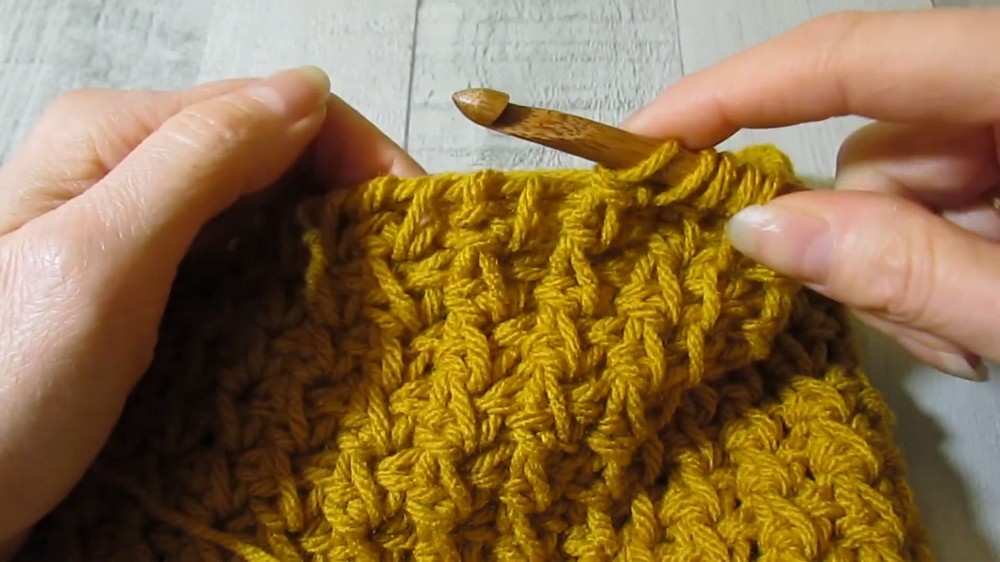
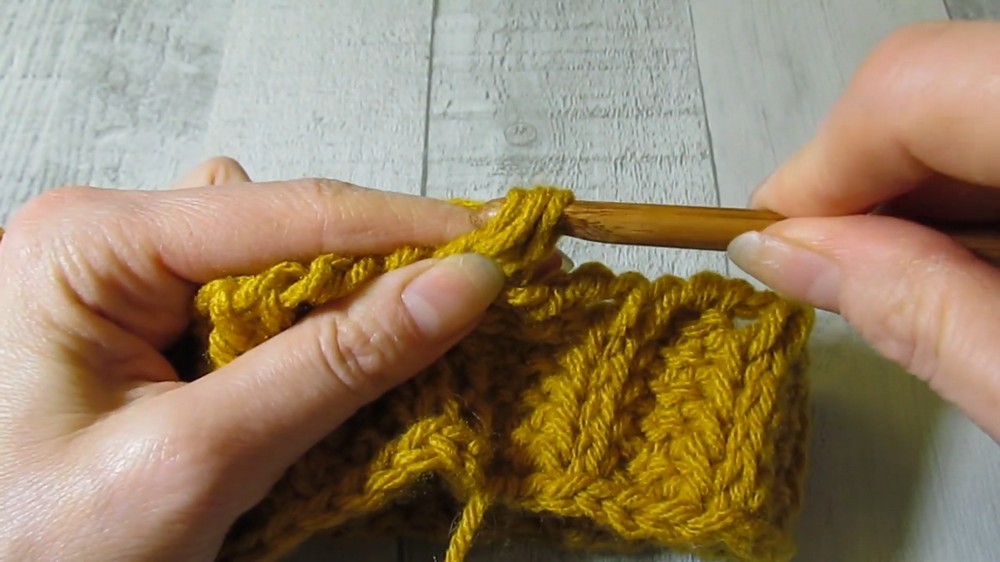
Step 4: Main Hat Body
- For the main section of the hat, use the bubble stitch pattern:
- Insert the hook under the first two vertical bars as if working a decrease, yarn over, and pull up a loop.
- Yarn over, repeat by inserting the hook into the same two stitches, and pull up another loop. Yarn over again.
- Pull through two loops at a time until one loop is left (creates a bubble).
- Repeat this bubble stitch across the round for the Forward Pass.
- Join the round as before and work the Return Pass.
- Continue this stitch pattern for 20 total rounds (or desired hat length for a slouchy style).
Step 5: Decreases (Shaping the Crown)
- Round 21: Work in sequences of 8 stitches:
- Work the bubble stitch pattern for 4 pairs.
- Then decrease: Insert hook into 4 vertical bars, yarn over, pull through all 4 loops, yarn over, and complete the stitch.
- Repeat this sequence of 4 bubble stitches + 1 decrease around. Finish the Return Pass.
- Round 22: Work in sequences of 6 stitches:
- Work the bubble stitch pattern for 2 pairs.
- Decrease: Insert the hook into 4 vertical bars, yarn over, pull through all 4 loops, yarn over, and complete.
- Repeat around and finish the Return Pass.
- Round 23: Work in sequences of 4 stitches:
- Decrease: Insert the hook into 4 vertical bars, yarn over, pull through all 4 loops, and yarn over to complete.
- Repeat across the round to complete the Forward Pass.

Step 6: Closing the Top
- Cut the yarn, leaving a long tail.
- Use a regular hook to yarn over and pull through all the loops on the last row (slip stitch all loops together).
- Secure the top by pulling tightly. Use the yarn tail and yarn needle to weave through the remaining loops at the top and close the hole completely.
Step 7: Finishing Touches
- Weave in all remaining ends using the yarn needle.
- Optionally, add a pom-pom at the top for extra flair. Block the hat lightly if needed.
Final Words:
Congratulations! You’ve completed a stylish and functional Tunisian slouchy hat. This project uniquely combines texture through the bubble stitch and a neat ribbed band. The hat can be adjusted for a snug or relaxed slouchy fit.
Correction Point:
Ensure the starting chain is not twisted when joining to form a circle. Double-check stitch counts after each decrease round to avoid unintentional shaping errors.
Helpful Insight:
Using a larger hook and slightly thinner yarn creates better drape and flexibility. Block the hat lightly for smooth edges and a professional finish.