
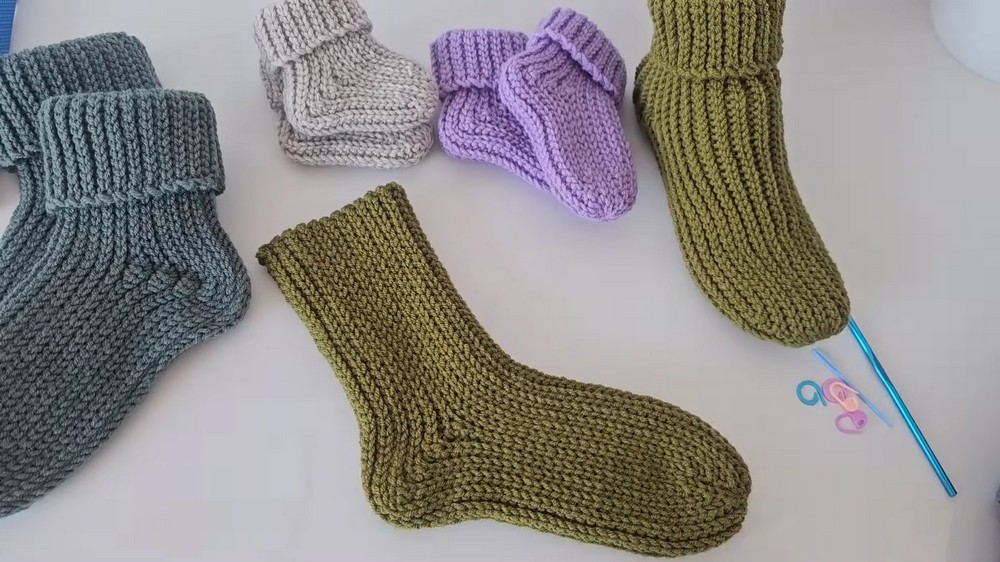
Fun & Easy Crochet Socks Pattern To Keep Your Feet Happy
Step into the cozy world of crochet socks, combining softness, and unique style that's for relaxing at home, gifting, or enhancing your everyday look.
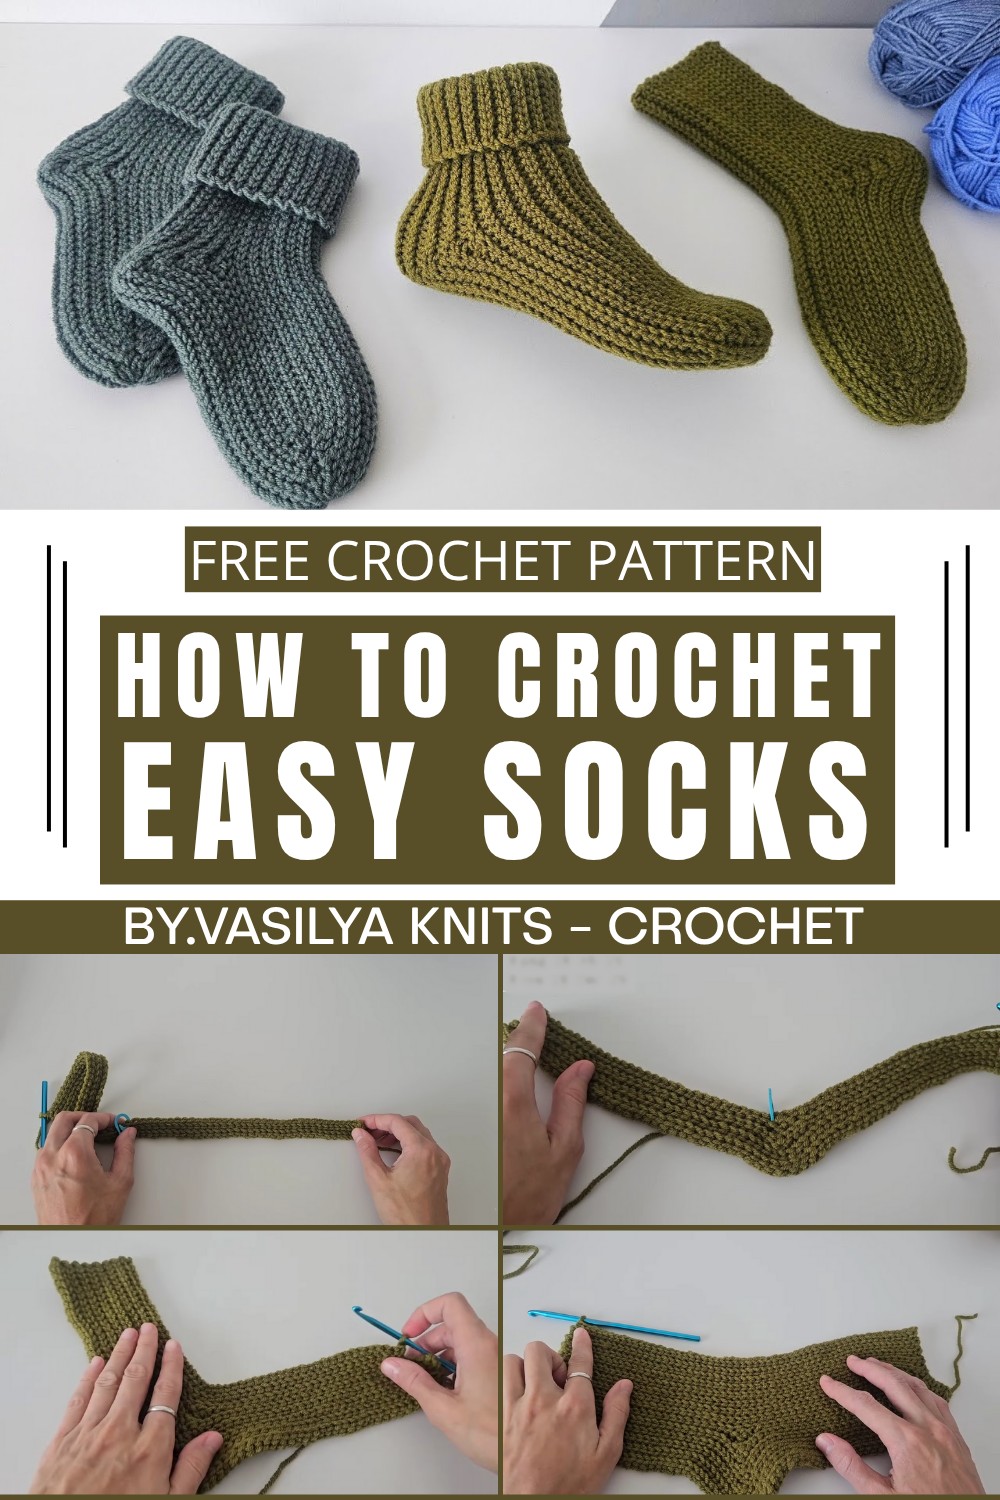
Trendy Crochet Socks Pattern for Every Style
Warm toes on a chilly day always feel like a small slice of comfort, and crocheted socks offer just that with a touch of charm. Soft yarn shaped into cozy footwear is not only practical but also a visual treat. These socks boast beautiful textures, colorful stitches, and snug fits that make them perfect for relaxing at home or keeping warm outdoors.
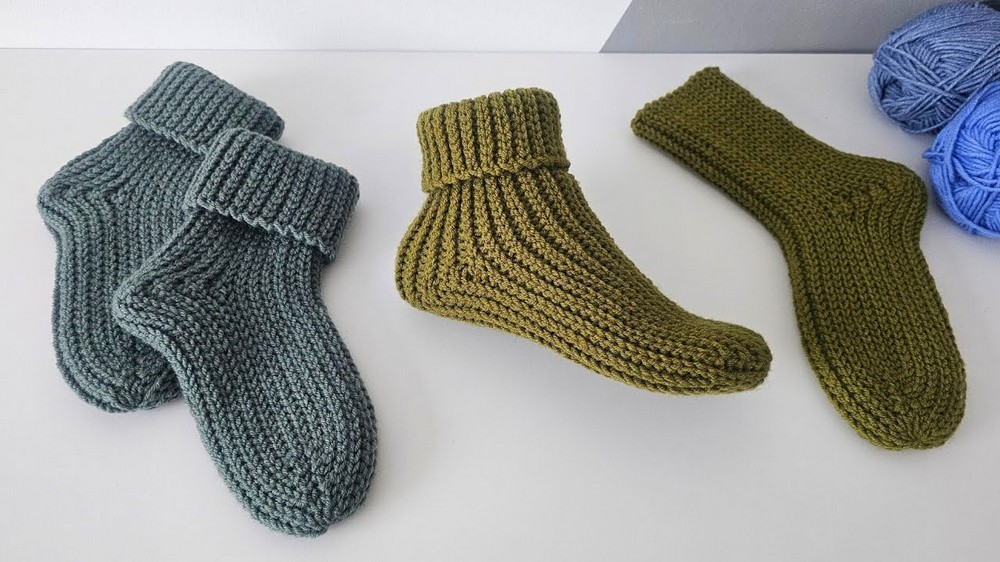
They’re as stylish as they are functional, with endless options to suit every mood—from vibrant hues to soft, neutral tones. Whether you prefer ankle-length or taller designs, crochet socks give your feet a unique look that feels luxurious with every wear. Their cozy vibe and delicate appearance make them a thoughtful gift or a soothing project to enjoy during quiet moments. With their warmth and beauty, crochet socks are the perfect addition to the colder seasons while adding charm to your daily life.
Crochet Transversely Crocheted Socks
Materials Needed
- Tools:
- Crochet Hook: 5.0 mm
- Stitch Markers (optional but recommended)
- Needle with a large eye (for assembly and toe finish)
- Scissors
- Yarn:
- Alize Lanagold Classic
- Weight: 100 g = 240 m
- Composition: 51% Acrylic, 49% Wool
- Each pair of socks (up to size 38) will require 1 skein.
- Alize Lanagold Classic
- Note on Technique:
- The socks are made using slip stitch rows, which create an elastic and flexible fabric.
- Loosely crochet slip stitch rows to avoid tightening the fabric, which can make it hard to insert the hook into subsequent stitches.
Key Techniques Used
- Slip Knot
- Chain Stitch (ch)
- Slip Stitch (sl st)
- Single Crochet (sc)
- Joining with Slip Stitches
- Toe Loop Collection
- Invisible Seam Assembly
Pattern Overview
- Foundation Chain Creation
- Forming the Sock Body
- Decreasing and Shaping for the Toe
- Shaping the Heel with Increases
- Final Rows and Assembly
- Toe Closing
- Finishing Touches
Pattern Instructions
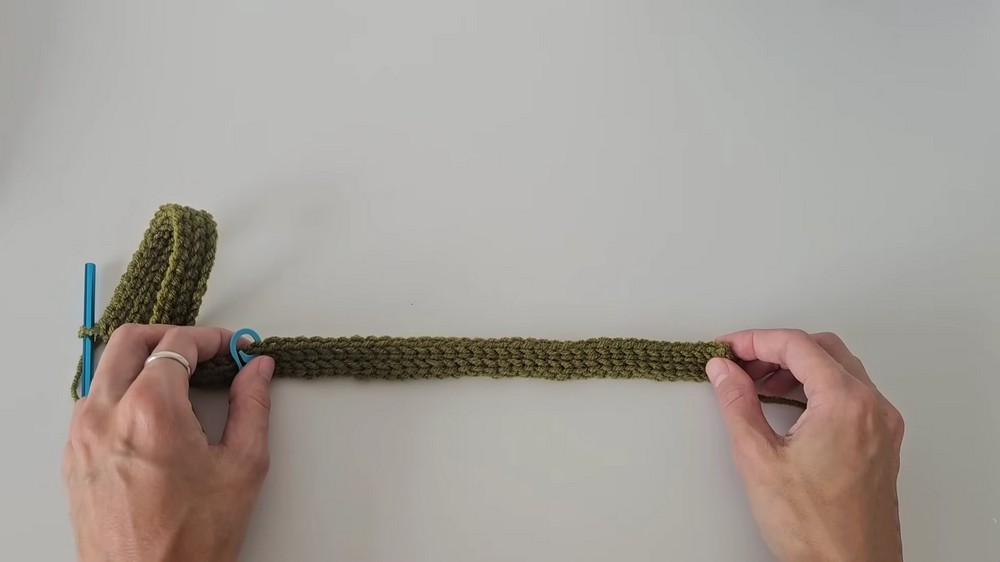
Step 1: Foundation Chain Creation
- Determine the Size:
- For size 37-38, chain 70 stitches.
- Adjust by adding/subtracting 2 chain stitches for every size up/down.
- Example: Size 39-40 → 72 chains; size 35-36 → 68 chains.
- Example: Size 39-40 → 72 chains; size 35-36 → 68 chains.
- The chain should measure 45-46 cm unstretched for size 37-38, with length adjustments for different sizes.
- Foundation Chain:
- Make a slip knot, leaving a short tail for weaving later.
- Chain the required number of stitches (e.g., 70 ch for size 37-38).
- Ensure the chain is loose—do not tighten stitches excessively.
- Row 1:
- Chain 1 (turning chain).
- Insert the hook into the second chain from the hook and pull up a loop.
- Work a slip stitch (sl st).
- Continue slip stitches (one per chain) across all chains.
- You should have 70 slip stitches at the end of Row 1.
- Tip: Mark the last stitch of the row to prevent skipping it in future rows.
Step 2: Forming the Sock Body
- Row 2:
- Chain 1, turn your work.
- Work slip stitches into the back loop only of each stitch from the previous row.
- Repeat this process across the entire row. There should be 70 slip stitches in total.
- Note: At the last stitch of every row, insert the hook through both loops for added stability.
- Chain 1, turn.

- Rows 3-4:
- Repeat Row 2 for the third and fourth rows, ensuring that each row has 70 slip stitches.
- At the end of Row 4, mark the position for the top of the sock by counting 34 stitches down from the top edge.
- Mark this 34th stitch (for size 37-38); adjustments will vary based on size:
- Example: Size 39-40 → Mark 36th stitch.
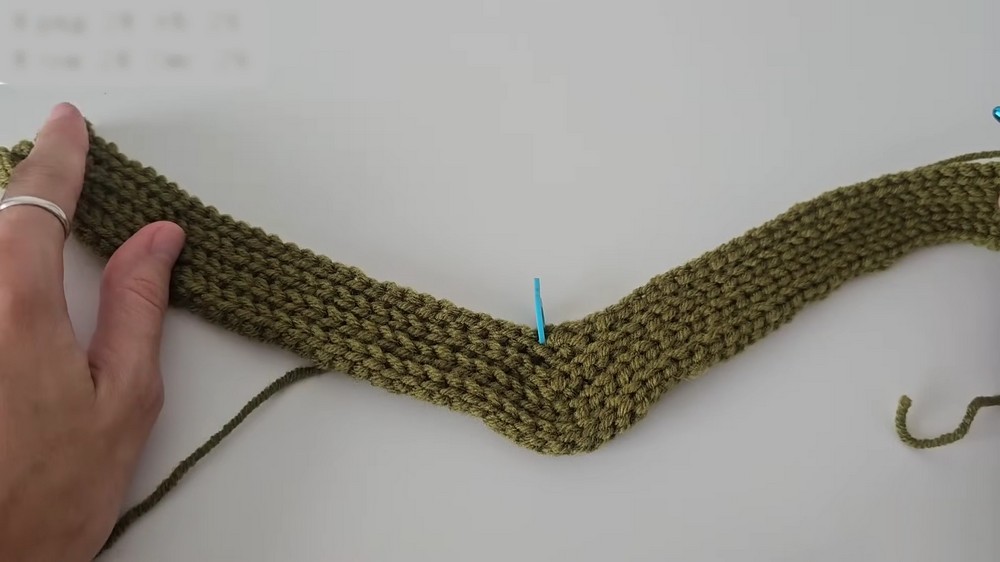
Step 3: Decreasing and Shaping for the Toe
- Row 5:
- Chain 1, turn your work.
- Work slip stitches into the back loops only until you are one stitch before the marker.
- Leave 1 stitch unworked before the marker.
- Work a decrease:
- Insert the hook into the back loop of the last stitch before the marker, pull up a loop (2 loops on hook).
- Insert the hook into the next stitch after the marker, pull up a loop (3 loops on hook).
- Yarn over and draw through all 3 loops.
- Mark the resulting decrease stitch for tracking future decreases.
- Continue working slip stitches to the toe, leaving 2 stitches unworked at the end of the row.
- Row 6:
- Chain 1, turn your work.
- Repeat the decrease at the marked stitch as in Row 5.
- Leave 2 unworked stitches at the toe.
- Continue marking decreases as you progress.
- Rows 7-11:
- Repeat the decrease pattern at both the marker (top of the sock) and the toe (leaving 2 unworked stitches) until 4 steps (decrease rows) are formed.
- Row 11: Collect Decreases:
- Work slip stitches to the toe and halt at the 6 laddered stitches.
- Use slip stitches to collect all unworked stitches at the toe:
- Locate the unworked stitches (visible as small “bars”).
- Insert the hook under each bar and pull through all loops on the hook until the toe is closed.
Step 4: Shaping the Heel with Increases
- Following the toe shaping, count 27 stitches from the top of the sock and mark the position as the starting point for heel increases.
- Increase Rows (Rows 12-19):
- In each row, work increases at the marked stitch:
- Insert the hook into the marked stitch, pull up a loop, and work 3 sc into the same stitch.
- Mark the center sc of the increase cluster each time to create consistent shaping.
- In each row, work increases at the marked stitch:
- Rows 20-28:
- Work even rows (no increases or decreases) across 70 slip stitches.
Step 5: Final Rows and Assembly
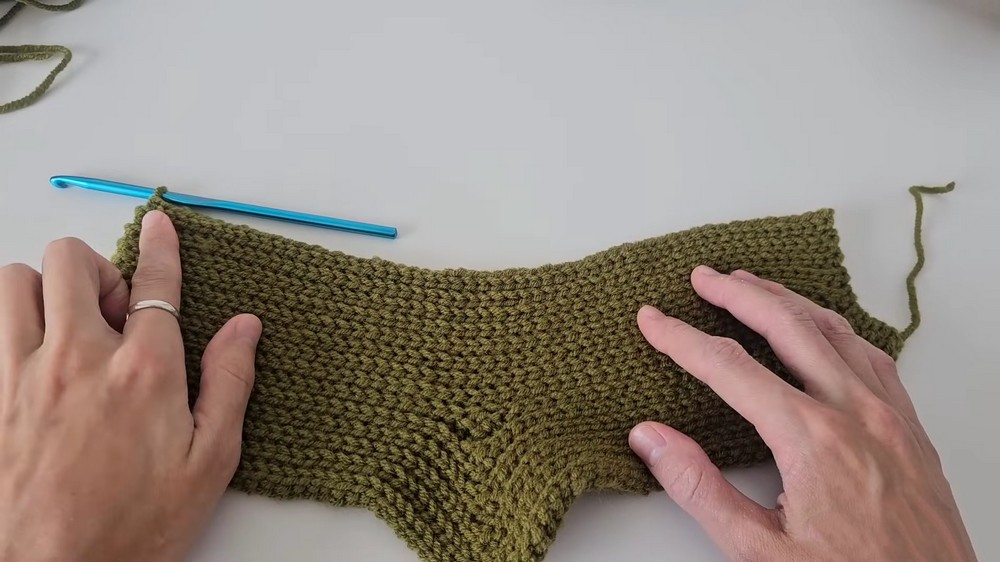
- Seam the Sock:
- Fold the fabric in half, aligning the edges.
- Use slip stitches worked through front loops only to sew the sides of the sock together.
- Take care to avoid tightening the seam.
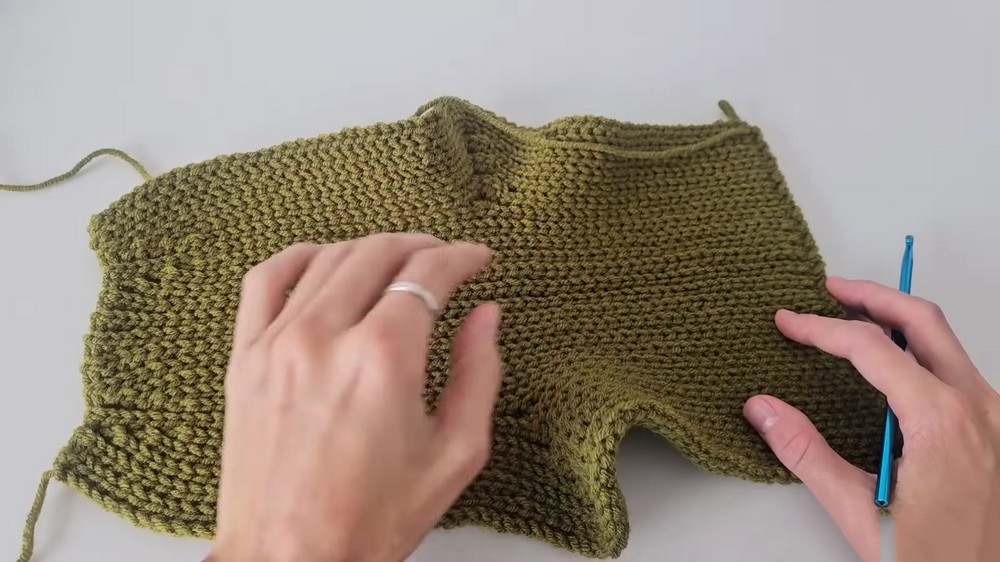
- Toe Closure:
- Thread a needle with the remaining yarn.
- Weave the needle under the bars at the toe and pull to close the gap into a neat finish.
- Secure the yarn and weave in the ends.
Final Words and Tips
- The socks should feel snug but elastic due to the stretchy nature of the slip stitch rows.
- Adjust stitch counts depending on foot size; measure frequently to ensure a customized fit.
- Always crochet loosely, as tight slip stitches can make it difficult to work into the loops.
Care and Maintenance
- Handwash or machine wash in cold water on a gentle cycle. Lay flat to dry to preserve the elasticity of the stitches.