
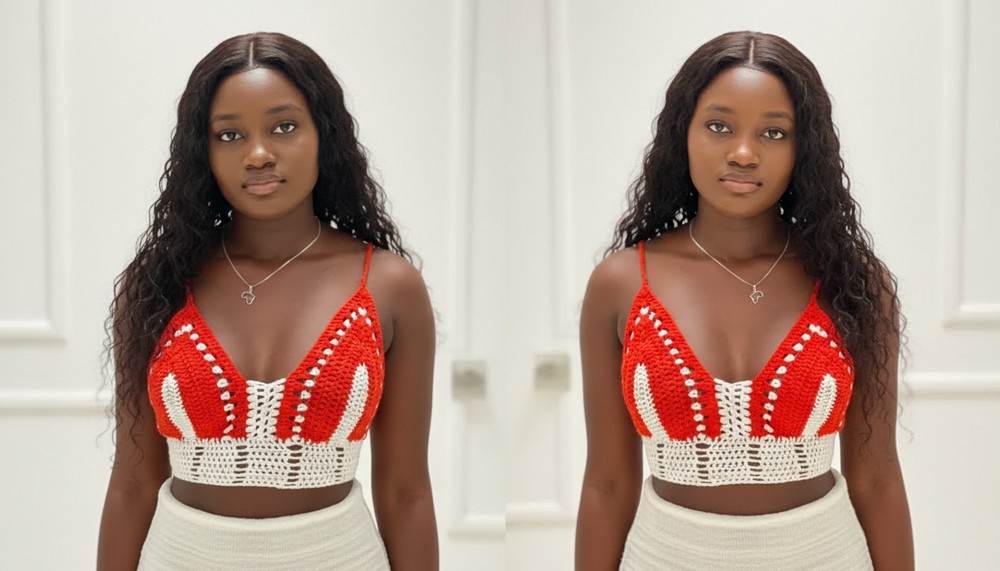
Radiant Free Crochet Crop Top Pattern That’s Perfect For Festivals
Bring your creativity to life with this free crochet crop top pattern that is beautifully designed, and fits perfectly into your unique style.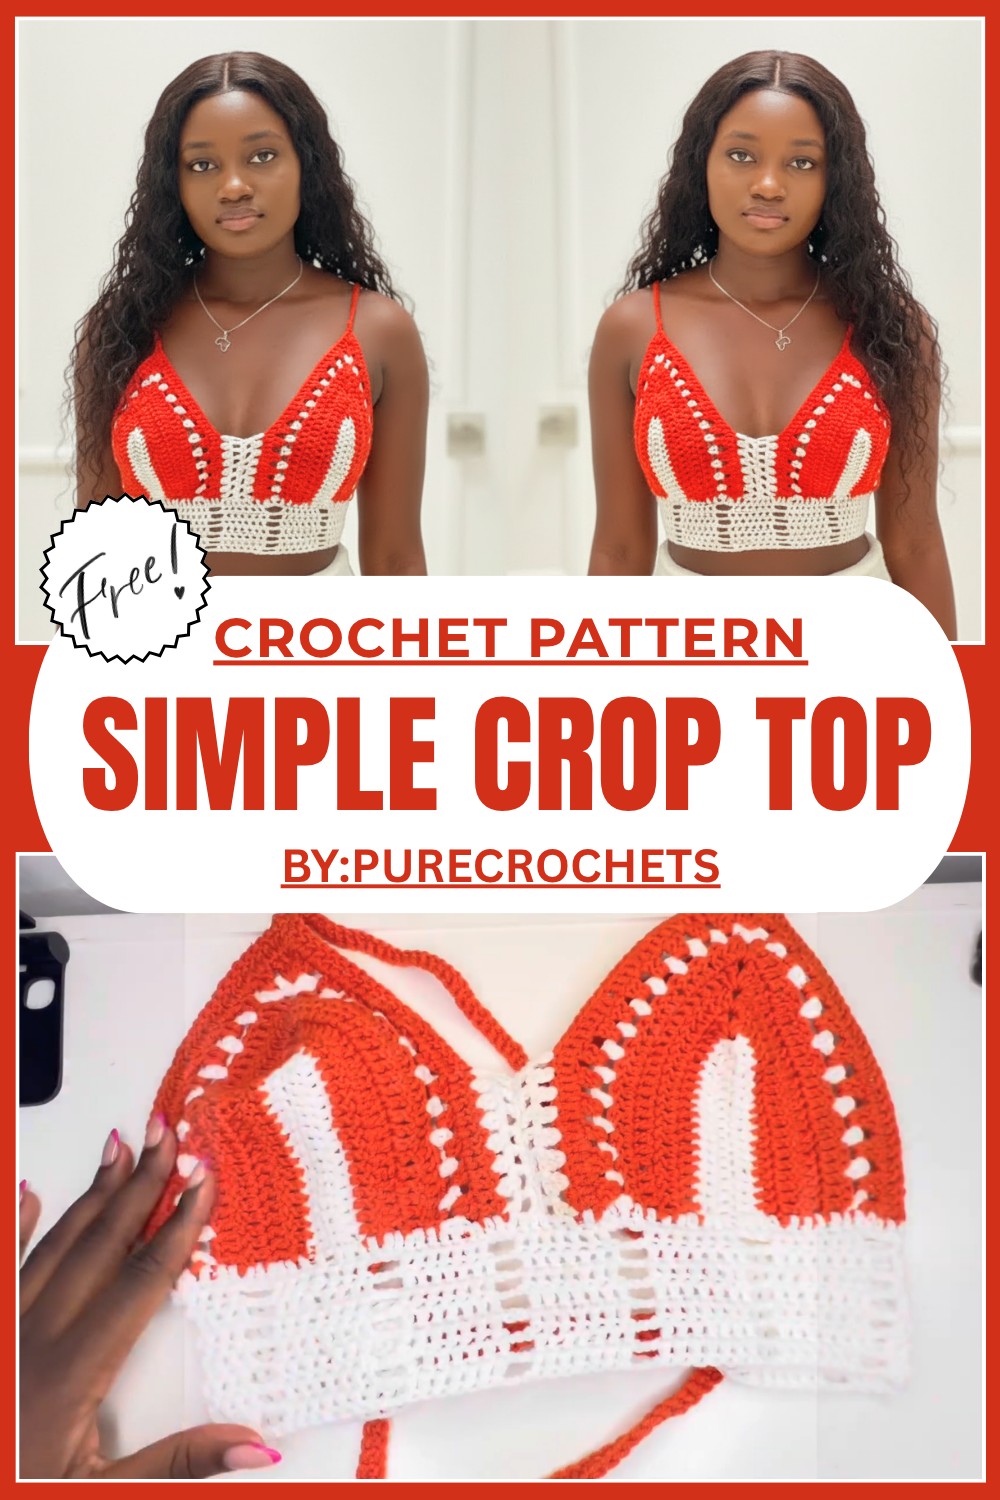
This Stunning Free Crochet Crop Top Pattern Will Transform Your Look
Free Crochet Crop Top Pattern Overview
This simple and stylish crochet crop top pattern is perfect for beginners and makes a lovely handmade piece of clothing. With easy to learn stitches like double crochets, granny stitches, and mesh designs, you can create a lightweight and trendy top that feels soft and looks beautiful. It uses 100% milk cotton yarn, which is gentle on the skin and comes in stunning colors to match your style.
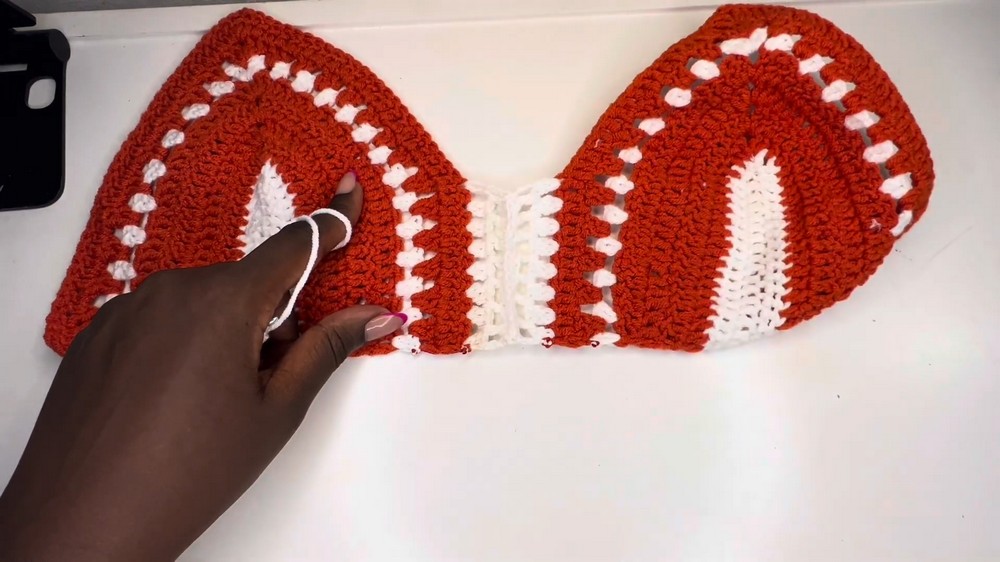
The top is made using two panels for the bust area, joined together seamlessly. Its design includes a delicate row of granny squares, adjustable straps, and decorative mesh stitches to give it a unique look. This crop top is ideal for casual outings, summer days, or fun occasions. Plus, you can customize its size, colors, and length to fit your preferences.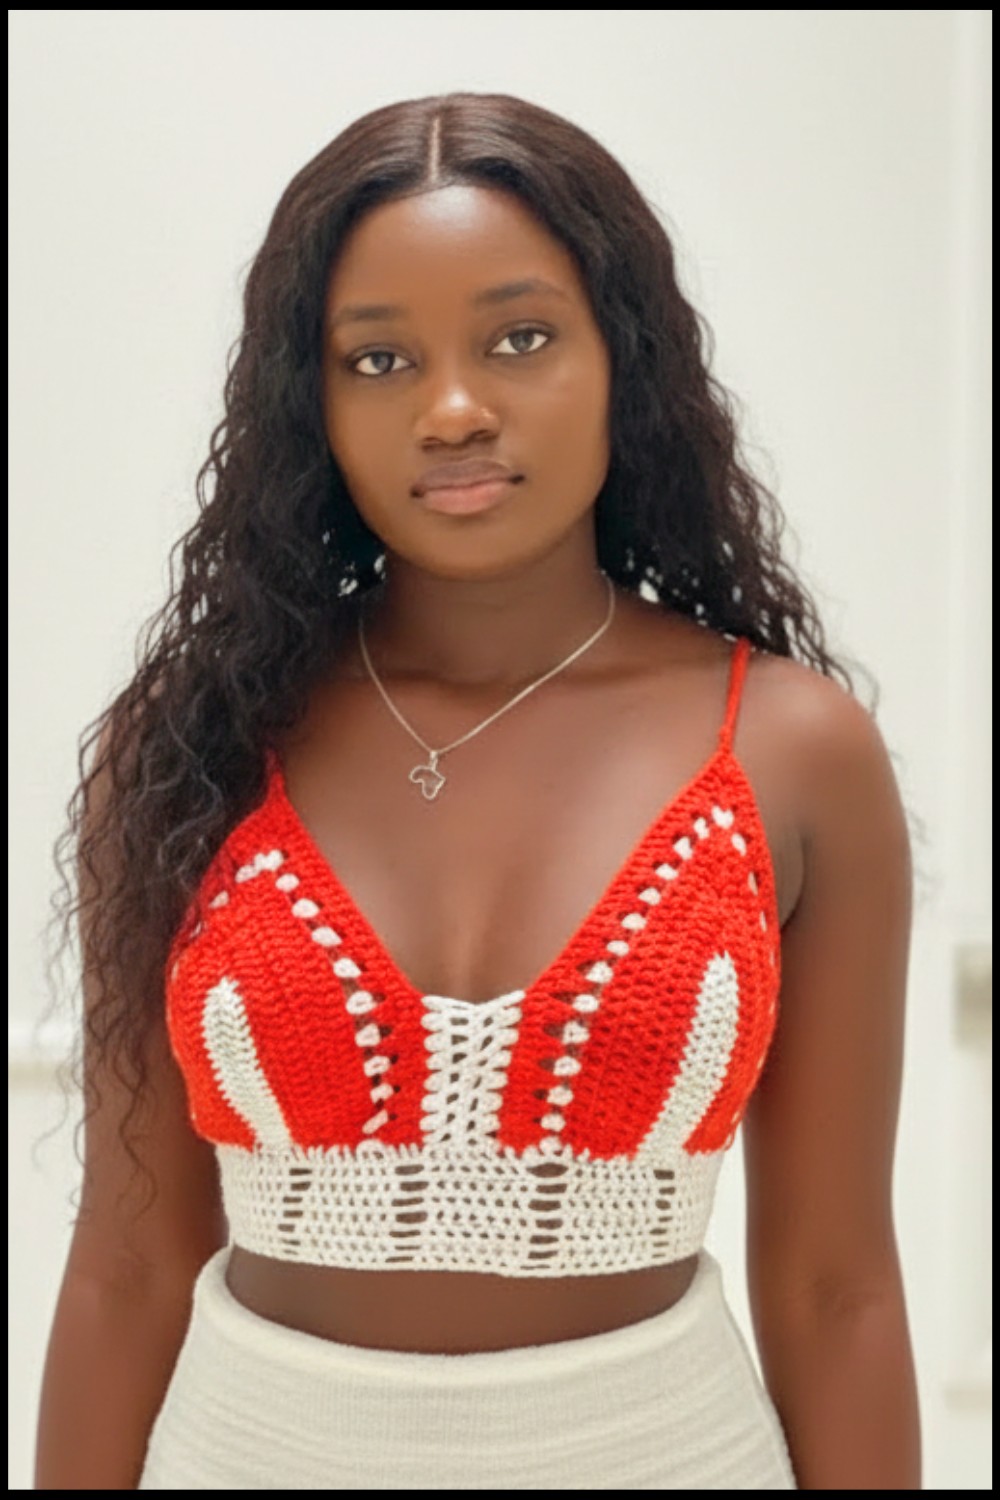 Give your wardrobe a boost with this easy to follow free crochet crop top pattern that’s fun to make and perfect to wear.
Charming Crochet Crop Top Pattern
Materials Needed
- Yarn: 100% milk cotton yarn (50g). You can choose an alternative soft yarn in your preferred color.
- Crochet Hook: 3.5 mm hook (recommended for proper coverage, especially around the bust area).
- Tape Measure: To check accuracy in measurements.
- Scissors: For cutting the yarn cleanly.
- Tapestry Needle: For sewing in loose ends.
Special Techniques
- Double Crochet (dc): Yarn over, insert the hook into a stitch, yarn over, pull up a loop, yarn over, pull through two loops, yarn over again, and pull through the final two loops.
- Granny Stitch: Work two double crochets in the same space, chain one, and repeat.
- Chain Stitch (ch): Simple yarn over and pull through the loop on the hook.
- Single Crochet (sc): Insert hook into a stitch, yarn over, pull up a loop, yarn over, and pull through both loops.
- Increasing: At the top of certain rows, work multiple stitches into the same space to widen the pattern.
Step by Step Instructions
Bra Cups
- Foundation:
a. Chain 18 for a size Medium (bust size 34 inches). Adjust chain length as follows:- Small: Chain 15
- Large: Chain 20
- Extra Large: Chain 22
b. Turn and work one row of double crochets across the chain. Skip the first two stitches from the hook when starting.
- Second Row to Increase:
a. Chain 2 and turn the work. Skip the first stitch and work double crochets across.
b. When you reach the top (last stitch), work the following into the same stitch:- Two double crochets, chain 2, and two more double crochets.
c. Continue on the other side of the work with normal double crochets.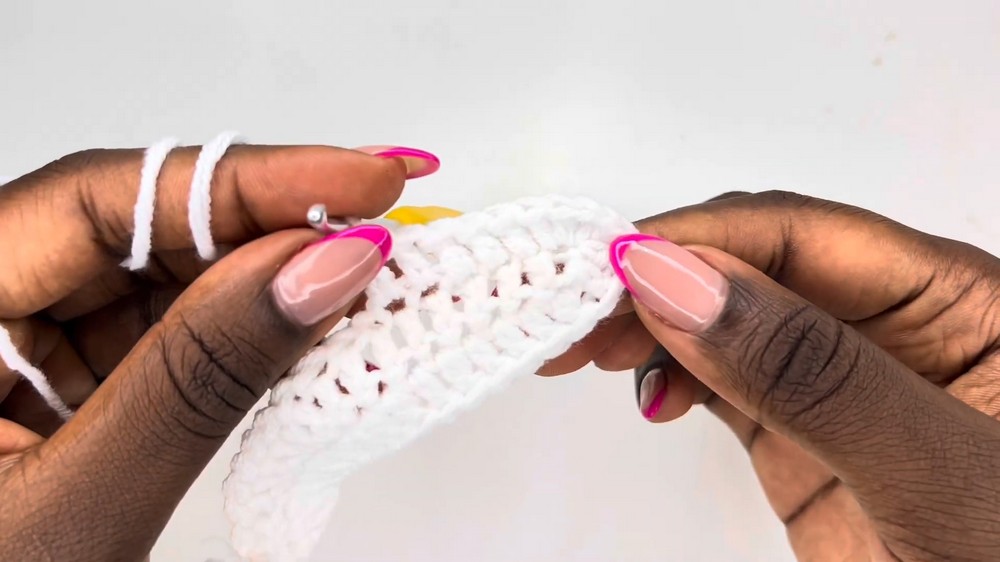
- Two double crochets, chain 2, and two more double crochets.
- Changing Yarn Color:
a. At the end of a row, cut off the yarn and attach a new color.
b. Chain 3 and proceed with double crochets while following the same increase pattern at the top. - Repeat Rows:
a. Continue alternating double crochet rows with increases at the top until the cup is wide enough to fully cover the bust area. Use a tape measure to adjust size as needed:- Medium size cups measure approximately 4.5 inches wide.
b. After the last double crochet row, switch to granny stitches.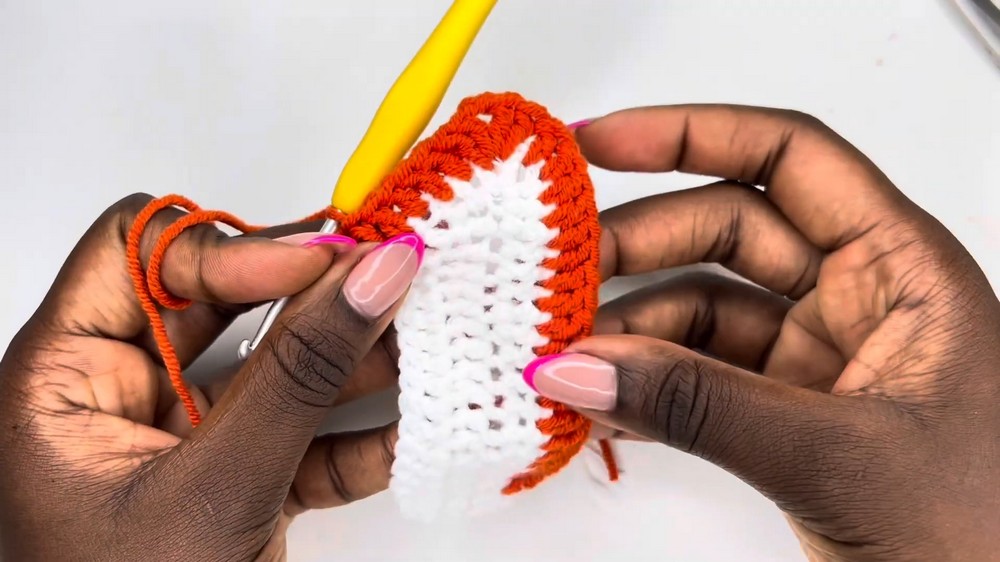
- Medium size cups measure approximately 4.5 inches wide.
- Granny Stitch Rows:
a. Attach yarn and chain 4.
b. Work two double crochets into the same space as chain 4. Chain 1, skip two stitches, and work two more double crochets into the third stitch.
c. Repeat this pattern across the row, remembering to increase at the top by working two granny stitches separated by a chain into the topmost space. - Complete One Cup:
After finishing with granny stitches and a row of double crochets, cut the yarn. Create the second bra cup using the exact same steps.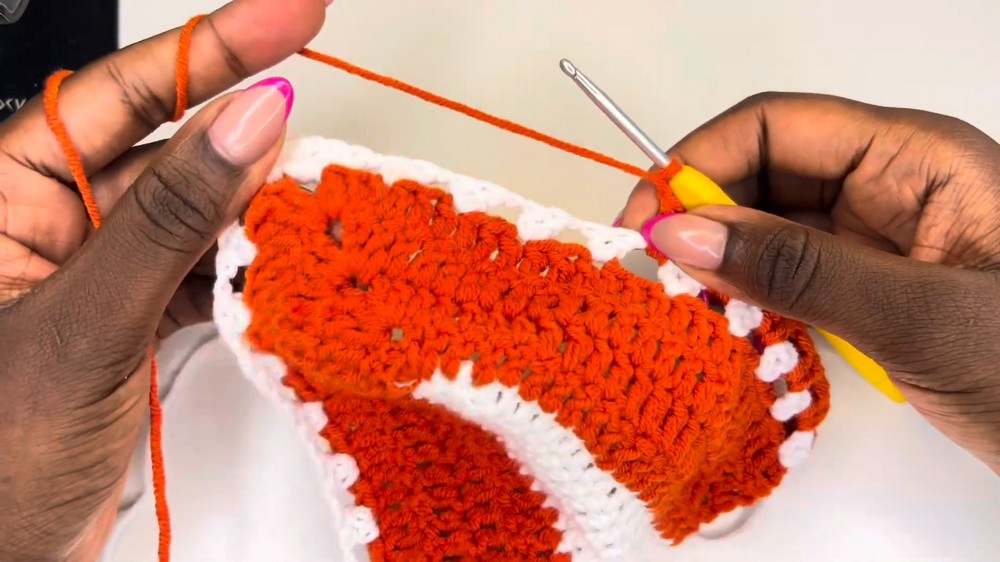
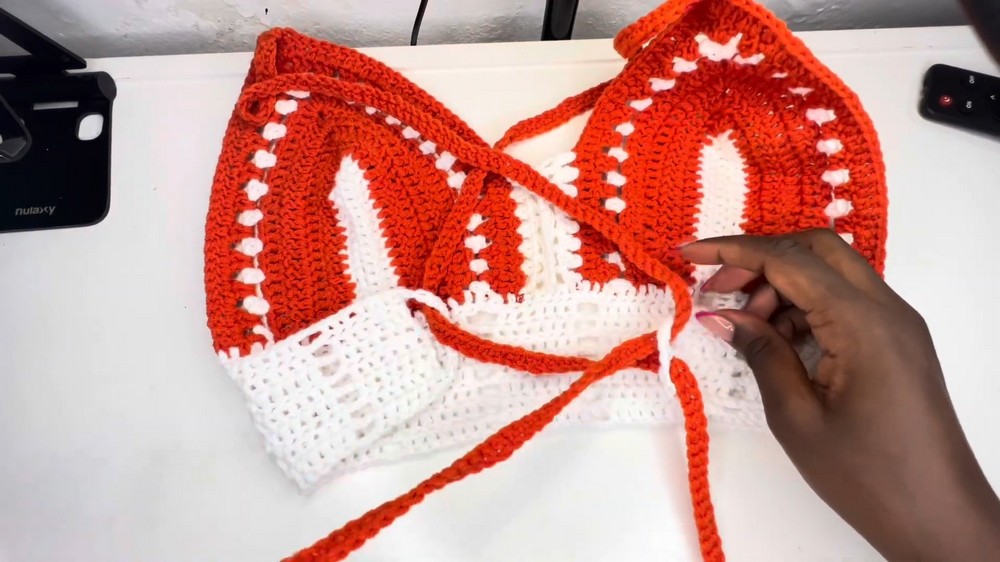
Joining the Cups
- Place the two bra cups side by side.
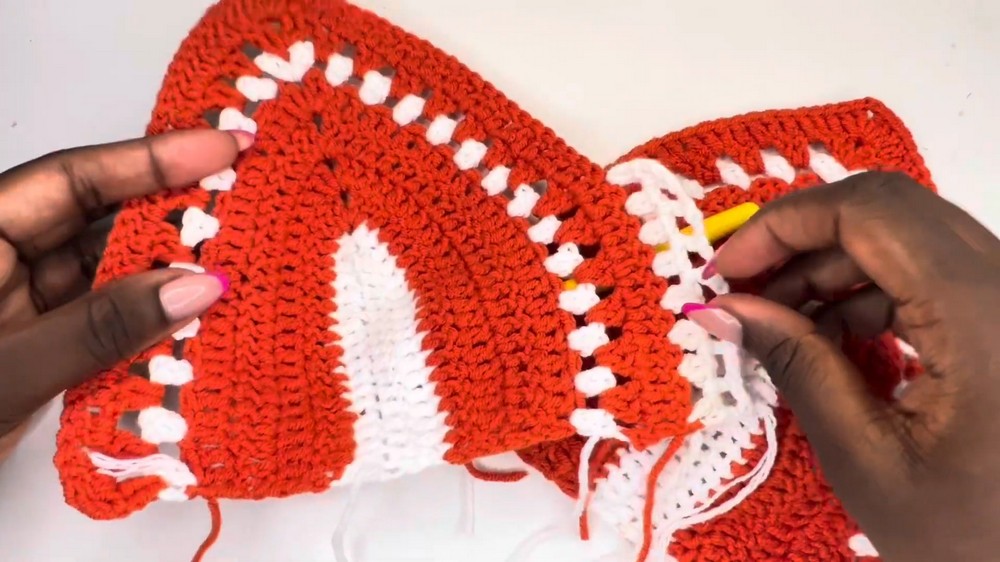
- Using a 3.5 mm hook, attach the cups with a row of single crochets along the sides to join them neatly. Alternatively, use a tapestry needle for more precision.
Lower Body Section
- Foundation Row:
Attach yarn at the base of the joined bra cups. Chain 18 for the extension on one side of the garment (adjust as follows):- Small: Chain 15
- Large: Chain 20
- Extra Large: Chain 25
- Body Rows:
a. Work double crochets across the base of the bra cups and extended chain. On the other side, extend with another set of 18 chains.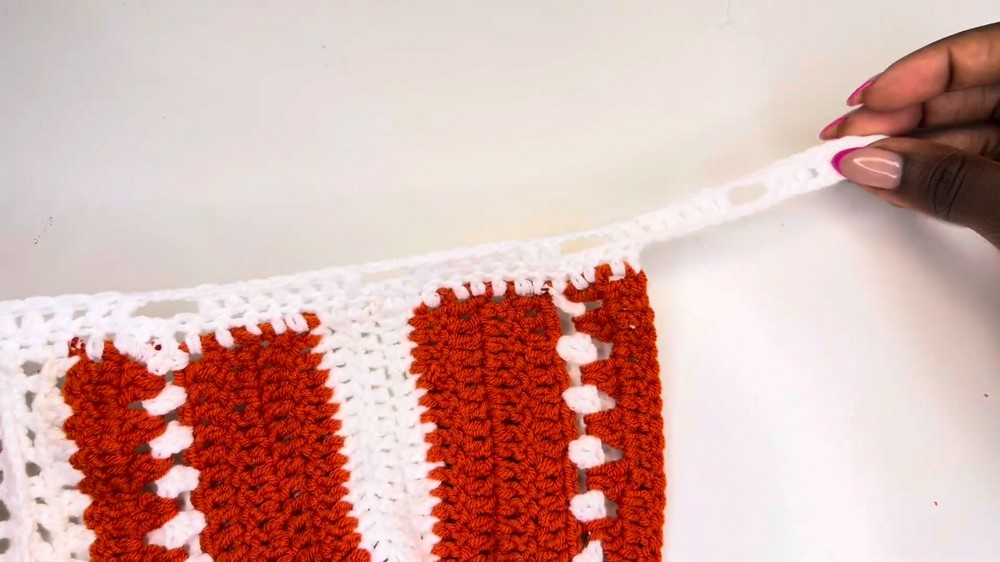
b. For decorative detailing in the body, after every six or seven double crochets, chain 3, skip three stitches, and resume double crochets.
c. Continue rows of double crochets and decorative gaps until the top reaches your desired length. Six rows are recommended for a medium size.
Side Adjustment Loops
- After completing the body, attach yarn to the sides of the top.
- Chain 4, skip three stitches on the side, and work a single double crochet to create looped gaps for adjustment ribbons.
- Reinforce the loops with a row of single crochets.
Adjustment Bands
- Neck Straps:
Attach yarn at the top of one bra cup. Chain 200 (for small size).- Medium/Large: Chain 250
- Extra Large: Chain 300 or more
Work back along the chain with single crochets for sturdiness. Repeat on the second cup.
- Back Lacing:
Create another band by chaining 250 for back adjustments. Thread the chain through the side loops to achieve a corset like fit.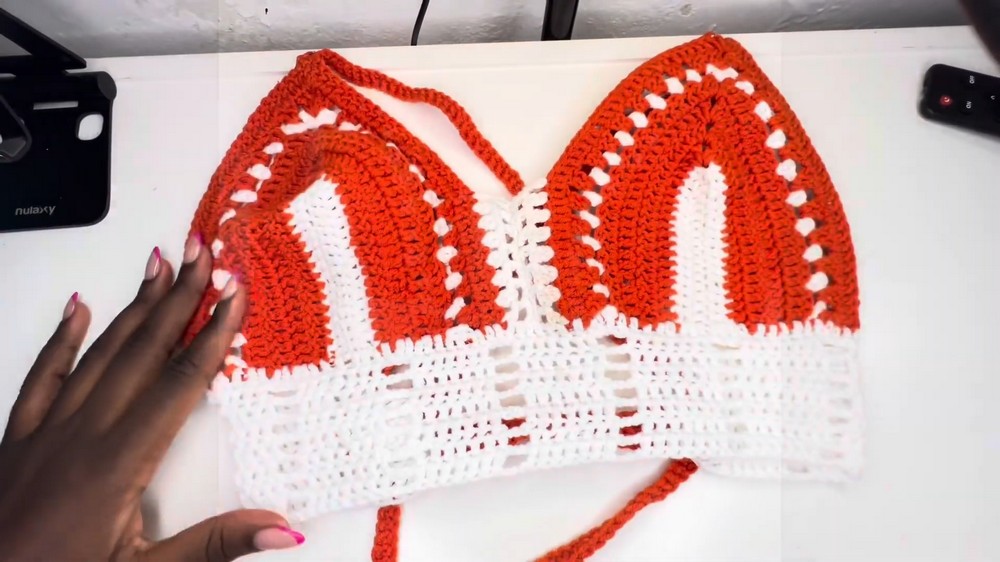
Finishing the Pattern
- Clean Edges: Use single crochets around all edges (cups, sides, and body) for a clean and sturdy finish.
- Weave in Ends: Tuck in all loose yarn tails with a tapestry needle for a neat appearance.
Final Words and Tips
- Custom Sizing: Adjust chain counts and row lengths to tailor the top to your body measurements. Always refer to a tape measure.
- Yarn Colors: Experiment with bold or pastel colors to suit your style.
- Care Instructions: Hand wash the top using mild detergent to maintain its softness and structure. Allow it to air dry.
- Storage: Store flat to avoid stretching the top unnecessarily.
This crochet top pattern is beginner friendly and customizable. Whether it’s for summer wear, layering, or gifting a friend, this project is both fun and practical.