Hook Up Cozy Free Crochet Rose Bookmark Pattern For Your Reading Joy
Let your books bloom with a gorgeous crochet rose bookmark pattern that is fun to create and perfect for making reading time a little brighter and more special.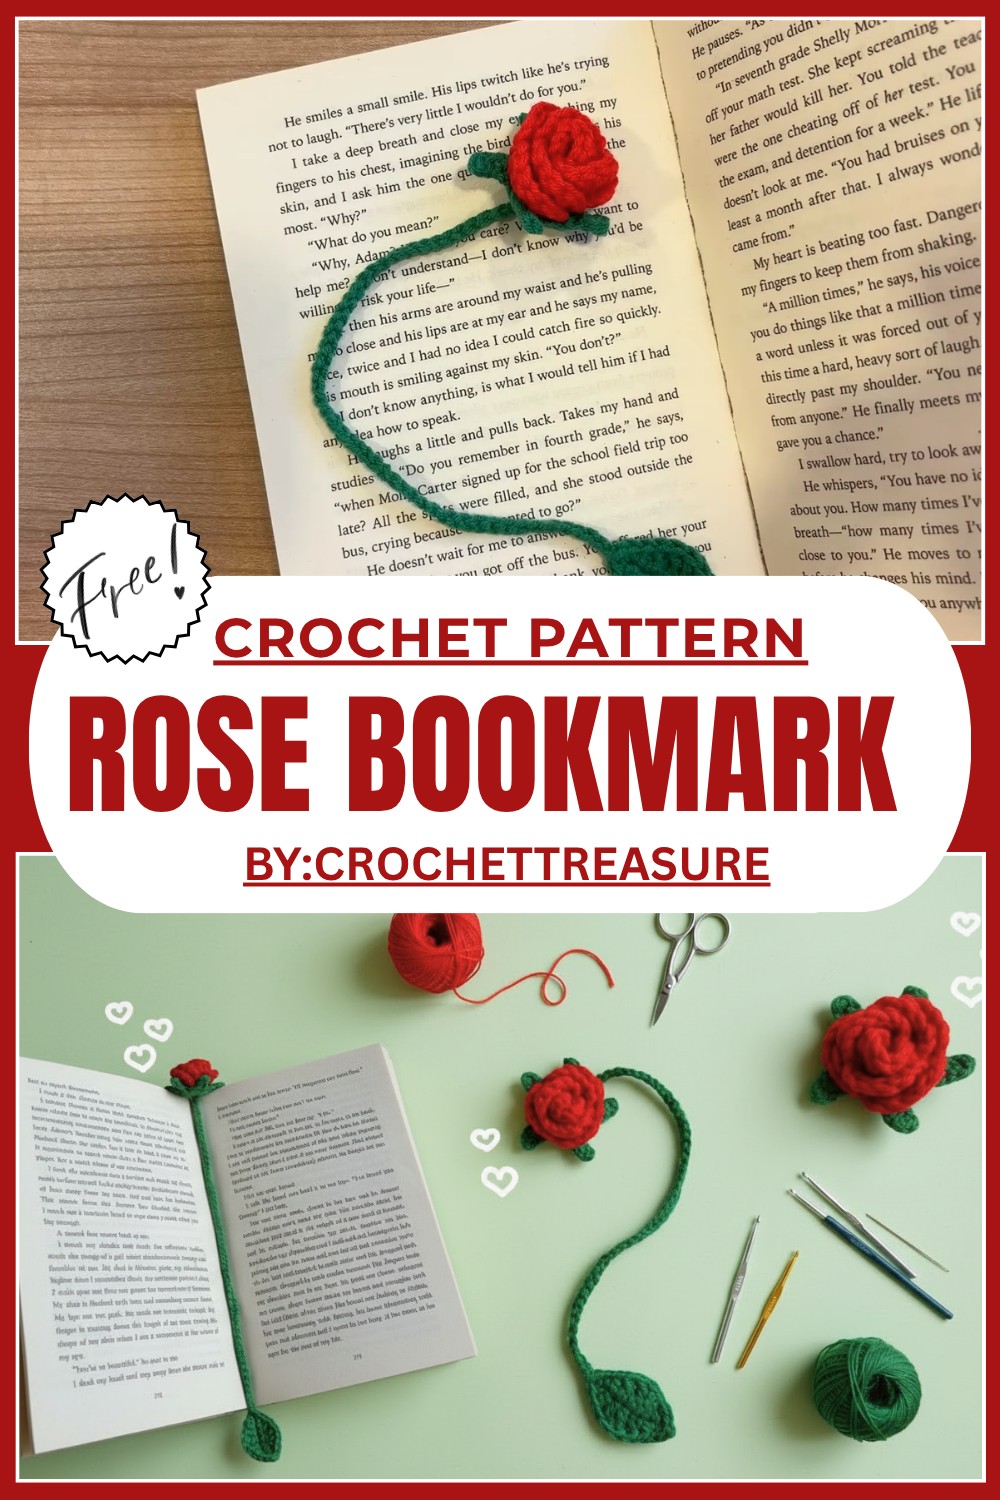
Give Life to Your Books with This Free Crochet Rose Bookmark Pattern
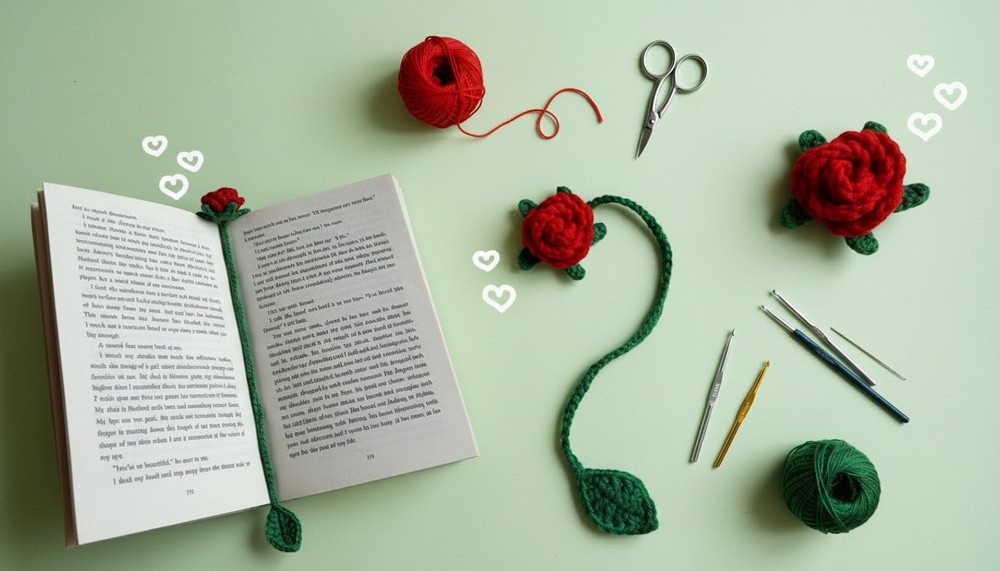
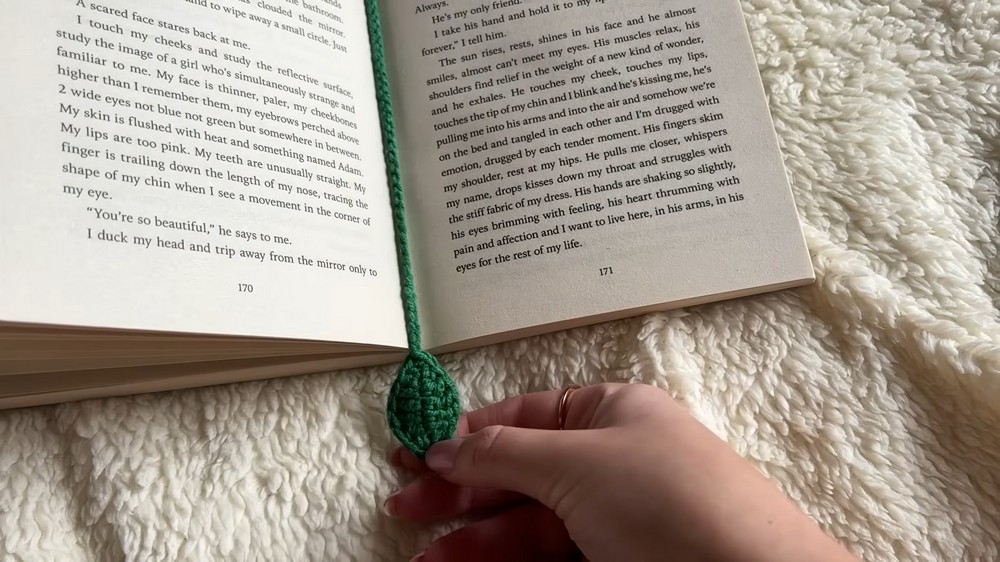
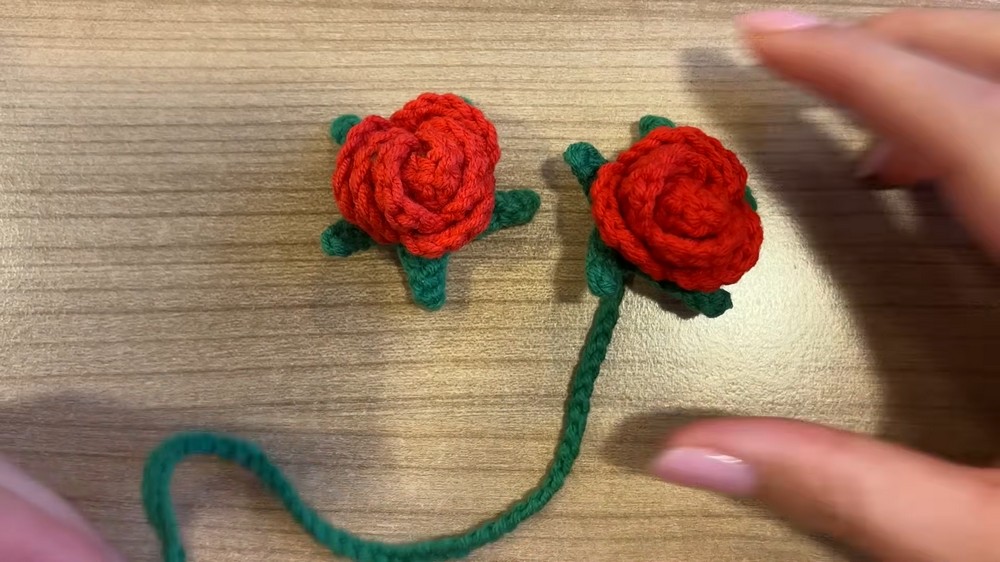
Turn your reading time into a magical adventure with this Free Crochet Rose Bookmark Pattern. A bright, blooming red rose with a slim green stem resting perfectly between the pages of your favorite book. This bookmark is more than just practical—it’s a piece of art. The soft, delicate petals make every book feel special, while the colorful design adds a splash of nature to your stories.
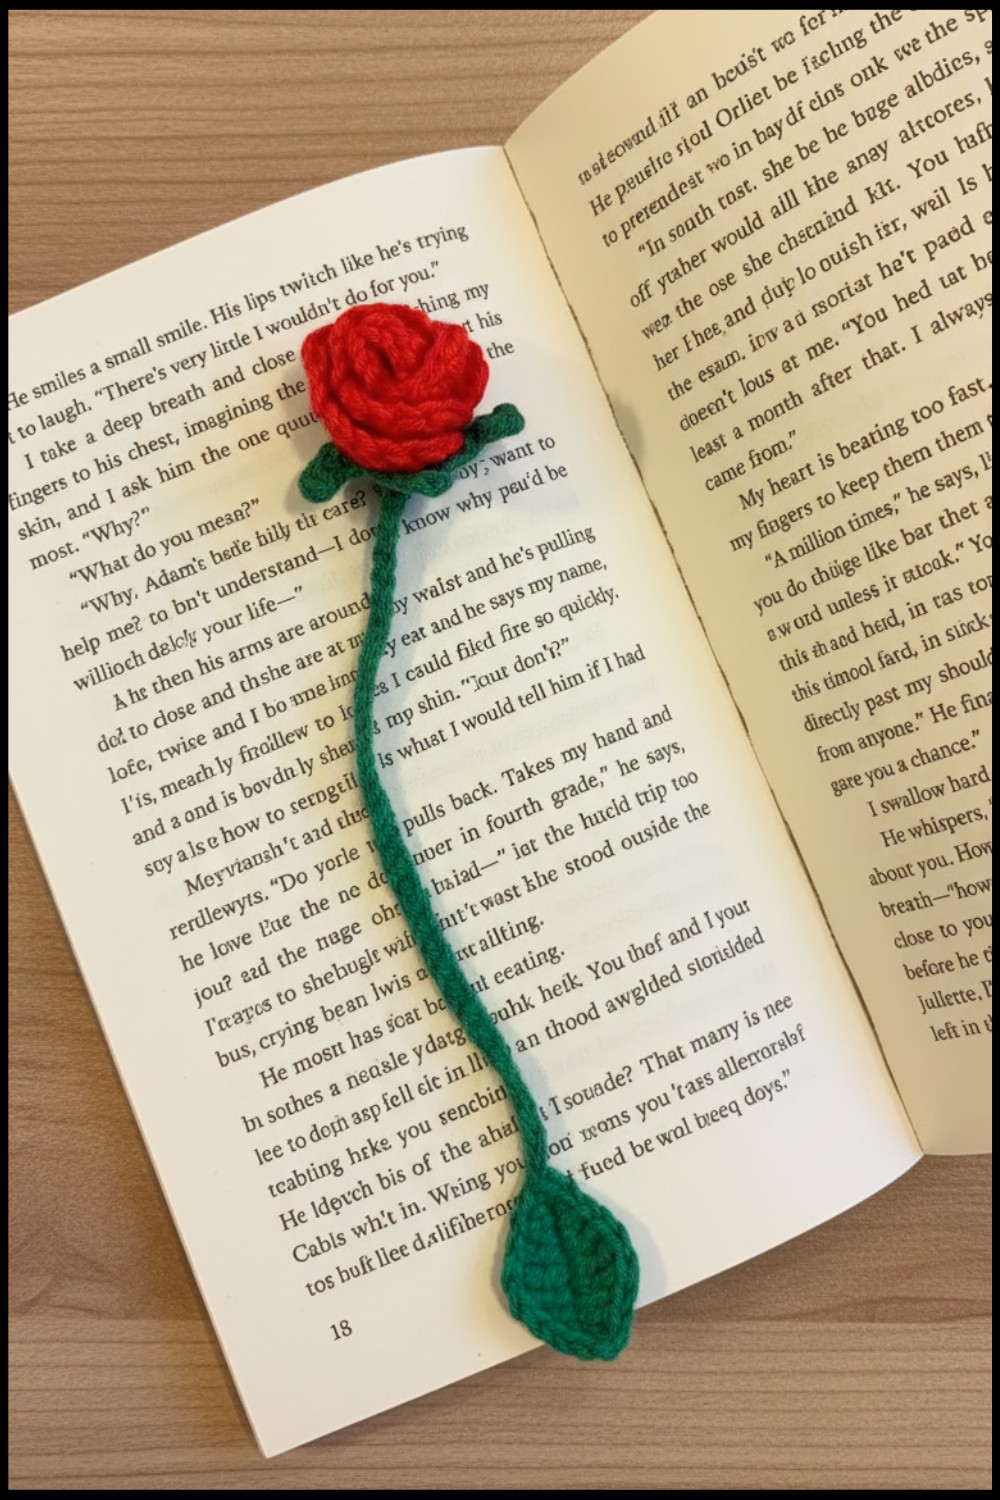 The flat stem slides easily between pages without damaging them, and the cheerful rose peeks out to greet you every time you open your book. The realistic leaves and forever fresh rosebud make it a showstopper.
Perfect for marking your spot in school or gifting as a handmade token of love to a teacher or friend, this project is super easy for beginners. In just a short time, you’ll have a unique and beautiful accessory that’s both fun to make and full of charm.
Adorable Crochet Rose Bookmark Pattern
Finished Size:
The finished bookmark measures approximately 6 inches for the rose diameter plus custom chain length to fit books of varying sizes.
Materials Required:
- Yarn:
- Rose: Red yarn (60% Cotton, 40% Acrylic).
- Stem & Leaf: Dark Green yarn (60% Cotton, 40% Acrylic).
- Crochet Hook: Size 3 mm.
- Scissors.
- Darning Needle.
Gauge:
Gauge is not critical for this project. Adjust hook size as necessary for comfortable tension and overall appearance.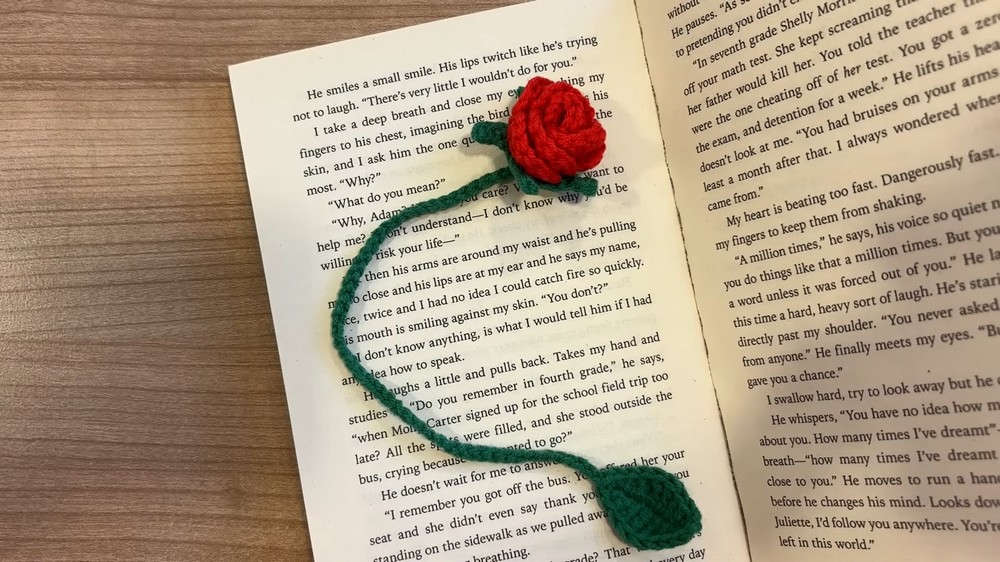
Pattern Instructions:
1. Making the Rose
Step 1: Create the Foundation Chain
- Begin with a slip knot.
- Chain 23 stitches.
Step 2: First Round
- Work into the 4th chain from the hook:
- Yarn over, insert the crochet hook into the 4th chain.
- Create a double crochet (DC).
- Repeat this twice more into the same chain (total = 3 DCs).
- Slip stitch into the next chain to secure the petal.
- Skip the next chain, then repeat the sequence:
- 3 DCs into the following chain.
- Slip stitch into the next chain.
- Continue this pattern to make 7 petals across.
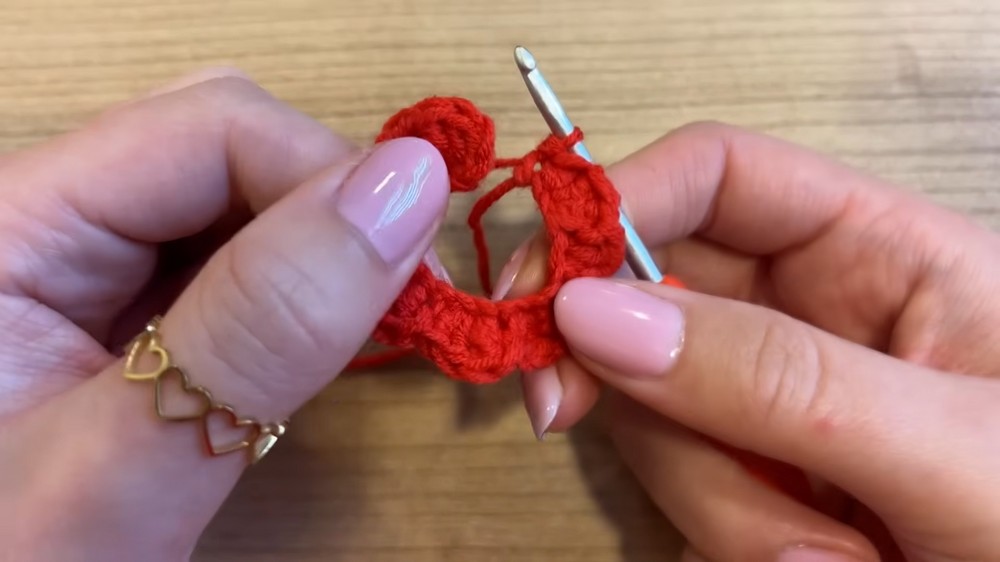
- End the round by slip stitching into the final chain.
Step 3: Second Round (Refining the Petals)
- Turn the work so the backside faces you.
- Using the first stitch, chain 2.
- Create the following sequence into the same stitch:
- 1 DC into the stitch.
- 2 DCs into the next stitch.
- 1 DC into the following stitch.
- Chain 2, then slip stitch into the next stitch to form a petal.
- Repeat this sequence for all petals.
- Finish the round by securing the yarn.
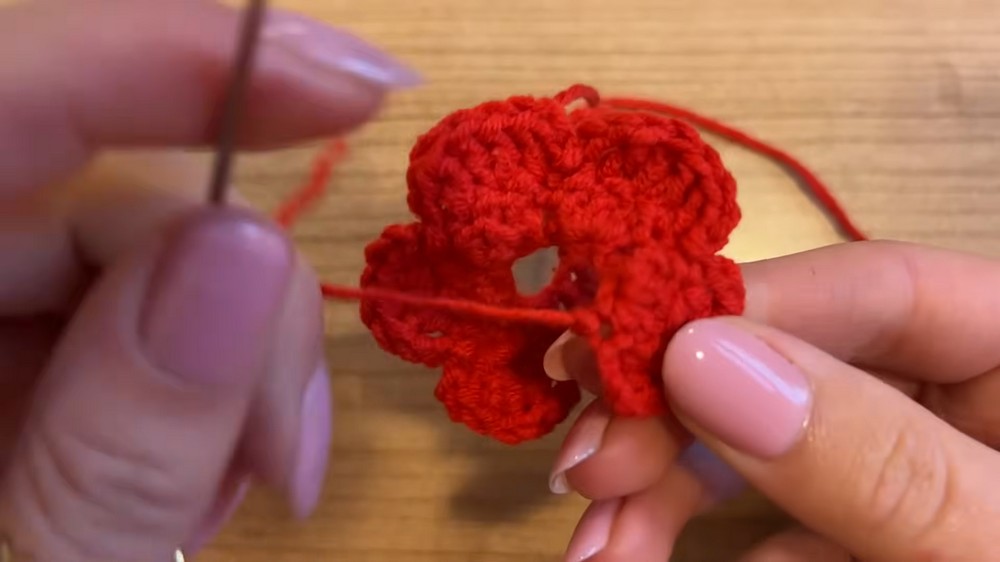
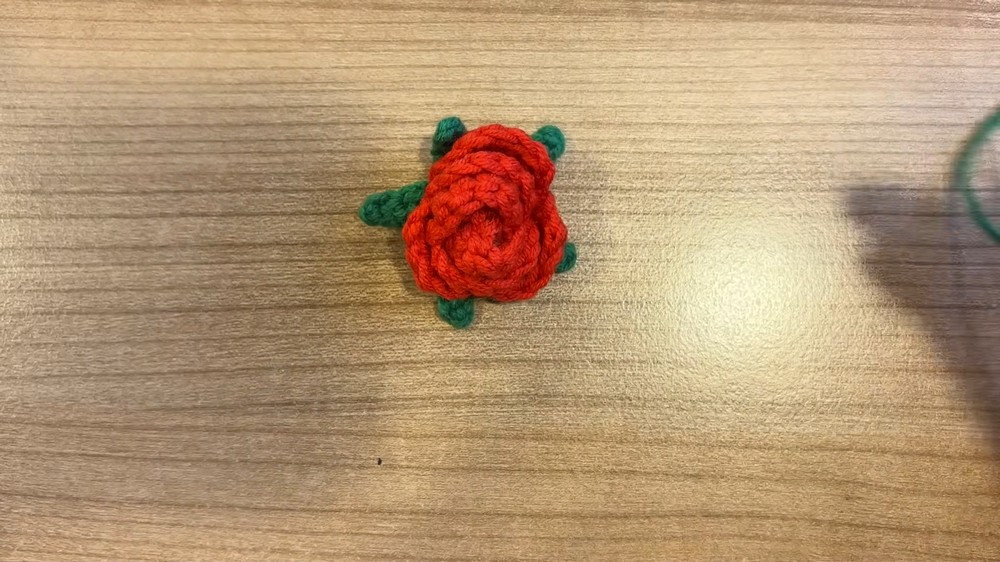
Step 4: Rolling & Securing the Rose Shape
- Roll the completed piece to form the rose, ensuring the bottom edges line up.
- Use the long tail (left from cutting the yarn) to sew the base together securely using a darning needle.
- Move through stitches at the bottom of the rose in various directions.
Tip: Tight rolling creates tighter petals; loose rolling creates a blooming look.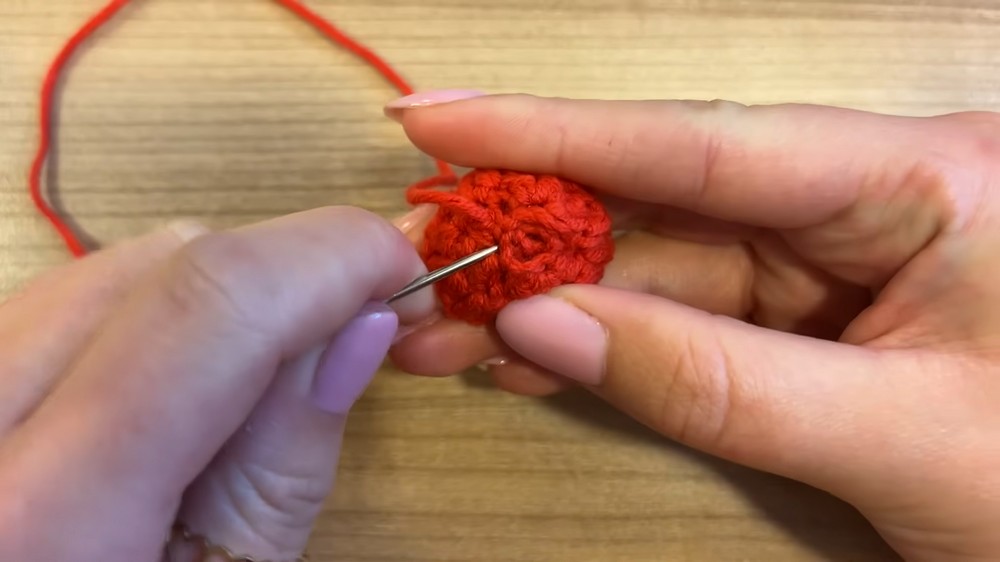
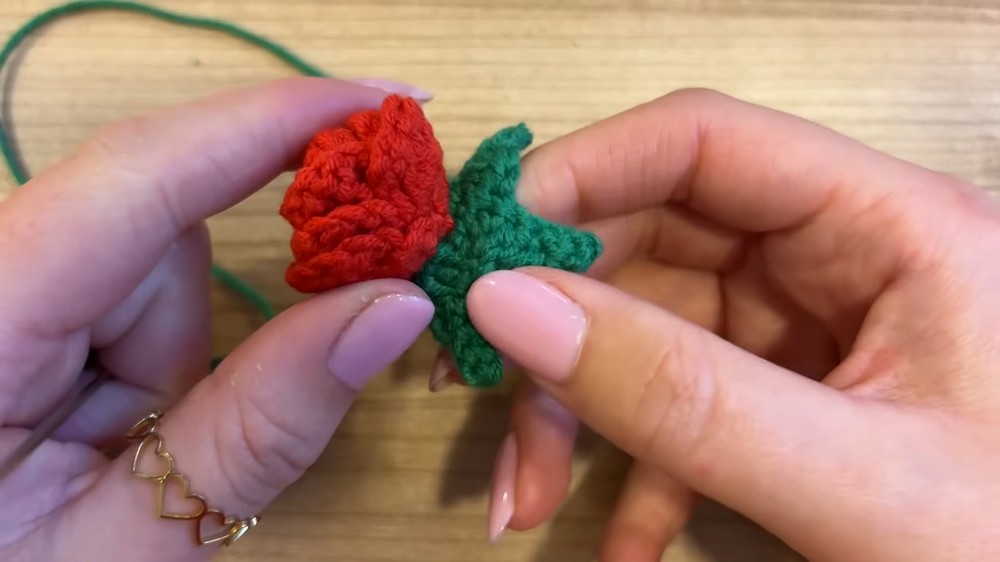
2. Making the Flower Base (Sepals)
Step 1: Create a Magic Circle
- Form a magic circle with the green yarn.
- Work 5 single crochets (SCs) into the circle. Pull the circle closed.
Step 2: Second Round
- Work increases into each stitch around:
- Place 2 SCs into each stitch.
- Total stitch count = 10 stitches.
- Finish with a slip stitch into the first SC.
Step 3: Third Round (Forming Sepals)
- Chain 5 stitches for the first sepal.
- Work back along the chain:
- Slip stitch into the 2nd chain.
- Slip stitch into the 3rd chain.
- Single crochet into the 4th chain.
- Half double crochet into the 5th chain.
- Skip one stitch and secure the sepal with a slip stitch into the next stitch.
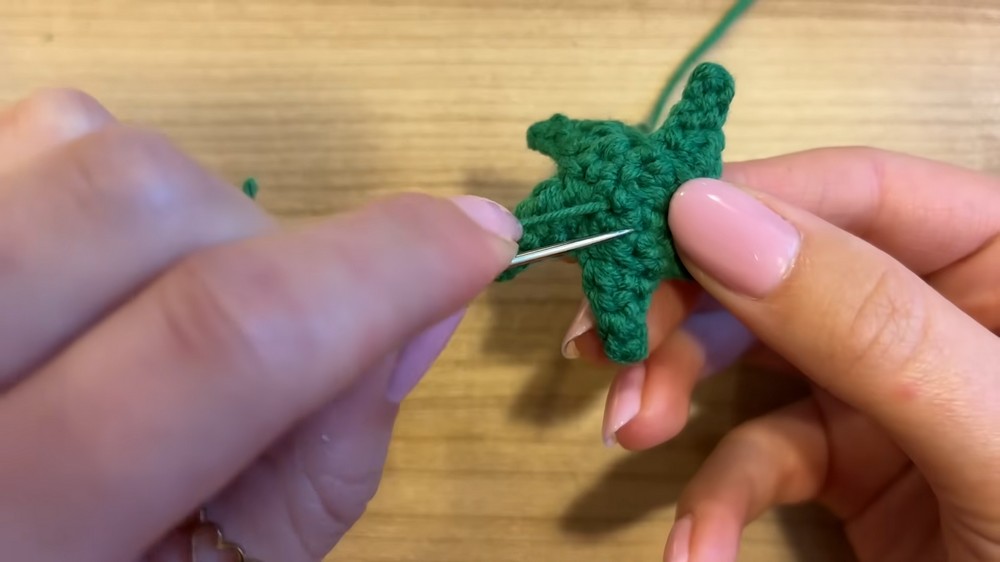
- Repeat for a total of 5 sepals.
Step 4: Attach the Sepals to the Rose
Using the long green tail and darning needle, sew the base onto the bottom of the rose by threading through stitches in the first round.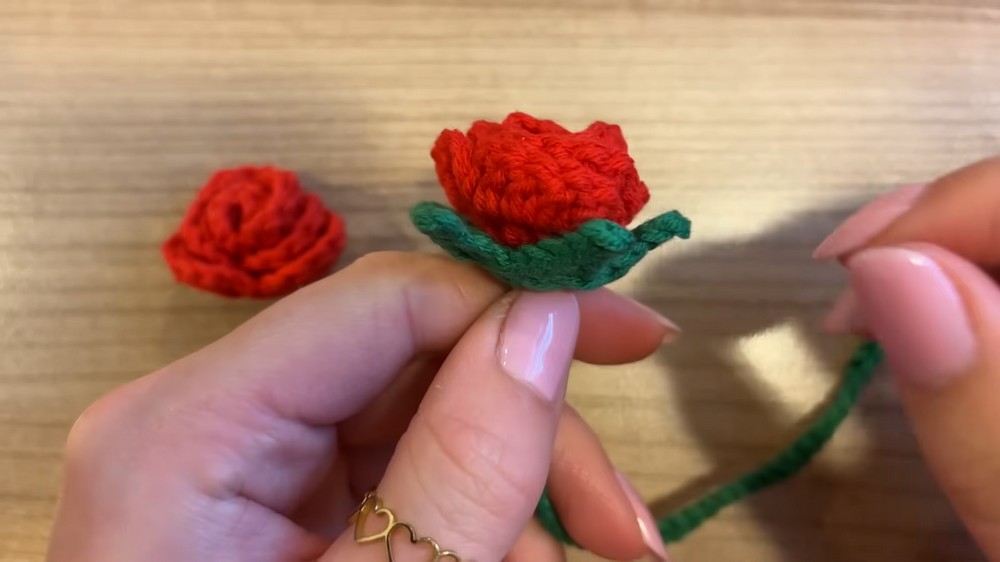
3. Making the Leaf
Step 1: Chain Foundation for Leaf
- Begin with a slip knot.
- Chain 9 stitches.
Step 2: First Side
- Skip the first chain, then crochet as follows:
- Single crochet (SC) into the 2nd chain.
- Half double crochet (HDC) into the next chain.
- Double crochet (DC) into the following chain.
- Triple crochet (TC) into the next two chains.
- Double crochet (DC), HDC, and SC into the last three chains.
Step 3: Second Side of Leaf
- Chain 2, turn your work, and mirror the first side’s sequence on the opposite side of the foundation chain.
Step 4: Slip Stitch and Finish
Secure the base with a slip stitch into the first stitch. Cut off excess yarn and hide the tail.
4. Making the Chain and Attaching the Leaf to Rose
Step 1: Chain Foundation for Bookmark
- Chain 50 stitches or the length of your book.
- Secure the yarn, leaving a long tail for sewing.
Step 2: Attach Chain to Rose
- Use the long tail and darning needle to sew the chain's base to the bottom of the rose (magic circle area).
- Secure firmly with a knot and hide the tail by weaving it through stitches.
Step 3: Attach Leaf to the Chain
- Sew the leaf onto the opposite end of the chain.
- Use similar sewing techniques to secure and hide the yarn ends inside the leaf stitches.
Customization Ideas:
- Color Variations: Experiment with rose and leaf color combinations for seasonal or personal themes.
- Embellishments: Add beads or embroidery to the chain for added charm.
- Size Adjustments: Change the number of chain stitches or use finer threads for miniature bookmarks.
Special Techniques Used:
- Magic Circle: Creates a seamless and adjustable center for circular crochet.
- Triple Crochet: Adds length and texture to the leaf.
Conclusion and Important Remarks:
Your handmade Crochet Rose Bookmark is complete! The lifelike rose and delicate leaf make this project ideal for personal use or gifting. When attaching parts, ensure secure sewing to maintain durability.
Final Look:
A beautiful red rose sits atop a green base with an elegant green chain and leaf flowing downward. The bookmark is both functional and decorative, making an excellent keepsake.