
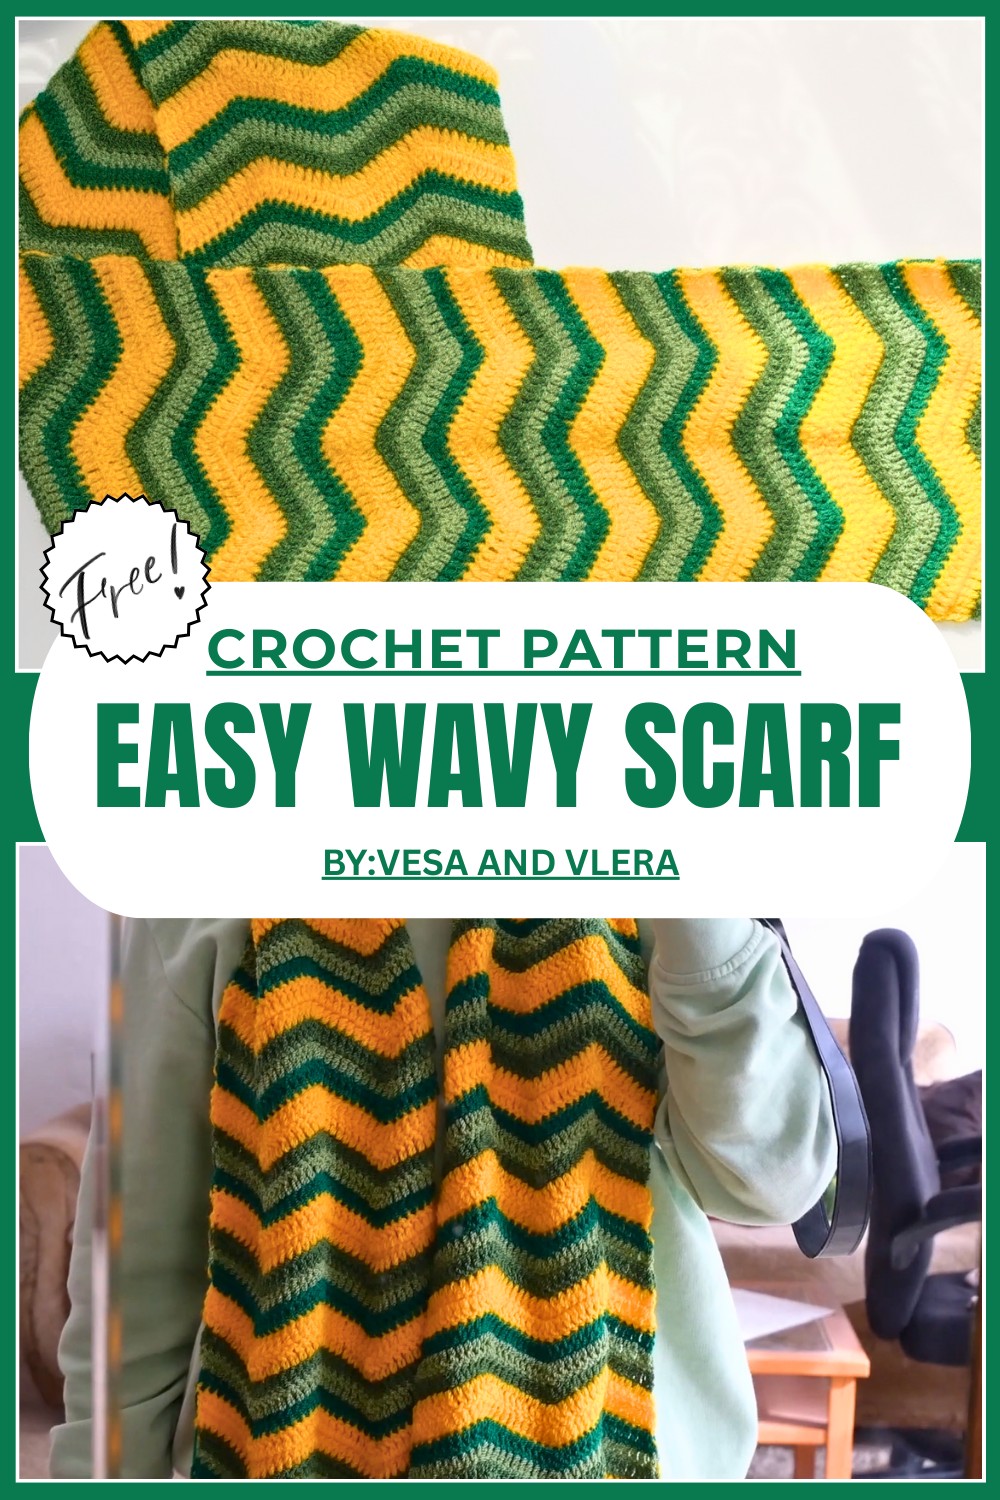
Stylish Crochet Wavy Scarf Pattern To Cozy Up Any Outfit
Wrap yourself in cozy waves with this lively crochet wavy scarf pattern that adds warmth and style to any outfit, perfect for all skill levels to enjoy.
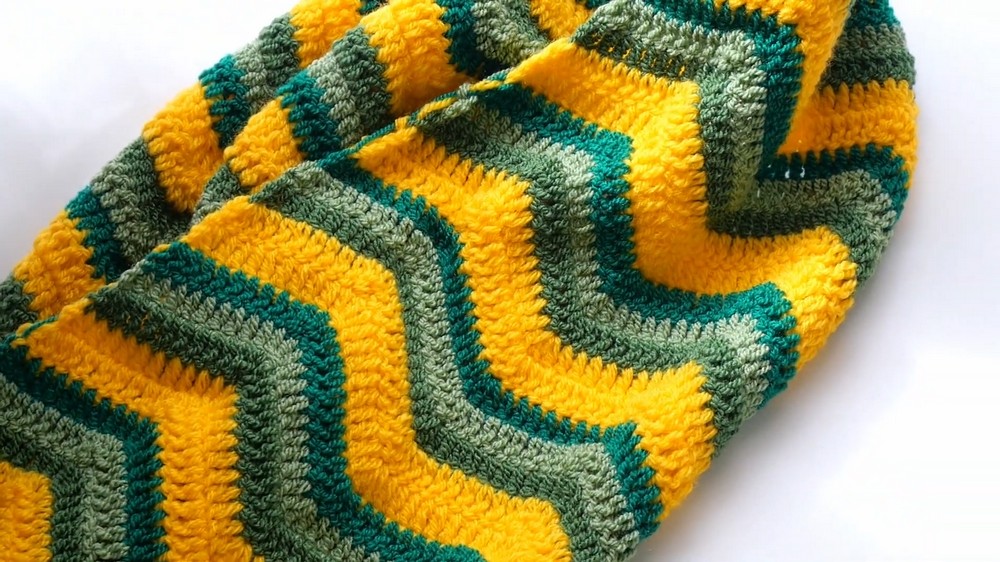
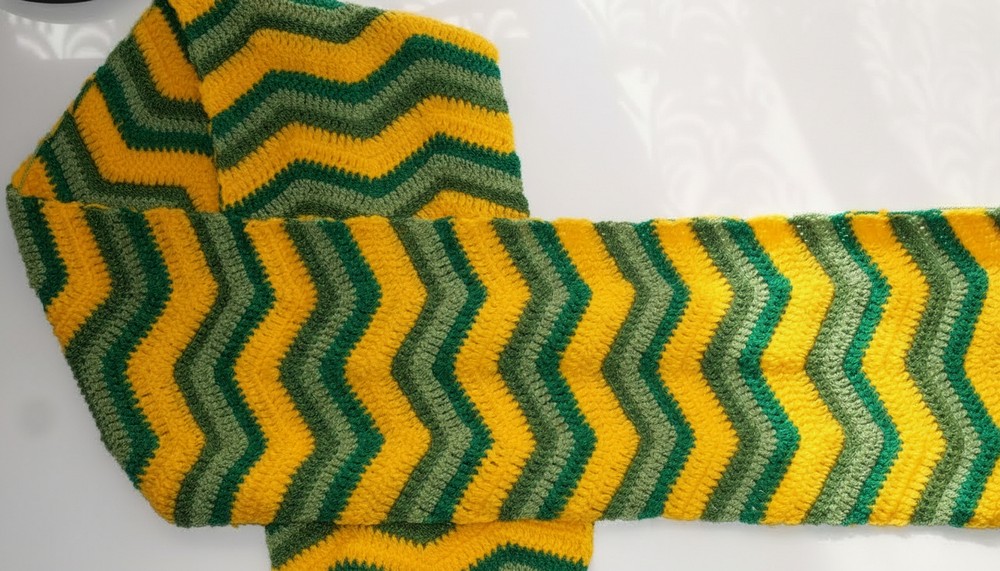
A soft, cozy scarf with gentle waves can brighten any cold day and add charm to simple outfits. The crochet wavy scarf pattern brings warmth and style together with its flowing, ripple-like texture that feels pleasant against the skin. Its unique wavy shape gives life to plain yarn, turning it into something attractive and fun to wear.
Crochet Wavy Scarf Pattern for Cozy & Comfort
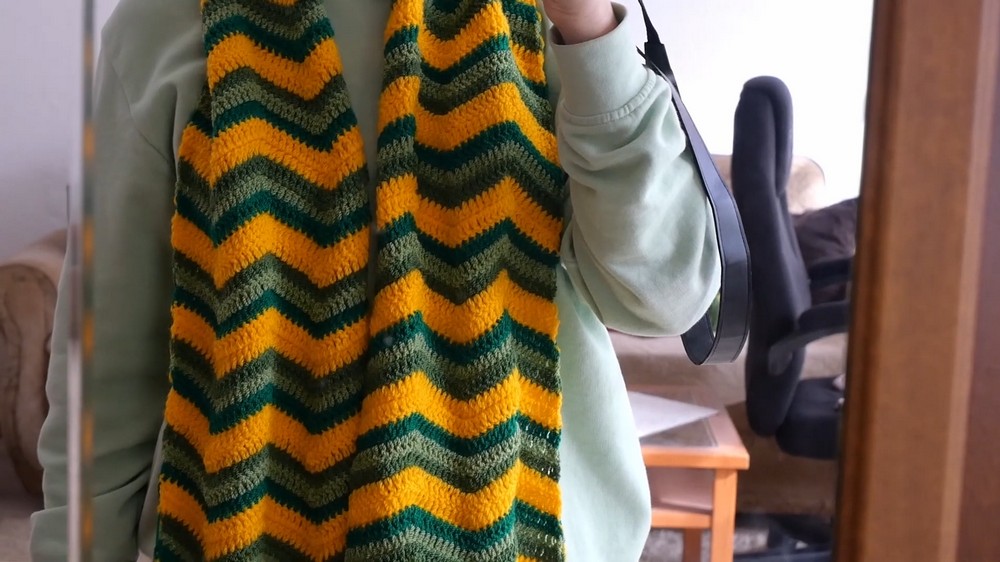
This scarf fits well around the neck, offering comfort without feeling heavy, making it suitable for outdoor walks or indoor use when the air is cool. The playful curves catch the eye and add a touch of cheerfulness to everyday clothes like jackets and sweaters.
With its easy-to-wear size and charming look, the crochet wavy scarf becomes a favorite accessory for many, bringing both warmth and a subtle fashion statement wherever it goes.
Crochet Wavy Scarf Pattern
Materials Needed
- Size 1 (super fine) acrylic yarn or any yarn size 1 [example: Yarn Art size 1]
- 3.5 mm crochet hook
- Scissors
- Yarn needle (for weaving in ends)
- Tape measure
Special Features
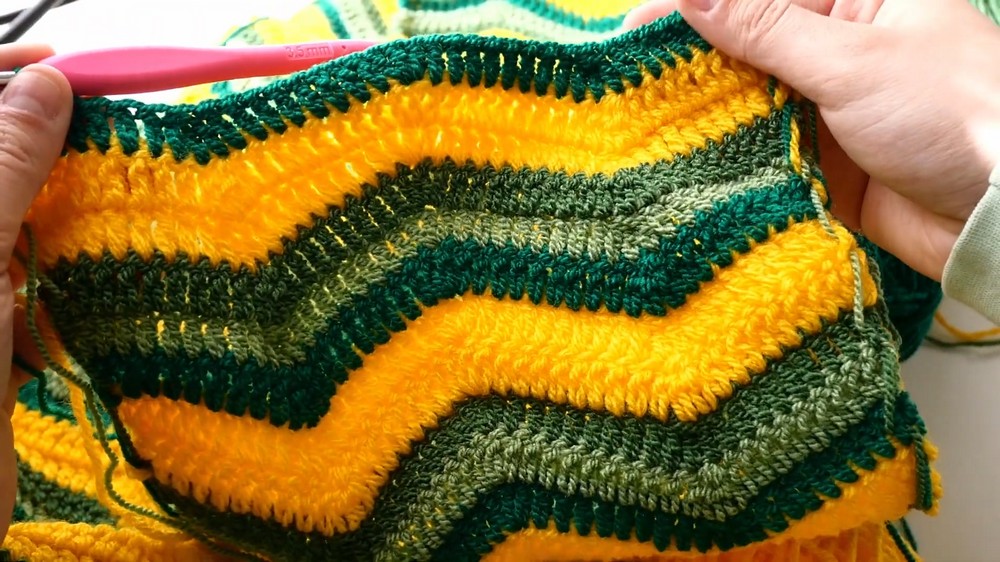
- Gorgeous ripple/wave texture from strategic crochet increases and decreases
- Color changes to create multi-color stripes
- Lightweight and airy ideal for spring
- Customizable length and width
- Uses basic stitches for ease but results in stunning texture
Difficulty Level
Beginner to Intermediate — relies mainly on double crochet, increases, and decreases. Familiarity with joining new colors and weaving in ends is helpful.
Pattern Instructions
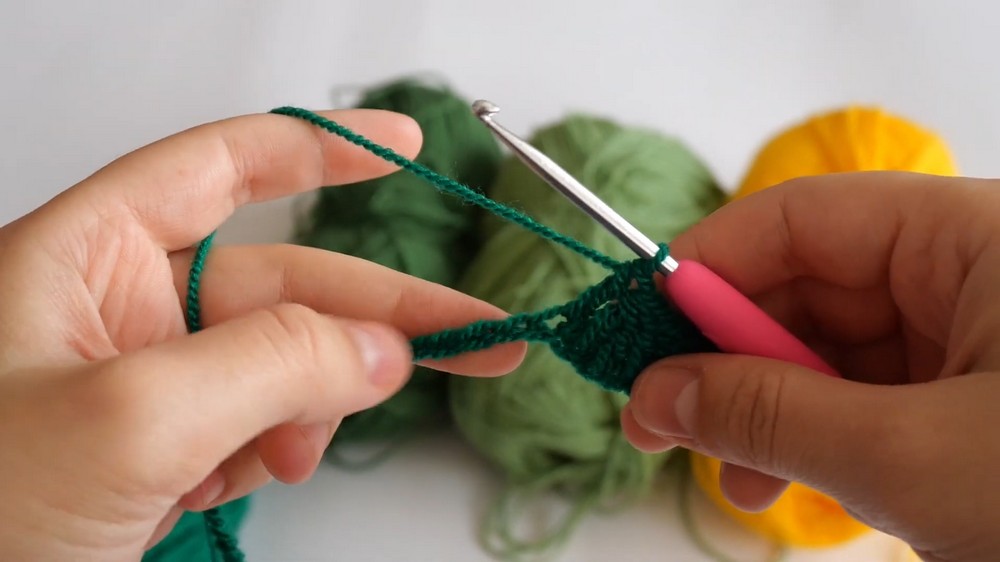
Step 1: Make a Slip Knot and Foundation Chain
- Create a slip knot using your preferred method.
- Chain 44 stitches (this measures approximately 23 cm). This forms the base width of your scarf.
Step 2: First Row – Begin Double Crochet
- Starting from the 4th chain from the hook (the 1st three chains count as a double crochet):
- Make 1 double crochet (dc) in the 4th chain (this counts as your first dc).
- Make 8 more double crochets in the next 8 chains (total 9 dc stitches including the first).

Step 3: Step 3 – Decrease Section (Double Crochet 3 Together)
- In the next 3 stitches, work a double crochet 3 together (dc3tog):
- Yarn over, insert hook in first stitch, yarn over, pull through (3 loops), yarn over, pull through 2 loops (still 2 loops remain on hook but do not finish).
- Repeat for the 2nd and 3rd stitches but do not finish them either until you have 4 loops on hook.
- Yarn over and pull through all 4 loops to complete the dc3tog.
- Then make 1 double crochet in the next stitch.

Step 4: Step 4 – Straight Section
- Make 7 more double crochets in the next 7 stitches. Total 8 dcs in this section.
Step 5: Step 5 – Increase Section (3 Double Crochets in One Stitch)
- In the next stitch, make 3 double crochets (increase):
- dc, dc, dc all in the same stitch.

- dc, dc, dc all in the same stitch.
Step 6: Step 6 – Straight Section
- Make 8 double crochets in the next 8 stitches.
- Your scarf should already show a wavy texture at this point.
Step 7: Step 7 – Repeat Steps for Wavy Pattern
- Repeat the pattern with:
- Dc3tog (decrease) over 3 stitches
- 8 double crochets
- 2 double crochets in the same stitch (increase) — for this round sometimes only 2 dcs for the increase instead of 3.
- 8 double crochets
- Maintain total stitch count at 41 stitches per row (counting the initial chain 3 that counts as a dc).
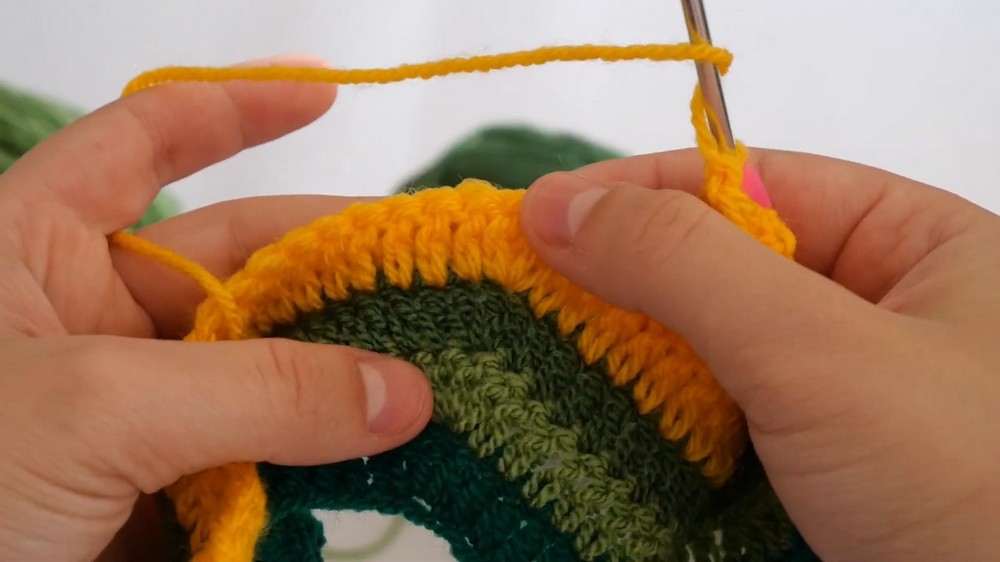
Step 8: Step 8 – Color Change
- To change colors:
- At the end of a row, stop before finishing the last double crochet, yarn over with new color, and pull through all loops to complete stitch.
- Alternatively, insert the new color as a slip knot loop and pull through to transition smoothly.
- Chain 3 to start the next row with new color.
Step 9: Step 9 – Hide Tails While Crocheting
- When starting a new color, hide the yarn tails underneath the stitches by crocheting over them with the first double crochet and continuing to crochet over tails as you work the row.
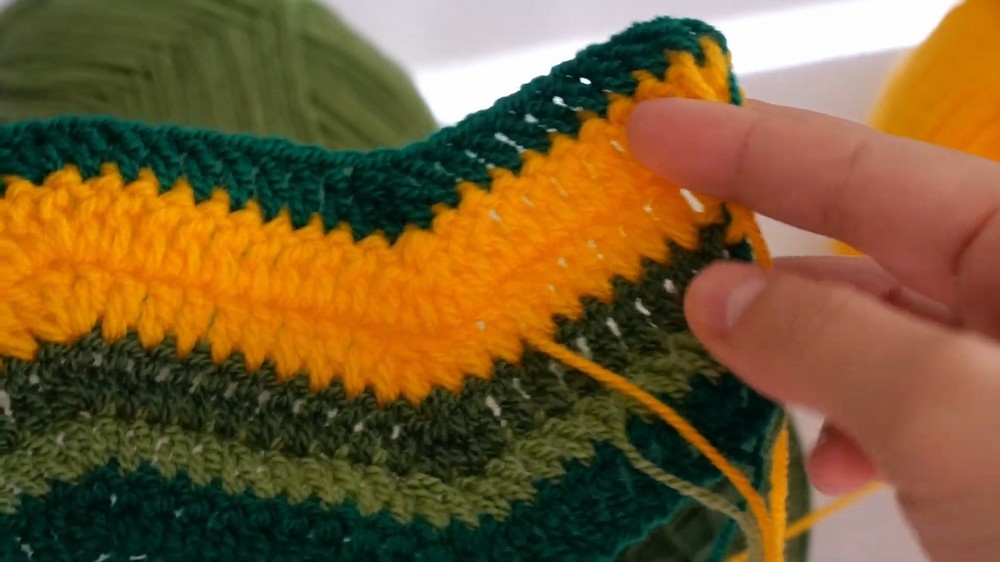
Step 10: Step 10 – Repeat Rows and Pattern
- Continue repeating these rows, maintaining the same ripple pattern with occasional increases and decreases for the wavy effect.
- Change colors every few rows to create stripes or use a single color throughout.
Step 11: Step 11 – Finishing
- When your scarf reaches your desired length, finish off by:
- Cutting the yarn, gently pulling through the last loop to secure.
- Weave in all remaining ends neatly with a yarn needle.
Tips from the Tutor
- The stitch count should always tally to 41 stitches per row including the chain 3.
- Be mindful of the tails when changing colors to keep your scarf neat and secure; you can hide some tails by crocheting over them.
- The back of the scarf may look messy due to color changes and weaving, consider adding a border for a cleaner finish if preferred.
- Customize your scarf length by adding or subtracting rows.
- Use similar or contrasting yarn colors for visual variety.
Conclusion
This crochet wavy scarf combines simple stitching techniques with clever increases and decreases to create an eye-catching ripple effect perfect for spring. It’s a versatile project you can personalize through length, colors, and yarn choice.