
Simple Free Crochet Hexagon Cardigan Pattern To Keep You Warm
Wrap yourself in cozy comfort with this free crochet hexagon cardigan that’s stylish, charming, and perfect for layering all year round.
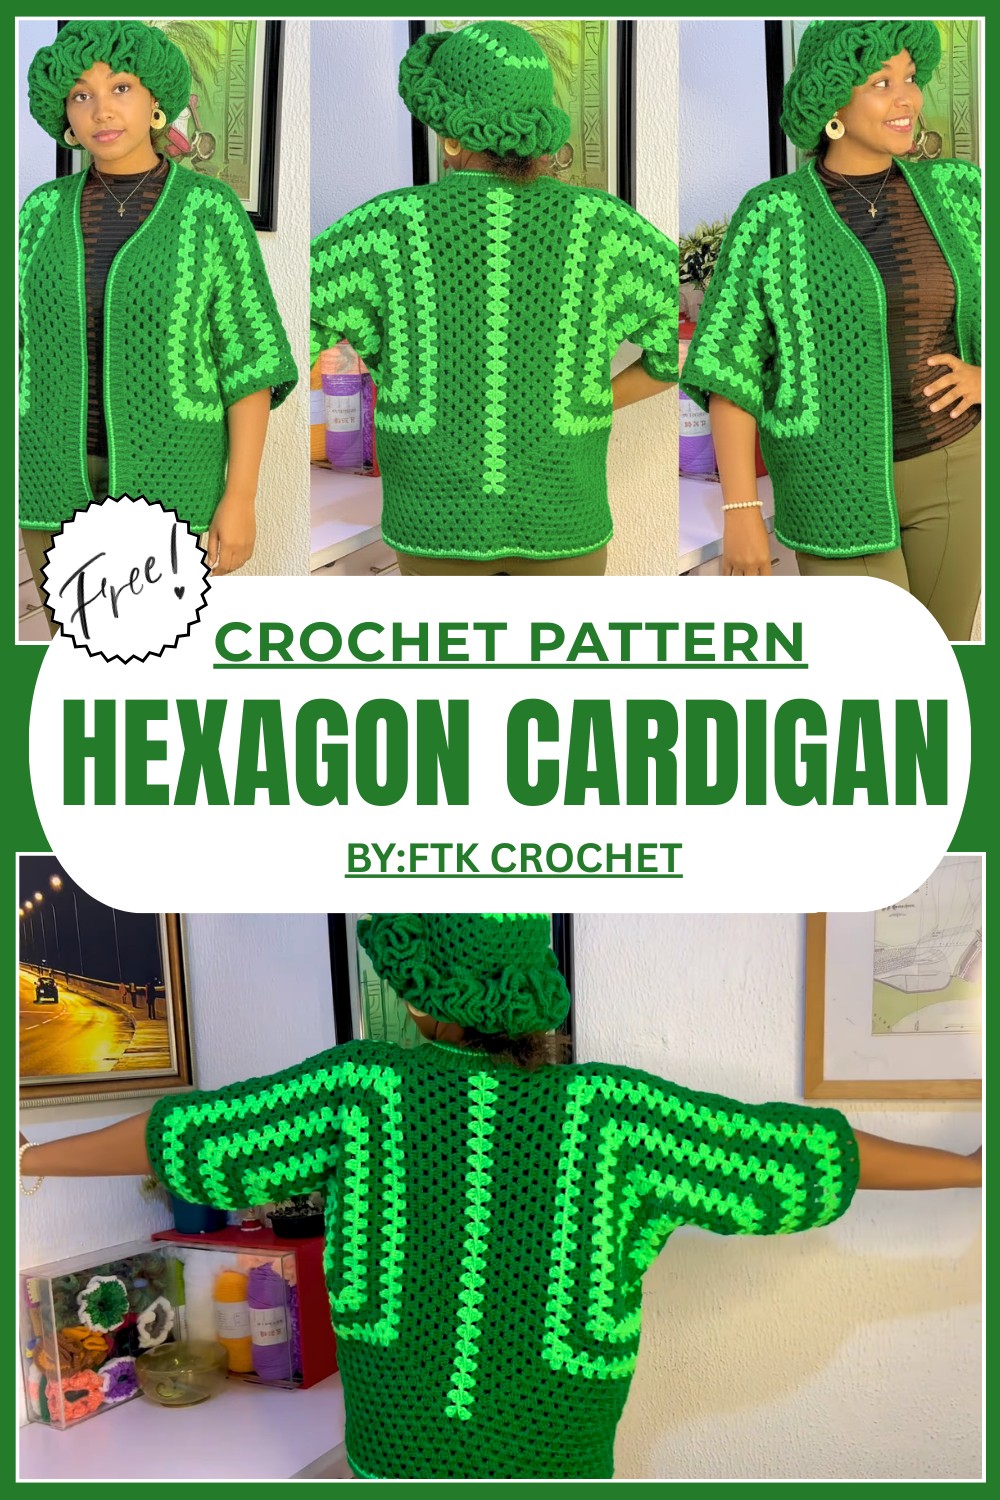
Free Crochet Hexagon Cardigan Pattern for Comfort & Style
Wrapping yourself in something that feels as cozy as a warm hug while looking effortlessly stylish at the same time. A crochet hexagon cardigan is the perfect combination of beauty and versatility. With its unique hexagon design, it offers a modern yet handmade charm that stands out in any wardrobe. This cardigan is not just practical for keeping warm, but it also doubles as a fashionable statement piece.
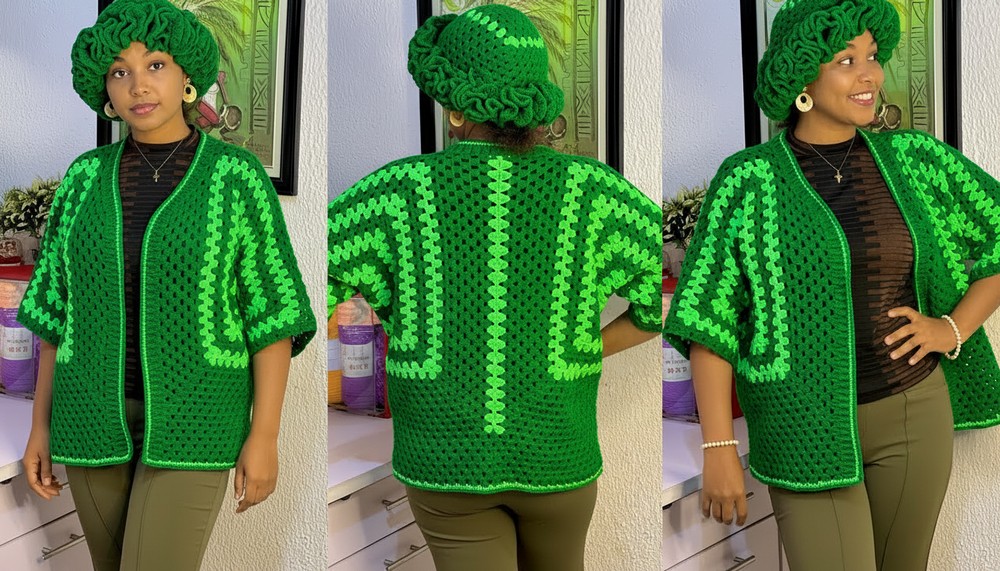
Whether it’s a chilly evening or a casual outing, its lightweight yet snug texture makes it great for layering over anything, from dresses to jeans. The intricate details in its hexagon pattern create an eye-catching look, making it feel special and one-of-a-kind. Soft, comfortable, and full of character, it’s not only an enjoyable project to work on but also a piece you’ll cherish wearing for years to come.
Materials
- Yarn:
- Main Yarn: Acrylic yarn, two-ply (held double to create a four-ply weight). Feel free to use any yarn that you are comfortable with. Choose colors based on personal preference.
- Gauge: 14 stitches x 16 rows = 4 inches (10 cm) in double crochet.
- Hook: 4mm crochet hook.
- Tapestry Needle: For weaving in ends and sewing pieces together.
- Stitch Markers: Optional but useful for marking corners and row ends.
- Measuring Tape: Essential for checking dimensions.
- Scissors: For cutting yarn.
Finished Size
The finished cardigan is designed to fit a bust size of 44 inches and measures 22 inches in length. Adjust measurements accordingly if a different size is needed.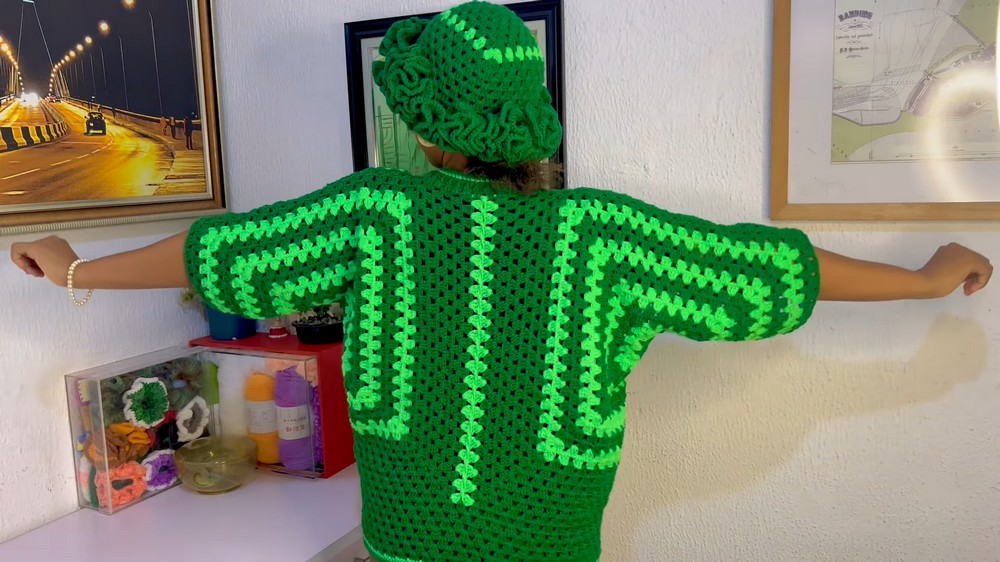
Special Techniques
- Magic Ring: Wrap yarn to form a loop, insert hook, yarn over, and pull through the loop. Chain to secure.
- Double Crochet (DC): Yarn over, insert hook into stitch, pull up a loop (3 loops on hook), yarn over, pull through 2 loops, yarn over, pull through the final 2 loops.
- Single Crochet (SC): Insert hook into stitch, yarn over, pull up a loop (2 loops on hook), yarn over, pull through both loops.
- Slip Stitch (Sl St): Insert hook into stitch, yarn over, and pull through both loops on the hook.
- Alpine Stitch: Alternates front post double crochet and regular double crochet to create a textured pattern.
Pattern Instructions
Part 1: Hexagon Panels
Creating the Hexagons
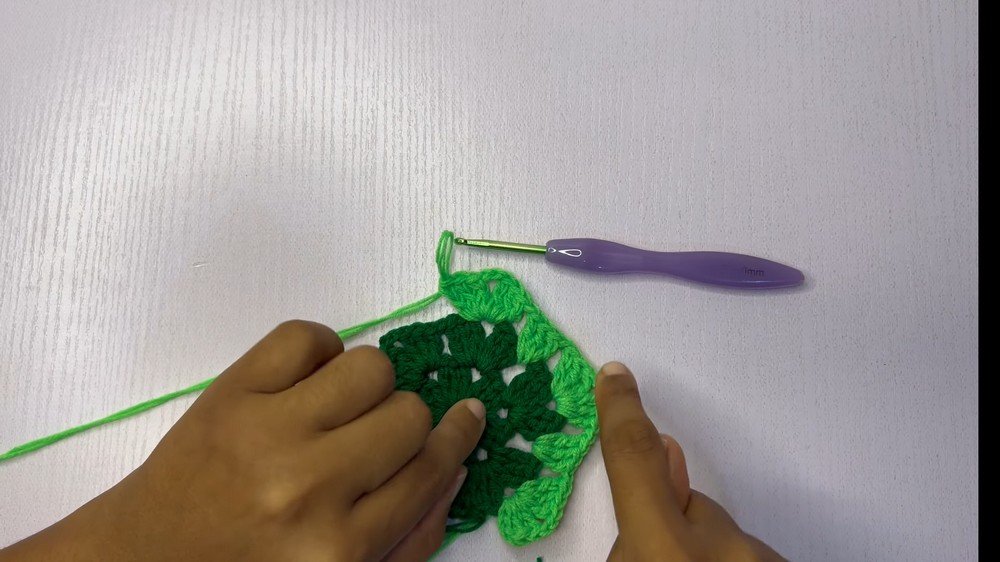
- Start with a Magic Ring:
- Begin with a magic ring, chain 3 (acts as first DC).
- Work 2 more DCs into the magic ring to form the first cluster.
- Chain 2, and repeat the following steps to create 6 clusters, each separated by 2 chains.
- Round 1:
- Form 6 clusters in the magic ring, each cluster consists of 3 DCs.
- Chain 2 after each cluster to form gaps.
- Join with a slip stitch to the top of the starting chain 3, tighten the ring.
- Round 2:
- Slip stitch to the next chain space.
- Chain 3 (acts as DC), work 2 more DCs in the same space, chain 2, work another 3 DCs in the same space (this forms the first corner).
- Chain 1, work 3 DCs in the next chain space, chain 2, work another 3 DCs in the same chain space (repeat around the hexagon).
- End with chain 1 and join with a slip stitch to the top of the starting chain 3.
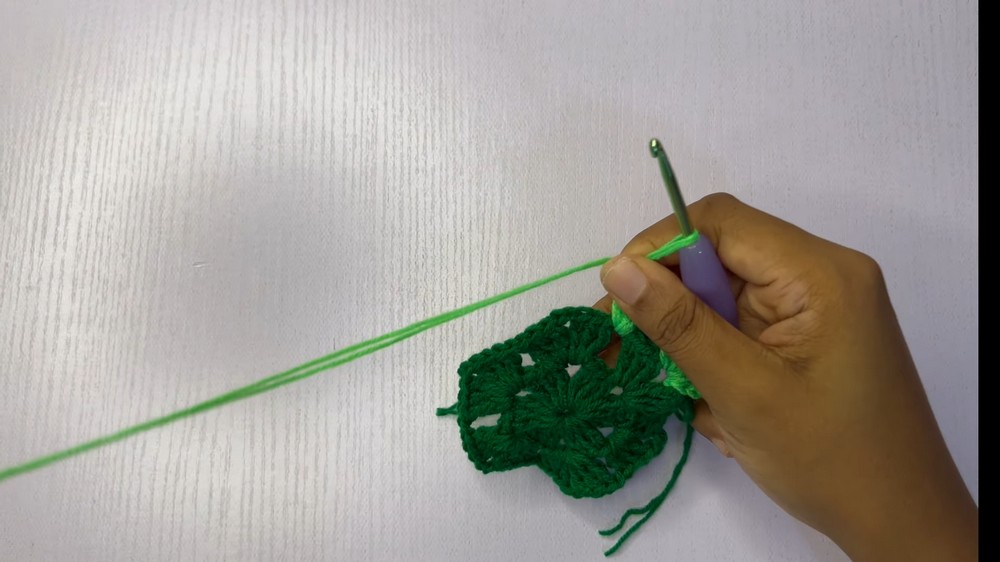
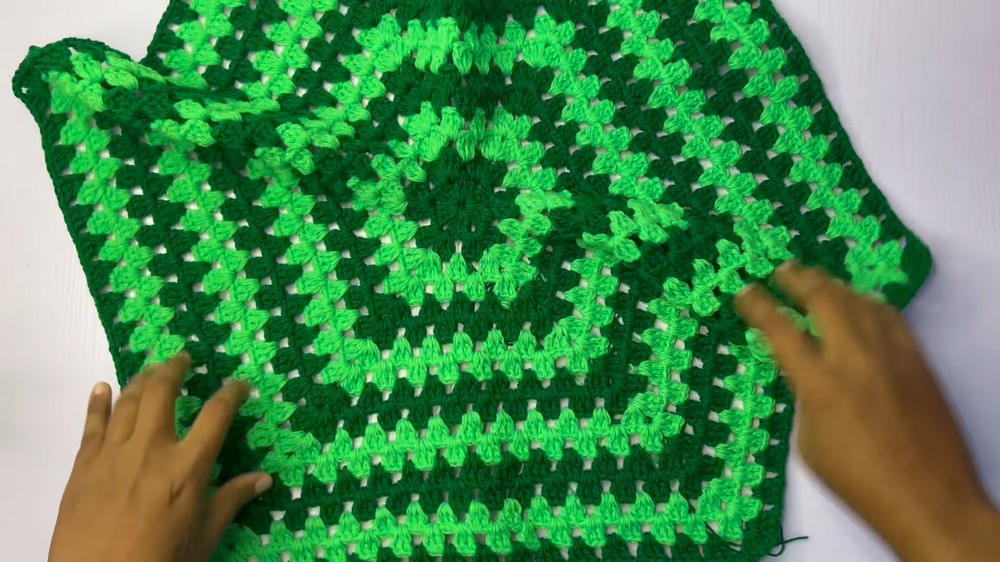
- Round 3 and Beyond:
- Repeat Round 2’s pattern, continuing to create clusters of 3 DCs, separated by chain 1 along the sides and chain 2 in the corners.
- Ensure each round expands evenly, maintaining the hexagon shape.
- Growth of Panels:
- Continue working rounds until the hexagon measures approx. 9 inches from side to side or until it matches your arm measurement when folded in half at the center (this forms the armhole).

- Continue working rounds until the hexagon measures approx. 9 inches from side to side or until it matches your arm measurement when folded in half at the center (this forms the armhole).
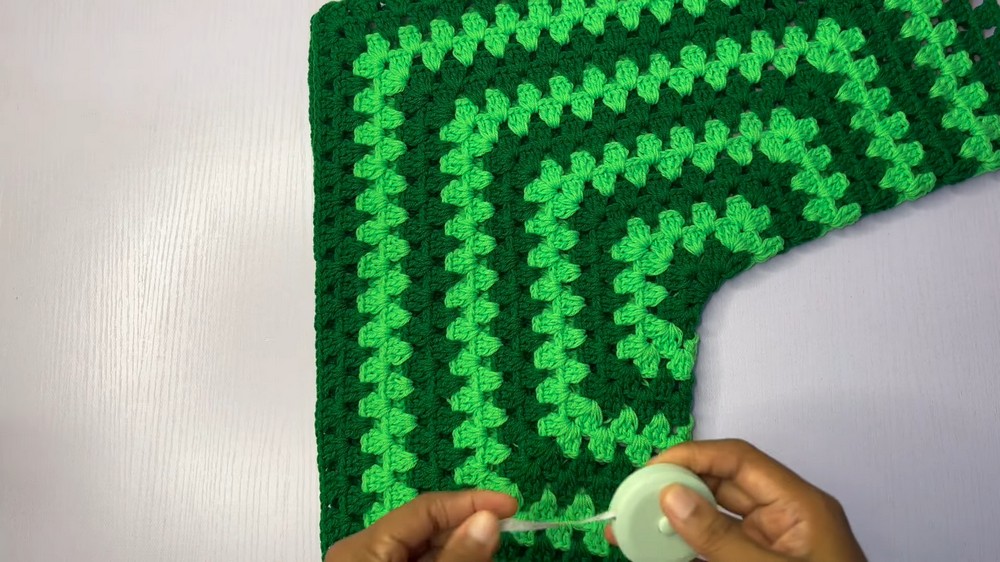
Part 2: Joining and Shaping
- Fold and Join Hexagons:
- Fold each hexagon to form the “L” shape for the cardigan's front and back.
- Join at the shoulder: Align the corners and use slip stitches or sewing to connect across the shoulder.
- Extending the Panels for Body:
- From the bottom edge, continue to extend the panel downward by working rows of clusters until the desired body length is achieved (approx. 22 inches total or your preferred length).
- From the bottom edge, continue to extend the panel downward by working rows of clusters until the desired body length is achieved (approx. 22 inches total or your preferred length).
- V-neck Shaping (if desired):
- Count 3 clusters from the center front where the panels will meet.
- Begin decreasing at the neckline by skipping the first space and working fewer stitches to create the V shape.
Part 3: Sleeves and Edging
- Sleeves:
- Pick up stitches around the armhole, and work in rounds, decreasing periodically to taper the sleeve if desired.
- When desired length is reached, finish with single crochet or a decorative edge.
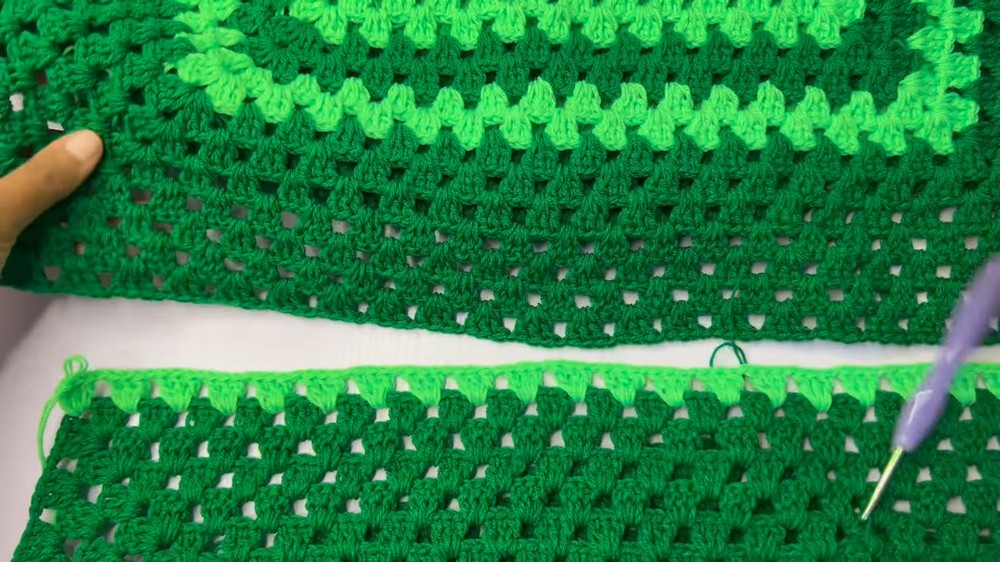
- Edging and Lengthening:
- Add rows of double crochet or other complementary stitches along the open edges of the cardigan to add decorative trim and neatness.
- Continue till you reach your desired length and aesthetic.
- Alpine Stitch Border:
- Work additional rows of single crochet to prepare for an alpine stitch border.
- Alternate front post double crochet and regular double crochet around the edges to form a contrasting and textured finish.
Part 4: Finishing
- Weaving in Ends and Blocking:
- Use a tapestry needle to weave in all loose ends for a neat finish.
- Lightly block the cardigan to smooth out any irregularities and set stitches evenly.

Tips and Customization Ideas
- Color Choices: Mix and match colors to create a unique palette. Use variegated or gradient yarns for a seamless color transition.
- Size Adjustments: Modify the starting hexagon’s size based on individual measurements for a more custom fit.
- Texture Additions: Add pockets, buttons, or fringe to personalize your cardigan further.
Conclusion
Congratulations on completing your hexagon cardigan! This versatile and stylish cardigan can easily become a staple in any wardrobe. The clear structure and allowances for personalization make it a favorite go-to project. Be sure to share your finished piece with friends and family as a testament to your craftsmanship.