
Eye Catching Free Crochet Star Coaster Pattern For Unique Decor
Add a lovely five pointed mat to your desk with this Free Crochet Star Coaster Pattern to finish a sturdy and very cute accessory that makes your room look like a bright galaxy.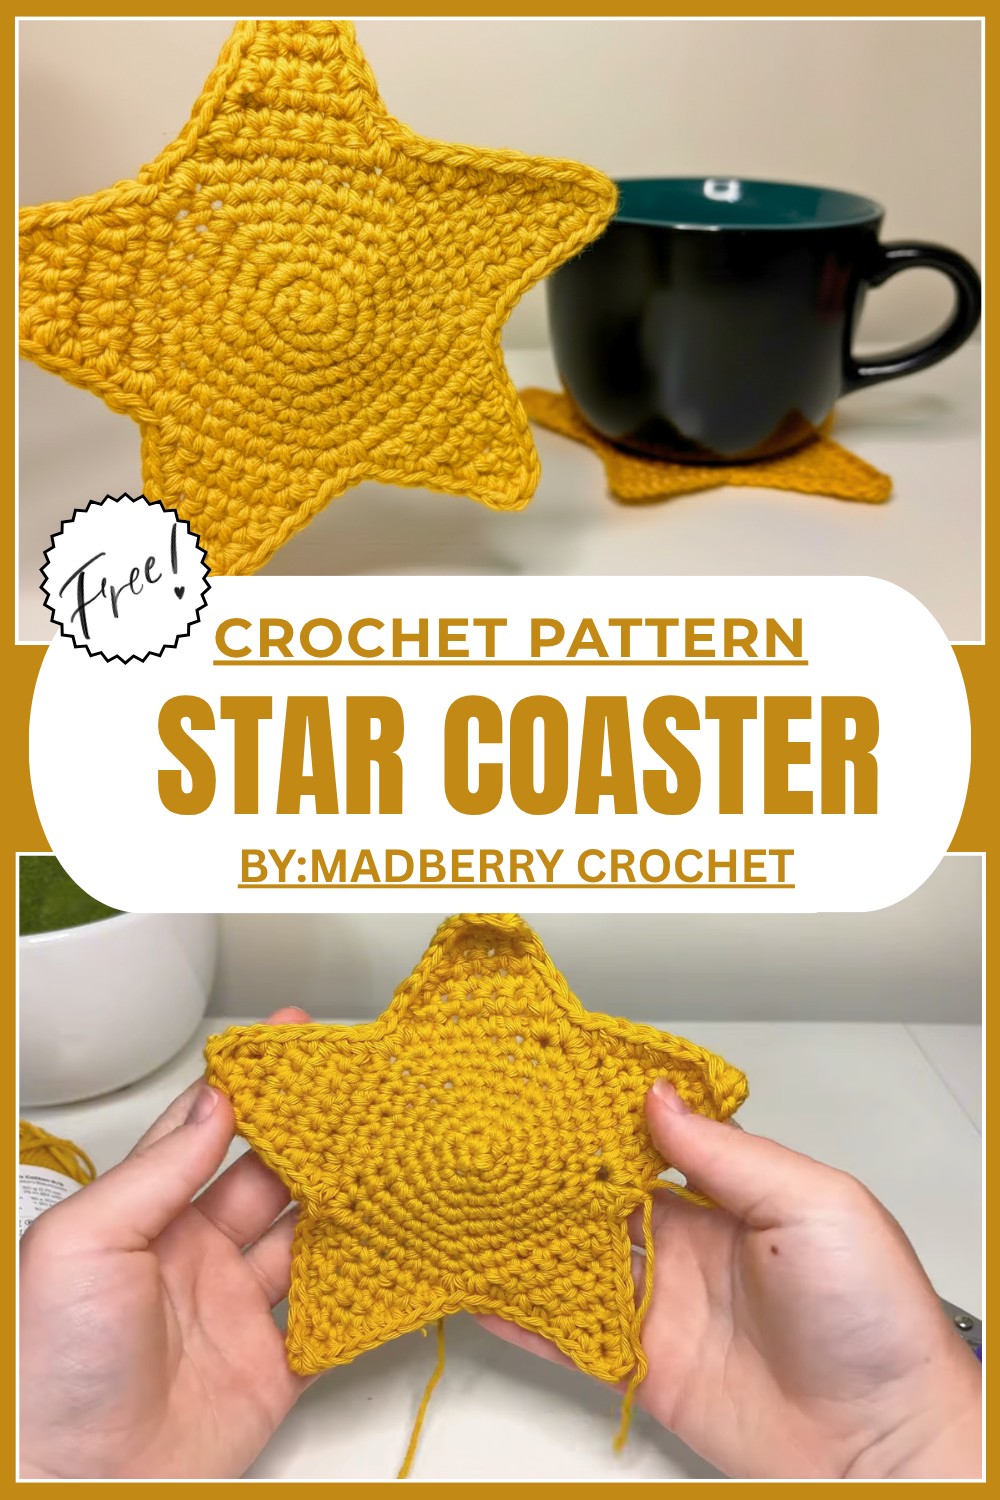
Spark Your Creativity with This Free Crochet Star Coaster Pattern
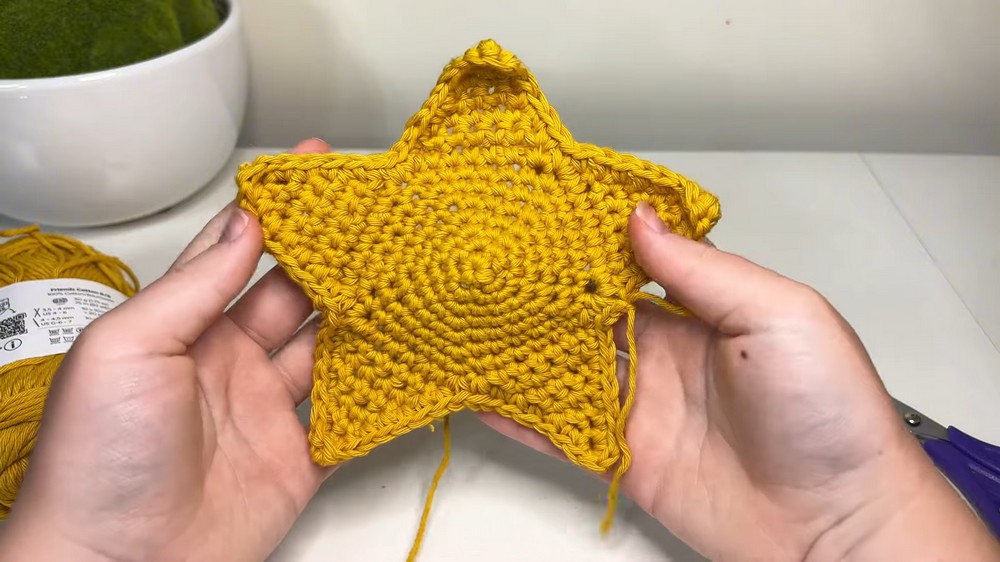
Bring Joy to Your Table with This Free Star Coaster Design, This easy and fun crochet pattern helps you create a delightful star shaped coaster perfect for adding charm to your home. The beautiful star design is playful, making it a perfect addition to any table setting. Not only does it look adorable, but it’s also practical for protecting your surfaces from hot or cold drinks.
With its smooth edges and sharp points, this coaster stands out as both decorative and useful. The pattern is simple to follow, even for beginners, using basic techniques like single crochets, increases, and a magic circle. 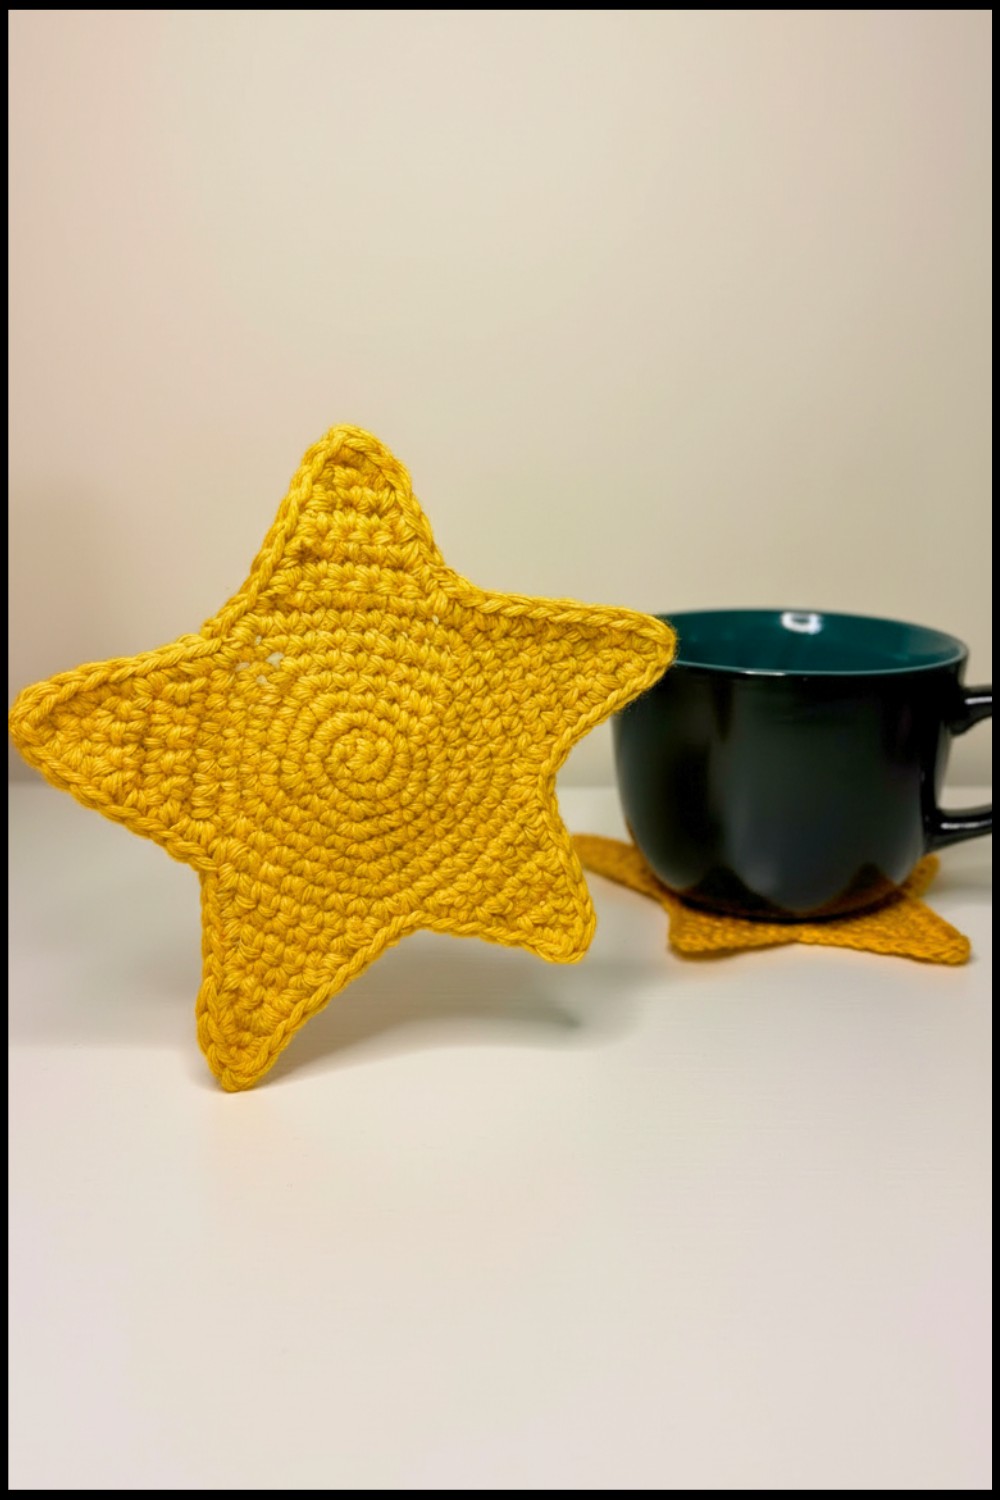 Made with cotton yarn, it’s durable and easy to clean. Whether you’re making it for your home or as a gift, this star coaster is a quick, joyful project everyone will love!
Crochet Star Coaster Pattern
Materials
- Yarn: Weight 4 medium yarn (cotton yarn recommended for durability; choose your favorite color(s))
- Crochet Hook: 4 mm hook
- Stitch Markers: 6-7 markers (optional but helpful for tracking stitches and star points)
- Scissors
- Yarn Needle: For weaving in ends
Gauge
- Gauge is not critical for this project, but aim for tight, even stitches so your coaster keeps its shape.
- Test Gauge: Approx. 5 single crochets = 1 inch using a 4 mm hook.
Finished Size
- Approximate Diameter: 5–6 inches, depending on yarn type, hook size, and tension.
Special Techniques
- Magic Circle: Used for the center of the star. Creates a tight, adjustable loop.
- Increase Stitches: Add extra stitches in each round to expand the pattern.
- Star Points: Work in rows as opposed to rounds to shape the star points.
Pattern Instructions
Foundation Round
- Create a magic circle. Wrap the yarn around your fingers, pull through a loop, and tighten slightly to leave room to work.
- Insert hook into the circle. Crochet 1 chain; this will not count as a stitch.
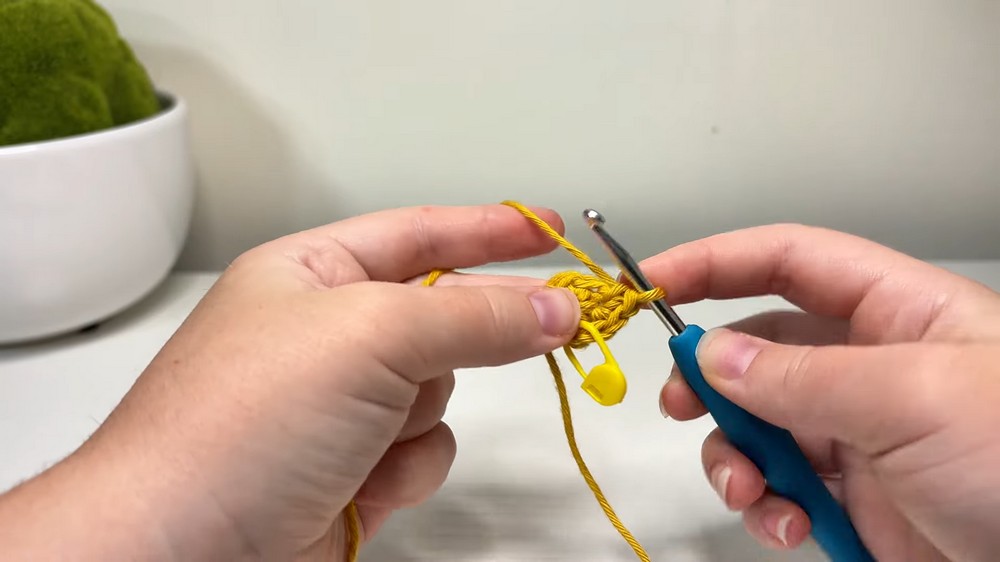
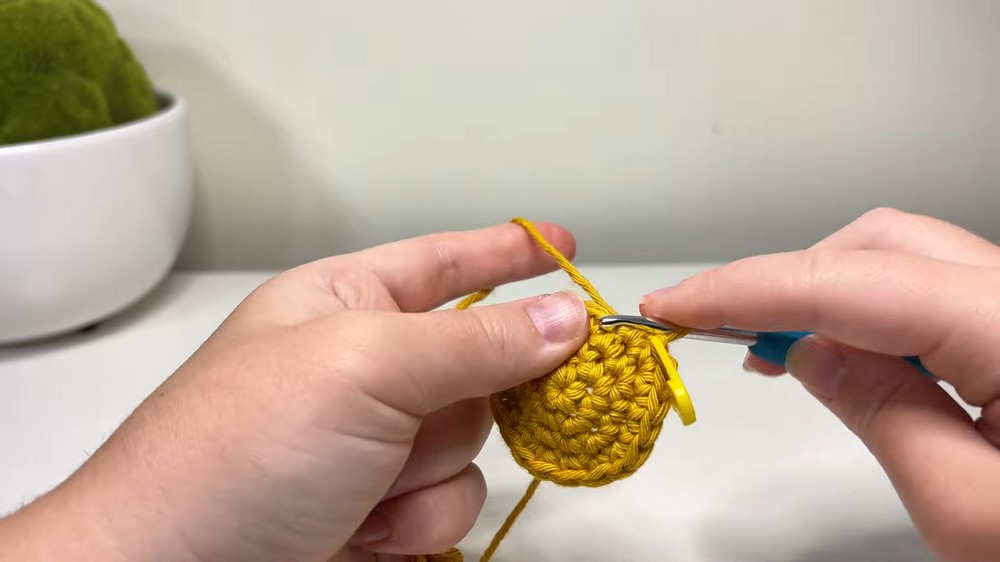
- Create 5 single crochets into the magic circle. Place a stitch marker in the first stitch to mark the beginning of the round.
- Pull the short tail of the magic circle tight to close the center.
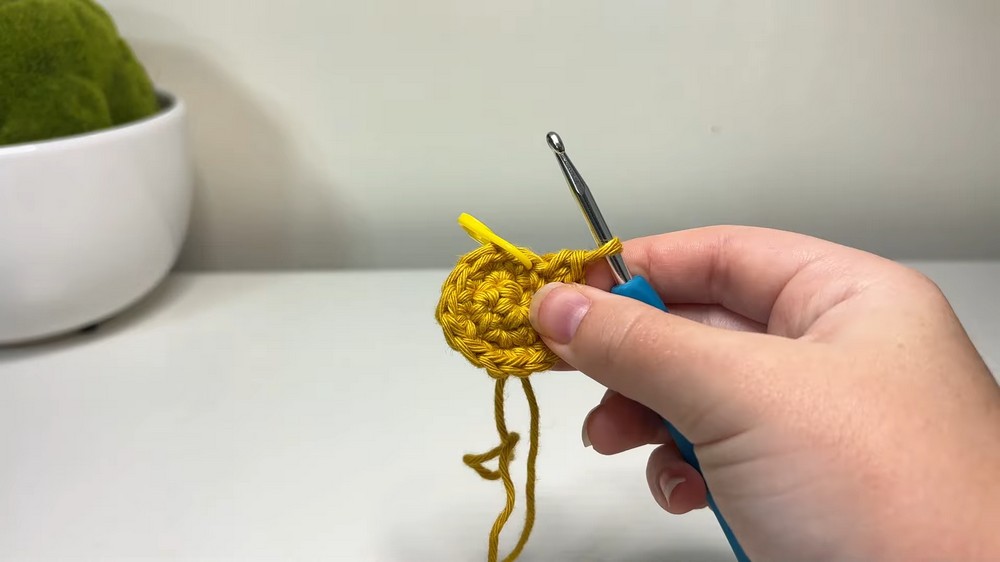
Round 2: (10 Stitches Total)
- Starting in the first stitch of the previous round (marked stitch), crochet 1 single crochet. Replace the stitch marker into this new stitch after it's made.
- Make 5 increases around (2 single crochets worked into each stitch). You should have 10 stitches at the end of this round. Double check your count.
Round 3: (15 Stitches Total)
- Repeat the process of removing the stitch marker and placing it in the first stitch of the round.
- Work the sequence: 1 single crochet in the next stitch, then 2 single crochets (increase) into the following stitch.
- Repeat this pattern 5 times. Ensure the last stitch has an increase. Check your count—there should be 15 stitches.
Round 4: (20 Stitches Total)
- Start with 1 single crochet in the stitch marked. Move the marker into the first stitch of the new round.
- Work the sequence: 2 single crochets, then 1 increase (2 single crochets into the next stitch).
- Repeat this pattern 5 times for a total of 20 stitches.
Round 5: (25 Stitches Total)
- Crochet 3 single crochets, followed by 1 increase.
- Continue the pattern (3 single crochets + 1 increase) until reaching the marker. Verify your count—25 stitches total.
Round 6: (30 Stitches Total)
- Work 4 single crochets, then make 1 increase. Repeat this sequence until the end of the round.
- Count your stitches to ensure you have 30 total stitches.
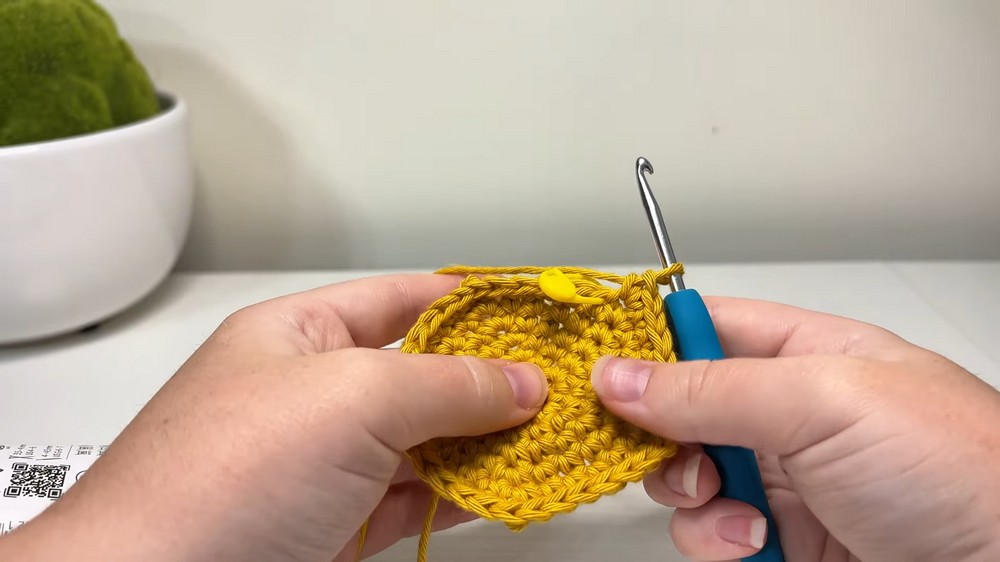
Round 7: (Start Marking the Points)
- Work 5 single crochets, followed by 1 increase. Repeat the pattern until the end of the round. You will begin to notice the circle slightly resembling a pentagon shape.
- Marking the Points: From the stitch with a marker, count 8 stitches, and insert a new marker. Repeat this process 5 times to create placement markers for each star point.
Star Points (Rows Instead of Rounds)
First Star Point:
- Begin at the marked stitch. Replace the marker into the stitch made here to track progress.
- Work 7 single crochets (one in each stitch) to the next marker. Do not crochet into the stitch with the second marker.
- Turn your work: Chain 1, then skip the first stitch and crochet 6 single crochets back toward your starting point.
- Turn your work again: Chain 1, skip the first stitch, and crochet 5 single crochets.
- Repeat the process, skipping the first stitch each row and reducing the number of single crochets as follows: 4, 3, 2, and finally 1.
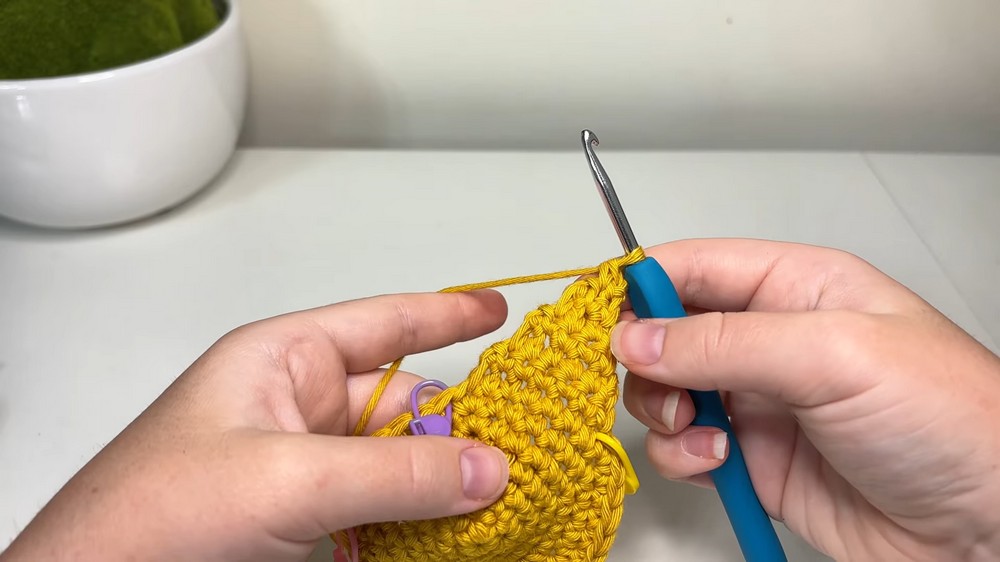
- After completing the point, chain 1, cut the yarn, and pull the loop tight.
Remaining Points:
- Attach the yarn near the next marked stitch in the same way as the first point.
- Follow the same process to create 5 identical star points.
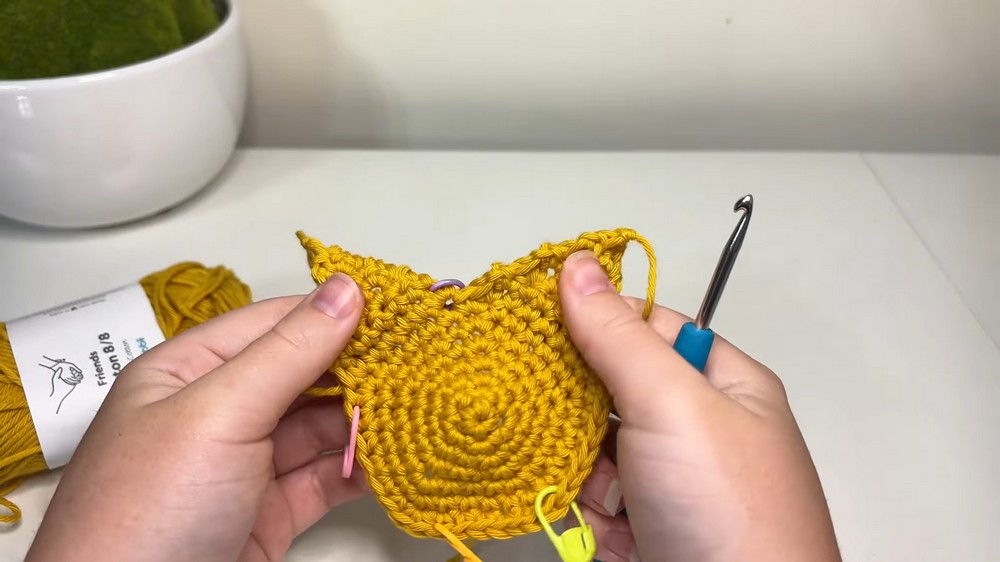
Bordering the Star
- If your yarn was already cut, reattach it near any star edge.
- Work 1 single crochet along the entire perimeter of the star. Place 3 single crochets at the tip of each star point to create a rounded, smooth effect.
- Weave in any ends as you crochet, or leave them for finishing later.
Final Steps
- Once you reach the end, make a slip stitch into the first stitch of the border.
- Chain 1, cut the yarn, and pull it through.
- Weave in all ends using a yarn needle for a clean finish.
Tips and Customization Ideas
- Change Colors: Add stripes or alternate colors for a vibrant, multicolored star. Change yarn color at the start of each round or each star point.
- Add Texture: Experiment with textured stitches (e.g., puff stitches) for a unique effect.
- Blocking: If your star curls at the edges, lightly block it using steam or pins for a flat finish.
- Create Sets: Make several coasters in different colors for a cohesive set.
- Hook Size: Use smaller hooks for tighter stitches, or larger hooks for looser stitches and a slightly larger coaster.
Conclusion and Important Remarks
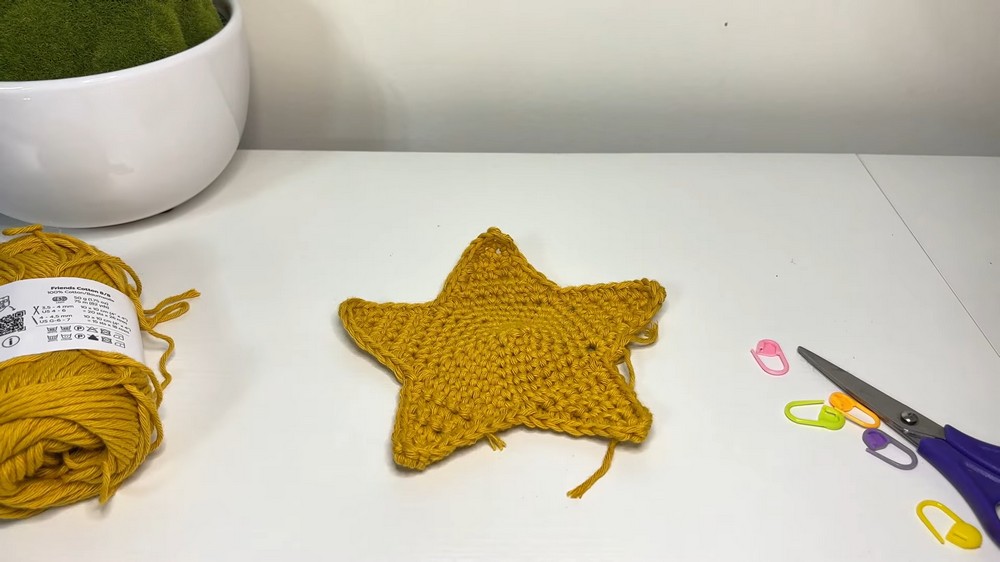
Congratulations—your star coaster is complete! This project is perfect for decor, practical use, or heartfelt gifts. The final star has crisp edges, smooth corners, and a fun, dynamic shape. Make sure to clean up any loose ends and enjoy the creative satisfaction of crafting your own star masterpiece.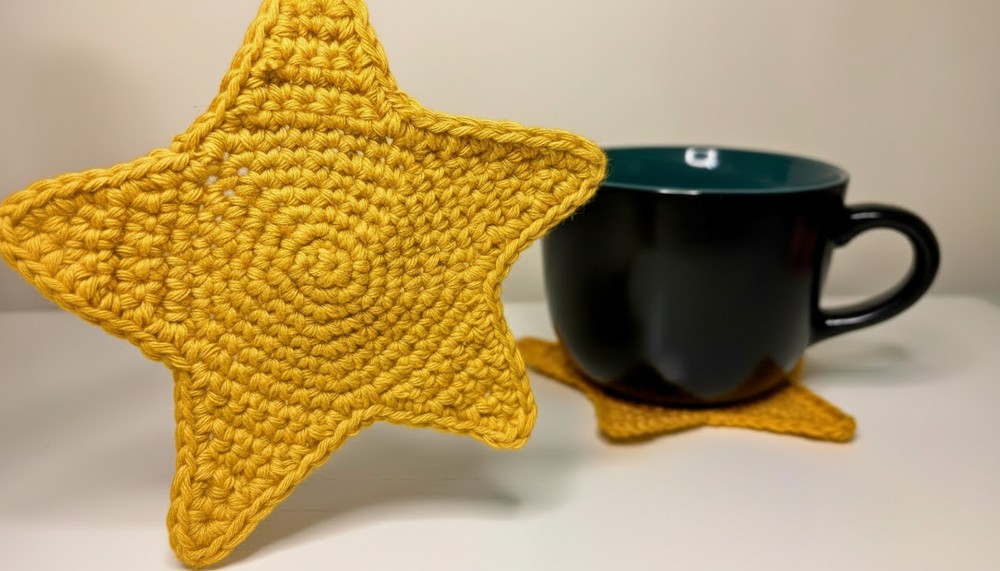
Final Look
Expect a flat, playful star shape with neat points and a smooth outer border. With multiple colors or embellishments (e.g., embroidery or applique), this pattern can be easily personalized to suit any aesthetic.