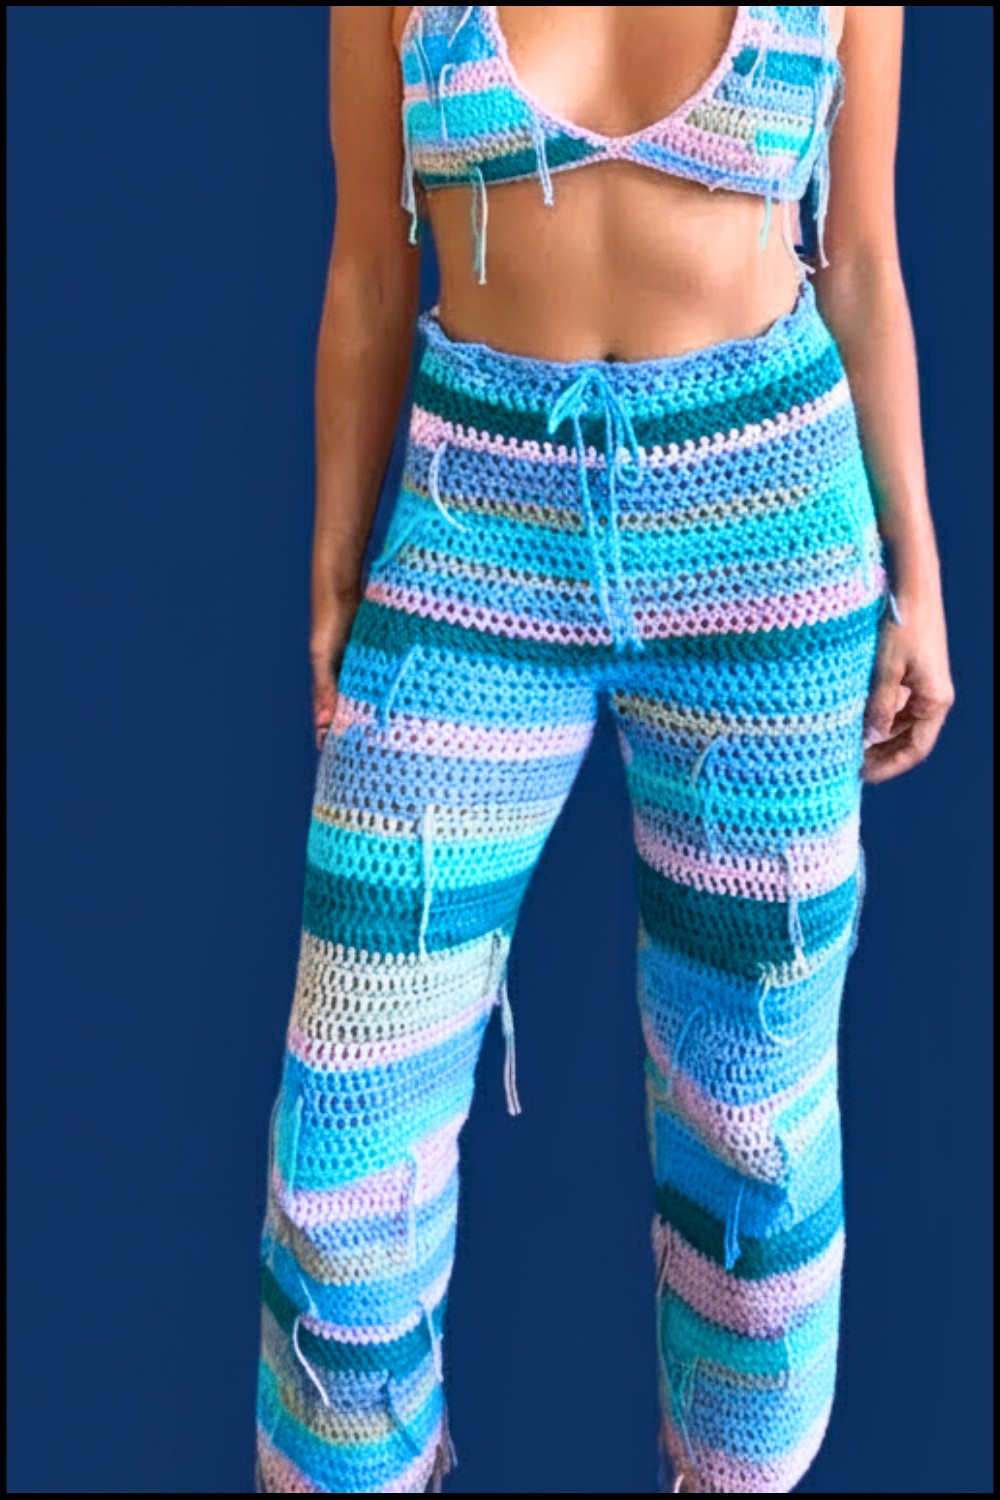
Adorable Free Crochet Pant Pattern For Stylish Handmade Looks
Stitch your own cozy and trendy pant effortlessly with this free crochet guide that’s for relaxing at home or showcasing your style anywhere you go.
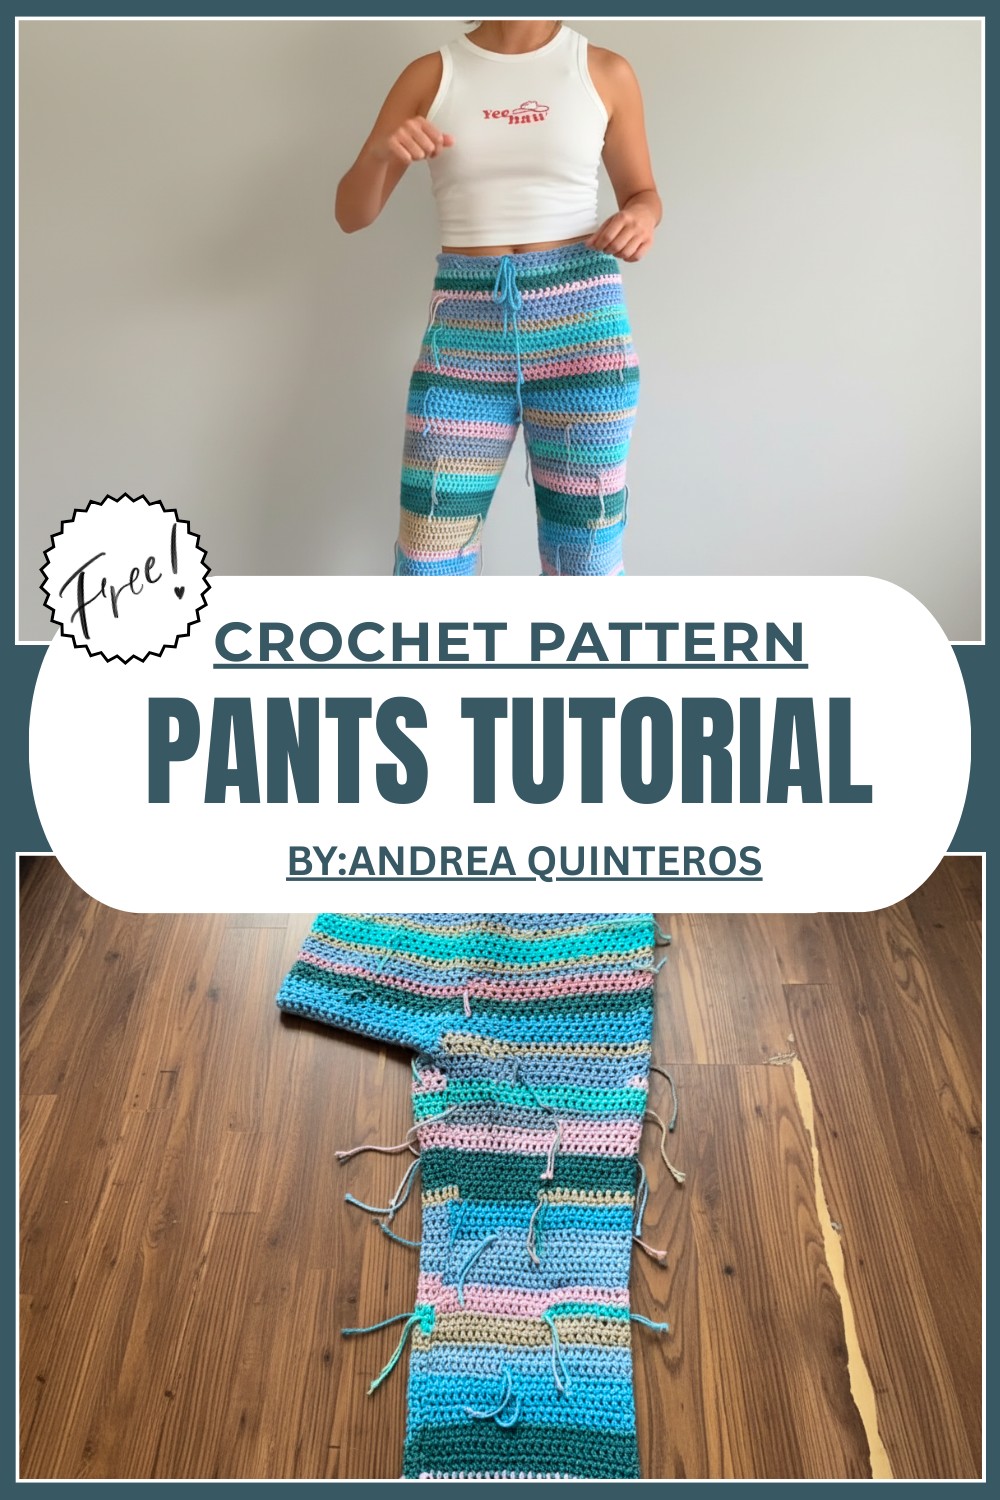
Everyday Free Crochet Pant Pattern to Upgrade Your Closet
Have you ever wanted to create something cozy, stylish, and practical all at once? A free crochet pant pattern is the perfect answer! This timeless piece is as beautiful as it is comfortable, with soft yarn and intricate details that make it stand out. Crochet pants are not just a wardrobe addition, they’re a versatile accessory you can wear at home, on a casual outing, or even dress up for a more stylish look.
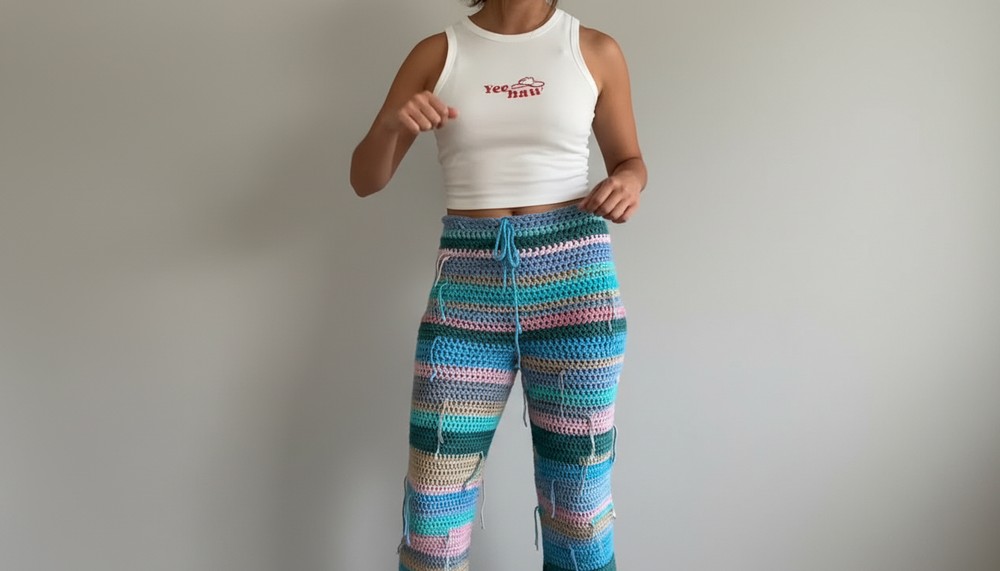
The texture and design of these pants add charm, making them both functional and fashionable. Whether you’re relaxing at home or need a unique statement outfit, crochet pants offer endless possibilities. This pattern also gives you the joy of creating something handmade and personal, perfect for anyone who loves to crochet. No matter your skill level, you’ll find this project fun, easy, and worth every stitch.
Finished Size
- The size and fit are customizable based on your waist, hip, and leg measurements.
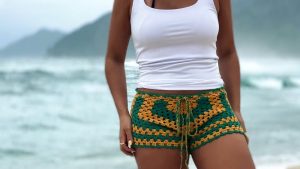
- The sample design was created with high-waisted fit and flared legs, with a crotch length of approximately 10.5 inches.
Materials
- Yarn:
- Medium-weight yarn in your choice of color. The example uses multiple colors for a vibrant design. Approximately 400-600g of yarn (calculated based on size and length).
- Hook: 4.5mm crochet hook. Adjust size depending on your yarn for a neat gauge.
- Tapestry Needle: For weaving in ends and sewing the final seam.
- Stitch Markers: For marking leg holes, rows, and middle points.
- Measuring Tape: To ensure precise measurements.
- Scissors: For cutting yarn.
Gauge
- The gauge is based on double crochet (DC) rows:
- 4 DC and 2 rows = 1 inch.
- Adjust hook size to achieve gauge based on your intended fit.
Special Techniques
- Double Crochet Foundation Stitch: Combines creating the chain and working the double crochets in one go, making the foundation stretchier and easier to measure against the body (explained in Section 1 below).
- Double Crochet (DC).
- Yarn over, insert hook into stitch, pull up a loop (3 loops on hook), yarn over, pull through 2 loops, yarn over, pull through last 2 loops.
- Slip Stitch (Sl St): Seamlessly joins rows.
- Chain Stitch (Ch): Used for spacing and creating foundation chains.
- Increasing: Adding extra stitches within a row to widen the fabric for a flared or custom fit.
- Flipping Rows: Alternate directions at the start of each row to keep the seam straight.
Pattern Instructions
Part 1: Creating the Waistband
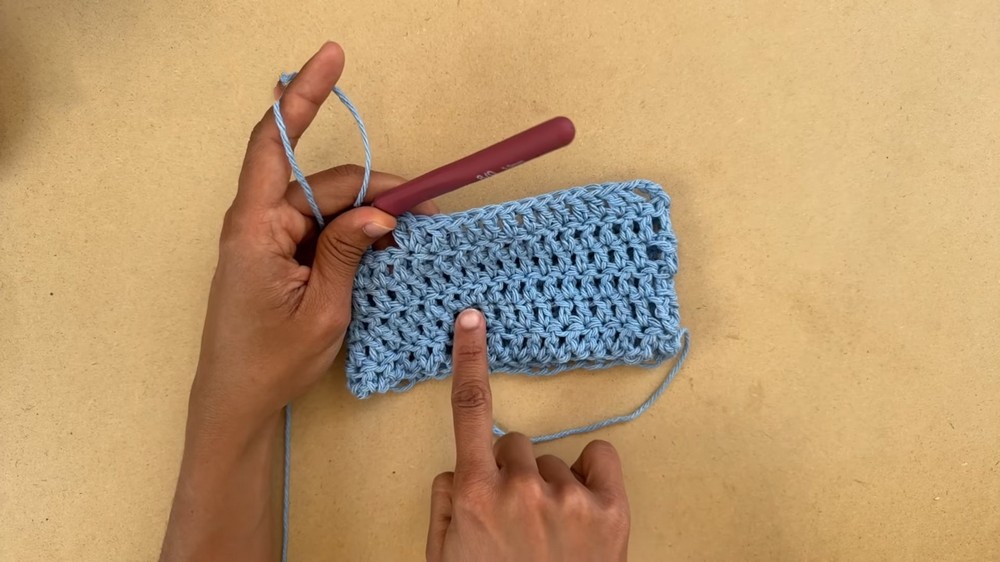
Row 1: Double Crochet Foundation Row
- Start with a slipknot:
- Wrap the yarn around your fingers, pull a loop forward, and tighten the knot. Leave a small tail to secure.
- Foundation Stitch:
- Chain 3 (Ch 3): This counts as the first stitch.
- Yarn over, insert the hook into the first chain, and pull up a loop (3 loops on hook).
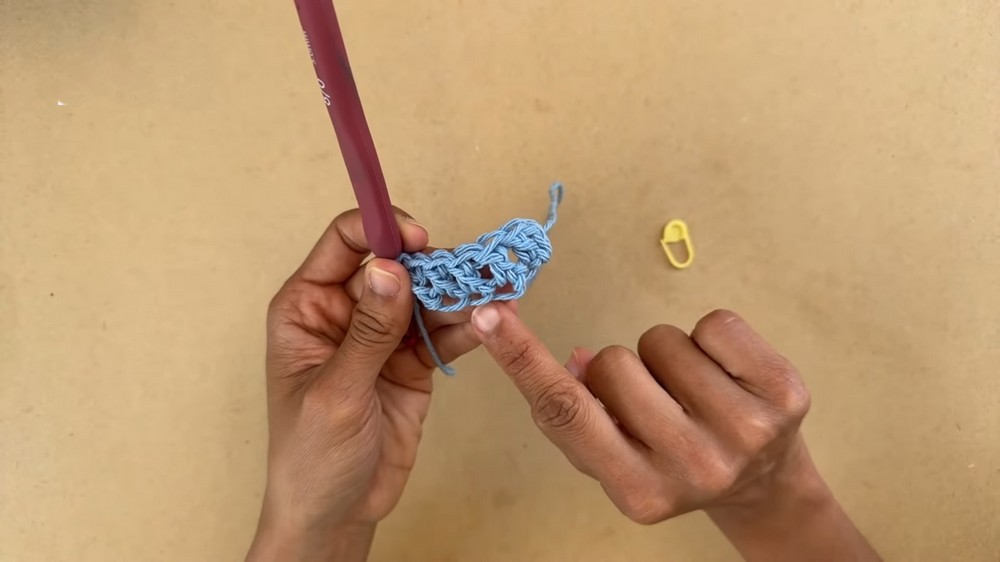
- Yarn over, pull through only 1 loop (this creates a “chain” at the bottom).
- Yarn over again, pull through 2 loops, then pull through the last 2 loops to complete the first double crochet (DC).
- Repeat: Yarn over, go into the “chain” created at the base of the previous DC, and pull up a loop (3 loops on hook). Yarn over, pull through 1 loop, then complete the double crochet.
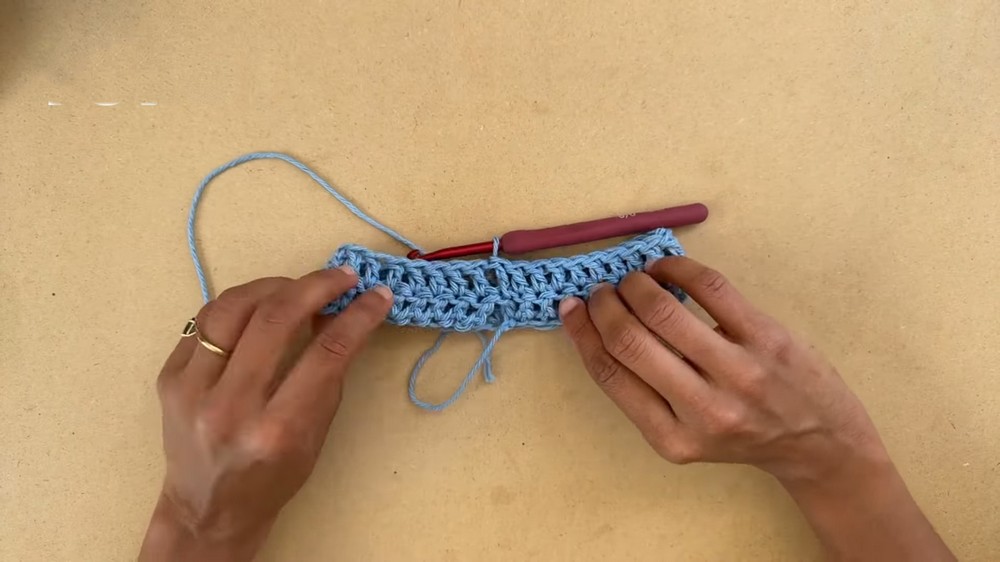
- Measure Against the Waist:
- Continue until your row matches your waist measurement (high, mid, or low, as preferred).
- For the sample design, 69 foundation stitches were used. Adjust based on personal measurements.
Joining the Band
- Once the waistband length is complete, ensure it isn’t twisted.
- Slip stitch to the top of the first Ch 3 to join the waistband into a circle.
- Chain 3 and flip your work to begin Row 2.
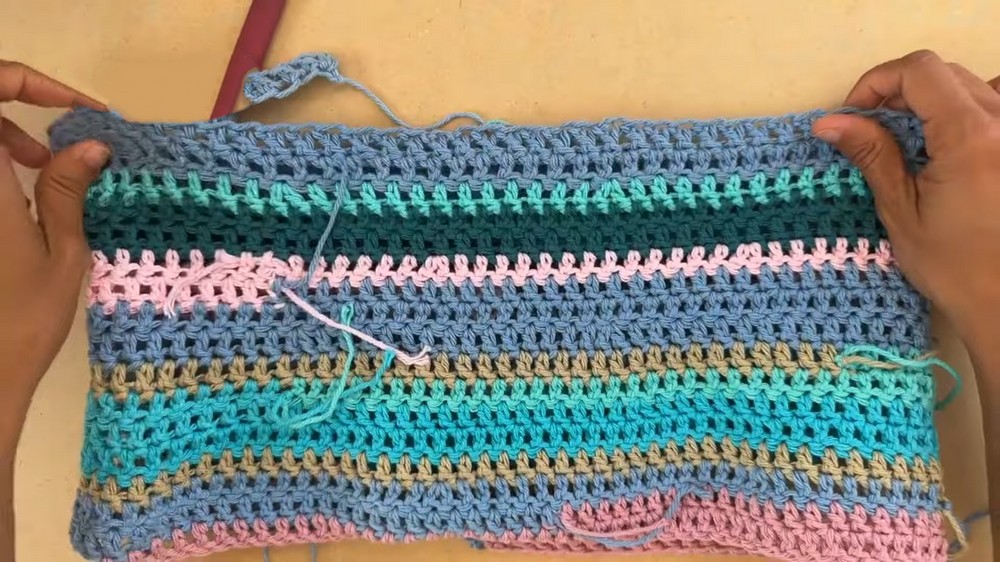
Part 2: Shaping the Pants
Rows 2-3: Base Rows
- Row 2:
- Work 1 double crochet (DC) into each stitch all the way around.
- Slip stitch to the top of the beginning Ch 3.
- Row 3 (Increase Row):
- Chain 3 and flip your work.
- Work 1 DC into each of the next 11 stitches, then create an increase (2 DC into the next stitch).
- Repeat [1 DC into the next 12 stitches, then increase] around.
- If your stitch count doesn’t perfectly reach the end, simply work DCs into the remaining stitches.
- Slip stitch to the top of the Ch 3 to close the row.
Rows 4-5: Even Rows
- Chain 3, flip your work, and skip the slip stitch.
- Work 1 DC into each stitch all the way around.
- These rows maintain the stitch count and allow gentle shaping.
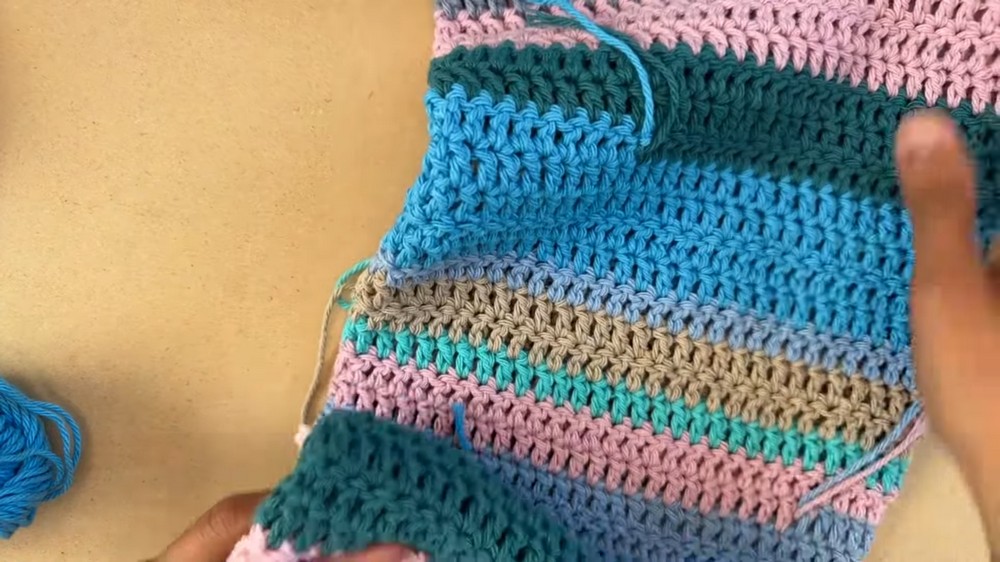
Row Pattern for Shaping
- The pants widen to fit hips by alternating increase rows with two even rows.
- Row 6 (Next Increase Row):
- Chain 3, flip your work, and DC into 12 stitches before increasing (2 DC into the next stitch).
- Repeat [DC into the next 13 stitches, increase] around. Each increase row adds 1 more DC between increases.
- Repeat this pattern until the crotch length is achieved (approximately 10.5 inches).
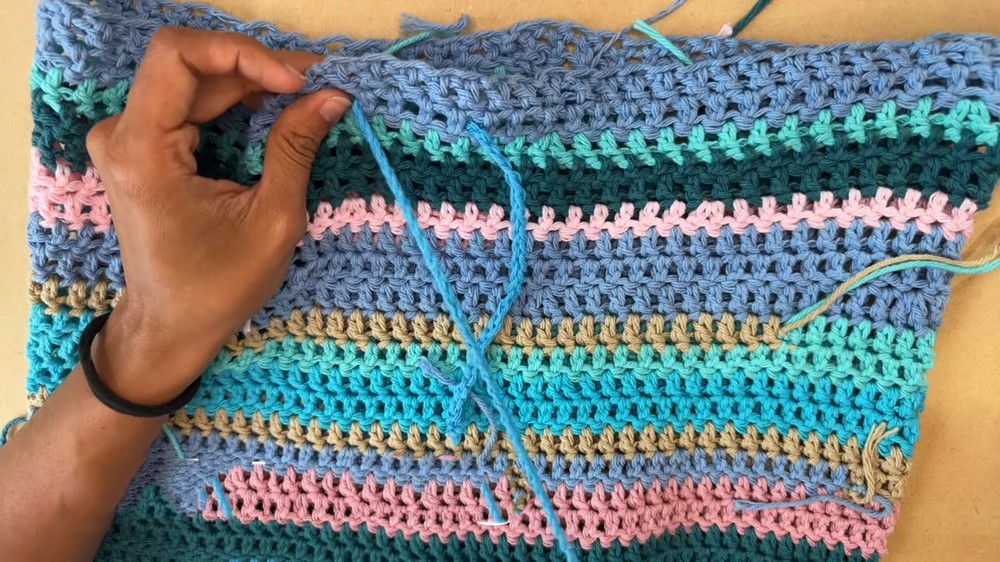
Part 3: Dividing for Legs
Divide for Leg Holes
- Flatten the piece and measure the width. Divide the circumference in half to find the center (e.g., 18 inches = 9 inches for each leg).
- Mark the center stitch on both the front and back panels with stitch markers.
- Chain for Crotch:
- Attach yarn at one stitch marker, chain 10–15 stitches (depending on desired leg gap), and join to the opposite marker with a slip stitch.
- Attach yarn at one stitch marker, chain 10–15 stitches (depending on desired leg gap), and join to the opposite marker with a slip stitch.
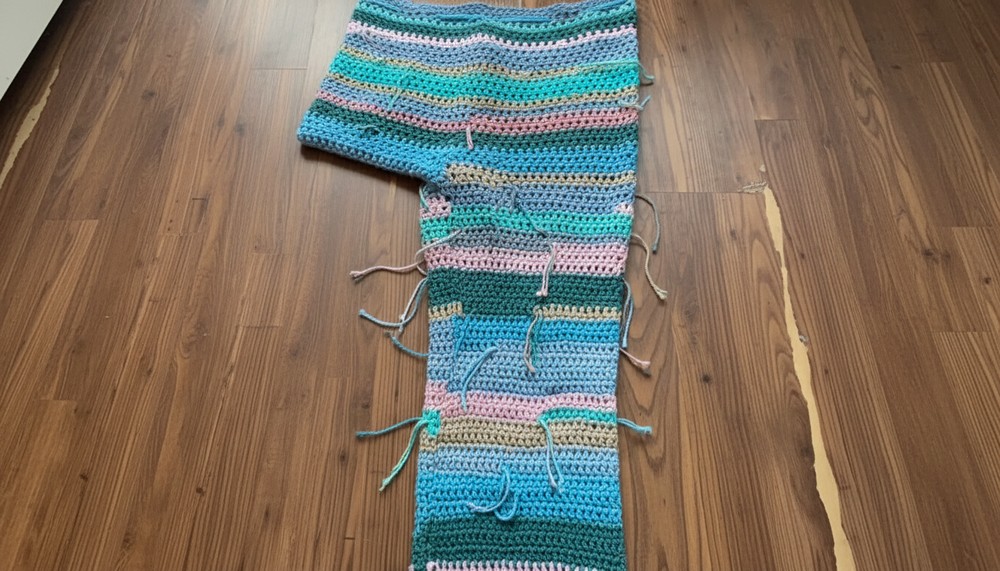
Part 4: Working the Legs
Leg Row 1:
- Chain 3, flip your work.
- Work 1 DC into each stitch and chain around the leg opening.
- Slip stitch to the top of the Ch 3.
Leg Row 2 Onward:
- Chain 3, flip your work, and continue working 1 DC into each stitch.
- Repeat until the leg length is reached.
- For variation, add increases every few rows for flared pants or maintain the stitch count for straight legs.
- Block the piece to achieve desired fit and ease.
Part 5: Waist Drawstring
- Chain a drawstring:
- Make a long chain that can wrap around your waist and tie into a bow (approximately 80–100 chains).
- Thread Through Waistband:
- Use a tapestry needle to weave the chain through the second row of stitches, working over 4 stitches and under 4 stitches for even spacing.
Finishing
- Sew the Back Seam:
- Use a tapestry needle to sew the back crotch gap neatly and securely.
- Weave in Ends:
- Use the tapestry needle to hide all loose yarn strands.
- Blocking:
- Gently block the pants to smooth stitches and stretch to the desired fit.
- Try On:
- Make adjustments as needed or add rows to achieve length or additional fit.
- Make adjustments as needed or add rows to achieve length or additional fit.
Tips and Customization
- Flared Legs: Add increases every 8–10 rows for a wider bottom.
- Color Play: Switch colors after a few rows for a playful striped effect.
- Length Adjustments: Measure inseam and desired pant length for a perfect fit.
- Elastic Alternative: For a snugger waistband, optional elastic can be sewn in.
Conclusion
Congratulations on completing your crochet pants! This stunning and customizable design reflects both creativity and functionality. The waistband ensures a secure fit, while the flared or straight leg options allow for personal expression. Use vibrant colors to make a statement or keep it neutral for a versatile piece.