
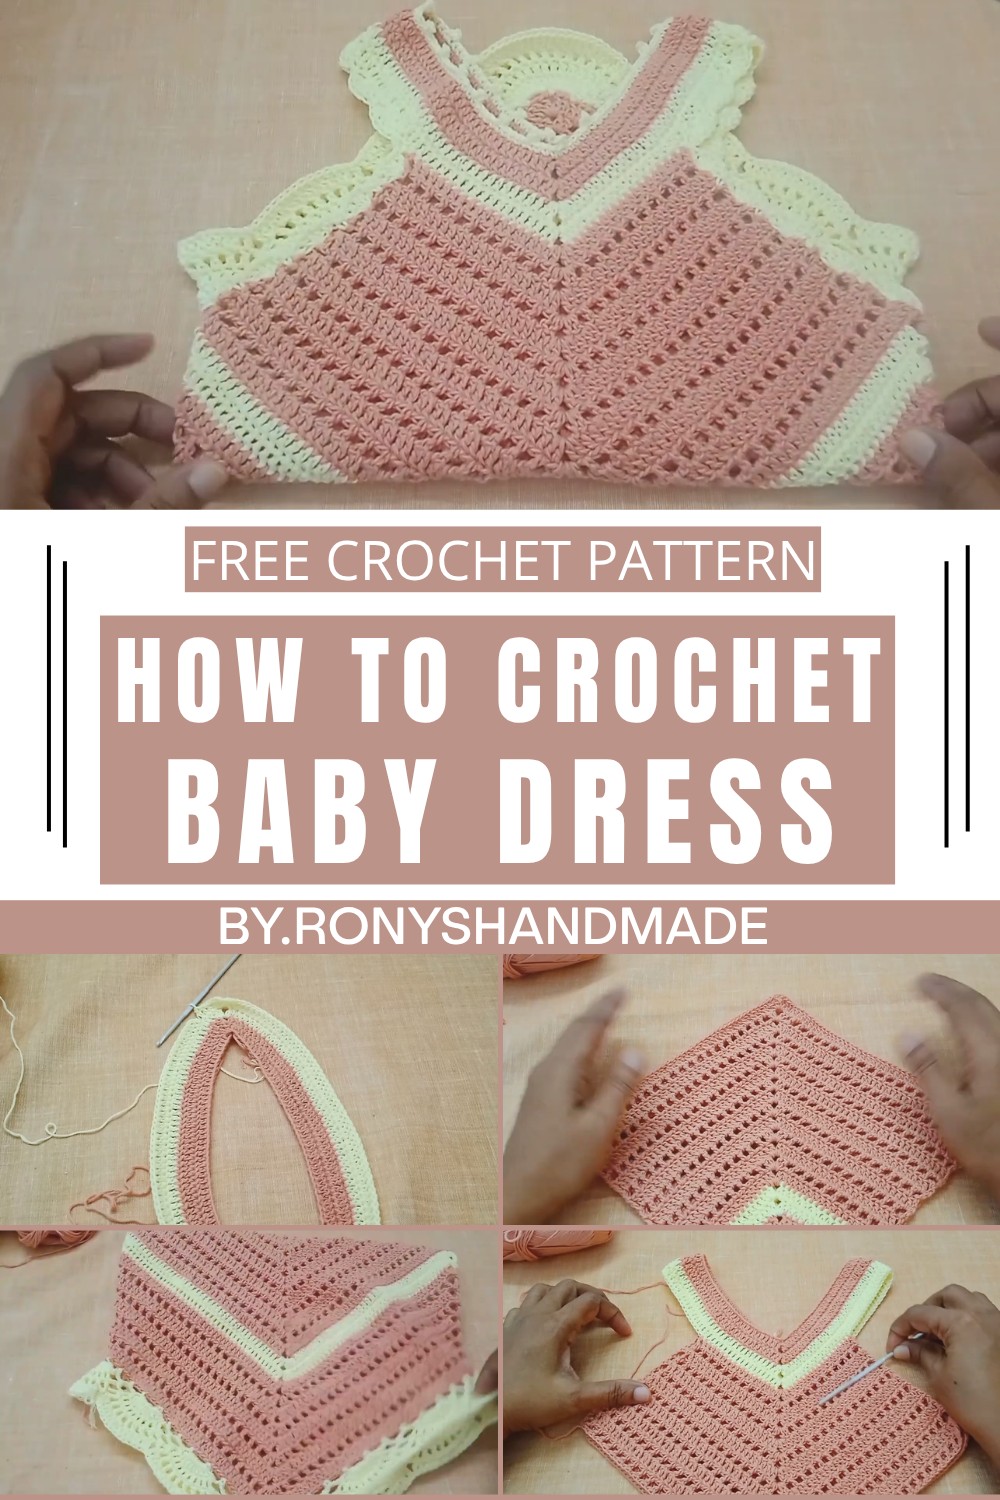
Lovely Free Crochet Baby Dress Pattern For Tiny Fashionistas
Whip up cuteness with this Free Crochet Baby Dress Pattern that make every baby twirl, giggle, and steal the show effortlessly.
Lovely Free Crochet Baby Dress Pattern for a Special Occasion Outfit
Dressing up your little one in something truly adorable and made with love. Through a free crochet baby dress pattern, you can create a charming outfit for kids aged 2 to 3 years. These handmade dresses often feature soft, flowy designs with gentle textures that are perfect for delicate skin. Their beauty shines through vibrant colors, playful patterns, and delightful details such as ruffles or bows.
Whether it’s a casual day or a special event, these dresses add a touch of elegance while being comfortable for toddlers to move and play freely. Beyond their adorable appearance, crochet baby dresses are practical because they’re lightweight, breathable, and easy to customize to fit perfectly.
Crochet Summer Dress for 2–3-Year-Old
Finished Size
- Width: 11 inches (approx. 28 cm).
- Length: 18 inches (approx. 46 cm).
Adjustments for Size
- By adding rows to the bodice width, the dress can fit children up to 5 years old.
- Increase the length by adding rows to the body of the dress to suit your desired measurements.
Materials Needed
- Yarn:
- 100% cotton yarn, 6-ply, 100g for the main color and a small amount of secondary color for accents.
- Hook: 3mm crochet hook (recommended to ensure tight and neat stitches).
- Additional Tools: Stitch markers (optional but useful), scissors, and a tapestry needle for weaving in ends.
Gauge
- Gauge isn't critical for this project but for reference:
- 10 single crochets and 4 rows = 2 inches (5 cm).
- Measure as you go to ensure the desired fit.
Key Abbreviations (US Terminology)
- Ch: Chain
- DC: Double Crochet
- SC: Single Crochet
- Sl St: Slip Stitch
- Rep: Repeat
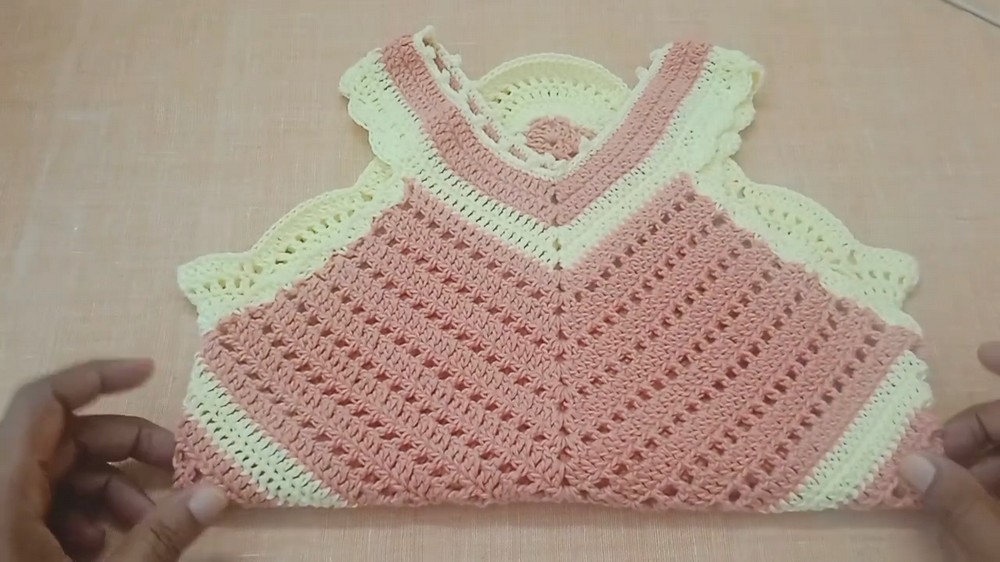
Pattern Overview
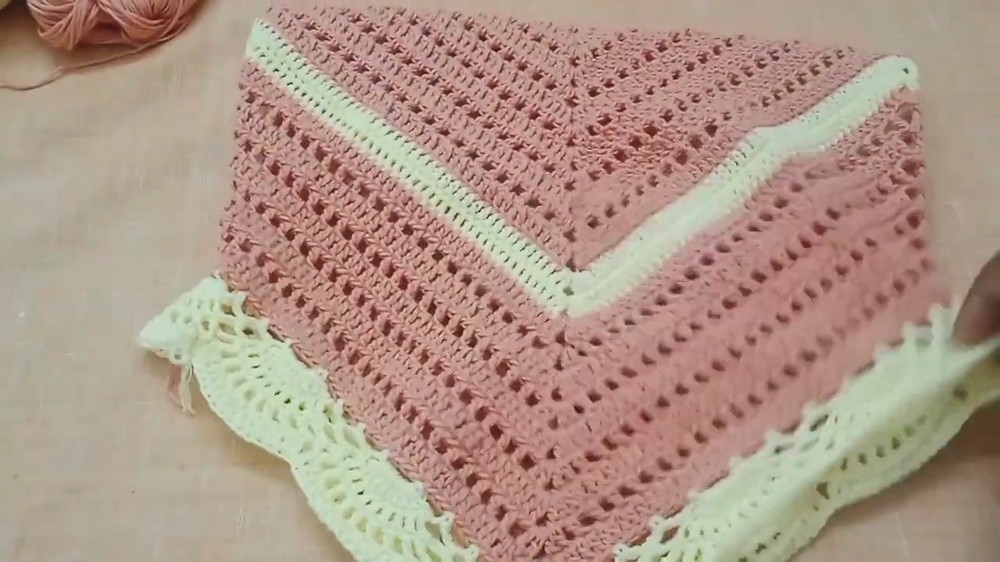
The dress is worked top-down starting from the neckline, with increases added to shape the shoulders and bodice. The body of the dress is worked in rows and joined to form the circular dress shape. A decorative hem and armhole edging complete the elegant look.
Step-by-Step Instructions
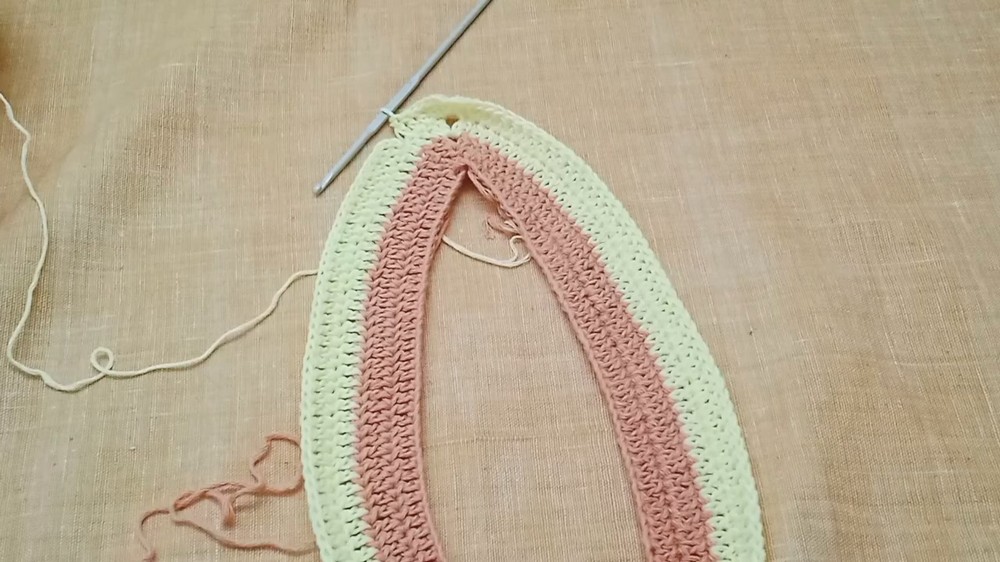
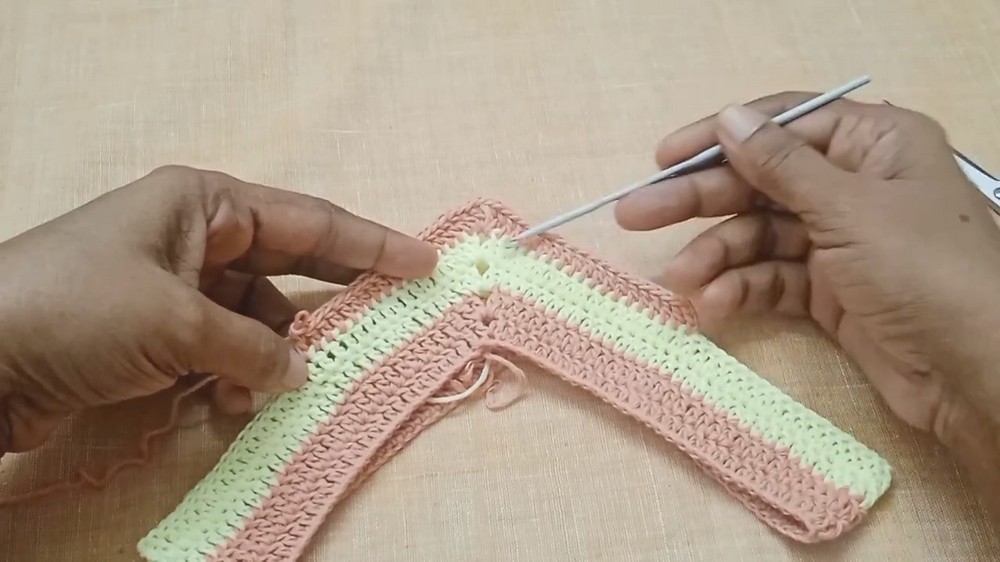
Step 1: Neckline
- Foundation Chain:
- Start with 120 chains (2–3 years size). Adjust the foundation chain length for larger sizes, ensuring the stitch count is divisible by 2.
- Join to the first chain with Sl St to create a circle (be sure the chain is not twisted).
- Round 1:
- Ch 3 (counts as 1st DC). Work 60 DC evenly across the first half of the chain.
- At the 60th stitch, into the same chain, work (1 DC, Ch 2, 1 DC) to form a V Stitch.
- Work 60 DC across the second half. In the last stitch (120th chain), repeat the V stitch by working (1 DC, Ch 2, 1 DC).
- Close with a Sl St into the top of the starting Ch 3.
Step 2: Bodice and Shoulder Expansion
- Round 2:
- Ch 3 (counts as 1st DC). Work 1 DC into each stitch until reaching the V Stitch from the previous row.
- In the V space (Ch-2 space of the V Stitch), work (2 DC, Ch 2, 2 DC) to create an increase.
- Continue working 1 DC into each stitch around, making sure to add increases at the next V space as well.
- Close the round with a Sl St into the Ch 3 from the start of the round.
Repeat the process for several rows to shape the shoulder and increase the bodice width.
- Work 2 rows per color if alternating colors, or continue with a single color as desired.
Step 3: Separate Bodice for Armholes
- Determine Armhole Size:
- Count the total number of stitches between the V stitches on both halves of the bodice.
- Divide the stitch count by 2 to get the front and back panels.
- For example: In the video, there are 72 stitches per panel. Divide by 2 to get 36 stitches for each armhole.
- Work Armhole Rows:
- Mark the 18 stitches on each side (half of one panel's stitches) as the armhole opening. Skip these stitches while working on the front and back panels separately.
- Continue working the bodice rows, shaping the neckline and shoulders evenly.
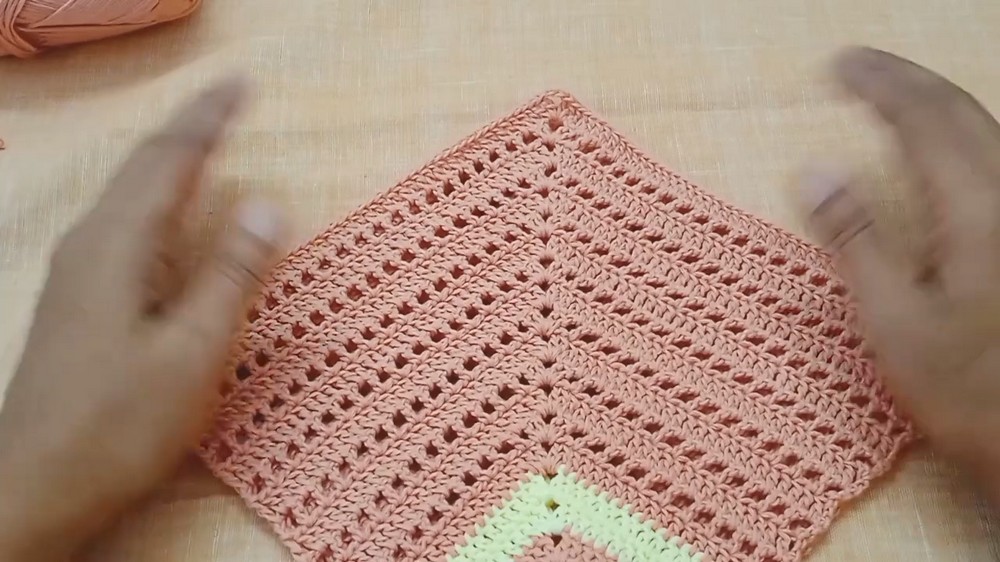
Step 4: Body of the Dress
- Join Front and Back Panels:
- Using a Sl St, join the front and back panels at the marked stitch points to form the body of the dress.
- Work Alternating Rows:
- Row 1: Work all DC across the round.
- Row 2: Work (1 DC, Ch 1, skip 1 stitch) across the round to create a lighter design.
- Continue alternating these two rows to create a striped pattern.
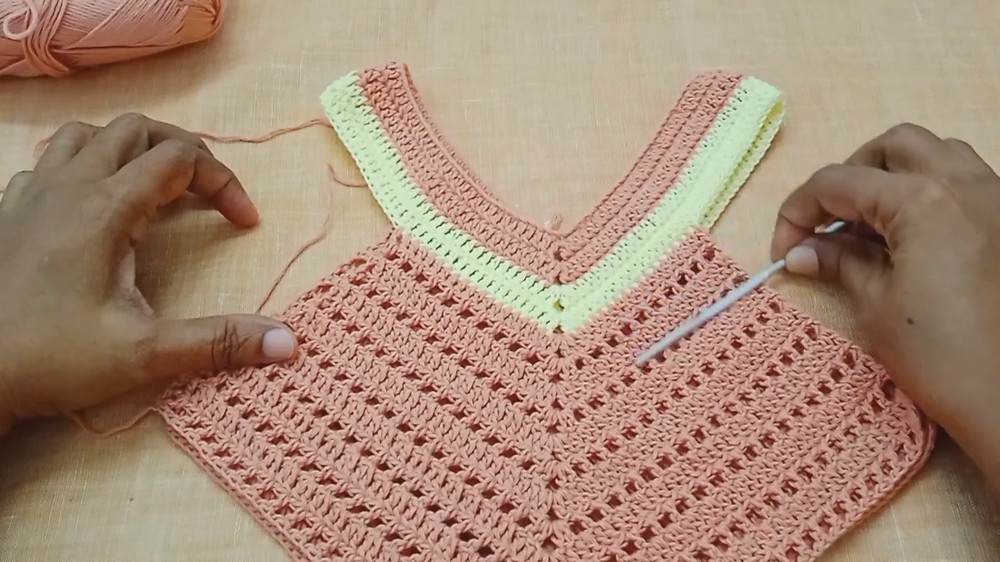
- Length:
- Work a total of approximately 15 rows for the body. Measure to ensure the desired length has been reached, and adjust accordingly.
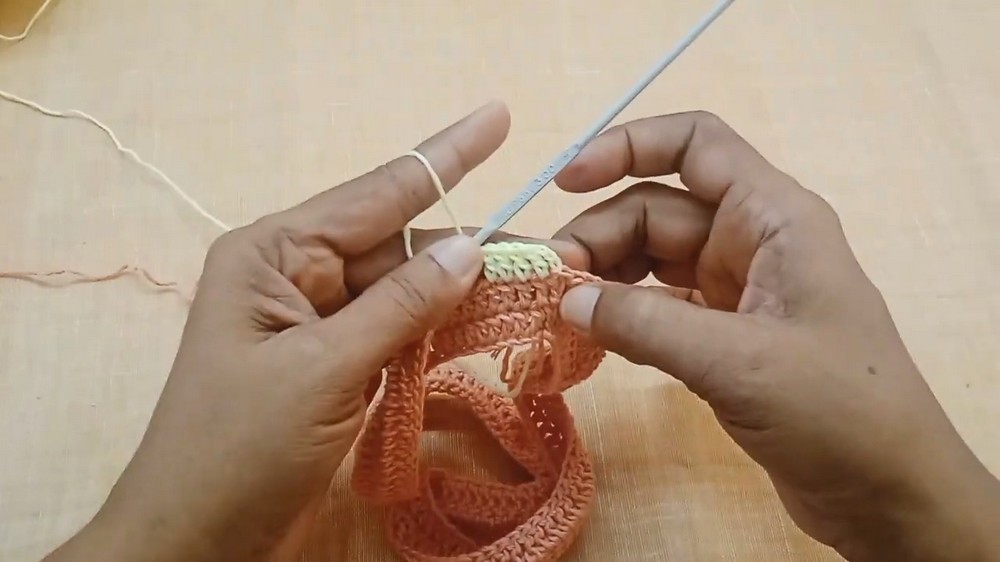
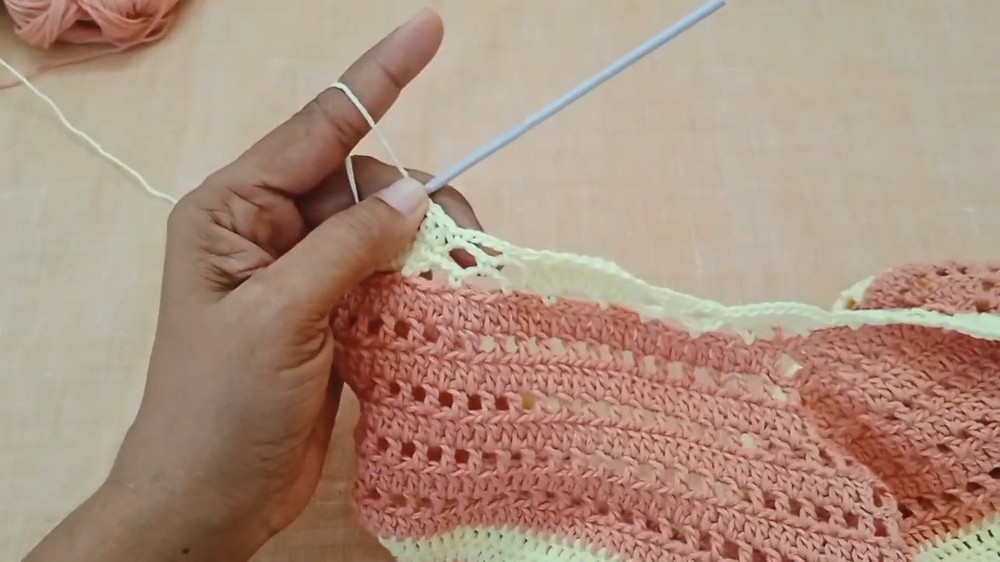
Step 5: Hemline Lace Edging
- Lace Setup Row:
- Ch 4 and work SC into every 4th stitch, skipping 3 stitches between (this creates small chain loops across the hem).
- Shell Stitch Edging:
- Into each loop created in the previous row, work 8 DC to form a shell.
- Skip to the next loop and repeat 8 DC in each loop.
- Expand the Shells:
- In the next row, expand the shells by working 1 DC, Ch 1 into each stitch of the existing shell, creating a lacy effect. Alternate single crochets between shells to define the pattern.
- Continue this pattern until the hem is as wide or decorative as desired.
Step 6: Sleeves and Armhole Edging
- Edging the Armholes:
- Use a simple shell stitch around the edges of the armholes.
- Work 5–6 DC stitches in each section evenly to mimic the hem detailing.
- Repeat around both armholes.
Step 7: Neckline Edging
- Add a scalloped edge around the neckline using picot stitches for a refined look.
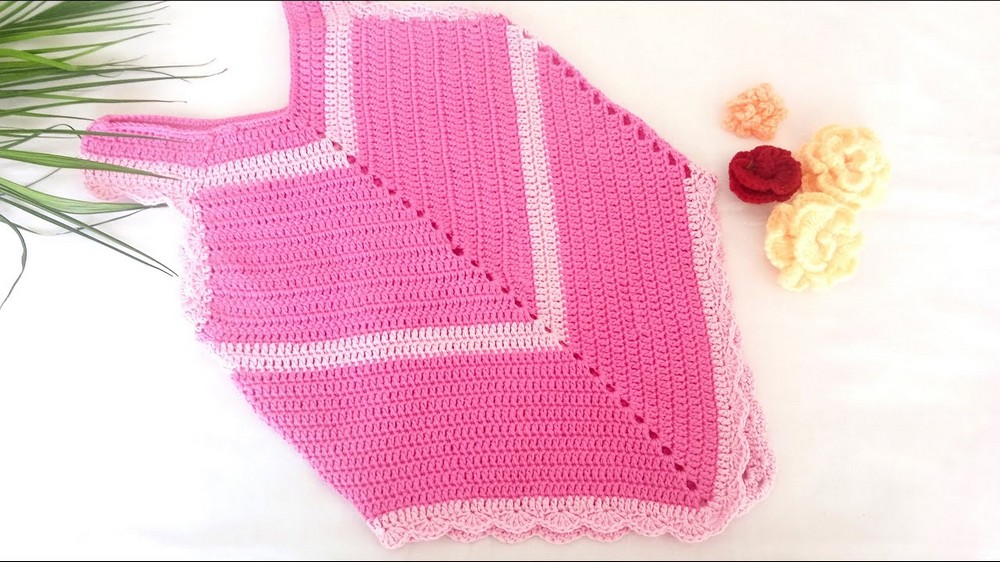
Finished Look
The completed dress will feature:
- A fitted bodice expanding into a lightweight and airy skirt.
- Decorative hemline lacework with shell and fan stitching.
- Clean armhole and neckline edging for a professional and polished finish.
Tips and Customization Ideas
- Sizing:
- To adjust for older children, increase the number of foundation chains and follow the same scaling process.
- Color Customization:
- Try using gradient or variegated yarn to create an ombré effect.
- Alternate colors every few rows for a striped look.
- Lacework Variation:
- Choose your favorite lace pattern for the hem and sleeves for a unique design.
- Accessories:
- Add small buttons or embellishments, such as bows or flowers, to enhance the design.
Conclusion
Congratulations! You’ve successfully crocheted a versatile and beautiful summer dress for toddlers. This lightweight and breathable design is perfect for warm weather and can be adjusted to suit different sizes and styles.
Important Remarks
- The reduction on the sides ensures proper shaping, while the straight sides from the waist down give the dress a flowing and comfortable fit.
- The decoration on the hem and sleeves adds elegance, suitable for both casual and special occasions.