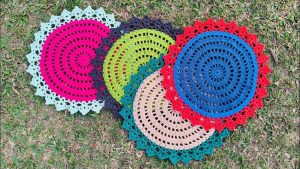
Playful Free Crochet Coaster Pattern To Brighten Coffee Time
Protect your surfaces in style with this Free Crochet Coaster Pattern and create charming, quick-to-make mats that add color, fun, and personality to any table.
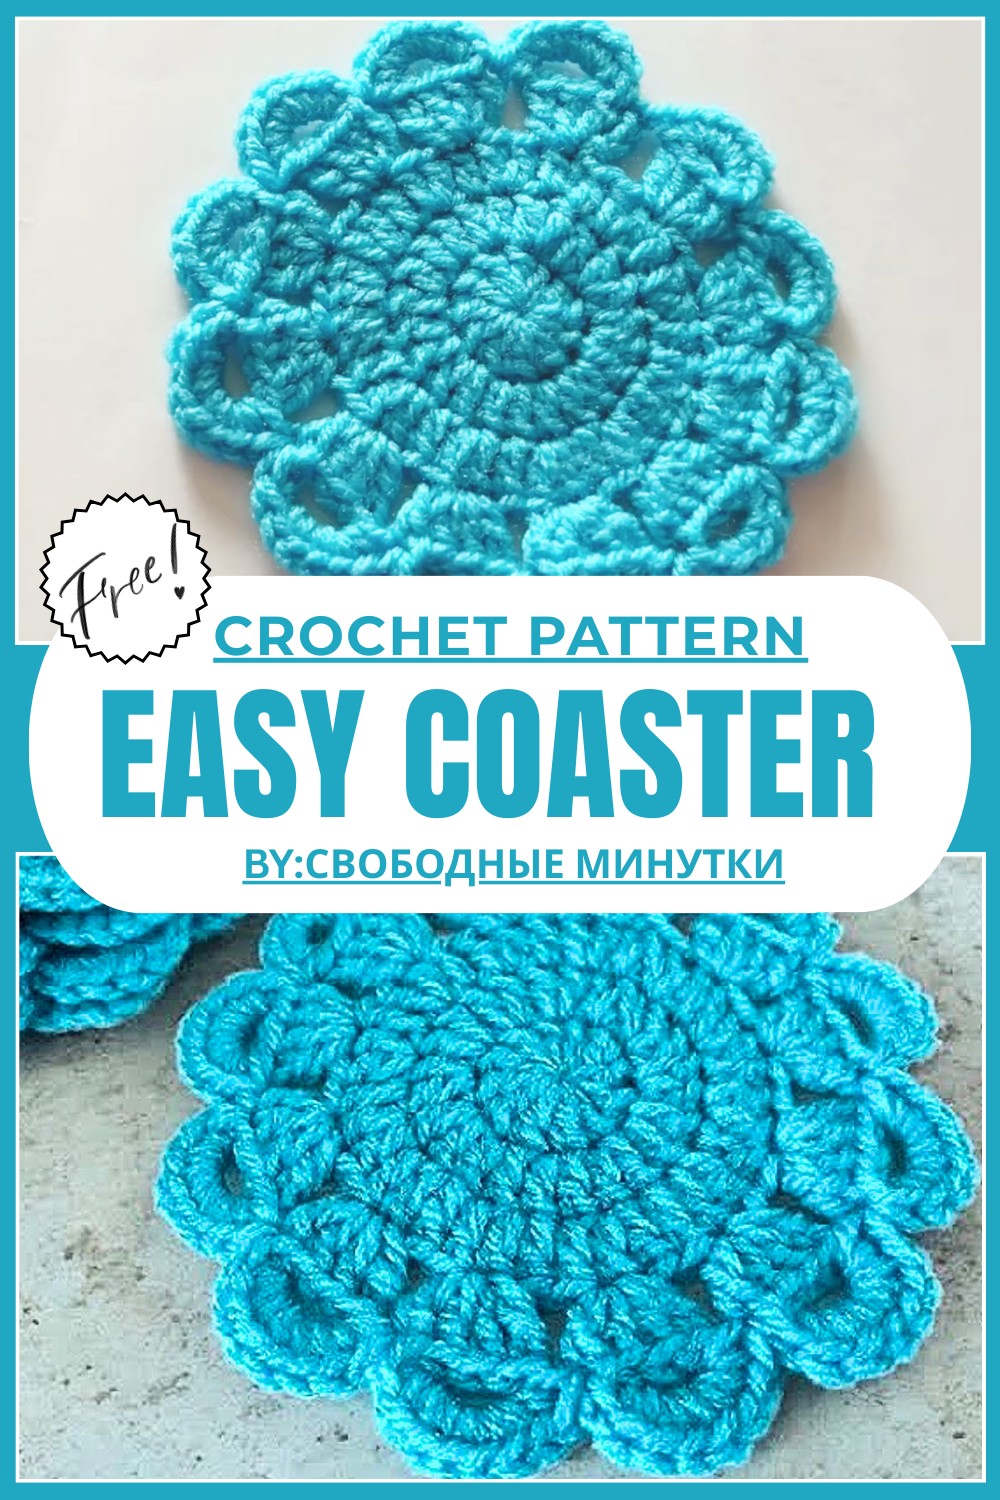
Trendy Free Crochet Coaster Pattern with Modern Handmade Style
It’s easy to overlook small details, but those little things can bring a special charm to your home. A crochet coaster adds elegance and warmth to your table while quietly protecting surfaces from stains and heat marks. With a free crochet coaster pattern, you can create a beautiful design that easily catches the eye. Whether simple or intricate, a crochet coaster combines functionality with style, turning an ordinary item into a creative expression.

Its texture and color bring life to a dull space, making every sip of tea or coffee feel a bit more special. From soft pastels to bright hues, it can complement any decor and reflect your personal taste. Lightweight and easy to make, it’s perfect for both decoration and daily use. A crochet coaster offers not just beauty and practicality but a wonderful way to enjoy handmade creations in your everyday moments.
Detailed Crochet Coaster Pattern
Materials Needed
- Yarn: Choose any yarn of your preference. A medium-weight (DK or worsted) works best for practice, but fine or lace-weight yarn can be used for a delicate finish.
- Crochet Hook: Use a hook size suited to your chosen yarn (e.g., 3 mm – 4.5 mm for medium-weight yarn).
- Scissors: For cutting yarn tails.
- Tapestry Needle: For weaving in loose ends.
Special Techniques
- Air Loop (Chain Stitch):
- To form the foundation or lifting chains.
- Single Crochet:
- Insert the hook into the stitch, yarn over, pull through, yarn over again, and pull through both loops.
- Double Crochet (Column with One Yarn Over):
- Yarn over, insert the hook into the stitch, yarn over again and pull through (3 loops on hook), yarn over, pull through the first 2 loops, yarn over again, pull through the remaining 2 loops.
- Slip Stitch (Connecting Stitch):
- Insert the hook into the stitch, yarn over, and pull through both the stitch and the loop on the hook.
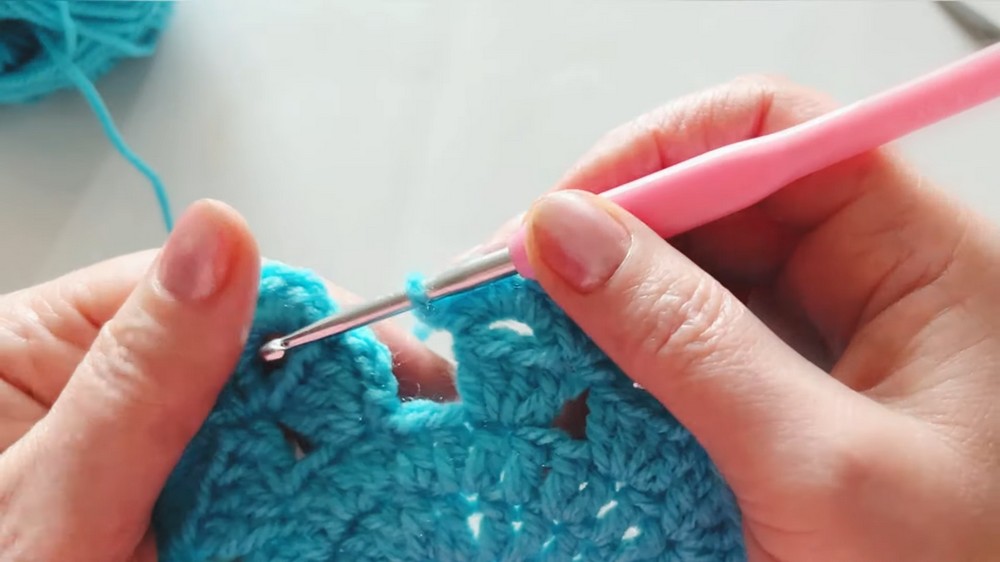
- Arch Formation (Five Chains and Hook Removal):
- Forms a decorative arch by removing the hook from active loops and re-inserting it into specific stitches.
- Forms a decorative arch by removing the hook from active loops and re-inserting it into specific stitches.
Pattern Instructions
Foundation Circle
- Create the Circle:
- Begin with a foundation chain of 3 air loops.
- Slip stitch into the first chain to form a ring.
- Form the Base Stitches:
- Work 3 double crochet stitches (columns with one yarn over) into the center of the circle:
- Start with 3 lifting air loops, replacing the first double crochet.
- Crochet the second and third double crochet stitches into the ring, keeping all three stitches snug and even.

- Work 3 double crochet stitches (columns with one yarn over) into the center of the circle:
Row 1: Building Decorative Arches
- Create Arches:
- Work 5 air loops (chains). This serves as the base for the arches.
- Remove the hook from the active loop, leaving the loop open.
- Secure the Open Loop:
- Insert the hook at the top of the first lifted loop (the start of the double crochet group).
- Pick up the open loop and gently pull it through the hook.
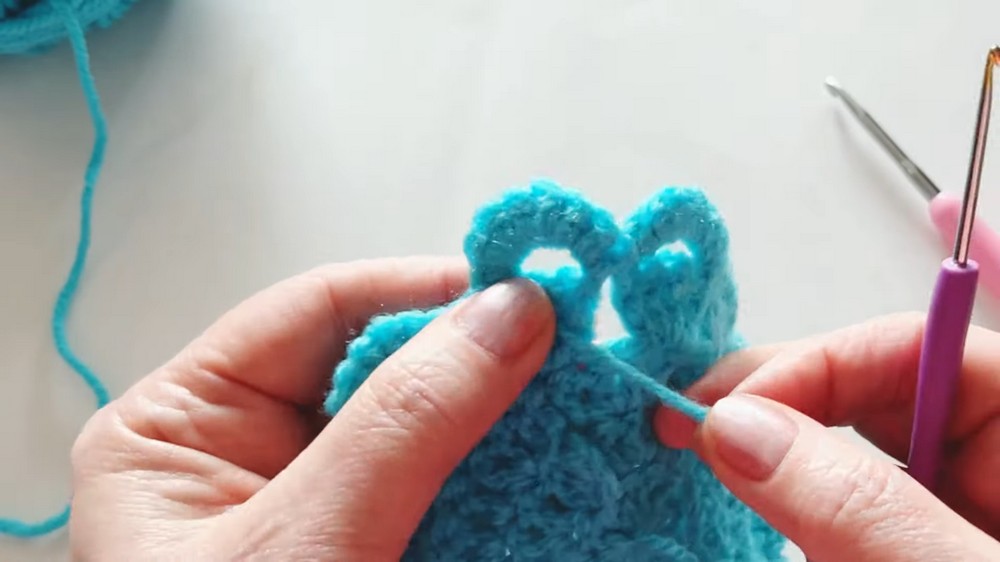
- Fill the Arch:
- Work 8 single crochet stitches into the newly formed 5-chain arch:
- Insert the hook under the arch, yarn over, pull through, and complete single crochets.
- Work 8 single crochet stitches into the newly formed 5-chain arch:
- Skip and Repeat:
- Skip 2 stitches from the previous row. In the third stitch, work 4 double crochet stitches.
- Follow with 5 air loops.
- Repeat the process of forming arches:
- Remove the hook, insert it into the front of the first double crochet, re-insert the open loop, and complete 8 single crochet stitches into the arch.
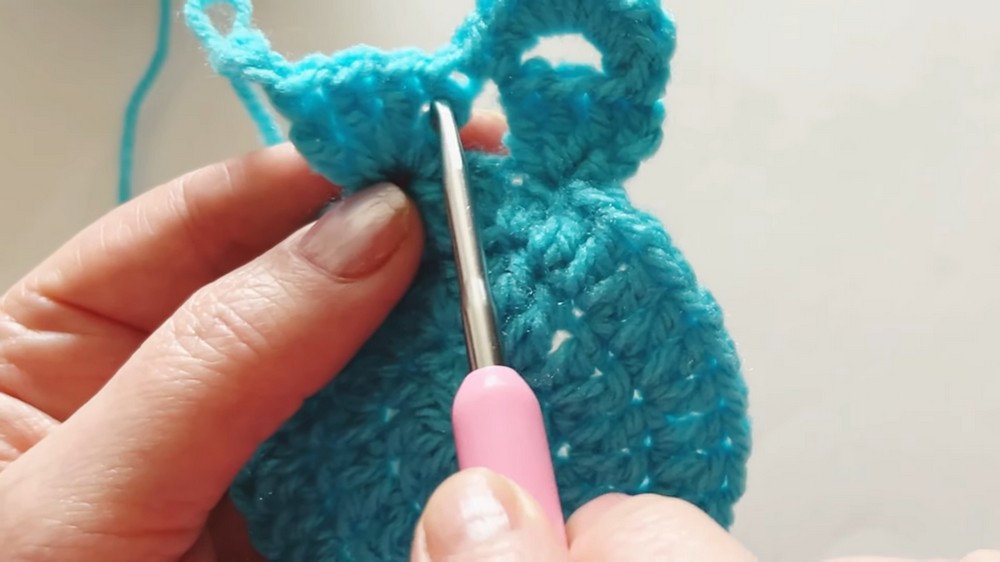
- Remove the hook, insert it into the front of the first double crochet, re-insert the open loop, and complete 8 single crochet stitches into the arch.
Row 2: Continuation
- Repeat the sequence:
- Skip 2 stitches of the previous row and work 4 double crochet stitches in the third stitch.
- Create 5 air loops, remove and reattach the loop as described, and crochet 8 single crochet stitches into the arch.
- Continue this pattern until you finish the row.
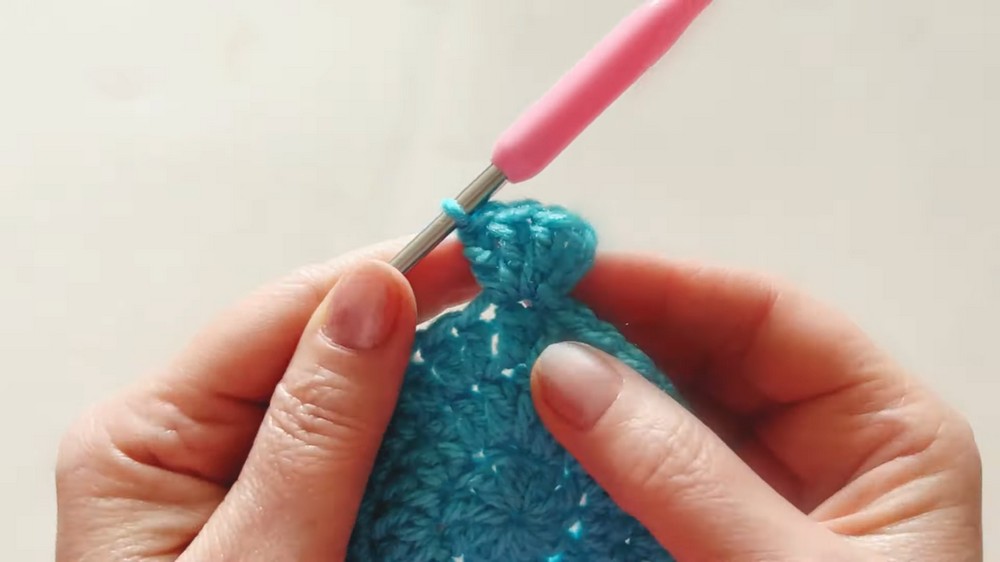
Finishing
- Closing the Row:
- Finish the row by joining with a slip stitch:
- Insert the hook into the top of the first group of double crochets (the starting 3 air loops), yarn over, and pull through both loops to close the row.
- Finish the row by joining with a slip stitch:
- Secure the Yarn:
- Using a smaller hook or tapestry needle, weave the loose end to the back side. Insert the hook under the work and pull the yarn through stitches to hide the end.
- Cut Excess:
- Trim the loose yarn after weaving it into the work.
- Trim the loose yarn after weaving it into the work.
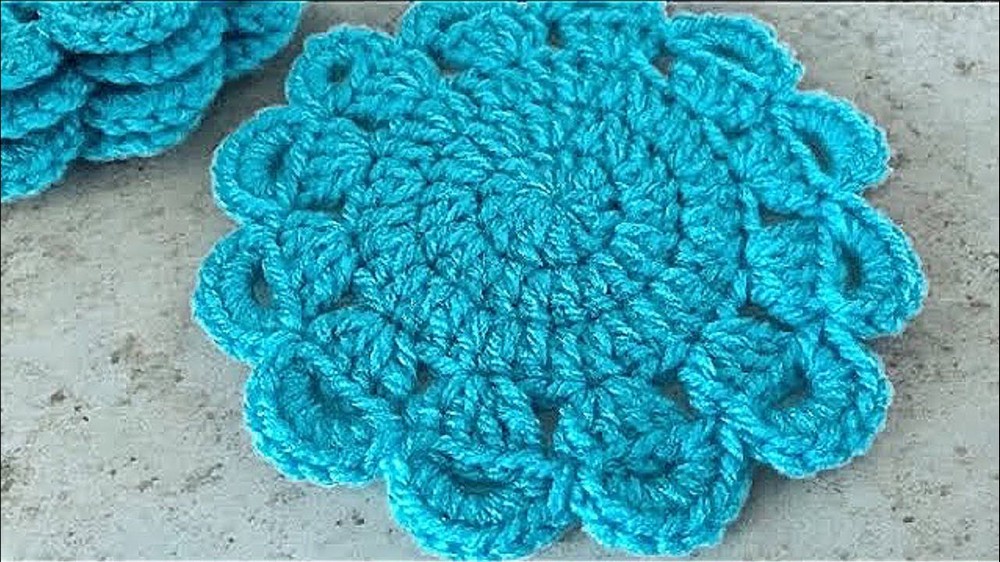
Final Words
Congratulations! You’ve completed a beautiful circular tying row with decorative arches. This edging design is versatile and looks elegant on any crochet project, whether you use it as a standalone piece, such as a coaster, or as a border on larger items like blankets, table runners, or curtains.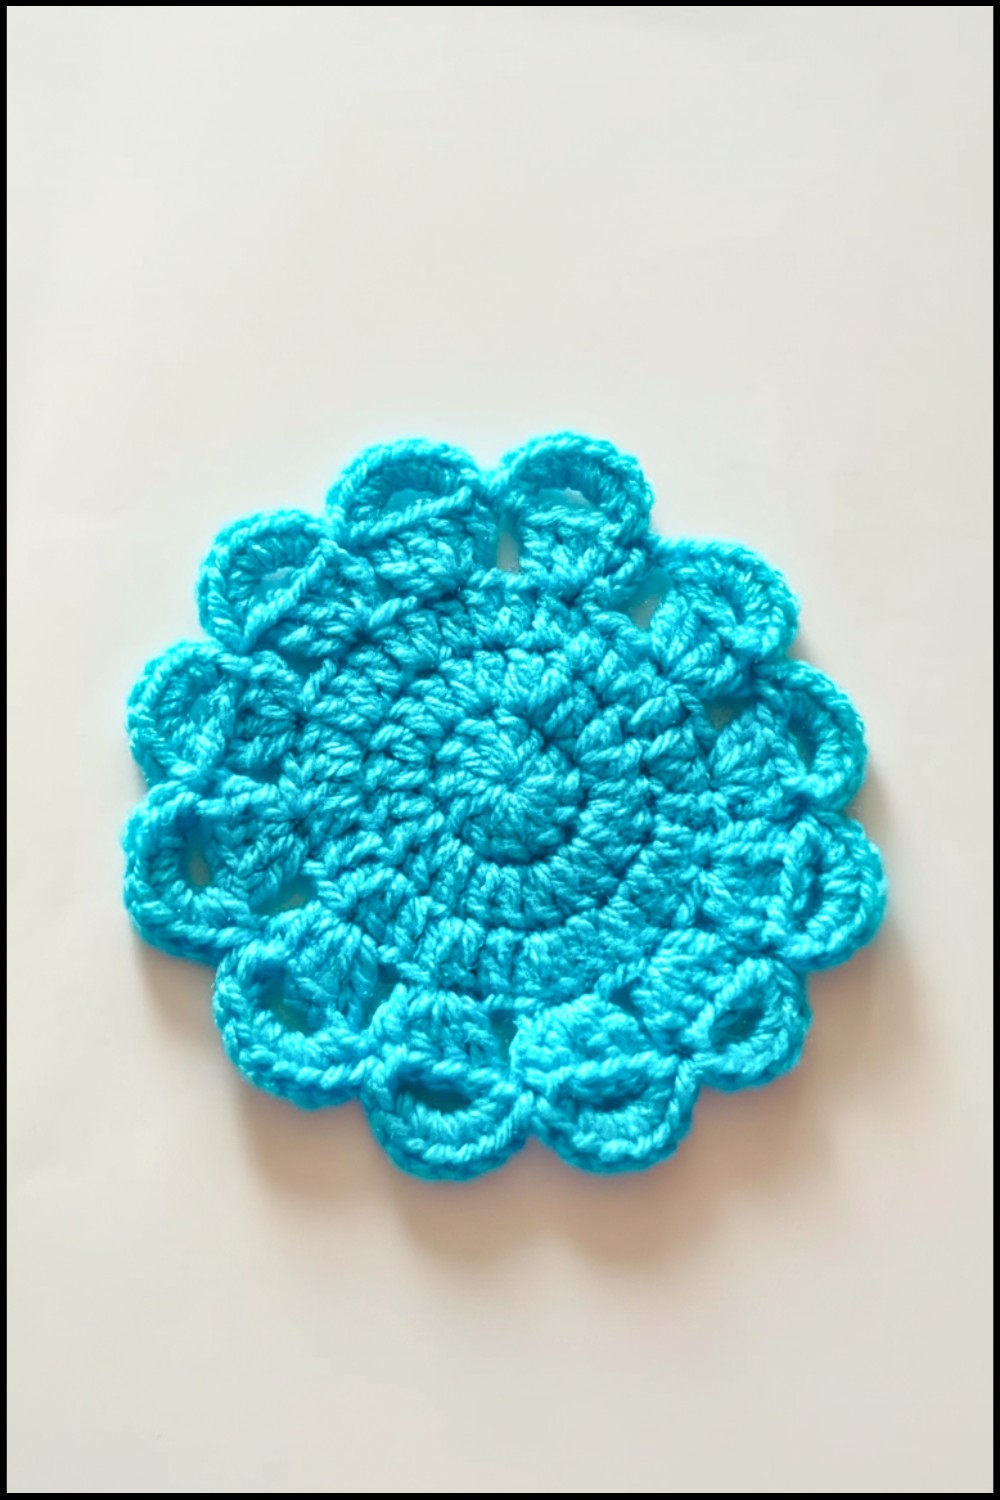
Tips for Maintaining the Pattern
- Smooth Tension:
- Ensure your tension is consistent throughout to prevent the arches or stitches from puckering or sagging.
- Choose the Right Yarn:
- For decorative purposes, consider using cotton yarn or a yarn with a firm texture to hold the shape better.
- Experiment with Sizes:
- Adjust the diameter of the base circle or the length of air loop arches to create different looks.