Exciting Free Crochet Granny Square Sweater Pattern You’ll Use Forever
Make your own unique and cozy Crochet granny square sweater with this free crochet pattern that is simple, fun, and perfect for adding color to any outfit.
Unique Free Crochet Granny Square Sweater Pattern Everyone Uses
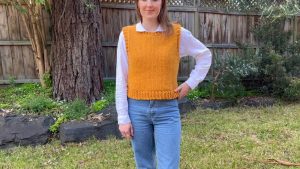
Turn your yarn into a masterpiece of color and comfort by making your very own cozy top with this Free Crochet Granny Square Sweater Pattern. This beautiful sweater looks like a collection of bright and cheerful patches that join together to create a warm hug you can wear any day.
The beauty of this project lies in how you can use all your favorite colors to make a design that is as unique as a rainbow. It features a loose and comfy fit that feels very soft against your skin whether you are at school or relaxing at home.
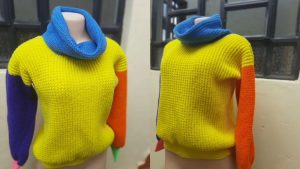
Its unique appearance comes from the classic square shapes that look like a vintage treasure made by hand. You can wear this stylish sweater to stay warm on a breezy afternoon or give it as a special gift to your best friend.
 Even if you are just starting to learn the easy steps make it very fast to finish. Completing this fun project is a great way to show your talent and have a wonderful outfit that looks amazing.
Crochet Granny Square Sweater Pattern
Materials Needed
To complete this project, gather the following supplies:
- Yarn: Use medium weight yarn in colors of your choice (approximately 4–6 skeins depending on size and design). Cotton or acrylic yarn works best for sweaters.
- Crochet Hook: Size 4mm (G) or 4.5mm (determined by your tension).
- Scissors: For cutting yarn.
- Measuring Tape: To take accurate measurements.
- Yarn Needle: For weaving in ends and attaching squares.
- Stitch Markers: To mark specific stitches (essential for neck shaping).
- Blocking Mats (Optional): For blocking your garment if needed.

Measurements Needed
Before crocheting, take the following measurements:
- Chest Measurement: Around the widest part of the chest or bust.
- Sweater Length: From shoulder to desired hemline.
- Sleeve Length: From shoulder to the wrist or desired hoodie length.
- Sleeve Width: Around the widest part of the arm.
- Shoulder to Shoulder Width: Measurement across the back from one shoulder to the other.
Special Techniques Used
- Granny Square Basics: A granny square consists of clusters of stitches separated by chain spaces.
- Joining Squares: Single crochet or slip stitch method is used for a neat, flat join.
- Front Post and Back Post Double Crochet: Creates ribbing for the edges.
- Decrease Techniques: To shape the neckline and sleeves.
- Granny Rows: Rows of granny stitches worked along edges to adjust size.
Step 1: Make the Granny Squares
Instructions:
- Begin Your Square:
- Create a magic ring or chain 4 and slip stitch to form a ring.
- Round 1:
- Chain 3 (counts as first double crochet), make 2 double crochets into the ring, chain 2.
- Repeat (3 double crochets, chain 2) three more times into the ring.
- Slip stitch into the top of the beginning chain 3 to close the round.

- Round 2 onwards:
- Slip stitch to the next chain 2 space, chain 3. Make 2 double crochets into the same space, chain 2, and make 3 more double crochets into the same space (corner cluster).
- Continue working clusters of 3 double crochets separated by chain 2 in each corner chain 2 space around.
- For sides, make clusters of 3 double crochets in chain spaces between clusters.
- Slip stitch to close each round and repeat until your square measures 5.5 inches (or desired size).
- Make Enough Squares:
- For this sweater:
- Measure chest size and divide by 2 to calculate the panel width.
- Determine how many squares are needed for each panel and adjust accordingly.
- Example: For a 48 inch chest, you may need 32 squares (16 per panel), each measuring 5.5 inches.
- For this sweater:
Step 2: Join the Squares
- Arrange your squares in rows according to your desired color or layout pattern.
- Use the single crochet join method for a neat finish:
- Place two squares wrong sides together and align the edges.
- Insert your hook into the corresponding stitches of both squares, pull yarn through, and make a single crochet stitch.

- Continue across each edge, joining squares one by one to form a strip.
- Once strips are ready, join them horizontally to form the front and back panels.
- Repeat this process for both the front panel and the back panel.

Step 3: Add Granny Rows to Adjust Panel Width
If the panel width needs to be adjusted, work additional granny rows along the sides of the panels:
- Attach yarn at the corner of the panel.

- Work clusters of 3 double crochets separated by chain 1 into the spaces between the squares.
- Add rows until the panel width matches your desired measurement.
Step 4: Work the Bottom Ribbing
- Row 1: Attach yarn at the corner of the panel. Work one double crochet into each stitch across.

- Rows 2–3: Decrease at the start and end of each row using the double crochet decrease technique.
- Row 4: Work one double crochet in each stitch (no increases or decreases).
- Rows 5–9: Alternate front post and back post double crochets to create a ribbing effect.

- Repeat this process for the bottom ribbing on both the front and back panels.
Step 5: Shape the Neckline
- Mark the center stitch on the top edge of the front panel.
- From the center, measure 4 inches on each side (or adjust based on your neckline preference) and mark these points with stitch markers.
- Row 1: Work one row of double crochet across. Ensure the total stitch count is odd so the center stitch is clearly defined.

- Rows 2–4: Gradually decrease near the neckline as follows:
- On one side of the neckline, work decreases at the start of each row.
- On the other side of the neckline, mirror the decreases.
- Repeat this process for the back panel if desired, although the neckline is typically straighter for the back.
Step 6: Sleeves
- Decide the sleeve length and width.
- Create an initial row around the armhole using double crochet.
- Work in rounds, decreasing gradually near the cuff for a tapered fit.
- Add the same ribbing as used for the bottom hem.

Step 7: Finishing the Sweater
- Sew the front and back panels together at the shoulders and sides, leaving space for the sleeves and neckline.
- Attach the sleeves to the armholes.

- Weave in all loose ends using a yarn needle.
- Block the sweater to set the stitches and achieve a polished look.

Final Words
Congratulations on finishing your granny square sweater, This project is a great way to showcase your creativity and crochet skills. Whether you make it for yourself or gift it to a loved one, it’s sure to be a cozy, handmade treasure.
Tips for Maintaining the Sweater
- Washing: Hand wash or use a gentle cycle with cold water to prevent stretching or damage.
- Drying: Lay flat to dry to maintain the shape. Avoid hanging as it might stretch the fabric.
- Storage: Store folded, not hanging, to prevent distortion.