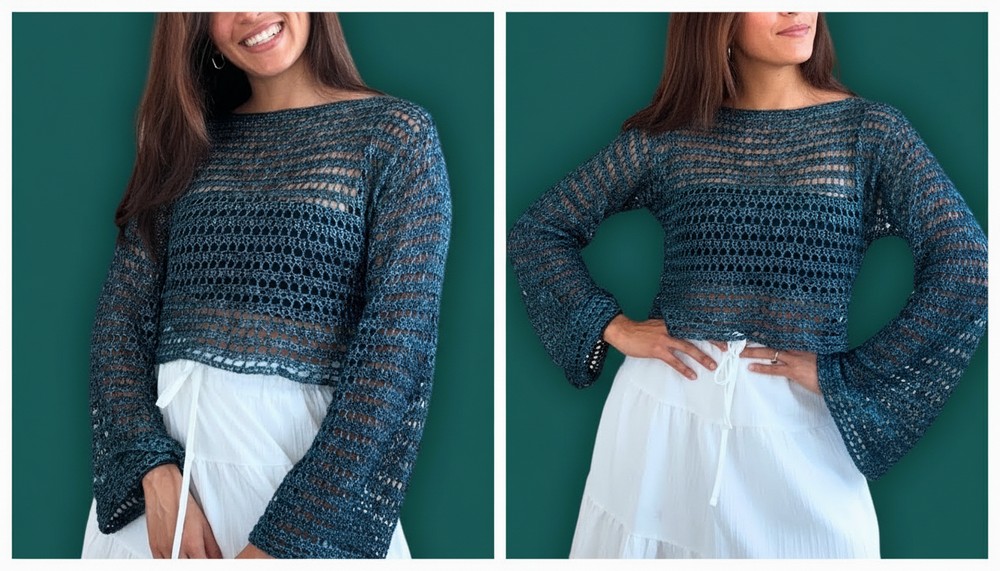
Breezy Free Crochet Sweater Pattern For Trendy Vibe
Learn to crochet a soft and stylish sweater with this free pattern that is simple, fun to follow, and perfect for relaxing while creating something special.

Effortless Free Crochet Sweater Pattern You’ll Adore
A free crochet sweater pattern is an amazing way to create something cozy, stylish, and handmade. This sweater pattern is super simple and perfect for beginners who want to try making their own clothes. The design combines soft and breathable yarn with a mix of solid lines and airy gaps, giving it a modern and lightweight feel.
It’s a perfect piece for summer evenings or layering during cooler months. You can customize the size to fit perfectly by adjusting the starting chains or adding extra rows. The sweater is made by creating two rectangles (front and back panels) and sewing them together, leaving space for the neck and arms.  Sleeves are added by crocheting in the round, following a repeating pattern. This sweater is not only easy to make but also beautiful when finished. It’s a fun and creative way to add a unique touch to your wardrobe.
1. Materials
- Yarn: Fine weight yarn (the designer mentions it takes more time because of fine yarn).
- Choose a yarn you are comfortable with; cotton or cotton‑blend works well for a light “summer sweater.”
- Hook: A hook size suitable for your yarn (commonly 3.0–4.0 mm for fine yarn).
- Check your yarn label for a suggested hook and adjust to get a fabric you like.
- Yarn needle: For sewing seams and weaving in ends.
- Stitch markers: At least 4–8 markers for marking shoulders, armholes, and rows to join.
- Measuring tape: To measure body width, length, and armhole.
- Scissors.
- Blocking tools (optional but recommended):
- Blocking mats or a flat, clean surface.
- Rust‑proof pins or blocking wires.
- Spray bottle or other method depending on blocking technique you choose.
2. Special Stitches and Techniques
Double Crochet (dc)
- Yarn over (yo), insert hook into stitch or chain.
- Yo, pull up a loop (3 loops on hook).
- Yo, pull through 2 loops (2 loops on hook).
- Yo, pull through remaining 2 loops.
Chain Space (ch‑sp)
- The open gap created by one or more chains between stitches.
- For this pattern, “chain space” refers to the space made by a ch 1 between dc stitches.
Turning Chain
- At the beginning of most rows, you will chain 3 (ch 3).
- For the panels:
- The initial ch 3 at the start of a row usually counts as a dc (as indicated in the video).
- For the sleeves:
- The ch 3 at the start of each round does NOT count as a stitch. You will always join into the first actual dc at the end of the round.
Seaming / Sewing
- The designer prefers sewing seams (with a yarn needle) rather than slip stitching them together.
- Seams are made by inserting the needle through the top of the corresponding stitches/edges of both panels.
3. Gauge and Sizing Notes
The designer gives a concrete example size:
- Foundation chain for panel: 72 chains.
- Width: approximately 15 inches for one panel.
- Panels: Front and back are identical rectangles.
- Total rows per panel: 39 rows.
- Panel length: approximately 15.5 inches before blocking.
This appears to be a smaller, fitted summer cardigan. To modify the size:
- Width:
- Foundation chain is a multiple of 3.
- For a wider cardigan, add chains in multiples of 3 until the width of one panel matches the desired half‑body width.
- Length:
- Work more or fewer rows until the panel length meets your desired measurement from shoulder to hem.
- Armhole depth and sleeve length:
- Determined by how many rows you sew together at the sides (the sample uses 18 rows) and how long you work the sleeve.
Always measure against your body and adjust.
4. Construction Overview
- Make two identical rectangular panels: front and back.
- Sew the panels together at the shoulders and sides, leaving openings for neck and armholes.
- Pick up stitches around each armhole to work the sleeves downward in the round.
- Optionally add gentle sleeve increases near the cuff for a slight flare.
- Block the finished cardigan.
- Weave in ends and tidy seams.
5. Front and Back Panels
Each panel is worked flat in rows. Front and back panels are identical.
5.1 Foundation Chain
- Decide width.
- Example from the transcript:
- Chain 72 for ~15" width per panel.
- To increase width:
- Chain a multiple of 3 (e.g., 75, 78, 81, etc.) until it matches your desired panel width.
- Example from the transcript:
- Make foundation chain.
- Chain your required number of chains.
- Example swatch in the video: 21 chains (used only to demonstrate the pattern).

5.2 Row 1: Solid Double Crochet Row
- Purpose: Create a full row of dc across the foundation chain.
- Skip the first 3 chains from the hook.
- The loop on the hook does NOT count as a chain.
- These 3 skipped chains count as your first dc.
- In the 4th chain from the hook, work 1 dc.
- Work 1 dc into each chain across the row until you reach the end.
- At the end of Row 1, turn your work.

You now have a full row of dc, where the initial ch 3 counts as dc 1, and each dc into a chain is one stitch.
5.3 Row 2: Gappy Row (dc and ch‑1 spaces)
- This row introduces the “gaps” that create the textured stripe effect.
- Chain 3 (counts as first dc).
- Turn your work.
- Because this ch 3 counts as a dc (occupying the last dc of the previous row), chain 1 more.
- This means you effectively have ch 4 at the start, but conceptually it is:
- ch 3 for the first dc,
- plus ch 1 to create a gap.
- This means you effectively have ch 4 at the start, but conceptually it is:
- Skip the first stitch and the next stitch (these are the first 2 dc of the previous row).
- Into the next stitch, work 1 dc.
- Repeat across the row:
- Chain 1, skip 1 stitch, 1 dc into next stitch.
- Chain 1, skip 1 stitch, 1 dc into next stitch.
- At the end of the row:
- After working your second‑to‑last dc (dc in the second‑to‑last stitch), you will have:
- One remaining dc from the previous row.
- The starting turning chain from Row 1 (which was ch 3 and counted as a dc).
- Chain 1, skip the last dc,
- Work your final dc into the top of the turning chain (the 3rd chain from the bottom of that starting ch 3).
Insert your hook carefully into that chain and complete the dc.
- After working your second‑to‑last dc (dc in the second‑to‑last stitch), you will have:
Row 2 is now complete, with spaced dc and ch‑1 gaps.
5.4 Row 3: Solid Row (dc in stitches and chain spaces)
- This row fills in the gaps, creating a solid stripe.
- Chain 3 (counts as first dc).
- Turn your work.
- Skip the first dc (directly below the ch 3).
- Work 1 dc into the first chain‑1 space (the gap).
- Then work:
- 1 dc into the next dc,
- 1 dc into the next ch‑1 space,
- and so on.
- Continue this pattern all the way across:
- 1 dc into each chain space,
- and 1 dc into each dc.
- At the end of the row:
- You will have a ch‑4 from the previous row (which is effectively a ch 3 + 1).
- Work 1 dc around the ch‑1 space at the bottom of that ch‑4.
- Then work 1 dc into the 3rd chain of the ch‑3 (the part that counts as dc) from the previous row.
- This ensures:
- You do not lose a stitch,
- Your edge remains straight.
Row 3 is now complete, creating a solid stripe.
5.5 Row Repeat (Row 4 and Beyond)
- From here:
- Row 4 is worked the same as Row 2 (gappy row).
- Row 5 is worked the same as Row 3 (solid row).
- Continue repeating Row 2 and Row 3 alternately.
Total rows:
- In the sample:
- The designer worked 39 rows total for each panel.
- This gave a length of about 15.5 inches (before blocking).
To adjust length:
- Work more rows for a longer cardigan,
- Fewer rows for a shorter one.

6. Joining Front and Back Panels
When both panels are complete:
- Lay both panels flat, one on top of the other, with right sides facing each other (if your fabric has a definite right side).
- Ensure stripes line up (solid rows over solid rows, gappy rows over gappy rows).
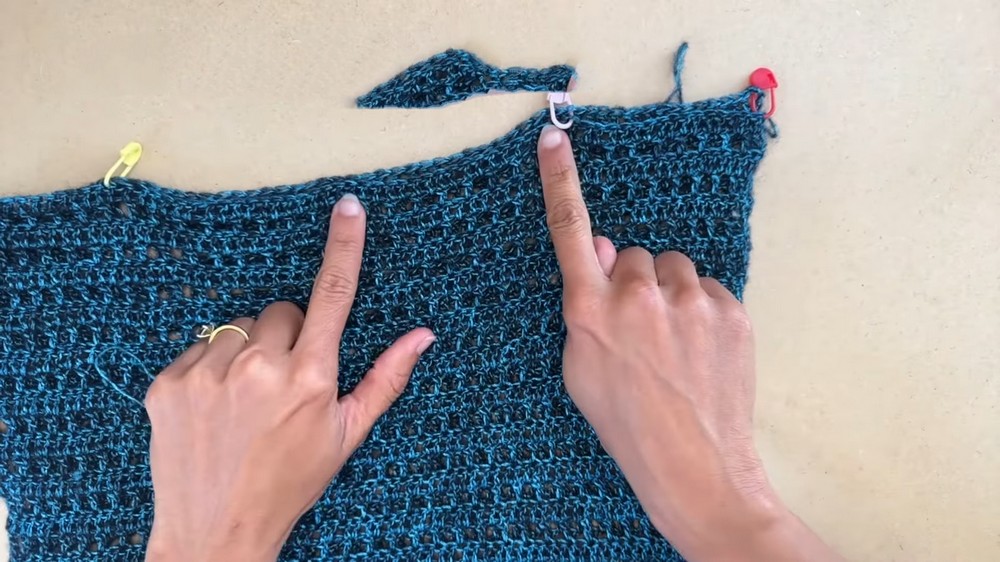
6.1 Marking Neck Opening and Shoulders
- Use your measuring tape to determine the desired neck opening width.
- The designer placed markers about 3.5 inches in from each outer edge at the top of the panels.
- Place a stitch marker through both the front and back panel at that point on each side.
- Also place a marker at each top outer corner (edge of shoulders) to define where you will sew.
You will join between the markers at the top to form shoulder seams, leaving the center open for the neck.
6.2 Sewing the Shoulder Seams
- Thread a yarn needle with matching yarn.
- Starting at one outer shoulder edge:
- Insert needle through the top of the first stitch of the front panel and the corresponding stitch of the back panel.
- Pull yarn through, leaving a short tail to weave in later.
- Sew stitch‑by‑stitch along the top edge:
- Always match the corresponding stitches (ch 3 or dc tops) of front and back.
- Stop when you reach the neck opening marker.
- Secure yarn and leave tail to weave in later.
- Repeat for the other shoulder.
The result: shoulders sewn, neck hole left open.
6.3 Marking and Sewing Side Seams
- Decide your desired armhole depth:
- The designer tried the garment on before sewing and used 18 rows from the bottom up as the side seam, leaving the rest for the armhole.
- Put on the garment with panels pinned at the shoulders and place stitch markers to mark where you want the armhole to start.
- Once you know how many rows to join:
- Count the number of rows joined on one side and match exactly on the other side.
- Place markers at:
- The bottom corners of the panels,
- The row where the side seam should end (armhole begins).
- Sewing the side seam:
- Thread a yarn needle with yarn.
- Starting at the bottom edge:
- Insert the needle through both panels at the very edge (the turning chains or dc edges).
- Sew up the side, row by row.
- The important detail:
- Make sure solid rows align with solid rows, gappy rows with gappy rows.
- This keeps the pattern continuous and the side seam straight.
- You can sew back and forth through two points per row if you like (bottom and top of each row edge).
- Continue until you reach the armhole marker.
- Secure yarn and leave tails to weave in later.
- Repeat for the other side.
At this point, you have a sleeveless cardigan sweater body with open armholes and a neck opening.

7. Sleeves
Sleeves are worked in the round from the armhole outward. The pattern mirrors the body: alternating solid rows of dc with gappy rows.
7.1 Attaching Yarn for Sleeve – Round 1
- Make a slip knot.
- Identify the bottom of the armhole:
- This is at the top of the last joined side‑seam row.
- Insert your hook through both panel edges at that junction point (front and back, where row 18 ended in the example).
- Pull up the loop of your slip knot and tighten.
- Chain 3.
- Important: For sleeves, the chain 3 does NOT count as a stitch throughout the sleeve rounds.
Distributing stitches around the armhole:
- Around each solid row edge at the armhole:
- Work 2 dc.
- Around each gappy row edge at the armhole:
- Work 1 dc.
Proceed as follows:
- Starting from your attached point:
- If the first row edge you meet is a solid row:
- Work 2 dc around that row edge (the edge stitch).
- If it is a gappy row:
- Work 1 dc around that row edge.
- If the first row edge you meet is a solid row:
- Continue around the entire armhole:
- Solid row edge → 2 dc.
- Gappy row edge → 1 dc.

Special note at the top of the armhole:
- At the top of the armhole (shoulder seam area), you move from the last row of the front panel to the first row of the back panel.
- In the video example:
- The last row of the front is solid → 2 dc around its edge.
- The first row of the back is also solid → again 2 dc around that shared edge point.
- This results in 4 dc around that double‑solid junction (2 for each panel edge), which is expected and helps shape the sleeve evenly.
- Continue the 2 dc / 1 dc pattern all around until you return to the starting point.
- At the end of Round 1:
- Ignore the initial ch 3.
- Insert your hook into the first actual dc you made.
- Slip stitch to join the round.
Round 1 of the sleeve is complete.
Tip: Count your stitches at the end of Round 1 and note the total. This helps you maintain consistent stitch count throughout the sleeve.
7.2 Round 2: Gappy Row for Sleeve
From now on, every round will begin like this:
- Chain 3.
- Turn (flip) your work before beginning stitches.
- This flipping every round helps keep the sleeve seam straighter and less noticeable.
For Round 2 specifically:
- After ch 3 and turning:
- Work 1 dc into the first stitch (first dc) of the round.
- Begin pattern repeat:
- Chain 1, skip 1 stitch, 1 dc into next stitch.
- Repeat all around:
- Ch 1, skip 1, dc into next.
At the end of the round:
- Ensure you end with the correct number of stitches:
- Example from transcript: if previously you had dc, ch‑1, dc, ch‑1, dc (5 “stitches” including chain sequences), you want to maintain that count.
- If you approach the end with 2 stitches left:
- Work ch 1, skip 1, dc in the last stitch.
- If your count is off, you may end with a final ch 1 instead; the key is that stitch count remains consistent.
- To close the round:
- Skip the starting ch 3,
- Slip stitch into the first dc of the round (not into the chains).
Round 2 is complete.
7.3 Round 3: Solid Row for Sleeve
- Chain 3 and turn your work.
- From now on, treat every ch 1 space and every dc as a place to put a dc.
- Work 1 dc in each dc and each ch‑1 space around:
- dc into the first dc,
- dc into the next ch 1 space,
- dc into the next dc,
- and so on.
At the end of the round:
- Work your last dc into the final dc and final ch 1 space before the starting ch 3.
- Skip the ch 3.
- Slip stitch into the first dc of the round.
Round 3 is complete.
7.4 Sleeve Repeat and Length
- Repeat Round 2 (gappy) and Round 3 (solid) alternately:
- Round 4: same as Round 2.
- Round 5: same as Round 3.
- Continue in this two‑round repeat.
In the sample:
- The designer worked 44 rounds before adding sleeve increases.
- Throughout, remember:
- Start each round with ch 3, turn.
- At the end, ignore the ch 3 and slip stitch into the first real dc.
- Count stitches occasionally to keep your stitch count consistent.

7.5 Sleeve Increases for Gentle Flare
After reaching your desired sleeve length minus the final flare (in the example, after 44 rounds), you will work a round of increases on a solid round (dc‑only round).
Increase Round (solid):
- Work as for a normal solid round, but add increases regularly:
- Pattern used in the transcript:
- Work 8 dc, then increase.
- “Increase” = 2 dc into the same stitch.
- So the repeat is:
- 8 dc, 2 dc in next stitch,
- 8 dc, 2 dc in next stitch,
- and so on around.
- Pattern used in the transcript:
- You may not end perfectly on a multiple of 8:
- This is acceptable; just ensure you spread increases reasonably evenly around.
- After this increase round:
- Return to the standard two‑round repeat (gappy round, then solid round) with your new stitch count.
- Continue until you reach your desired sleeve length.
- Optionally finish with either a solid or gappy round depending on the look you prefer.
Repeat the entire sleeve process for the second sleeve, ensuring you match:
- Number of rounds,
- Placement of increase round,
- Stitch counts, if you want them identical.
8. Finishing
8.1 Weaving in Ends
- Use a yarn needle to weave all loose ends into the fabric:
- Along seams,
- Inside double crochet columns,
- Around chain spaces, hidden from the right side.
- Weave each end in at least two directions for security.

8.2 Blocking
Blocking is recommended, particularly because:
- Fine yarn can shrink or crinkle during work.
- The fabric will open up and drape more beautifully.
- It can adjust the final dimensions (length and width) slightly.
Basic blocking steps (general guidance; always adapt to your fiber):
- Gently soak the cardigan in lukewarm water with a mild wool wash or gentle detergent (if your yarn allows it).
- Press out excess water carefully (do not twist or wring).
- Lay the sweater flat on blocking mats or a clean towel.
- Shape to desired measurements:
- Straighten edges and seams,
- Adjust sleeve length and width,
- Smooth body panels so that stripes lie flat.
- Pin in place if necessary.
- Allow to dry completely before unpinning and wearing.
For synthetic or special fibers, you may use steam blocking or light spray blocking instead; follow your yarn’s care instructions.
8.3 Final Inspection
- Check seams for gaps or loose stitches.
- Confirm that the neck opening, armholes, and overall length are comfortable.
- Trim any remaining stray yarn ends.
9. Tips and Suggestions
- Count regularly:
- Count your stitches at the end of each row/round (especially rows with chain spaces) to ensure you are not unintentionally increasing or decreasing.
- This is critical for straight edges and a neat sleeve seam.
- Mark your repeats:
- Use stitch markers to mark:
- The first dc of each round in the sleeves.
- The shoulder and side seam locations.
- This prevents confusion when joining or turning.
- Use stitch markers to mark:
- Customize fit:
- Width: add or subtract foundation chains in multiples of 3.
- Length: add or subtract row repeats (Row 2 & Row 3).
- Armhole depth: adjust how many side rows you sew (more rows sewn together = smaller armhole; fewer rows sewn = larger armhole).
- Sleeve length: add or subtract total rounds.
- Sleeve flare: change increase frequency (e.g., 6 dc, inc for more flare; 10 dc, inc for less flare).
- Check alignment when seaming:
- Always ensure stripes (solid and gappy rows) line up front and back when sewing shoulders and sides.
- Misaligned stripes will twist the pattern visually.
- Use the right hook size:
- If your fabric is too stiff, go up a hook size.
- If it is too loose and gappy, go down a hook size.

- Practice on a swatch:
- The designer uses a 21‑chain swatch to demonstrate the repeat; you can do the same to become comfortable with the alternation of rows before starting the full project.
- Care and maintenance:
- Wash gently by hand or on a delicate cycle if your yarn allows.
- Lay flat to dry to preserve shape.
- Avoid hanging the cardigan for long periods if it is heavy or made from fibers that stretch, as this can distort the shoulders.
10. Final Words
This Crochet Sweater is essentially built from two simple rectangles and two in‑the‑round sleeves, all using only chains and double crochets. The alternating solid and gappy rows create a light, airy texture that is ideal for a summer sweater, especially with fine yarn.
By adjusting chain counts, row counts, and armhole depth according to your own measurements, you can easily customize this pattern to fit your body. Take your time with seaming and blocking; those finishing steps greatly affect the final look.