
Stylish Free Crochet Flower Pillow Pattern For Easy Decor
Brighten your space with a Free Crochet Flower Pillow Pattern, featuring easy stitches that turn yarn into a cozy accent for beds, sofas, or gifts.
Cute Free Crochet Flower Pillow Pattern to Brighten Any Room
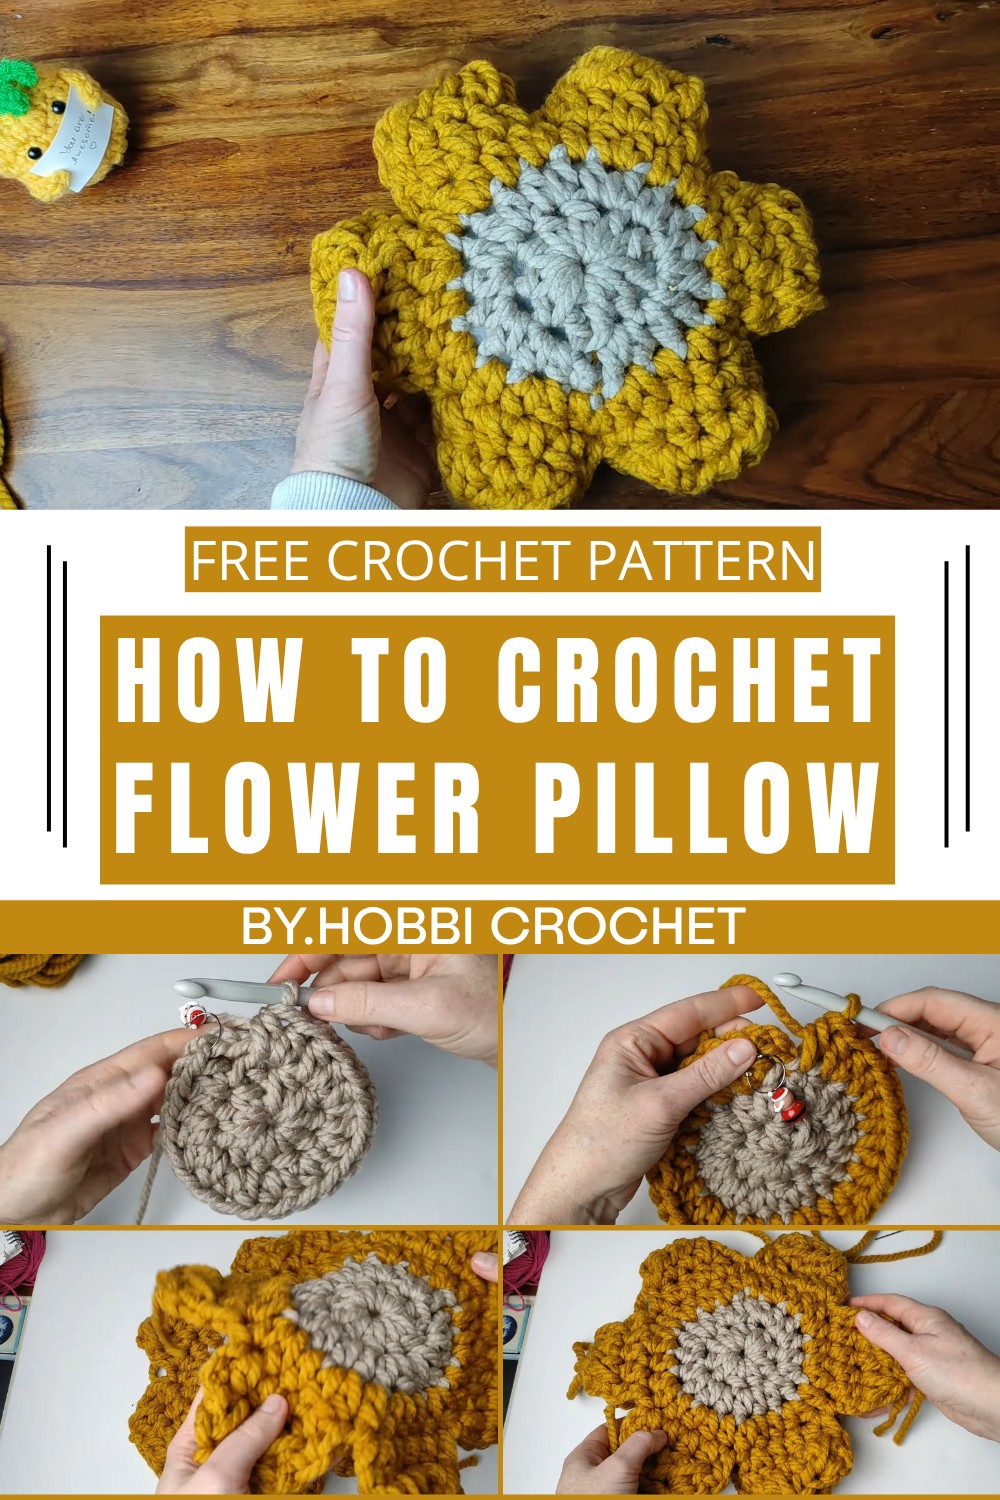
Adding a touch of softness and charm to your home with something handmade and beautiful. A free crochet flower pillow pattern gives you the chance to create a unique and decorative piece that brings joy and warmth to any room. These cozy pillows are designed with delicate flower shapes, making them both eye-catching and elegant.
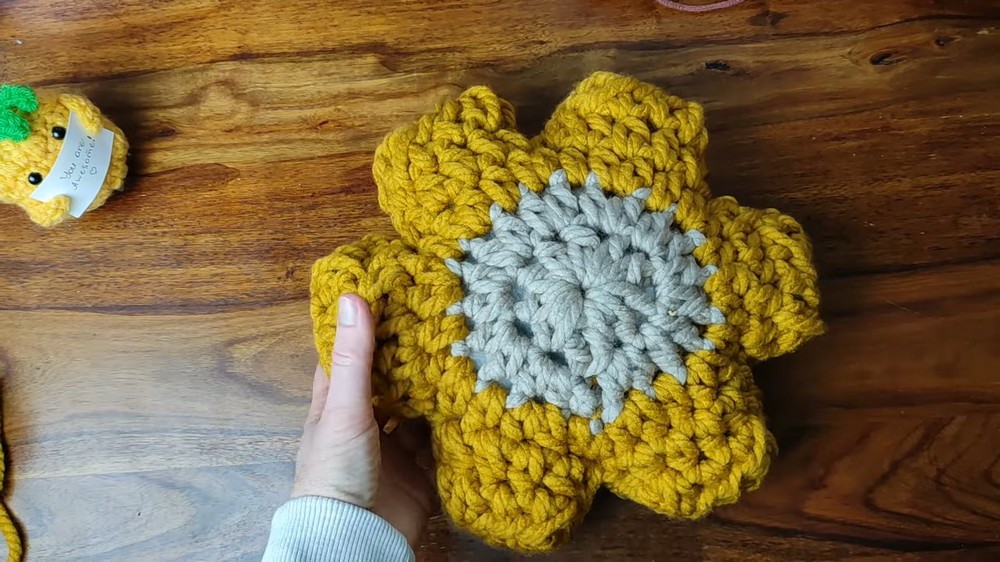
Their vibrant colors and intricate details can instantly brighten up a couch, bed, or chair. While they look stunning, they’re also practical, perfect for adding comfort while relaxing or simply as a lovely accent to your space.
The pattern lets you explore your creativity, allowing you to play with colors and designs to match your style. Whether you’re making it for your own home or as a heartfelt gift, this project is fun and rewarding for all levels. A flower pillow is not just decor, it’s a handmade treasure that spreads beauty and comfort.
Chunky Crochet Half Boot Pattern
Materials Required
- Yarn: 100g super chunky yarn (50m/109 yards per skein)
Example: Aldi's chunky yarn or similar (like Bernat Wool). 100% acrylic yarn was used in the transcription. - Crochet hook: 10mm (N/P-15) hook (or size that meets gauge).
- Stitch markers (optional).
- Scissors.
- Yarn needle for sewing pieces together.
- Polyester stuffing for shaping the half boot (optional).
Gauge (Optional)
- Gauge: 5 half double crochet (HDC) stitches = 4 inches.
- Ensure your gauge matches for the final size to ensure proper fit.
Finished Size
- Approximate Dimensions: Fits around small to medium indoor slipper size. Customize the number of stitches to adjust sizes if required.
Pattern Instructions
Round 1 (Base Circle)
- Start with a chain: Chain 4.
- Form a circle: Insert your hook into the first chain, pull up a loop, and make a slip stitch to create a small ring.
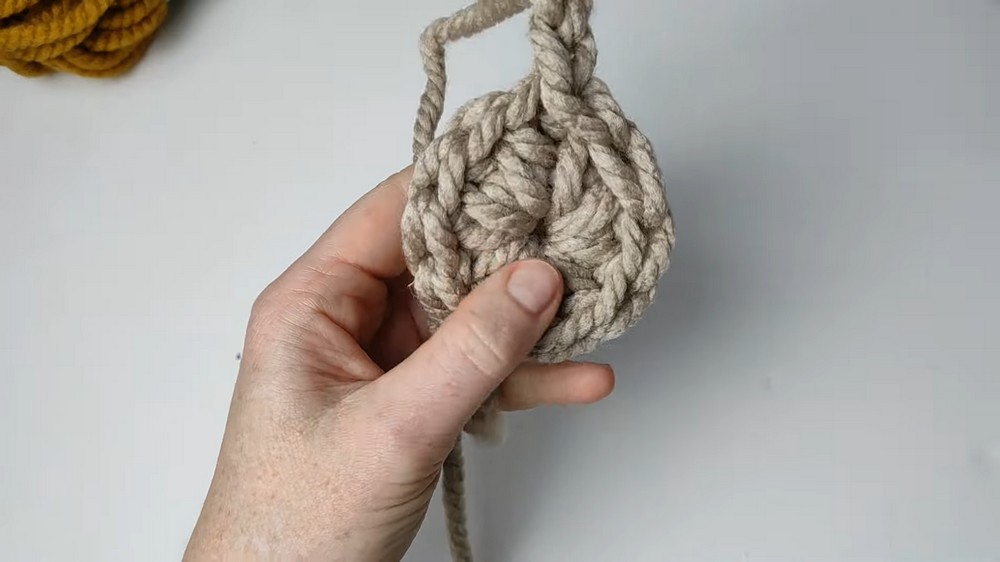
- (Alternatively, you can use a magic loop if you're comfortable.)
- Begin HDC stitches: Chain 2 (does not count as a stitch here). Crochet 10 half double crochets (HDCs) into the circle.
- Work over the loose tail and keep the stitches uniform in size.
- Close the round: Insert your hook into the top of the first HDC stitch (not the chain), pull up a loop, and slip stitch. You'll now have 10 stitches.
- Tighten the center loop: Gently pull the starting tail to close the middle circle, giving it a neat finish.
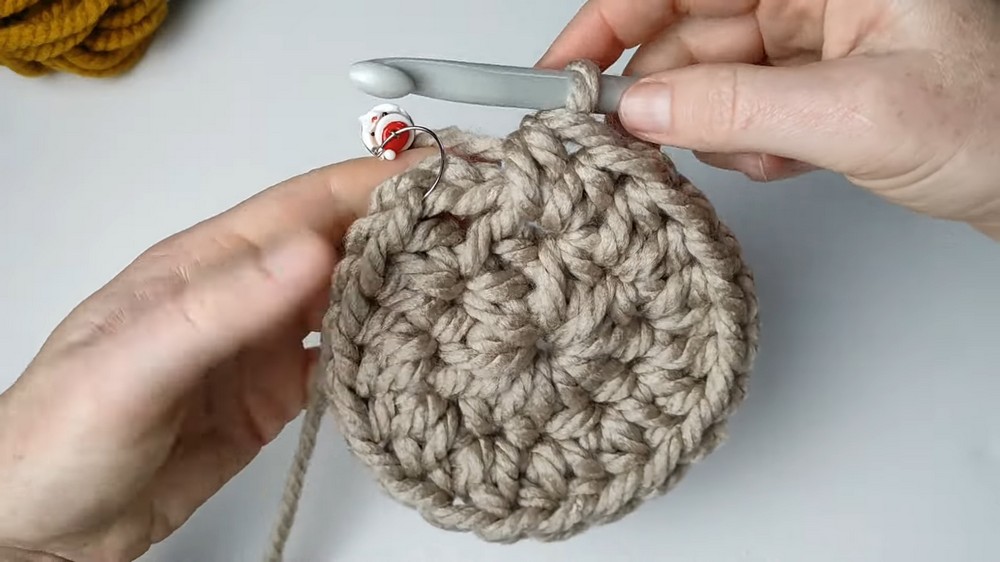
Round 2 (Increasing Stitches)
- Start the round: Chain 2 (does not count as a stitch). This round adds extra stitches.
- Increase in each stitch: Work 2 HDCs in each stitch from the previous round, resulting in 20 stitches total by the end of this round.
- (Optional) Use stitch markers to keep track of the start of each round or to ensure accurate counting.
- Close the round: Slip stitch into the first HDC to secure the round.
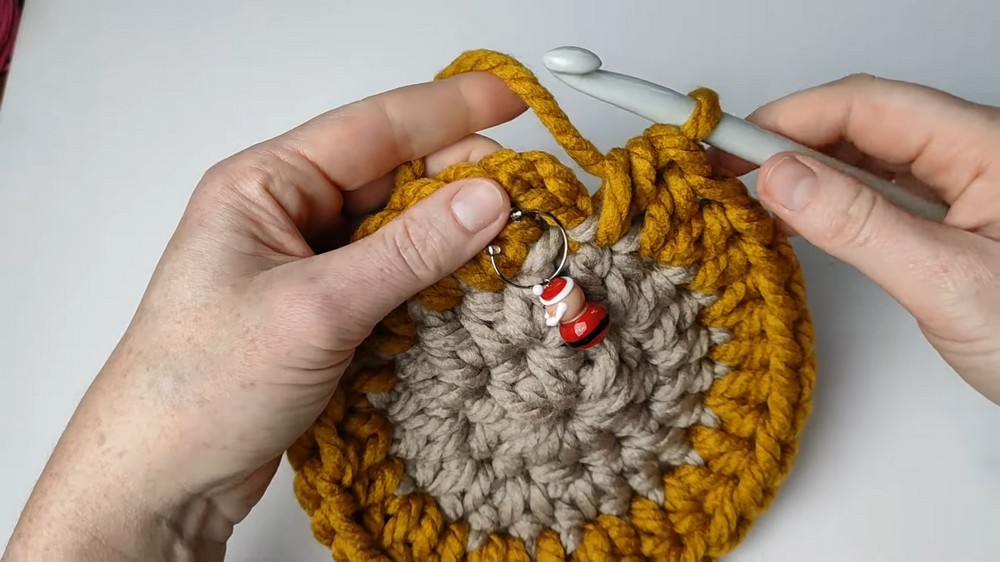
Round 3 (Shaping with More Increases)
- Start the round: Chain 2.
- Add 10 increases: Alternate between 1 HDC and 2 HDCs in the following manner:
- 1 HDC in the first stitch, 2 HDCs in the next stitch (increase). Repeat this pattern for the entire round.
- Finish the round: At the end, you’ll have 30 stitches total. Close the round with a slip stitch.
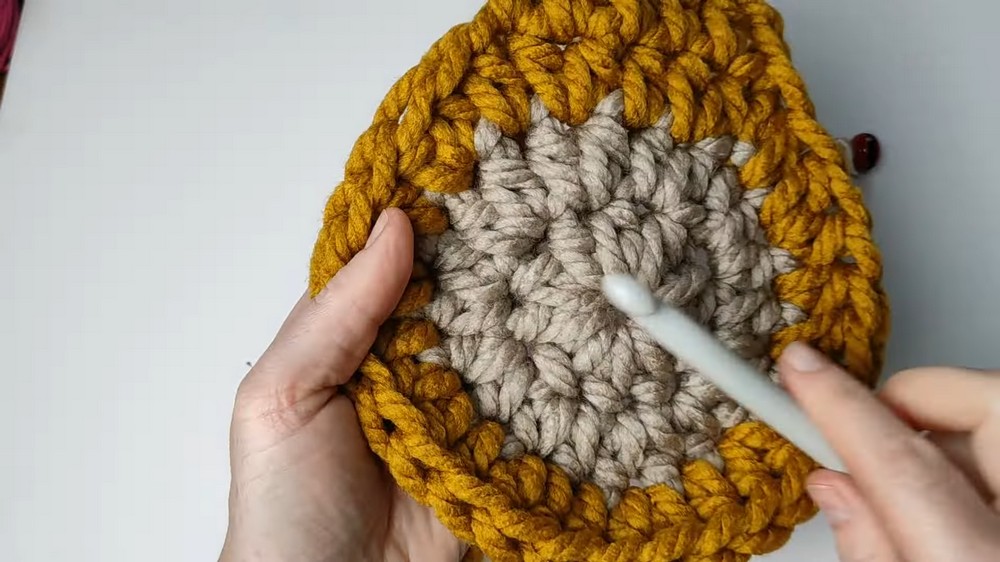
Creating the Petals
Now we’ll create 6 petals for the decorative top portion.
- First Petal:
- Row 1: Work 5 HDCs across the first 5 stitches. Chain 2, then turn your work.
- Row 2: Decrease and shape the petal: Work 2 HDCs together (decrease), then 1 HDC in the next stitch, followed by another HDC decrease in the final two stitches.
- Complete Petal: Chain 1 to secure the petal, leave a tail, and cut the yarn if necessary.
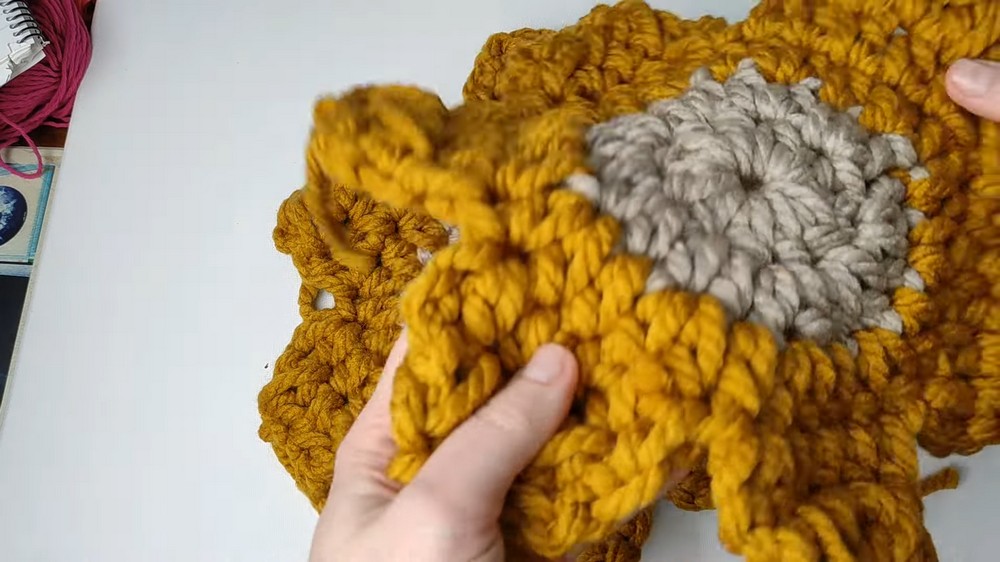
- Repeat Petals:
- Move to the next 5 stitches of the round and follow the instructions for the first petal. Repeat for all 6 petals.
- Joining the Pieces:
- After completing all petals, place the two boot pieces together (wrong sides facing in) and seam them using a whip stitch along the edges. Leave the bottom open to fit the foot or insert stuffing for a decorative piece.
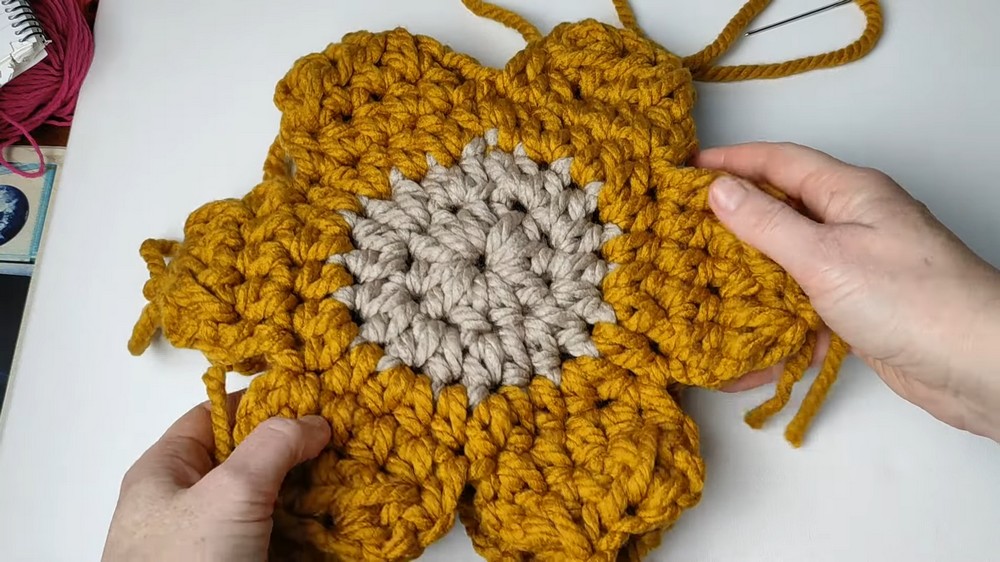
- After completing all petals, place the two boot pieces together (wrong sides facing in) and seam them using a whip stitch along the edges. Leave the bottom open to fit the foot or insert stuffing for a decorative piece.
Customizations & Tips
- Adjust the Size: Add or subtract HDCs in the base rounds to make the boot larger or smaller. Increase the number of stitches per petal if needed for a larger boot opening.
- Yarn Switch for Color: Experiment with color changes in Round 3 or during petal creation for a fun, vibrant look. Switch yarn at the beginning of a round using the slip stitch method demonstrated in the transcription.
- Add Stretch: Use a hook size smaller for tighter stitches if the boot feels too loose.
- Stuffing Option: The finished boot can serve as home décor or a gift bag if filled with stuffing or other items.
Special Techniques
- Whip Stitch for Joining: Insert your needle through both boot edges, wrap the yarn around, and pull snugly to seam the pieces together securely. Repeat evenly across for a polished finish.
- Invisible Decrease: If working on smaller projects or details, use this technique to reduce bulk at the top petals.
Conclusion & Final Look
Congratulations! You've crocheted a stylish and cozy Chunky Crochet Half Boot. Whether you use it as snug indoor footwear, decorative house pieces, or creative gifts, this pattern offers flexibility. The chunky yarn adds a modern flair, and the petals give the boot an attractive, feminine touch. Let your creativity shine with yarn colors and embellishments like pom-poms or bows. Share them proudly and stay tuned for more fun crochet projects!
Important Remarks:
- Ensure stitch counts are accurate for a symmetrical result.
- The finish size largely depends on the yarn thickness, hook size, and your tension.