
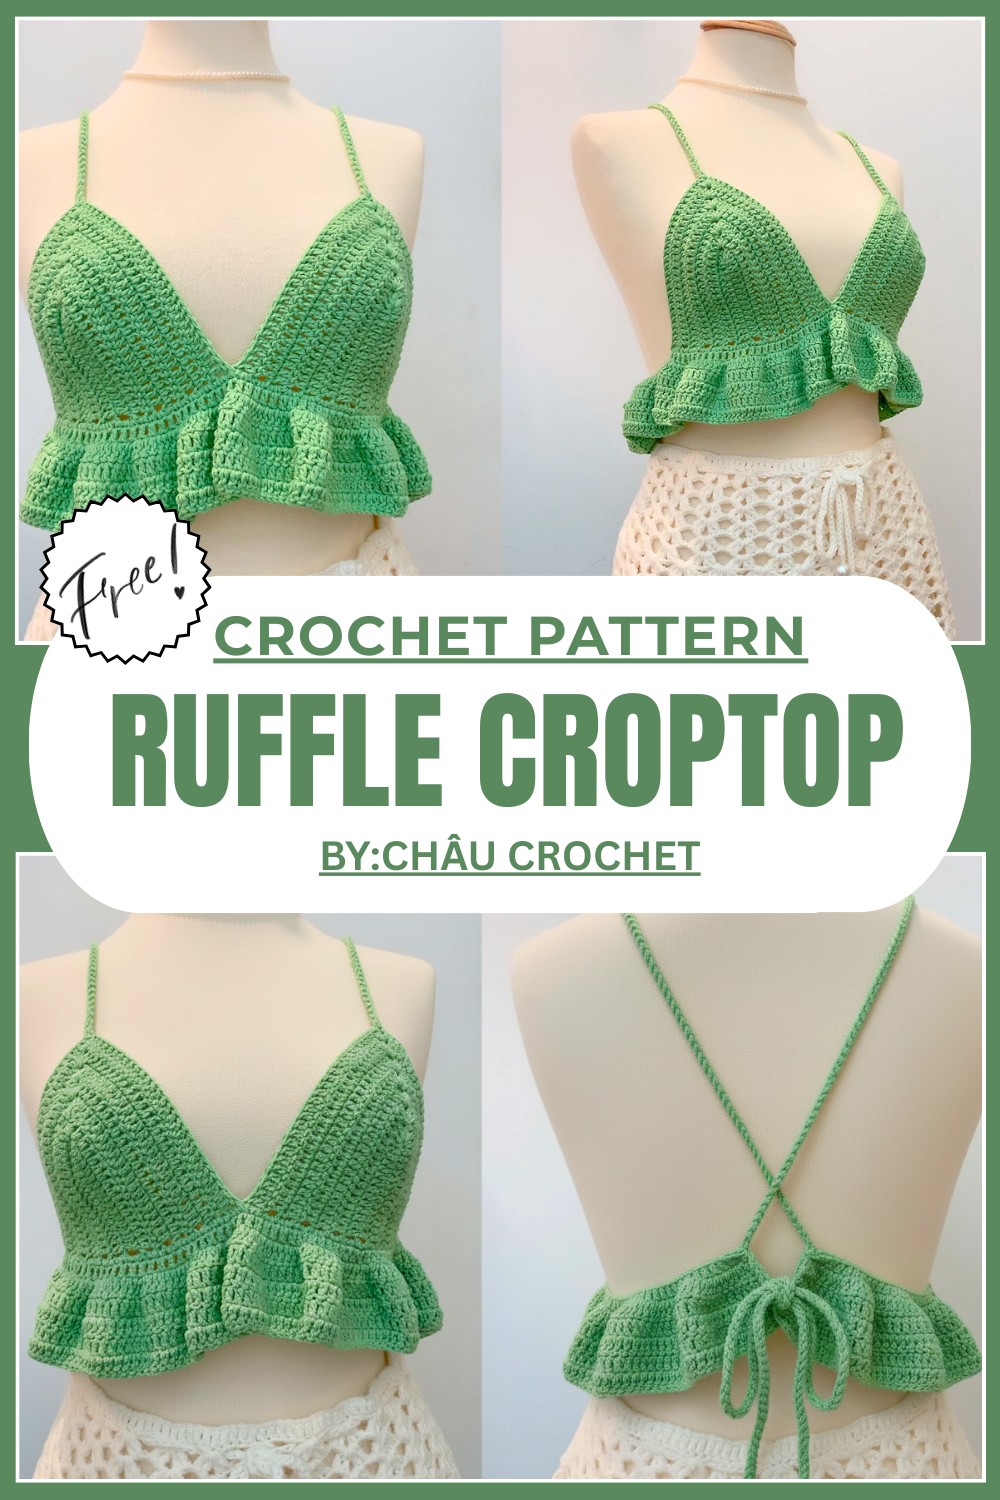
Flawless Crochet Ruffle Croptop Pattern That’s Fun To Wear
Spruce up your wardrobe with this crochet ruffle croptop that's an elegant piece offers endless styling possibilities for sunny days and casual outings.
Charming Crochet Ruffle Croptop for Flirty Summer Looks
Stepping out on a sunny day, feeling confident and stylish in something you made with your own hands. That’s the magic of a crochet ruffle croptop—it’s more than just a piece of clothing; it’s a little work of art. With its soft texture and delicate ruffles, this top radiates charm and elegance, making it perfect for casual outings, beach days, or layering with your favorite outfits.
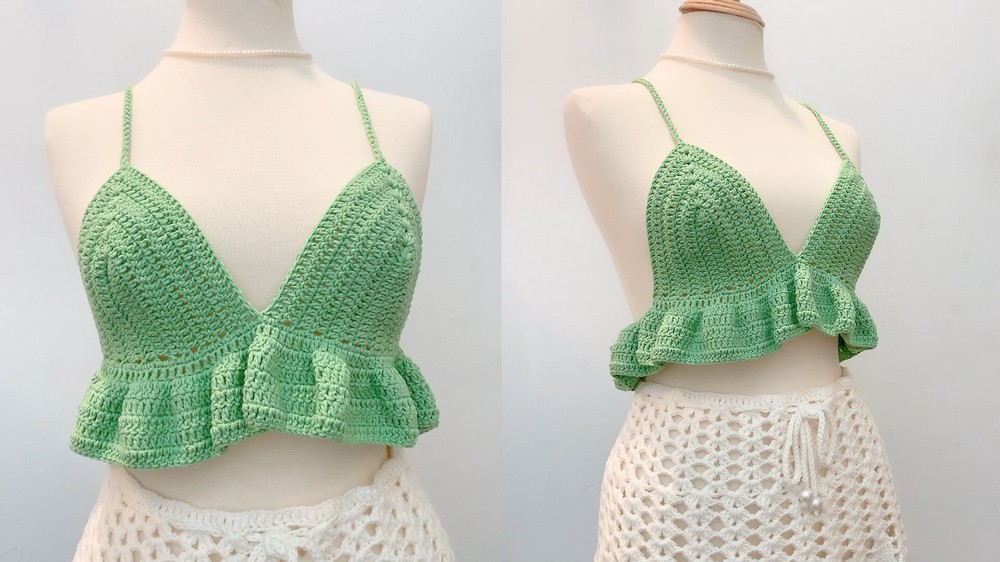
The playful ruffles add a dash of fun, while the hand-stitched details create a beautiful, one-of-a-kind design that’s hard to ignore. It pairs effortlessly with high-waisted jeans, skirts, or even over a dress, giving you endless ways to style it. Lightweight and breathable, it’s the ideal choice for warm weather, blending function and fashion seamlessly. Whether you wear it to express your creativity or to enjoy its unique beauty, this crochet ruffle croptop is sure to become a favorite in no time.
Crochet Girly PR Shirt Pattern
Skill Level
- Intermediate to Advanced: The project includes ruffle design, shaping techniques, bra cup construction, and assembling.
Materials List
- Yarn:
- Season 4 (Si S Sin 4) yarn (approximately 100g total):
- Composition: 4-ply yarn.
- Weight: Light or sport-weight yarn.
- Color Code: No. 77 (or a color of your choice).
- Note: 2 rolls of 50g each.
- Season 4 (Si S Sin 4) yarn (approximately 100g total):
- Hook: 3.0mm crochet hook.
- Notions:
- Stitch markers.
- Sewing needles for weaving in ends.
- Scissors.
- Measuring tape: For accurate sizing.
Key Abbreviations
- ch: Chain
- sc: Single crochet
- dc: Double crochet
- st(s): Stitch(es)
- sl st: Slip stitch
- rep: Repeat
- rnd(s): Round(s)
Special Notes
- Gauge: Accurate gauge is crucial for ensuring the correct fit:
- 15 chains = 6.5cm.
- Cup width ranges between 15–16cm based on chest size.
- Sizing Info:
- Adjust the number of rows and chains based on your chest and underbust measurements.
- Throughout the pattern, instructions refer to measurements and customizable size guides.
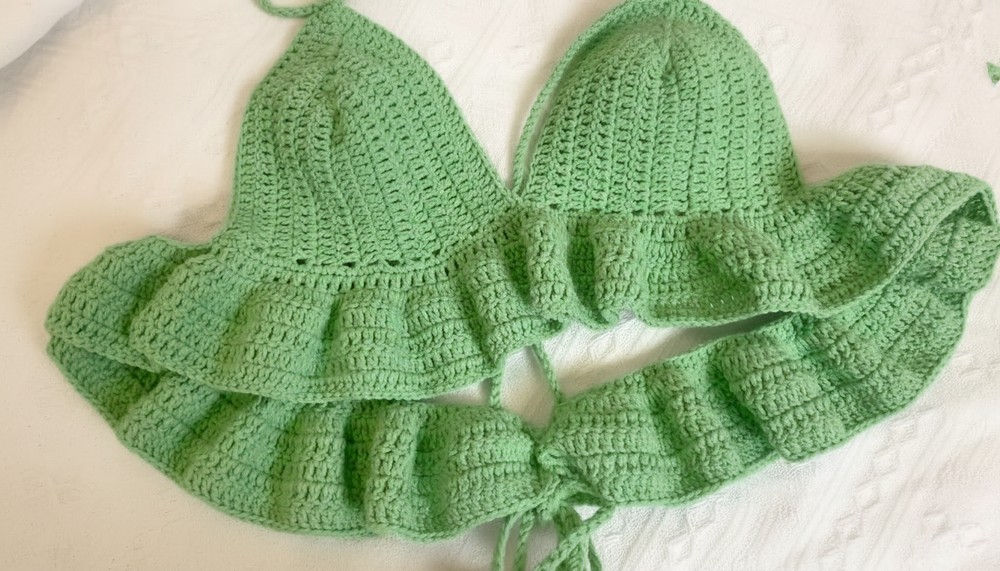
- Construction Flow:
- Crochet two bra cups as the base structure.
- Join the two cups and work around them, creating the torso and the ruffle sections.
- Attach straps and finish the pattern with decorative and structural touches.
Step-by-Step Detailed Pattern
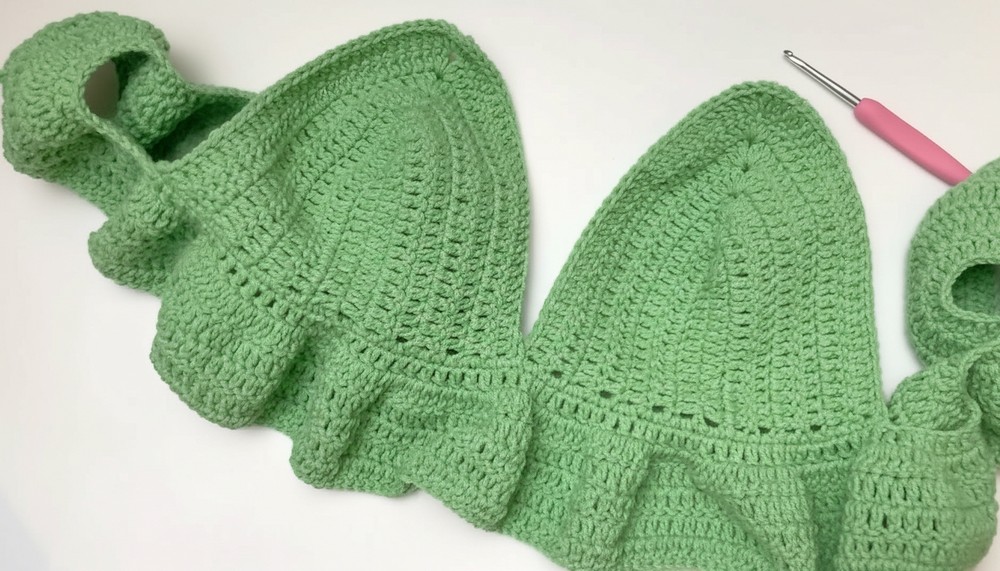
1. Starting the Bra Cup (Make 2)
- Foundation Chain:
- Create a slipknot.
- Chain 15 sts.
- Measure your chain to ensure it is 6.5cm wide (adjust accordingly).
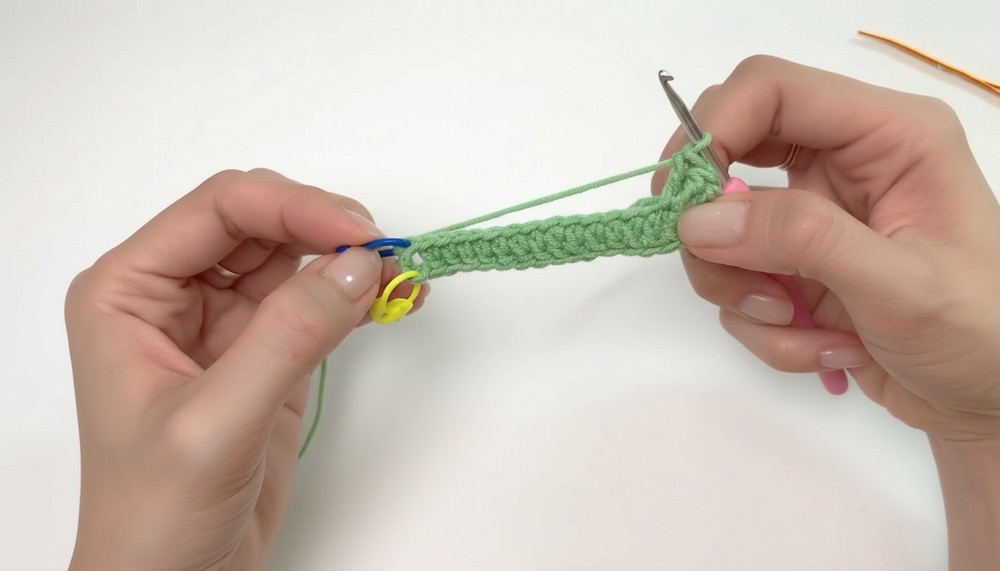
- Row 1:
- Flip the chain so the "belly" of the chain is facing up.
- Work into the back loops of the chain:
- Dc into the 5th ch from the hook (skip 4 chains).
- Dc into each st across for 13 stitches (13 dc total).
- Into the last ch, work:
- 3 dc, ch 1, 3 dc (this creates the corner for the cup).
- Continue working dc down the other side of the chain for 14 dc total.
- Mark the last st.
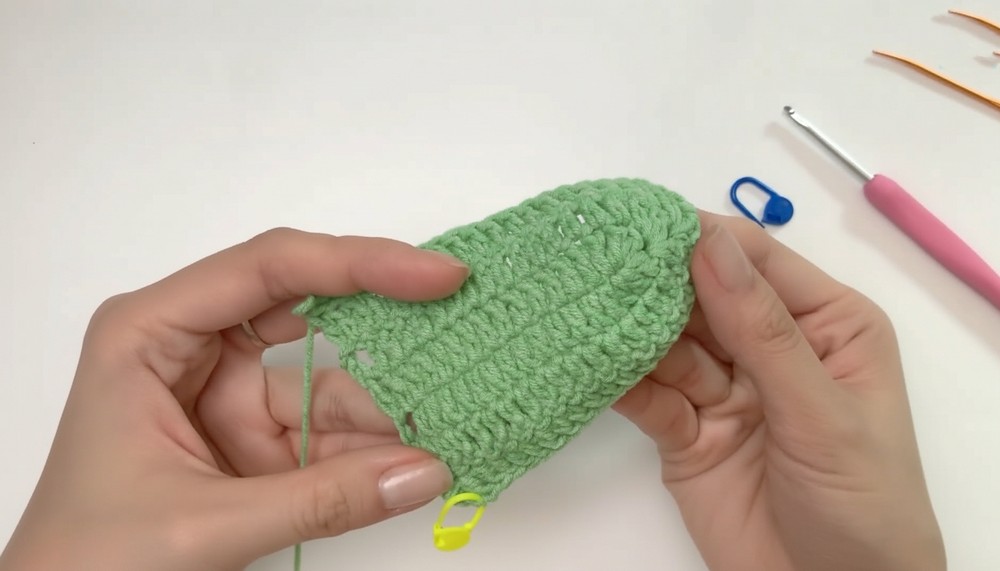
- Row 2:
- Turn your work. Chain 3 (counts as the first dc).
- Dc into each st across the row.
- At the corner (ch-1 space):
- 2 dc, ch 1, 2 dc.
- Continue dc across the row. End with 17 sts on each side of the corner.
- Rows 3–7:
- Repeat Row 2:
- Always work 2 dc, ch 1, 2 dc into the corner (ch-1 space).
- Increase the stitch count progressively by adding 1 st per side in each row.
- After Row 7, fasten off the first bra cup and leave a long tail for finishing.
- Repeat Row 2:
Tip: The number of rows may vary depending on the size of your bust. Use the measurements provided as a guideline, and adjust as needed.
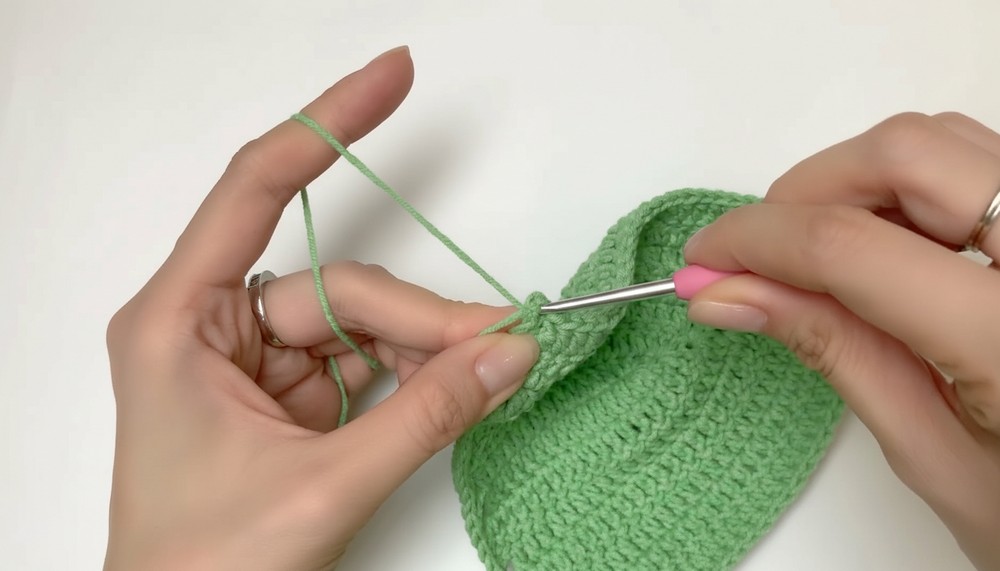
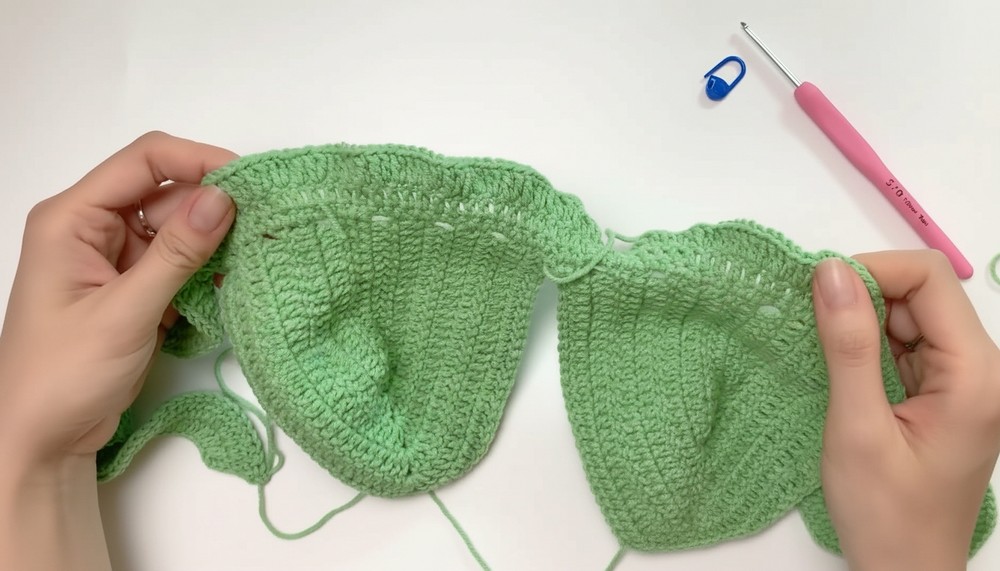
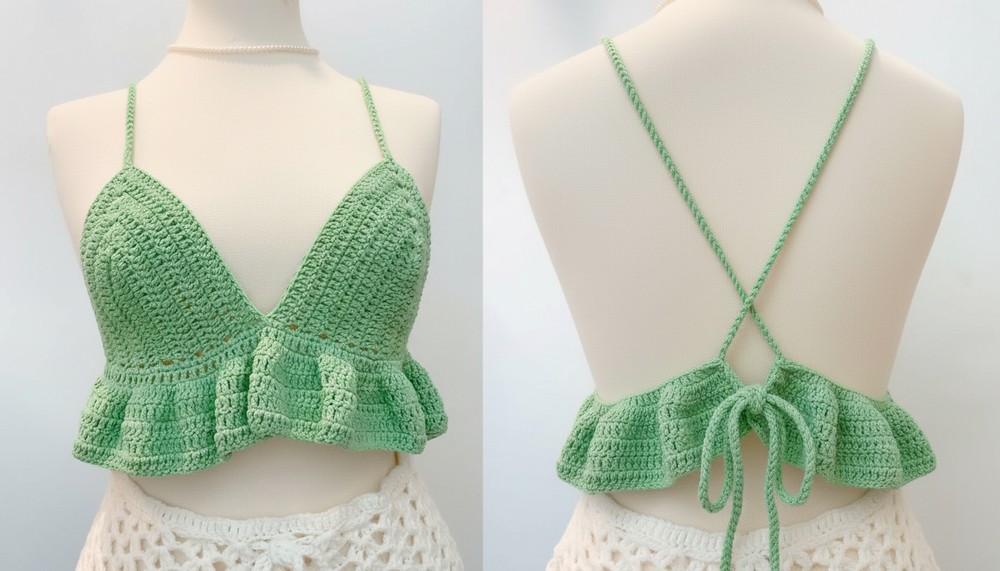
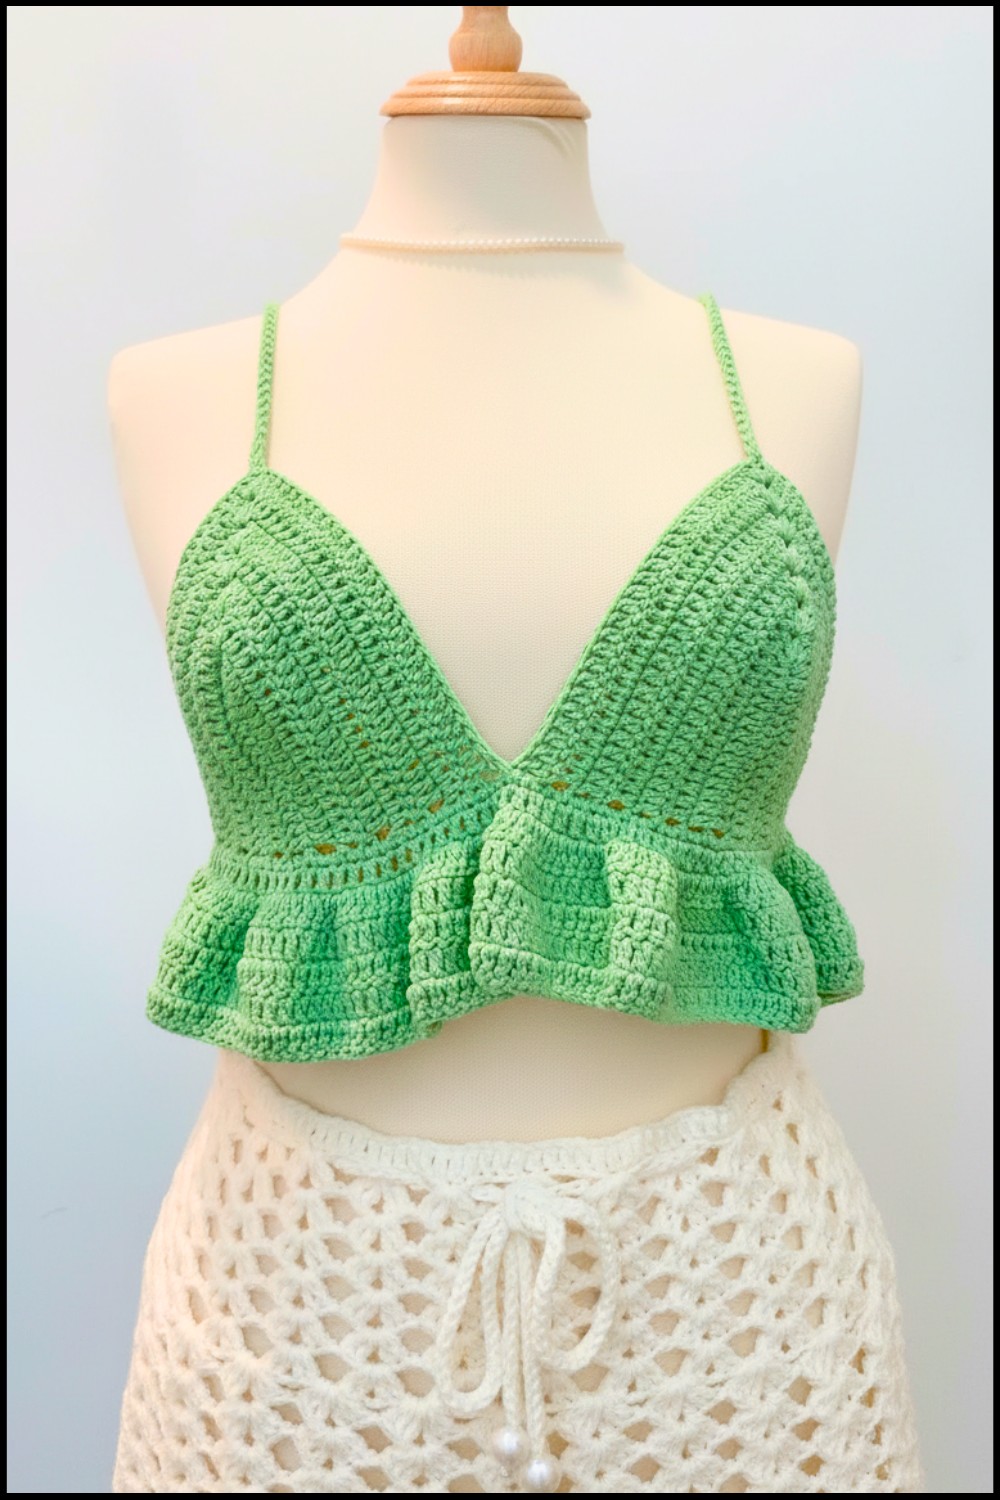
2. Joining the Bra Cups
- Take the first completed cup and attach the working yarn to the second cup (do not fasten off the second).
- Use single crochet (sc) stitches to join both cups at the inner edges:
- Insert the hook into the last dc of Cup 1 and sc into the corresponding st of Cup 2.
- Repeat across the inner edge until connected.
- Once joined:
- Work sc along the remaining edge of Cup 2, up the middle seam, and along the edge of Cup 1.
- This creates a seamless and clean connection.

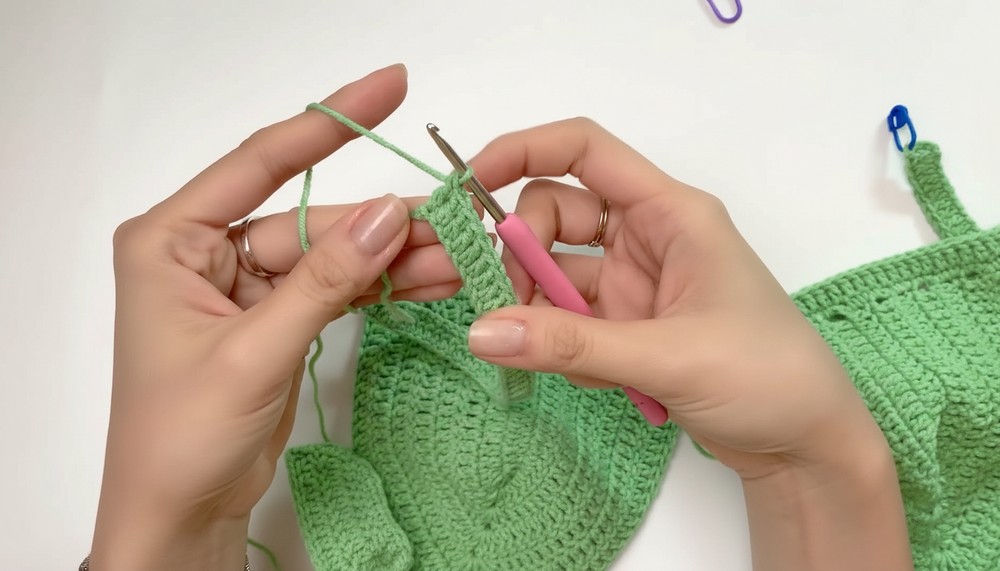
3. Underbust and Bodice
Working the Underbust
- Measure your underbust circumference and subtract the total width of both cups (15cm per cup):
- For example, if your underbust is 75cm, the remaining width is 45cm divided between the front and back.
- For example, if your underbust is 75cm, the remaining width is 45cm divided between the front and back.
- Chain the additional length for the side straps:
- For a 45cm gap: Chain approx. 50 sts per side (adjust according to your measurements).
- Attach one chain to each side of the bra cups.
Bodice Construction
- Once the chains are attached:
- Work Row 1 across the foundation chains using dc stitches (into each chain or st).
- At the center of each bra cup, work 1 sc into every st.
- Repeat for both sides.
- Repeat Rows 1 and 2 until the desired bodice length is achieved.
4. Ruffle Section
- Attach yarn to the bottom edge of the bodice.
- Row 1:
- Chain 3 (counts as dc). Work dc into each st across the edge.
- Row 2 (Ruffle Pattern):
- Chain 3.
- Work 2 dc into each st across the row.
- This will increase the stitch count, forming the ruffles.
- Repeat Row 2 for 6 rows or until the desired ruffle length is achieved.
5. Straps
- For each strap:
- Attach yarn to the upper corner of the bra cup.
- Chain 200 (approx. 100cm).
- Slip stitch to secure.
- Repeat for the second strap.
- Weave in any remaining loose ends.
Finishing the Pattern
- Edging: Add a simple sc or slip stitch edging around the bra cups and bodice for a polished finish.
- Blocking: Lightly block the finished piece to set the shape and even out edges.
Conclusion and Tips
- Customization:
- Adjust the cup size, strap length, and ruffle volume based on measurements.
- Experiment with yarn colors or add decorative edging for a personal touch.
- Corrections:
- Ensure even tension for consistent stitch sizing.
- Double-check measurements after each section.
- Care Instructions:
- Hand wash with gentle detergent.
- Lay flat to dry to maintain its shape.
This pattern results in a cute PR shirt, perfect for summer or as a fashion statement. The detailed ruffles and fitted cups create a flattering, feminine silhouette.