
Free Crochet Blouse Pattern To Update Your Closet
Find a beautiful crochet blouse pattern that is perfect for any skill level offering a stylish and comfortable addition to your wardrobe in your favorite colors.
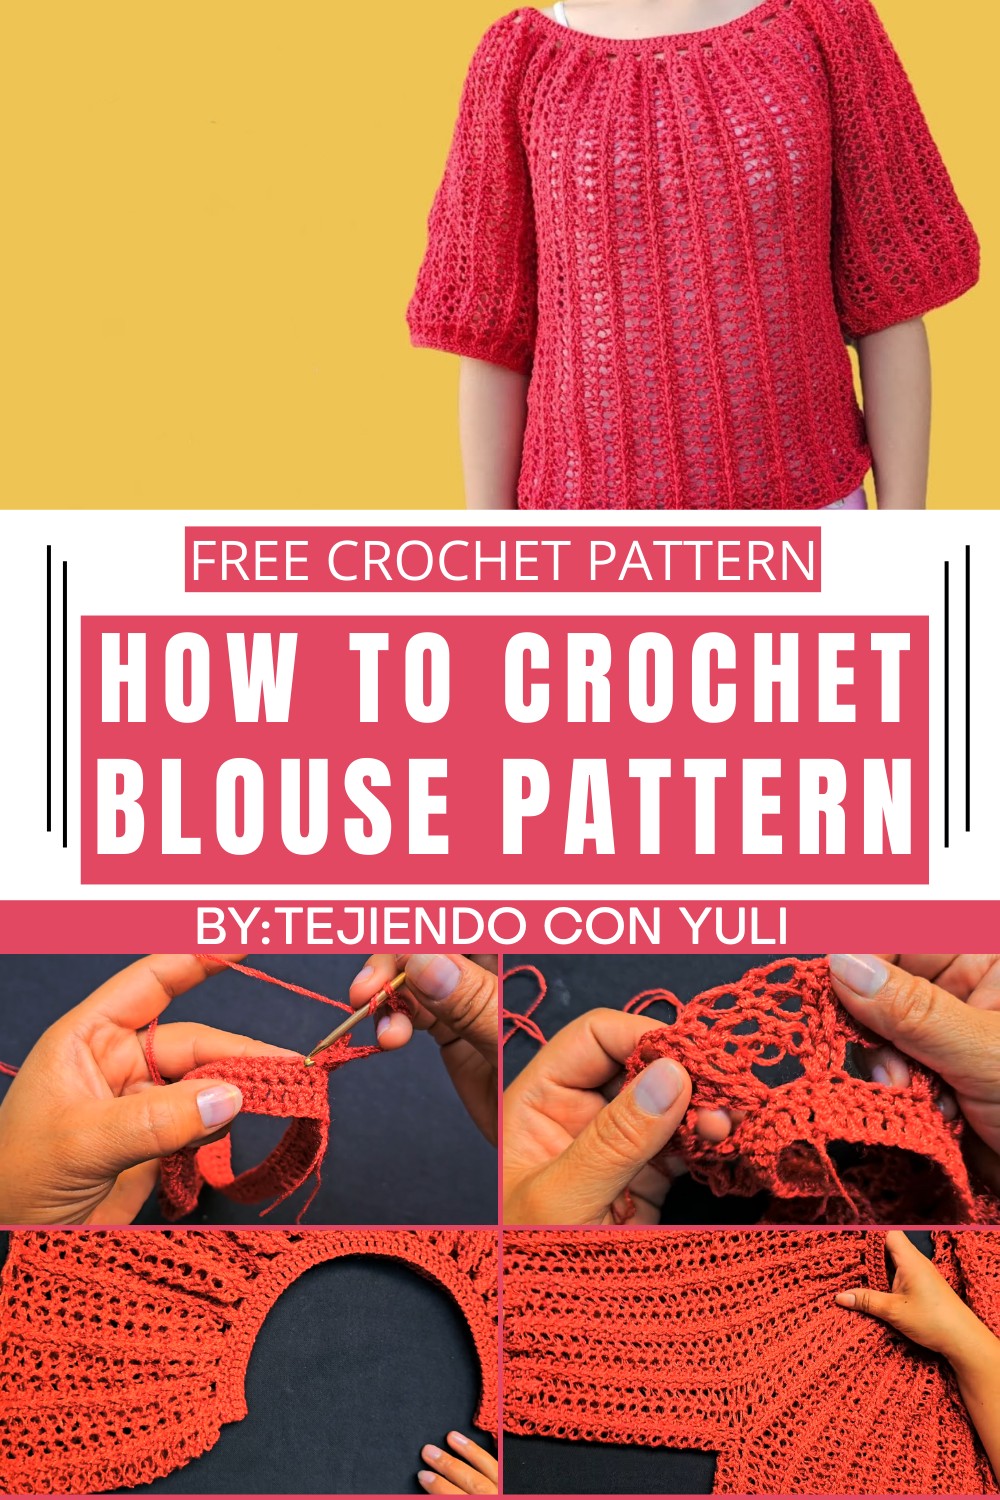
Unique Crochet Blouse Pattern to Stand Out
It’s easy to feel limited when searching for clothing that’s both stylish and personal, but this free crochet blouse pattern changes everything. Offering a stunning mix of comfort and elegance, this project gives you the freedom to create a customized piece tailored to your taste. Lightweight and versatile, this blouse works wonderfully for everyday wear or special occasions, all while showcasing beautiful stitchwork.
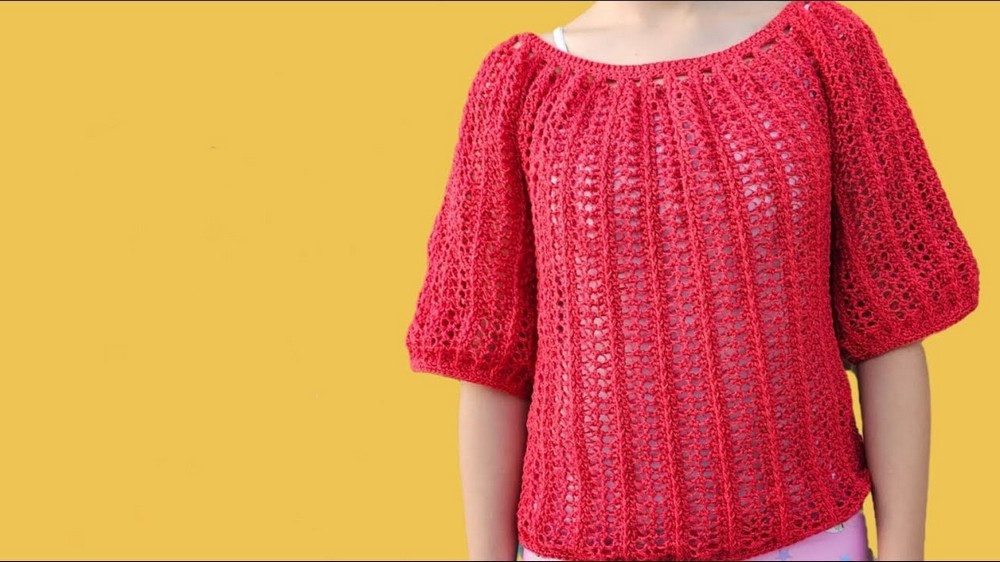
Whether you prefer soft neutrals or vibrant colors, the choice is yours to make it truly one-of-a-kind. Perfect for both beginners and advanced crocheters, this blouse is a timeless addition to enhance any seasonal wardrobe.
Materials Needed
- Yarn
- Crystal Yarn or any lightweight (2 mm thick) yarn.
- Yarn is held double throughout the project.
- Optional: Substitute with a thicker yarn and adjust hook size (refer to the gauge).
- Hook Size
- 3.0 mm crochet hook
- Optional 3.5 mm for a slightly looser gauge if desired.
- Additional Supplies
- Stitch markers or safety pins (for marking sleeve sections).
- Scissors.
- Tapestry needle (for weaving in ends).
Skill Level
Intermediate to Advanced. This pattern requires knowledge of working in the round, creating basic stitches, and working textured stitches.
Key Abbreviations (US Crochet Terms)
- ch: Chain
- dc: Double crochet
- hdc: Half double crochet
- sl st: Slip stitch
- yo: Yarn over
- st(s): Stitch(es)
- sp: Space
Gauge
- 10 dc x 6 rows = 4 x 4 inches (10 x 10 cm) using 3 mm hook and Crystal Yarn (held double).
- Gauge is important for ensuring the correct fit.
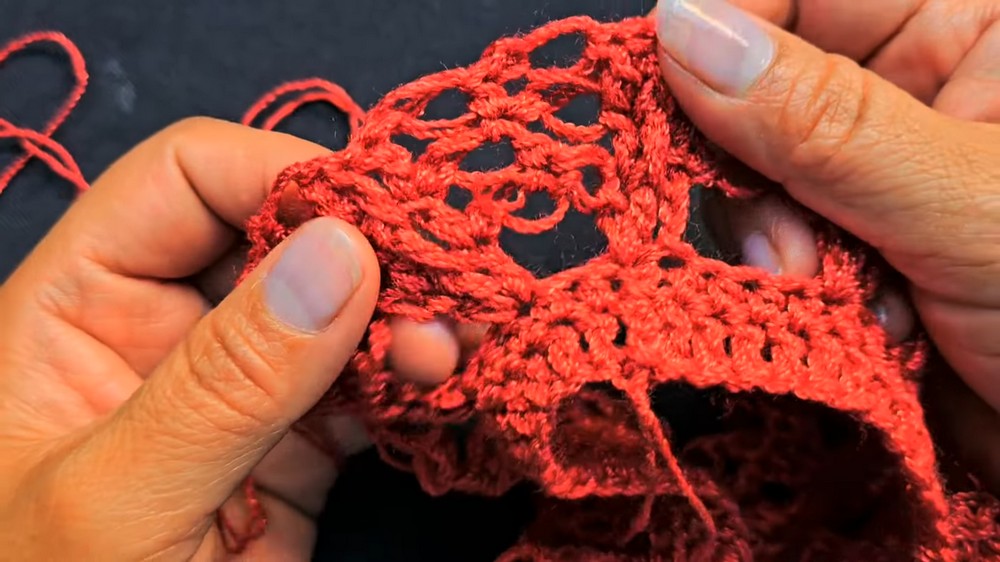
Special Stitches
- Seafoam Stitch
- Pull up a loop (larger than typical working loops).
- Insert the hook from behind the stitch or chain, pull up another loop, yarn over, and pull through all loops on the hook.
- This creates a textured loop as part of the seafoam stitch.
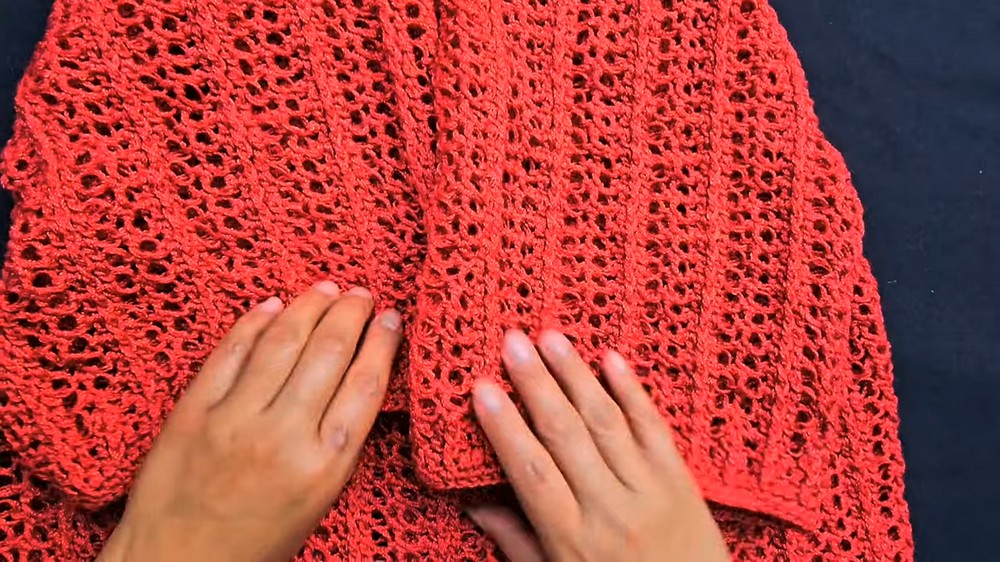
Pattern Notes
- The blouse is worked in the round from the neckline down to the hem in one piece. Sleeves are added later directly to the armhole openings.
- The size can be adjusted by increasing or decreasing the foundation chain in multiples of 6.
- You can customize the length by adding or removing rounds.
- The blouse has an equal front and back, making it reversible.
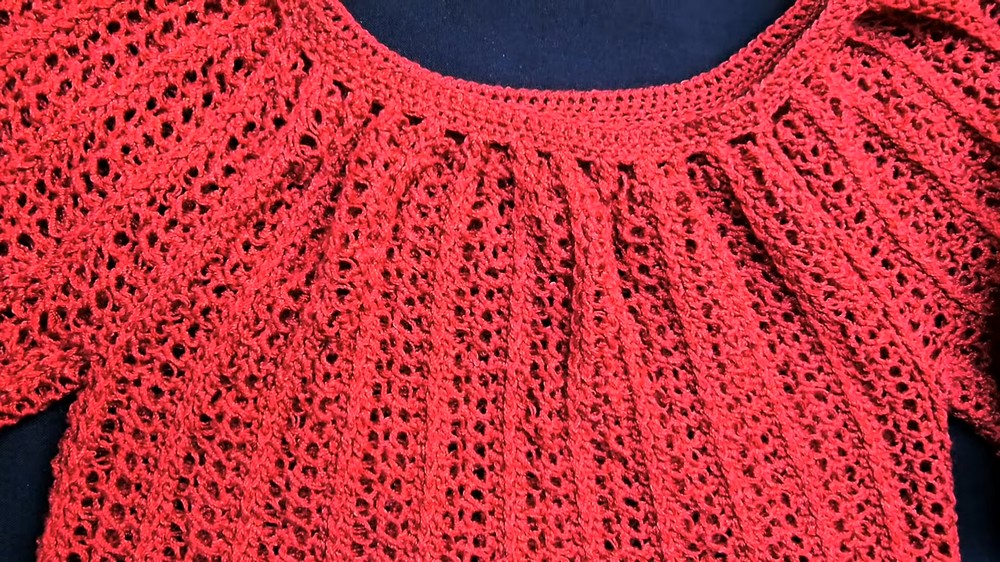
Pattern Instructions
1. Starting the Foundation
- Create a foundation chain of 130 chains (adjustable based on size: see the Pattern Variation section for guidance).
- Slip stitch into the first ch to form a circle. Ensure the chain is not twisted.
2. Round 1: Double Crochet Foundation
- Ch 3 (counts as the first dc).
- Work 1 dc into each chain. (130 dc total)
- Join with a sl st to the top of the starting ch.
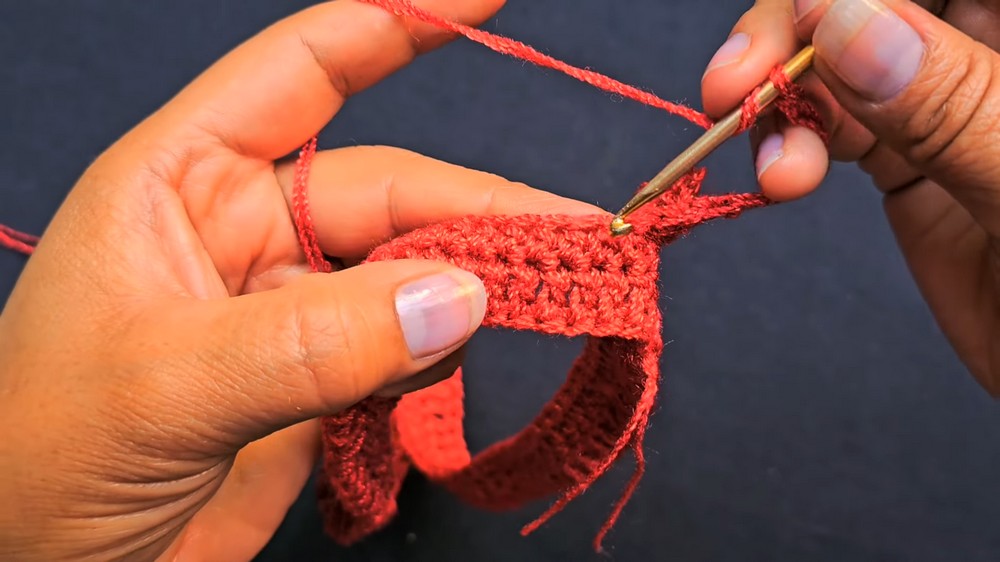
3. Round 2: Half-Double Crochet Round
- Ch 2 (counts as the first hdc).
- Work 1 hdc in each stitch around. (130 hdc total)
- Join with a sl st to the top of the starting ch.
4. Round 3: Start Seafoam Pattern
- Ch 3 (counts as the first dc).
- Work 2 dc into the same stitch to form a 3-dc cluster.
- Begin the seafoam stitch:
- Pull up a large loop, insert your hook from behind the next dc, and pull up another loop.
- Yo and draw through all loops on the hook to form a seafoam knot.
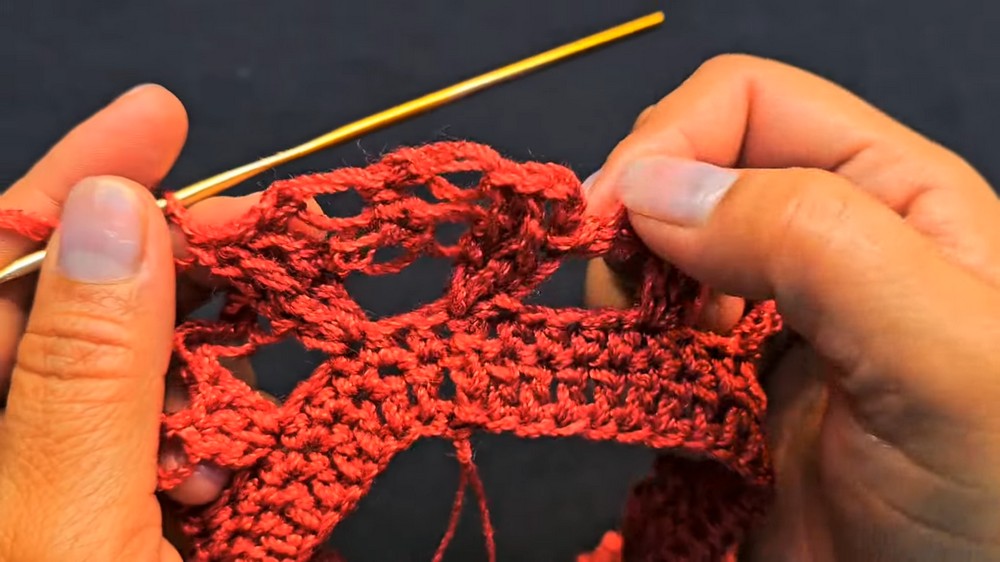
- Skip 2 sts; in the next stitch, work another 3-dc cluster.
- Repeat the pattern (Seafoam knot, skip 2 sts, 3-dc cluster) all around.
- Join with a sl st to the top of the first ch-3.
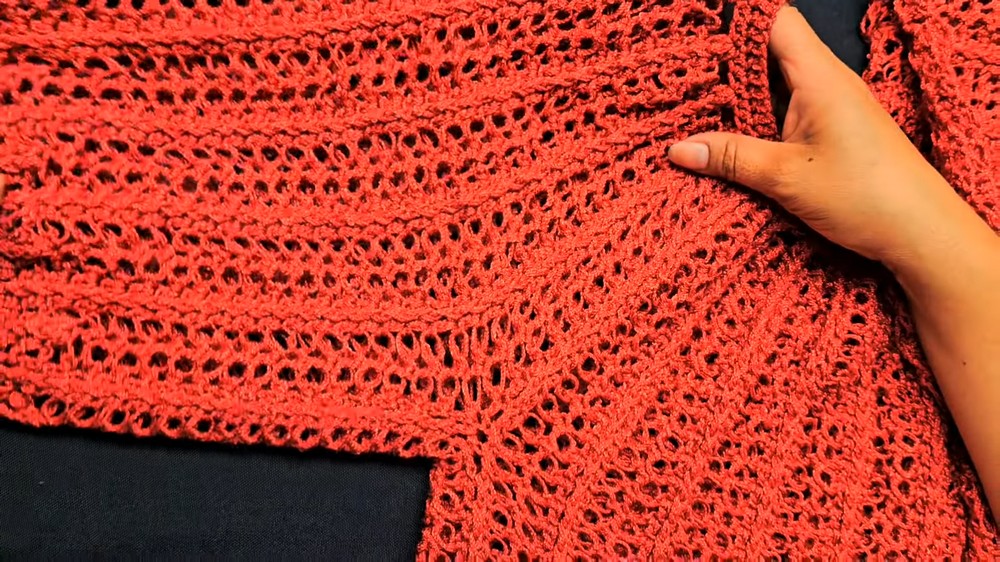
5. Rounds 4–14: Continue Seafoam Pattern
- For each round, repeat the Seafoam Pattern but alternate the placements of clusters and knots as follows:
- Work 3-dc clusters in the spaces between the clusters of the previous round to achieve a staggered effect.
- Work 3-dc clusters in the spaces between the clusters of the previous round to achieve a staggered effect.
- Continue this pattern for a total of 14 rounds.
- After finishing the 14 rounds, divide the stitches for sleeves and body.
6. Dividing for Sleeves and Body
- Using stitch markers:
- Divide the blouse into 6 panels:
- 2 panels for the sleeves.
- 4 panels for the front and back body.
- Example: Divide into 30/35/30 (sleeve/body/sleeve), depending on individual size.
- Count the same number of blocks for the front and back sleeves to ensure proportional division.
- Divide the blouse into 6 panels:
- Work ONLY on the body section rounds while skipping the sleeves:
- Begin working the Seafoam Pattern in the front and back panels ONLY, skipping the sleeve sections. Repeat the same steps with slip stitching across divisions to ensure smooth shaping.
7. Body Length
- After separating the body and sleeves, continue working the Seafoam Pattern in the round until the desired length is achieved.
- Reference Length: 27 rounds after division for medium-sized blouse length.
- Finish the last row as follows:
- Ch 3, work 3-dc clusters, but instead of seafoam knots, separate each cluster with 2 ch for the first finishing round.
- In the second finishing round, reduce spacing to 1 ch between the 3-dc clusters.
- Optionally, work a final row of half-double crochet (hdc) for a cleaner edge.
8. Sleeves
- Attach yarn to one of the marked sleeves.
- Work 1 dc in each of the open stitches around the sleeve opening.
- Continue the Seafoam Pattern for 15 rounds or until the desired sleeve length is achieved.
- Finish the sleeves similarly to the blouse hem:
- Work 2 rounds of reduced spacings or hdc stitches as described in Step 7.
- Work 2 rounds of reduced spacings or hdc stitches as described in Step 7.
Pattern Variations
- Sizes:
- Adjust the foundation chain length in multiples of 6 to increase or decrease sizing.
- Add/subtract extra rows in the yoke (top section) for larger or smaller bust coverage.
- Colors:
- Use gradient or variegated yarn for a beautiful ombré effect.
- Alternate two complementary colors for a striped effect.
- Open vs. Closed Blouse:
- For an open cardigan-style blouse, work the pattern flat instead of joining in the round.
Tips for Success
- Use stitch markers liberally when dividing for sleeves to ensure consistency.
- Steam block the final blouse for a polished look and to bring out the texture of the seafoam stitch.
- Watch the tension when creating seafoam loops to avoid overly tight or loose knots.
Conclusion
Your elegant Seafoam Crochet Blouse is now complete! With its intricate texture, airy design, and perfect sleeve detailing, this blouse is truly a wear-anywhere masterpiece. Customize it further with bold colors or extended lengths for a totally unique and personal look. Whether you’re wearing it casually or dressing it up, it’s guaranteed to turn heads.