
Free Ribbed Cardigan Crochet Pattern For Everyday Wear
Find a free crochet ribbed cardigan guide that helps you build cozy, timeless cardigans while enhancing your crochet skills with ease and simplicity.
I’ve always enjoyed making cozy crochet pieces, and one project that stands out is the Free Crochet Ribbed Cardigan Pattern. This cardigan is a stylish and COMFORTABLE layer to add to your wardrobe. With just a few simple changes, like altering the length or sleeve style, you can easily turn this pattern into a sweater or an open-front shrug, making it adaptable for different looks and seasons.
Easy Crochet Ribbed Cardigan Pattern | Free & Beginner-Friendly
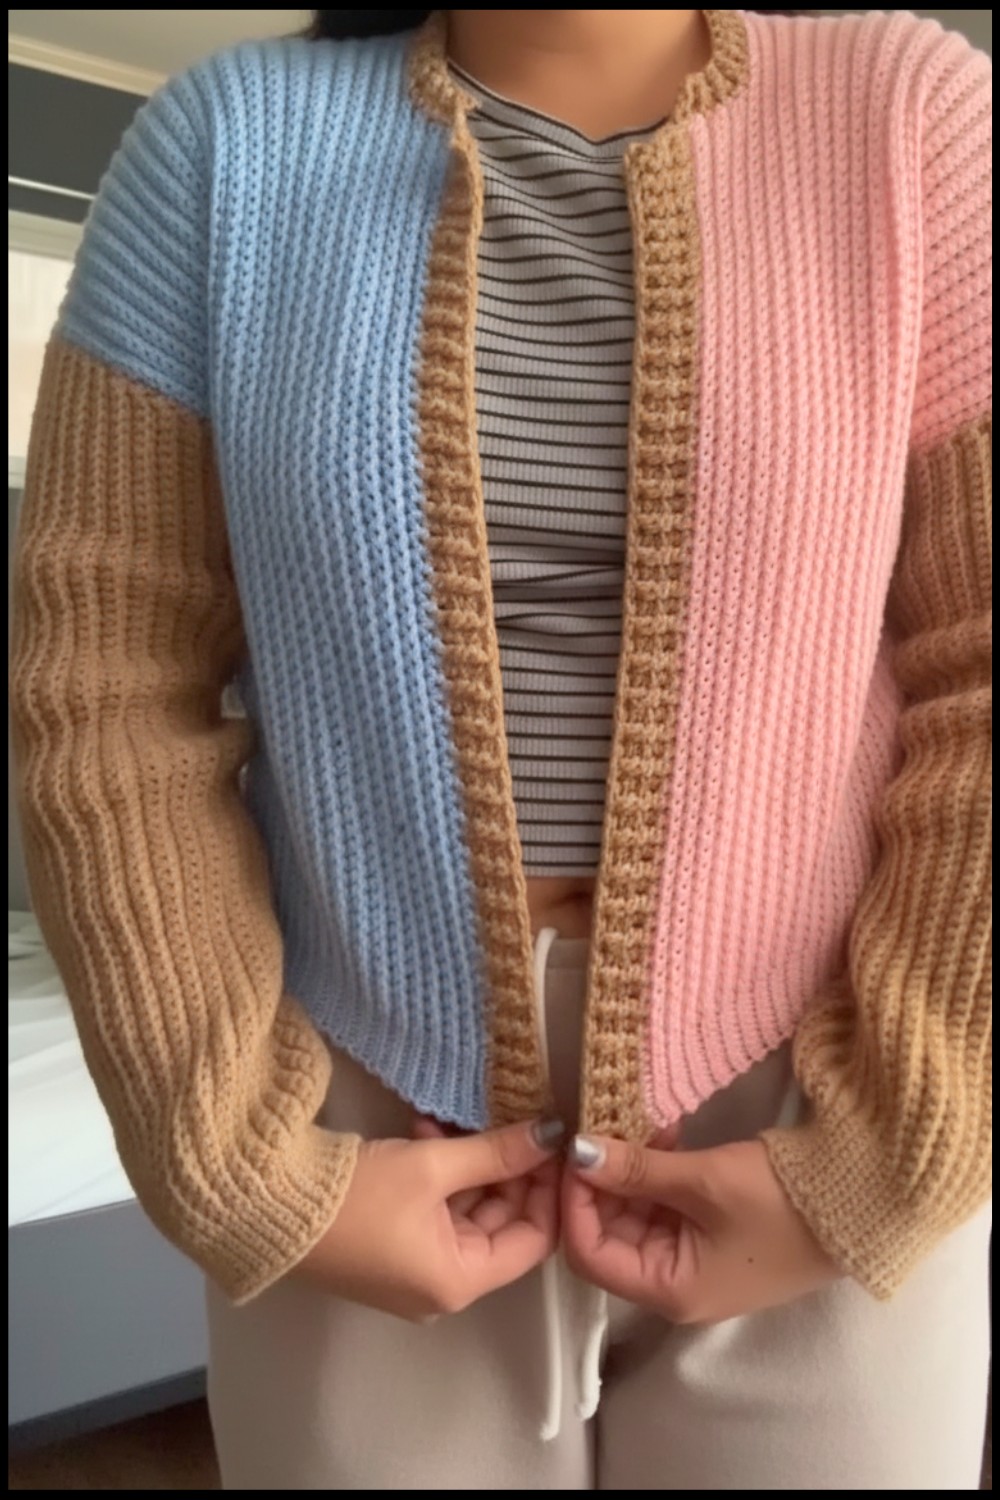
The charm of this ribbed cardigan lies in its soft texture and clean design. It has a gentle ribbing pattern that creates subtle vertical stripes, giving the fabric depth and warmth. The shape is relaxed and flattering, with a slightly loose fit that feels comfortable all day long. Its casual yet polished style makes it easy to pair with jeans, skirts, or leggings. The ribbing detail gives it a handcrafted feel that really makes this cardigan stand out from ordinary knitwear.

This cardigan is made using a ribbed stitch pattern, which involves working front and back post stitches to build that rich, raised texture. The pattern is great for intermediate crocheters, but confident beginners who want to try new stitches will enjoy it too. The cardigan is crocheted by making separate pieces for the back, front panels, and sleeves, which are then joined together, giving a satisfying sense of garment construction.
Not only is this project perfect for your own wardrobe, but it also makes a thoughtful and beautiful handmade gift. Its classic design adds decorative charm whether worn out or draped over furniture. If you want a crochet project that is stylish, wearable, and rewarding to create, the Free Crochet Ribbed Cardigan Pattern is a wonderful choice to explore and enjoy.
Ribbed Cardigan Crochet Pattern
Welcome to this step-by-step tutorial for a made-to-measure ribbed crochet cardigan! This cardigan features a stylish look with ribbed edges and customizable panel sizing, making it perfect for all body shapes. The instructions are beginner-friendly, easy to follow, and use basic crochet stitches for both texture and structure. You can personalize the cardigan with your own preferred yarn and colors.
How to Start & What Stitches Are Used
This cardigan is constructed in three main panels (2 front, 1 back), sewn together, then finished with ribbed sleeves and a ribbed border using both back loop stitches and post stitches for the edging. The whole project primarily uses single crochet stitches, slip stitches for ribbing, and double crochet (with front/post variations) for the final edging.
The main stitches you need are: ch (chain), sc (single crochet), sl st (slip stitch), dc (double crochet), fpdc (front post dc), bpdc (back post dc).
Skill Level & Terminology
- Skill Level: Advanced Beginner / Easy
- Terminology: Standard US crochet terms
Materials & Tools
- Yarn: 4-ply or size 3 lightweight yarn (amount will vary depending on size; you can use any yarn weight with matching hook size)
- Hook: 3.5 mm crochet hook (or size appropriate for your yarn)
- Notions: Yarn needle, scissors, stitch markers, measuring tape
Gauge
Gauge is not strictly crucial, as the pattern is made-to-measure, but for reference:
- 18 stitches x 22 rows = 4" x 4" (10 x 10 cm) in single crochet back loop only.
Abbreviations
- ch – chain
- sc – single crochet
- sl st – slip stitch
- dc – double crochet
- fpdc – front post double crochet
- bpdc – back post double crochet
- st – stitch
- BL – back loop
- rep – repeat
Special Stitch Instructions
Back Loop Only (BLO): Insert hook only into the back loop of the stitch, not both loops.
Front Post Double Crochet (fpdc): Yarn over, insert hook from front to back to front around post of dc below, complete dc.
Back Post Double Crochet (bpdc): Yarn over, insert hook from back to front to back around post of dc below, complete dc.
Measuring Guide
A: Shoulder to desired cardigan length (e.g., to belly button or hips)
B: Bust circumference ÷ 4 (e.g., 38"/4 = 9.5") - For each front panel. Panel B1 = B - 1", Panel B2 = B.
C: Armhole circumference ÷ 2
The Pattern
Each main cardigan piece is worked flat, then seamed. Edges and sleeves are worked directly onto the body.
Front Panels (Make 2)
Step 1: Chain + First Row
- Ch the number to match measurement A (shoulder to hem, in chains), e.g., ch 80.
- Ch 1 more for turning.
- Row 1: Sc in 2nd ch from hook and across until 10 sts remain. Sl st in last 10 sts. (This is your ribbed edge.)

If pattern isn’t clear: Make a long chain as tall as you want your cardigan; make single crochets across, and for the last 10, do slip stitch for ribbing at the edge.
Step 2: Work Rows
- Row 2: Ch 1, turn.
- Sl st (BLO) in first 10 sts (except first, work in both loops for cleaner edge). Place marker in first sl st.
- Sc (BLO) across remaining sts to end. Last sc through both loops for tidy edge.
- Row 3: Ch 1, turn.
- Sc in first st, then sc (BLO) across to stitch marker.
- Sl st (BLO) in next 10 sts to end.
- Repeat Rows 2 & 3 until your width matches B1 (measurement B minus 1").

For non-pattern readers: Keep making rows, alternating sc back and forth, with the last 10 stitched as slip stitches, until your piece is as wide as B1.
Step 3: Front Panel Cutout
- After hitting B1, skip 2–2.5” (10 sts) at one edge for the neckline.
- Continue Row ⅔ repeats, only to stitch marker (avoid those skipped 10).
- Continue until you reach full B2 (original B) width.

Summary: After your first part, leave a gap for the neckline by skipping stitches, then continue working until your piece matches the desired width.
Repeat for Second Front Panel.
Count your stitches/rows so both panels match.
Back Panel
- Work exactly as for the front panel, but the width is twice that of one front panel (B × 2).
- Make chain: Same as front.
- Work rows: Same as front, without neck gap. Work until you’ve reached full back width.

If you’re unsure: Make a wide rectangle the same height as your fronts, but twice the width.
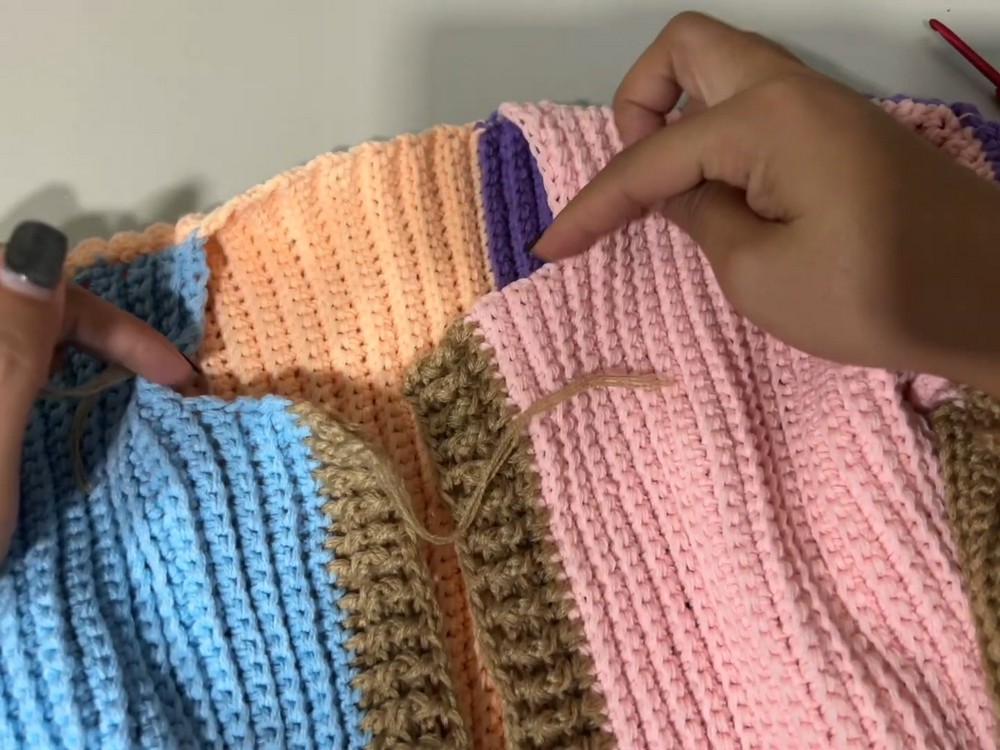
Assembly
Shoulder Seams:
- Lay panels RS together.
- Count rows, align both fronts to back.
- Sew shoulders using yarn needle and “invisible seam” (whipstitch through both loops at each row end).
Side Seams:
- Measure your armhole depth from the shoulder.
- Using stitch markers, mark the armhole length down the sides.
- Sew side seams up to stitch marker (leave armhole open).
Remember: Sew top first, then up the sides, leaving gaps for sleeves.
Sleeves (Make 2)
Attach Yarn:
- Find underarm ("armpit" of armhole).
- Attach yarn.
Step 1: Chain for Sleeve
- Ch enough for sleeve length (e.g., ch 85).
- Row 1: Skip 1st ch, sl st in next 10 ch (for ribbing), sc in each ch to end.
Repeat:
You’re making a long strip, then attaching as you go at the armhole.
Step 2: Join next row to cardigan:
- Sl st to armhole edge twice, turn.
- Work back (BLO): sl st in each ribbing st, sc (BLO) across.
Continue:
Repeat working back and forth, sl st at armhole, making a tube.
When completed, join starting row to end row with sl st seam for a circle.
If you need help: Make a rectangle for your sleeve, joining it as you work to the armhole edge.
Edging – Ribbed Collar and Center Fronts
Attach Yarn at Bottom of Front Opening.
Row 1:
- Ch 3 (counts as dc).
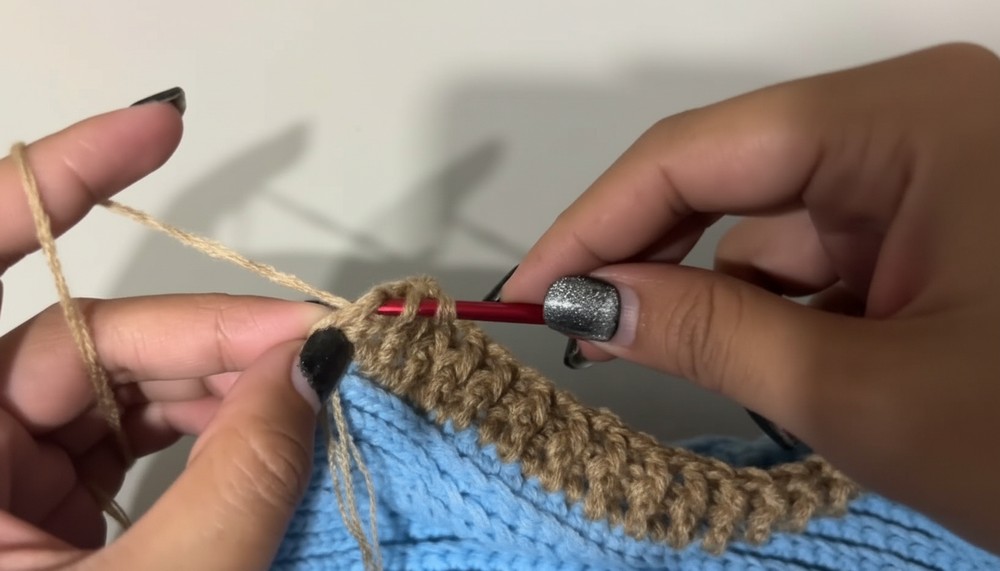
- Dc in each st along cardigan front, around neck, and back down the opposite side.
Rows 2–4: (as thick as you want)
- Ch 3, turn.
- Alternate fpdc and bpdc across row (matching the post — fpdc in fpdc, bpdc in bpdc).
Finish:
Fasten off and weave in ends.
Summary: Add a thick ribbing in double crochets (using front and back post dc) all the way around the cardigan opening for a finished, sturdy look.
Finished Size
- Customizable; use your body measurements.
- Sample: fits bust 38” (96cm); length, sleeve, and opening all adjustable.
Finishing
- Weave in all ends.
- Block if desired for best drape.
- Add buttons as desired, or leave open.
- Try on and enjoy your cardigan!

Conclusion
Congratulations! You’ve completed your own custom-fit ribbed crochet cardigan. This adaptable pattern allows for endless variations with colors and yarns and will build your confidence with shaping, seaming, and post stitches.
If you need help, refer to the summary after each step for guidance, and remember, working row-by-row and measuring as you go makes the fit perfect!
For non-pattern readers:
Follow the steps in sequence: make three rectangles (back and two fronts), sew together, add sleeves, and finish with the ribbed edging. Use single and double crochets for most of the cardigan, and slip stitches for the ribbed texture.