
Flirty & Fun Free Crochet Mini Skirt With Ruffles Pattern
A soft and bouncy skirt with lovely frills by following the Free Crochet Mini Skirt With Ruffles Pattern to end up a unique treasure that looks so great on everyone.
This Free Crochet Mini Skirt With Ruffles Pattern Is So Gorgeous
The Free Crochet Mini Skirt with Ruffles Pattern is a fun and beginner friendly project that anyone can enjoy making. This skirt is designed to be stylish, playful, and comfortable, making it perfect for casual outings or dinner dates. Its standout feature is the beautiful ruffled hem, which adds a touch of elegance and charm to the overall look.
The main body of the skirt uses simple and easy to learn stitches, such as back loop half double crochet and back loop single crochet. The ribbed texture ensures a snug and stretchy fit, while the ruffles at the bottom give the skirt a flowy and unique appearance. 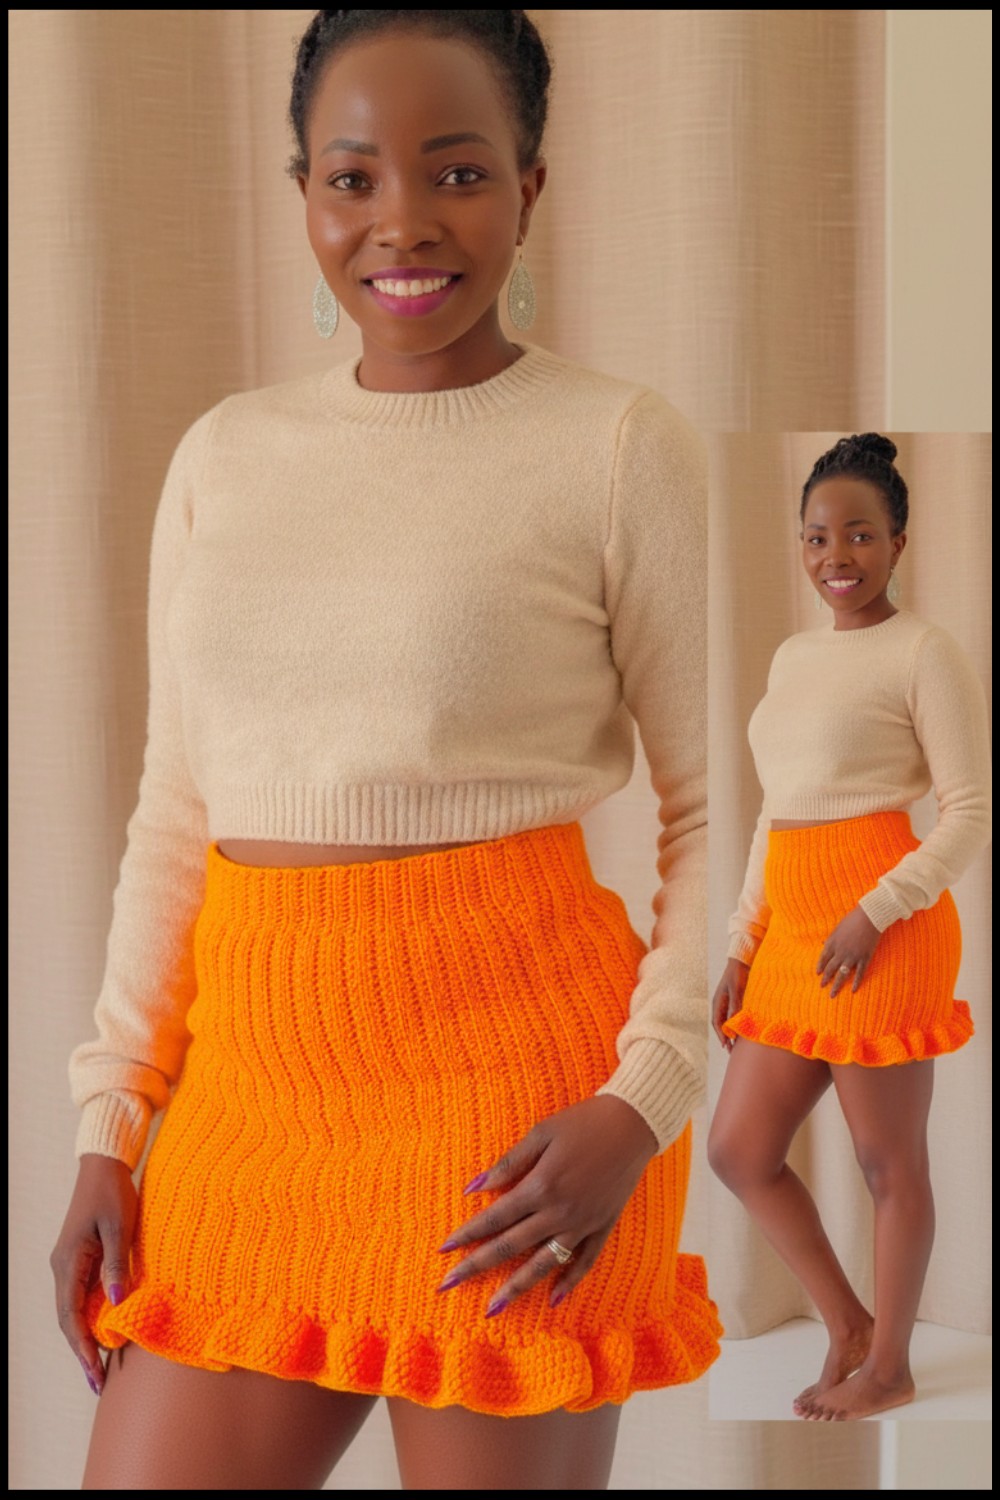 The best part is that you can customize the length, size, and color to suit your personal style. This trendy yet simple project is ideal for anyone looking to create a fun wardrobe piece with just a crochet hook, yarn, and a little creativity.
Free Crochet Mini Skirt With Ruffles Pattern
Materials
- Yarn: Lightweight #3 acrylic yarn. The video uses Azurite color #7 (Orange). Each skein is 50g or 140 meters. You will need a few skeins depending on the size.
- Hook Size: 4.25mm (G6 US). You may adjust the hook size for tighter or looser tension.
- Darning Needle: For seaming and weaving in ends.
- Tape Measure: To determine skirt dimensions.
- Stitch Marker: A clip or even a hairpin can be used.
- Scissors: To cut the yarn.
Techniques Used
- Back Loop Half Double Crochet (BLhdc): Yarn over, insert hook into the back loop of the indicated stitch, yarn over and pull through, yarn over, and pull through all three loops on the hook.
- Back Loop Single Crochet (BLsc): Insert hook into the back loop of the indicated stitch, yarn over and pull through, yarn over, and complete the stitch.
- Slip Stitch: Insert hook into the stitch, yarn over and pull through the stitch and the loop on the hook.
Pattern Instructions
Step 1: Taking Measurements
- Use a tape measure to determine the length of the skirt and the circumference of the widest part of your hips.
- Add 2 inches to the hip measurement for comfort or keep it snug, depending on preference.
Step 2: Foundation Chain & Length
- Create a slip knot and chain the desired length of the skirt. For a mini skirt, chain 70 (adjust based on personal length preference). Add 1 extra chain for turning.

- Use the tape measure to verify the desired length. For example:
- Chain length = 16 inches (mini skirt length).
- Additional ruffles will add 2–3 inches later.
Step 3: Row 1 Half Double Crochet with Band Section
- Turn your work and make 1 half double crochet (hdc) in the back loop of the second chain from the hook. Work across the row in BLhdc until 12 stitches remain for the waist band.

- For the last 12 stitches, switch to Back Loop Single Crochet (BLsc) to create the waistband.
- Place a stitch marker on the last Stitch of BLsc for easy identification.

Step 4: Row 2 (Repeat Row)
- Chain 1 (does not count as a stitch) and begin working from the waist band section.
- For the first 12 stitches: Work BLsc in each stitch.
- For the remaining stitches (body of the skirt): Work BLhdc across. Ensure the last stitch on both ends is worked through both loops to keep the edges stable.
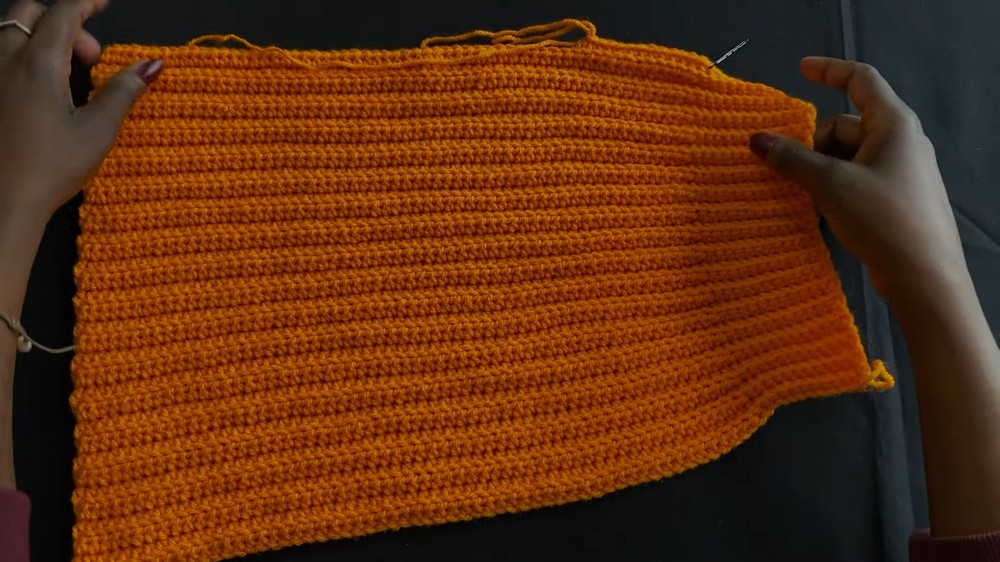
Step 5: Continuing the Body of the Skirt
- Repeat Row 2 until the single panel skirt reaches the desired hip circumference measurement (e.g., 22 inches or the personal measurement taken earlier).
Tip: You can periodically wrap the work around your hips to gauge fit.
- Once complete, fasten off the yarn, leaving a long tail for seaming.

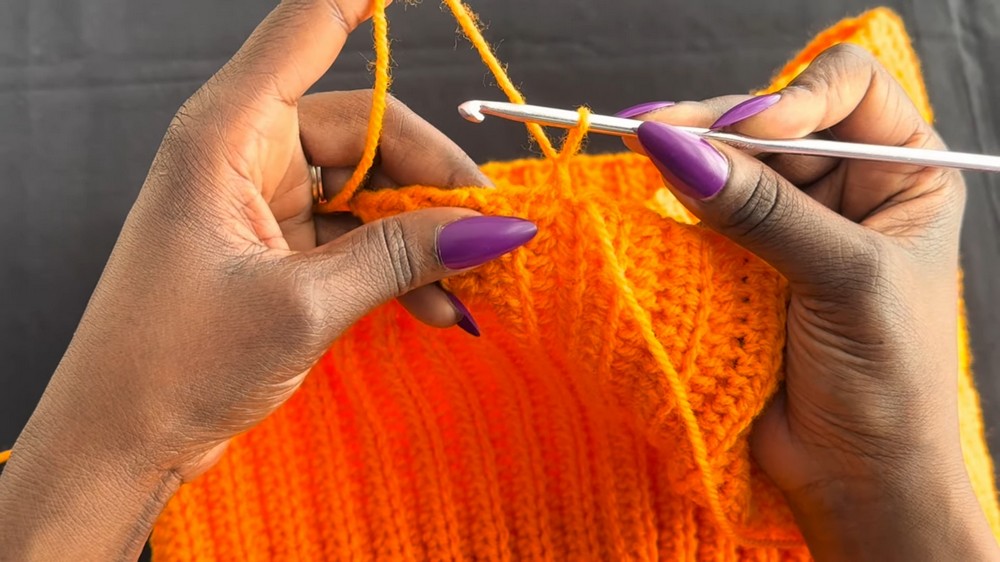
Step 6: Seaming the Panel into a Tube
- Fold the panel in half, aligning the edges. Use a darning needle to seam the skirt using a whip stitch or mattress stitch, ensuring the edges are uniform.
- Start from the waistband and work to the bottom edge.
- For a seamless join, pick up one loop from either side of the fabric.
- After joining, fasten off the yarn with a secure knot and weave in the ends.
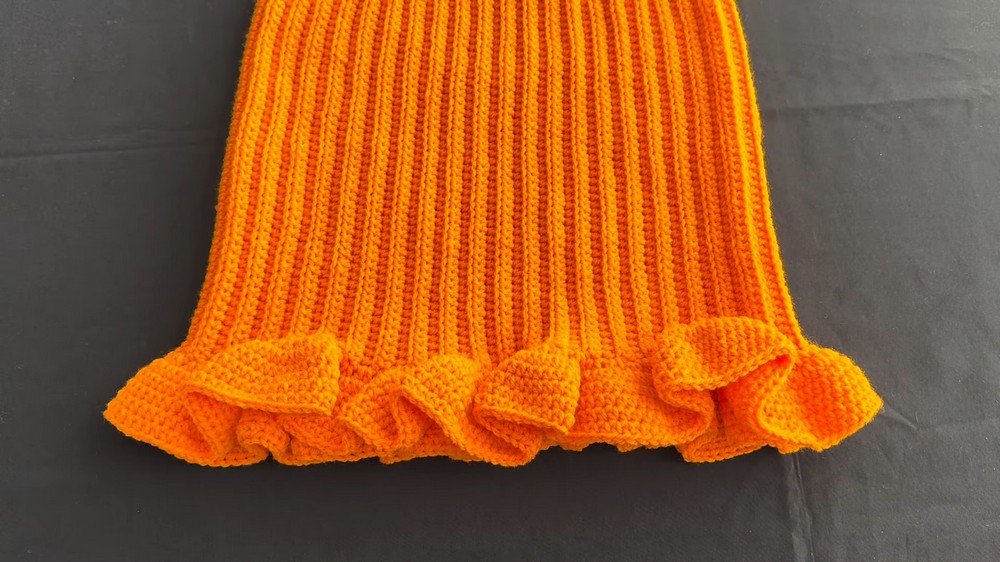
Step 7: Adding the Ruffles
Row 1 of Ruffles
- Attach the yarn to the bottom hem of the skirt at the seam. Chain 1.
- Work 2 half double crochets (hdc) into every stitch around the entire bottom of the skirt to increase.
- Slip stitch into the top of the first hdc to join the round.

Row 2 of Ruffles (More Increases)
- Chain 1.
- Work 2 hdc into every stitch around to create more volume for the Ruffles.
- Slip stitch to join.
Row 3–8 (or desired length)
- Chain 1.
- Work 1 hdc in each stitch around with no increases for the remaining rows.
- Repeat as many rows as needed to achieve the desired ruffle length. The video ended the ruffles with 6 rows in total.
Finishing the Ruffles
- After completing the last round, slip stitch to join.
- Cut the yarn, leaving a short tail. Pull the yarn through the loop to secure.
- Weave in all loose ends to finish the skirt.
Final Words and Tips
Your crochet skirt is now complete! The skirt is versatile for casual outings, dinner dates, or playful summer wear, and the ruffles make an elegant and unique statement.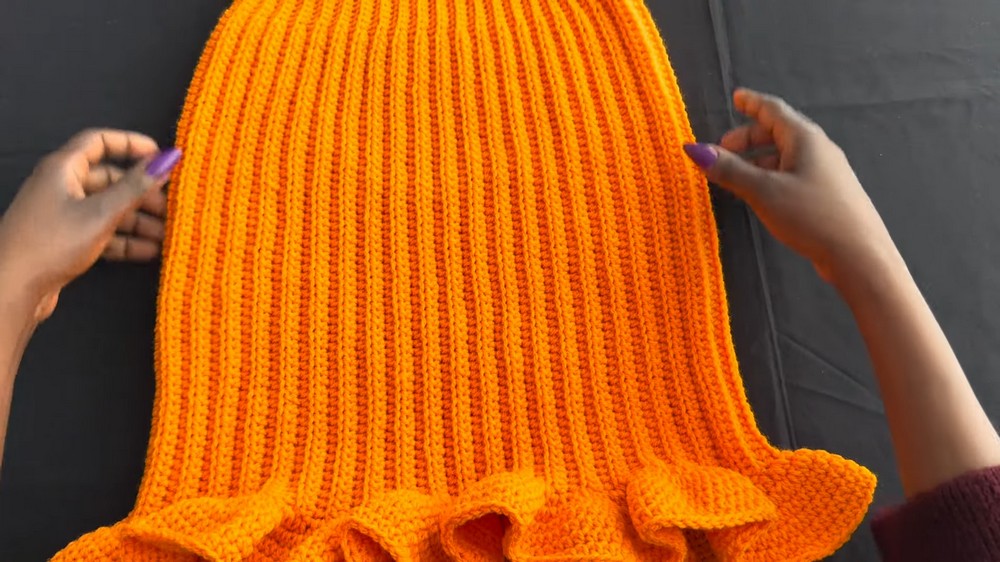
Tips for Maintaining the Skirt
- Washing: Hand wash or use a gentle cycle in cold water. Lay flat to dry to preserve the texture and shape.
- Care: Avoid excessive stretching, especially during wear, to maintain the elasticity of the ribbed pattern and ruffles.
- Storage: Fold neatly and store flat to avoid misshaping the ruffles.
Suggestions for Customization
- Length Variation: Adjust the chain length at the beginning for a longer or shorter skirt.
- Colors: Use multiple colors for stripes or gradient effects.
- Matching Accessories: Create a matching crop top or leg warmers for a complete set.
