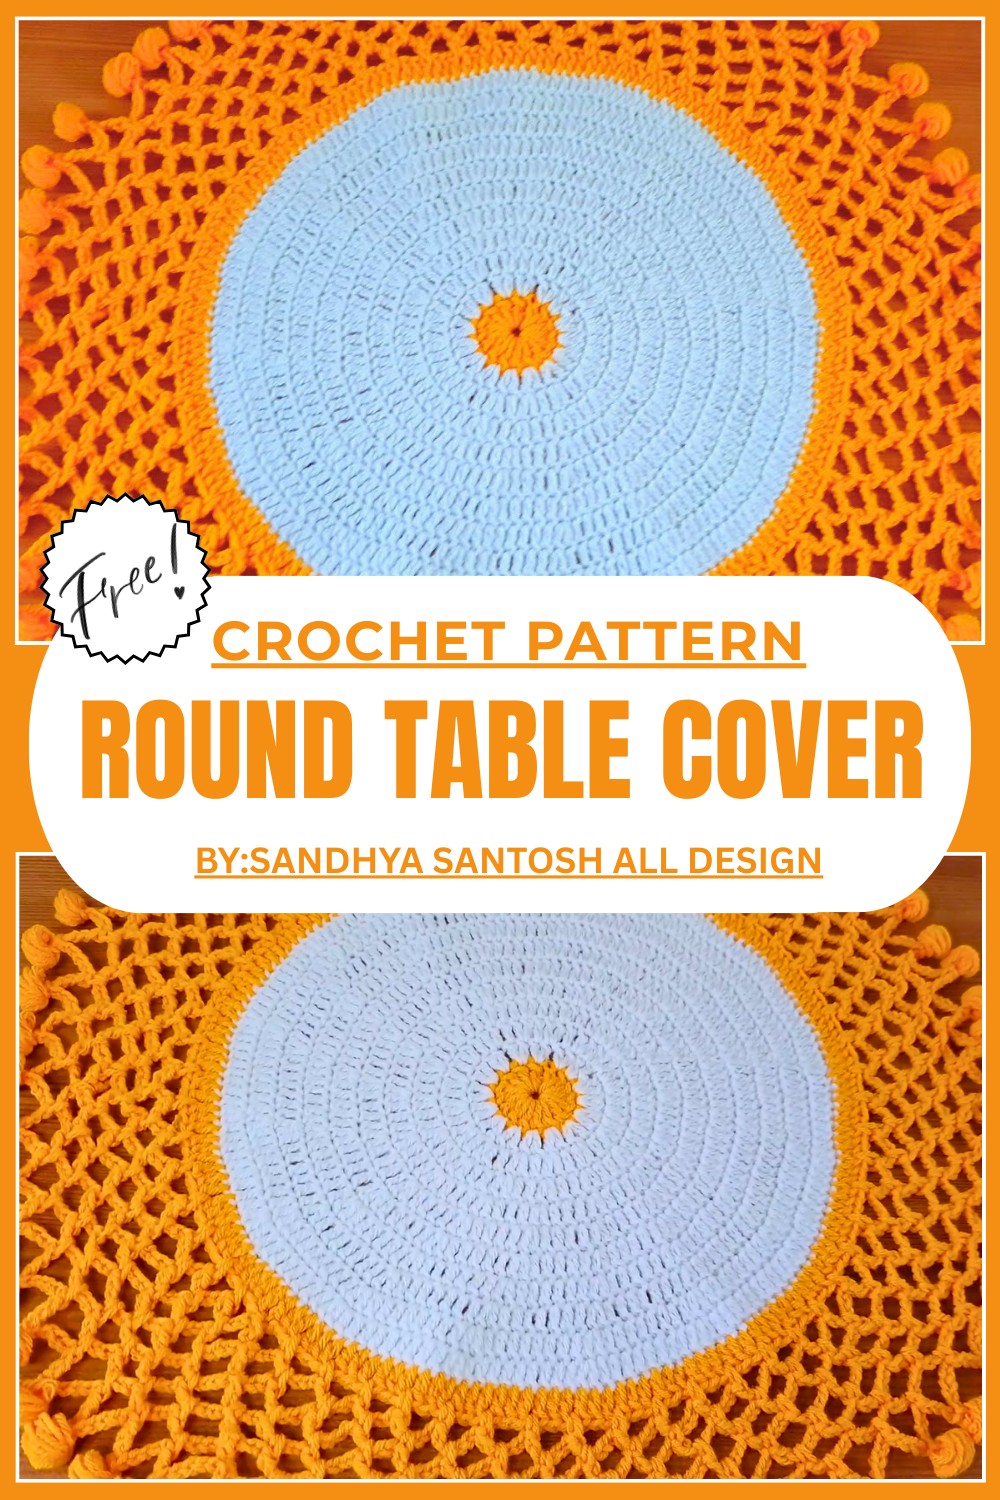
Inspiring Crochet Round Table Cover Pattern To Refresh Table
Refresh your table with the Crochet Round Table Cover Pattern as simple stitches turn a plain surface into a charming and cozy centerpiece for any room.
Turn your dining area with a stunning Free Crochet Round Table Cover Pattern, perfect for adding charm and elegance to any space. This timeless design protects your tabletop while showcasing intricate crochet artistry, making it ideal for special occasions or everyday use.
Beautiful Crochet Round Table Cover Pattern for Table Setting
Whether you prefer a delicate lace pattern or a bold textured style, this handmade cover brings warmth and personality to your home. Customize it with your favorite colors to match your decor and create a centerpiece that radiates beauty. Crocheting this table cover is both rewarding and practical, resulting in a lasting piece you’ll treasure for years.
Crochet Round Table Cover Detailed Pattern
Materials Needed
Before you begin, gather the following supplies:
- Yarn: 65 grams of wool (you can use different colors for customization; the project uses two colors).
- Hook: Crochet hook size 4mm.
- Scissors: For cutting the yarn between steps.
- Tapestry needle: For weaving in ends.
Abbreviations
Here are the stitch abbreviations to keep the instructions concise:
- ch: Chain
- sl st: Slip Stitch
- dc: Double Crochet
- sp: Space
- st: Stitch
Pattern Instructions
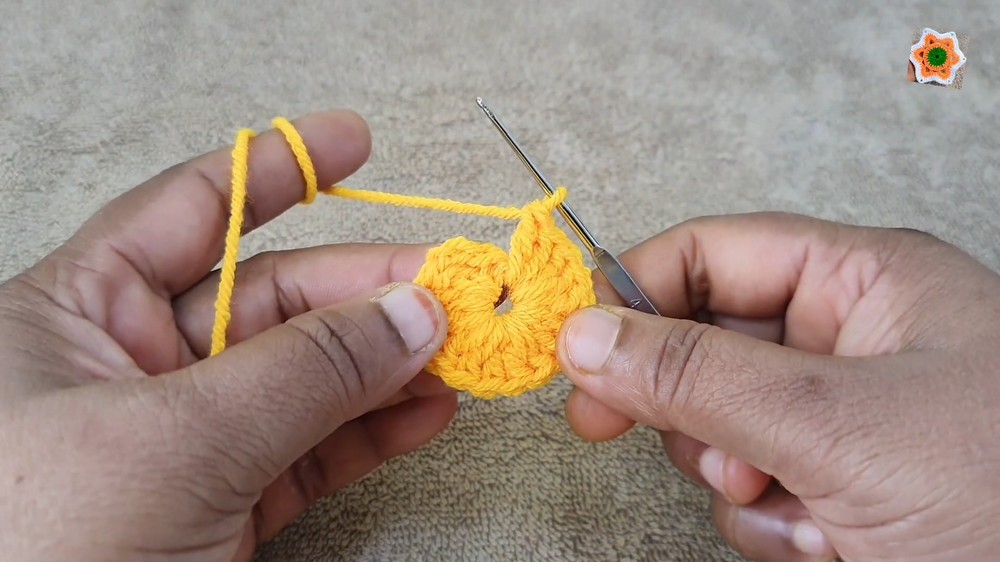
Step 1: Begin the Center of the Circle
- Make a slip knot and insert your size 4 hook.
- Create 5 chains (ch) to form a ring. Join the ends of the chain with a slip stitch (sl st) to form a circle.
- Chain 3 (this will act as your first double crochet stitch).
- Work 16 double crochets (dc) into the middle of the ring.
- Slip stitch into the third chain at the start to close the first round.
Step 2: Begin the Second Round
- Switch to a second color. Create another slip knot and insert the hook into any space between the stitches of the previous round.
- Chain 3 (acts as the first double crochet).
- Make 2 double crochets in each stitch from the previous round (this doubles the count to 32 dc).
- Slip stitch into the third chain at the top of the first chain to close the round.
Step 3: Increasing Rounds
- Round 3: Work 2 dc in one stitch, then 1 dc in the next stitch. Repeat this pattern around. (Creates 48 stitches in total.)
- Round 4: Work 2 dc in one stitch, then 1 dc in the next 2 stitches. Repeat around.
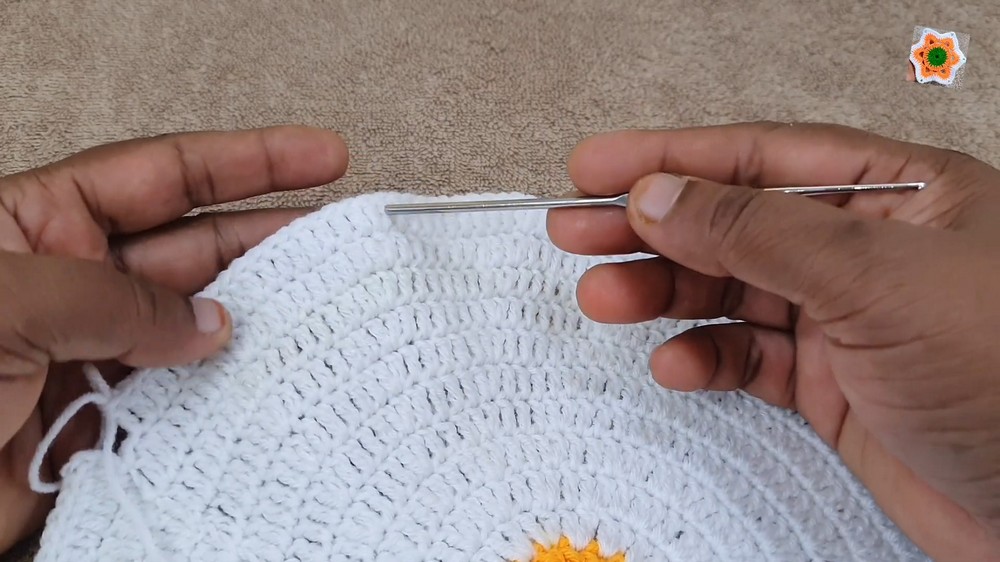
- Round 5: Work 2 dc in one stitch, then 1 dc in the next 3 stitches. Repeat around.
Continue increasing in the same fashion for as many rounds as you like, ensuring the circle becomes larger for your desired size. Each round increases the single dc stitches before placing 2 dc in one stitch.
Step 4: Create Chain Stitch Highlights
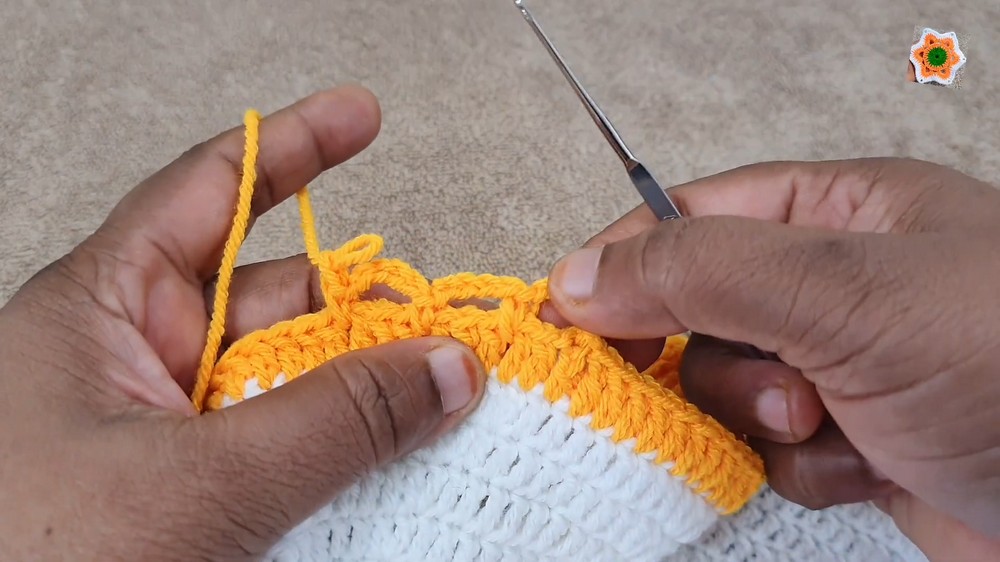 Once the circle reaches your desired diameter (10 rounds, as in the video):
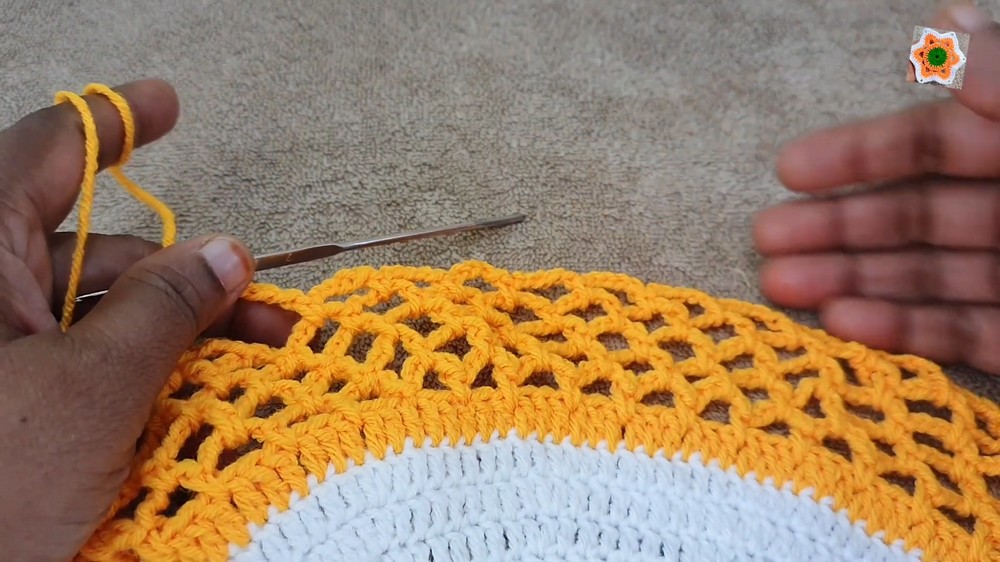
- Chain 5 and skip 3 stitches. Slip stitch into the next stitch to create an open loop.
- Repeat this pattern of ch 5, skip 3, sl st into the next around the circle.
- Slip stitch into the first chain loop to close the round.
Step 5: Puff Stitch Embellishments
- Start in any loop created in the previous round. Tie the second color yarn and make 5 chains.
- Work puff stitches into the next chain space as follows:
- Yarn over and pull up a loop (repeat this 4-5 times to create the puff stitch height). Pull through all the loops on your hook and chain 1 to close the puff stitch.
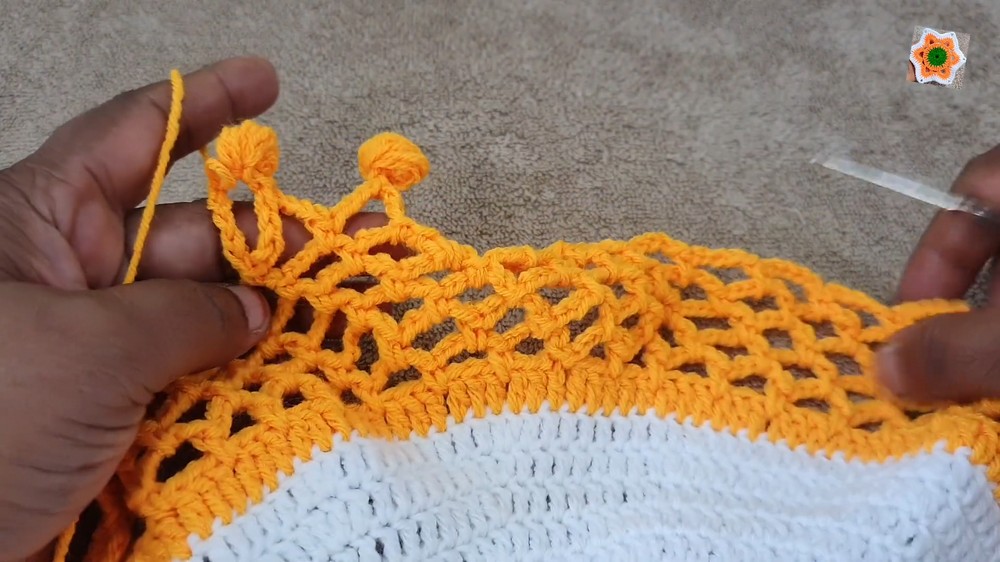
- Yarn over and pull up a loop (repeat this 4-5 times to create the puff stitch height). Pull through all the loops on your hook and chain 1 to close the puff stitch.
- Chain 5 and slip stitch in the next chain loop.
- Repeat the puff stitch + chain loop around the circle until the round is complete.
Customization Ideas
- Color Combinations:
- Use gradient or ombre yarn for a seamless color change.
- Alternate colors for each round to create a striped aesthetic.
- Add metallic or glitter yarn for a festive look.
- Size Variations:
- To make a smaller Thalapos coaster, stop increasing after 5-6 rounds.
- For larger designs (table centerpieces), continue increasing rounds or choose bulky yarn and a larger hook size like 5mm or 6mm.
- Edge Details:
- Add a fringe or tassel along the edges for a more bohemian style.
- Use scalloped edging instead of puffs for a softer look.
Tips for Success
- Tension Matters: Ensure consistent tension throughout your work for a smooth finish.
- Count Every Round: Keep track of stitch count to ensure the circle doesn’t buckle or become wavy.
- Practice the Puff Stitch: If puff stitches are difficult, pull the yarn gently with even tension after each loop.
- Blocking: Gently block your finished piece by wetting it and pinning it to the desired shape for a polished look.
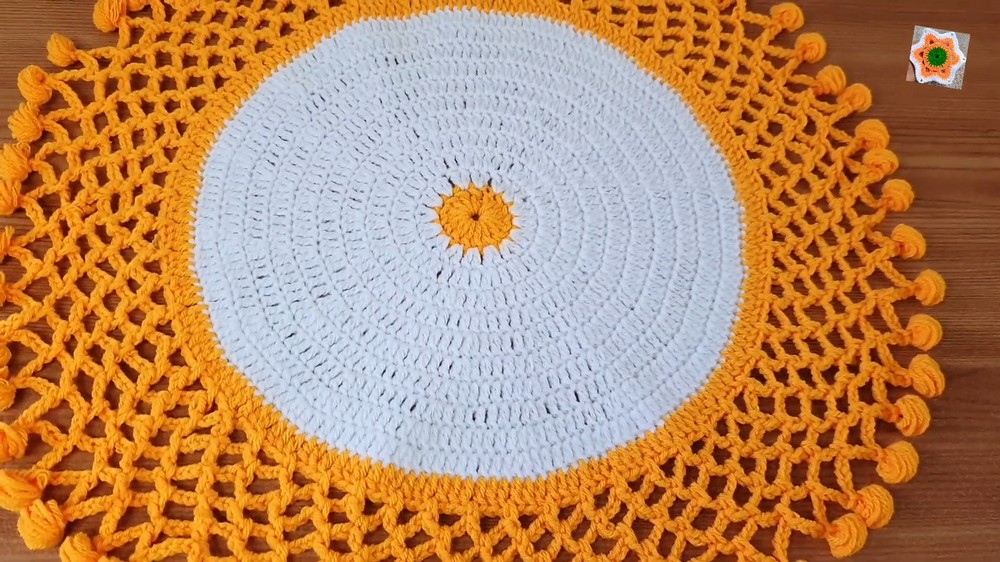
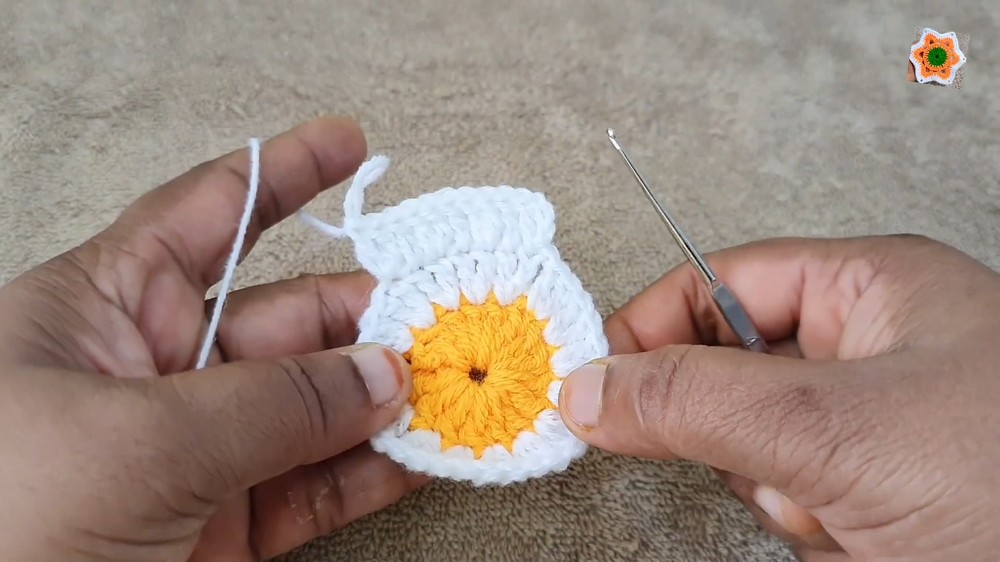
Finished Design
The completed crochet Thalapos features a delicate balance of structured double crochets at the center, transitioning into airy chain loops. The puff stitches create a decorative, floral-like edge that adds texture and a sense of elegance to the design. Perfect as a centerpiece, decorative cushion, or table mat, this piece blends function with beauty.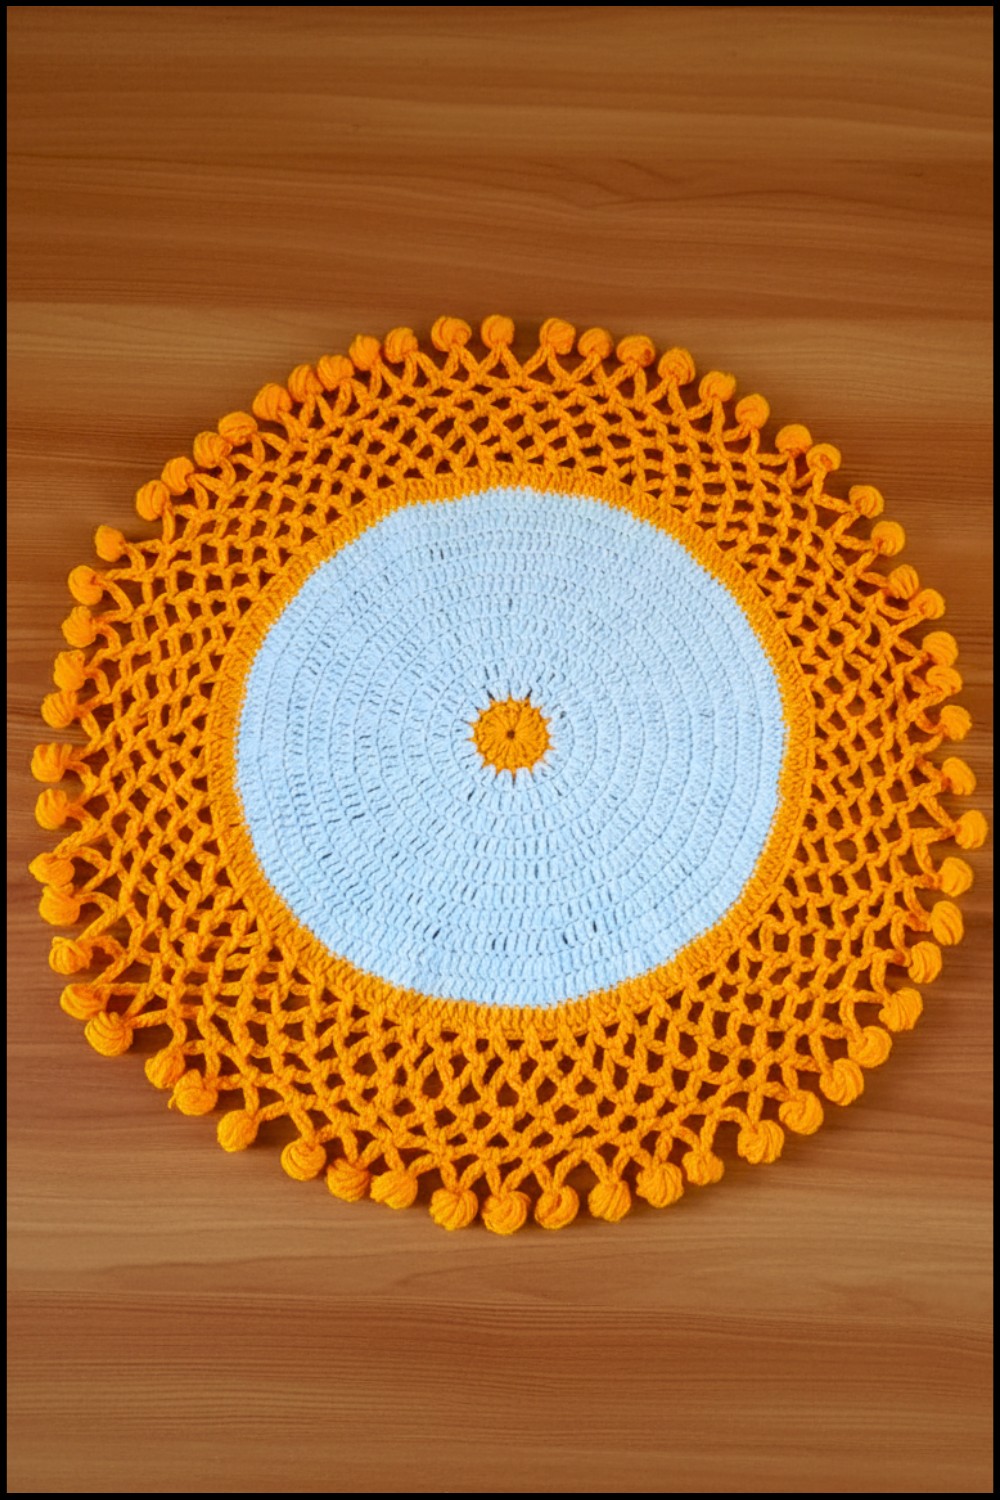
Closing Thoughts
This crochet cable stitch cushion pattern is not only a feast for the eyes but also a joy to make. Its simple repetition is perfect for beginners wanting to try new techniques like increasing and puff stitches, while offering endless customization for seasoned crocheters. Whether you’re giving it as a thoughtful gift or using it to adorn your space, the final product is sure to invite warmth and charm into any room.