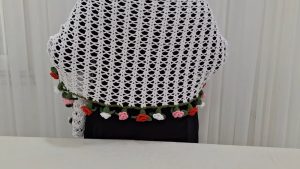
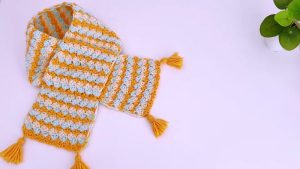
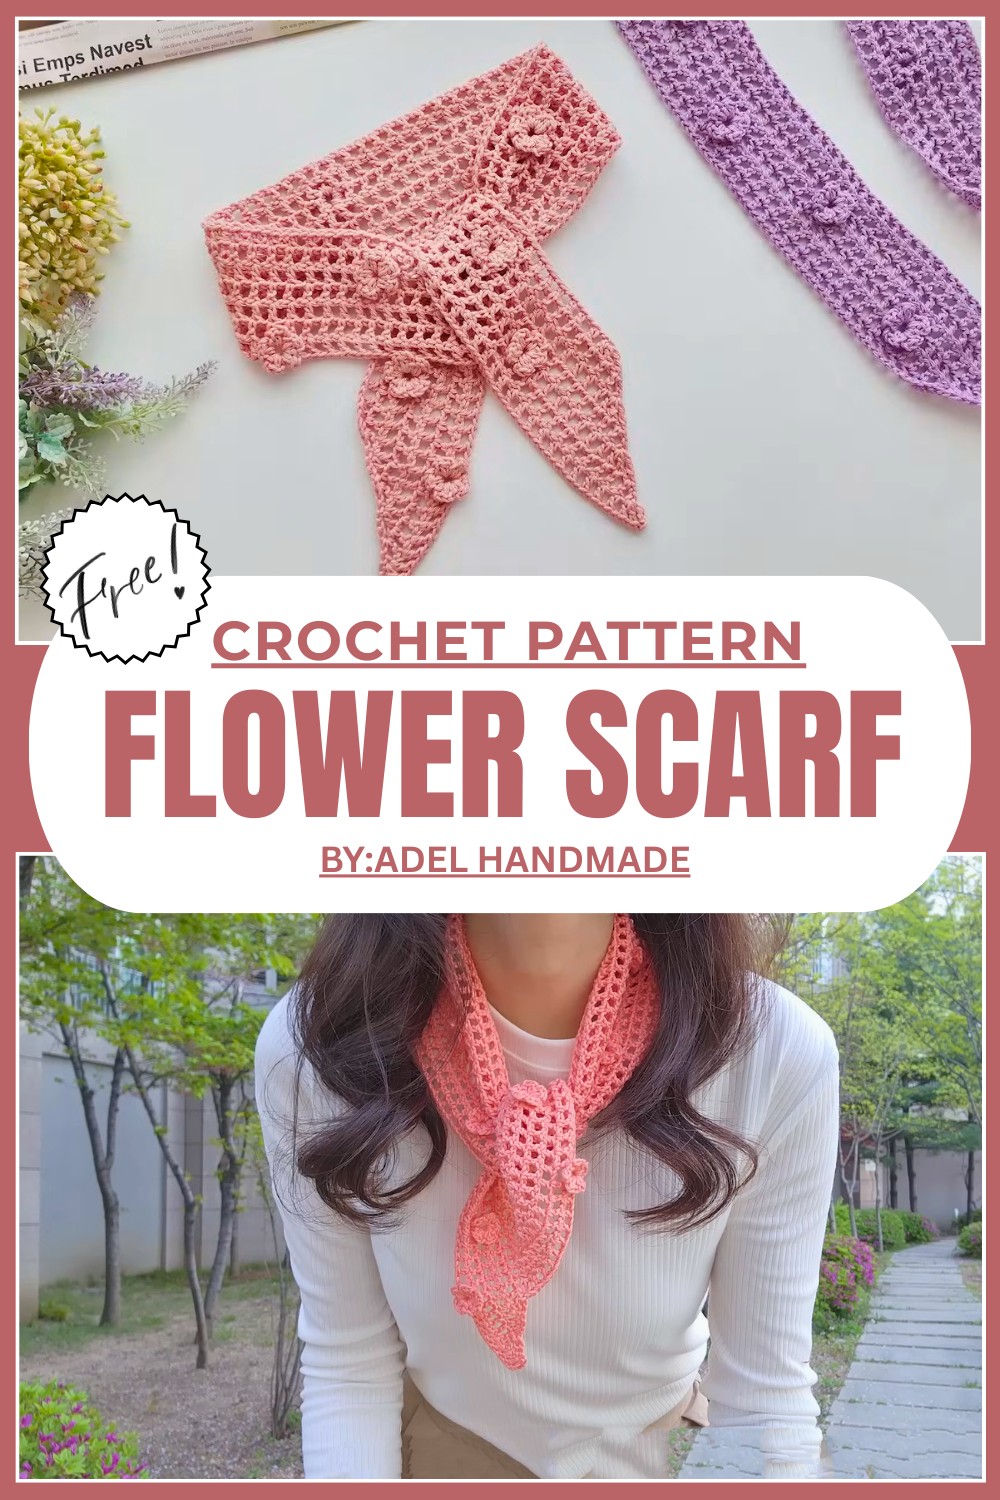
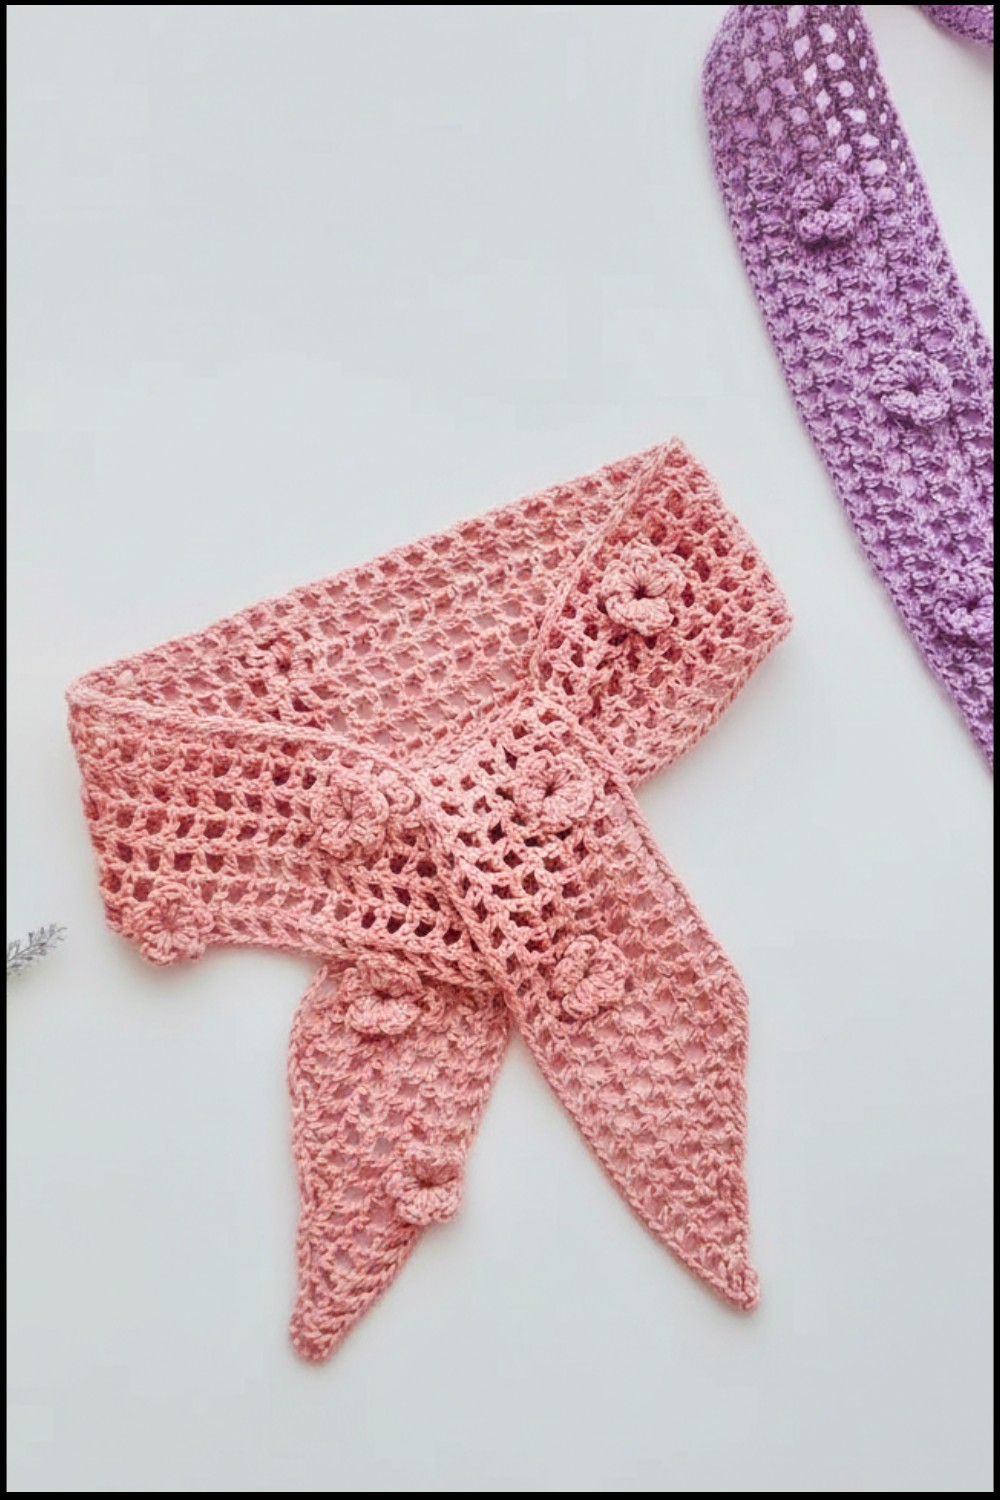
Chic Crochet Flower Scarf Pattern For a Stylish Wear
Warm up with the Crochet Flower Scarf Pattern as simple stitches turn soft yarn into a stylish floral scarf that feels cozy and playful for any season.
Wrap yourself in charm with the Free Crochet Flower Scarf Pattern, a delightful way to combine both warmth and style. Featuring delicate floral accents and soft textures, this scarf adds a touch of elegance to your outfit while keeping you cozy during chilly days.
Delightful Crochet Flower Scarf Pattern for a Cozy Winter Style
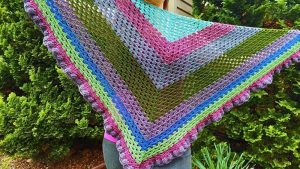
Perfect for casual wear or as a standout accessory, it can be customized in vibrant colors or subtle tones to suit your personality. Beyond its visual appeal, it makes for a meaningful handmade gift or a satisfying project for crochet enthusiasts. Whether for yourself or a loved one, this scarf is sure to brighten any wardrobe.
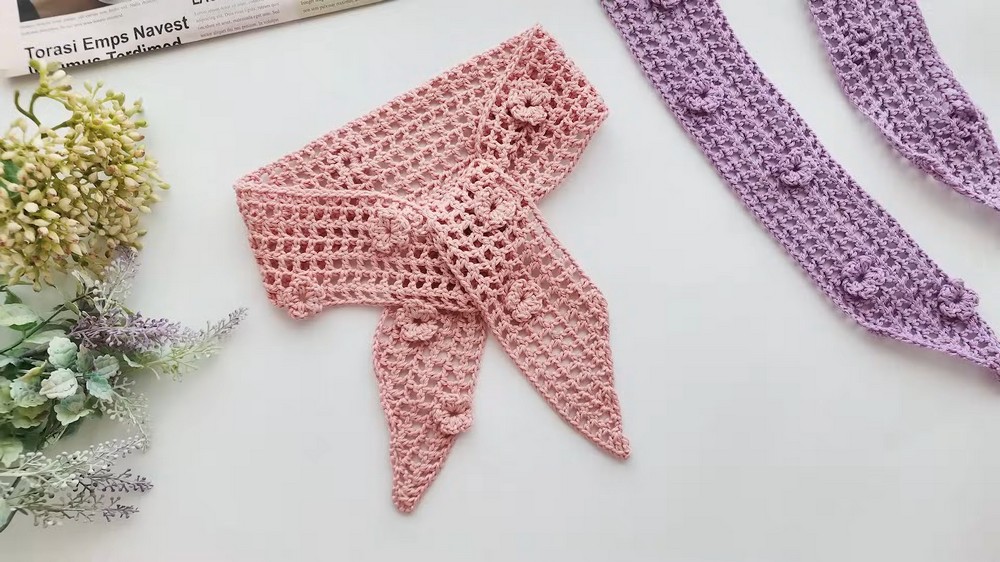
Crochet Pattern: Light and Airy 3D Flower Scarf
Materials
- Yarn:
- Lightweight yarn or fingering weight, any color of choice (approximately 100g of your preferred yarn).
- Tip: A softer yarn, like cotton or silk blends, is recommended for a draped, lightweight scarf.
- Hook:
- 2mm crochet hook or a hook size suitable for your selected yarn.
- Additional Supplies:
- Stitch markers.
- Scissors.
- Measuring tape.
Skill Level
Intermediate: This pattern involves working a net pattern, chain stitches, double crochets, and creating 3D flowers using puff stitches. While relatively simple, the 3D flower detailing may require some practice for beginners.
Key Abbreviations (US Terms)
- ch: Chain
- sc: Single Crochet
- dc: Double Crochet
- puff st: Puff Stitch
- st: Stitch
- sk: Skip
Special Notes
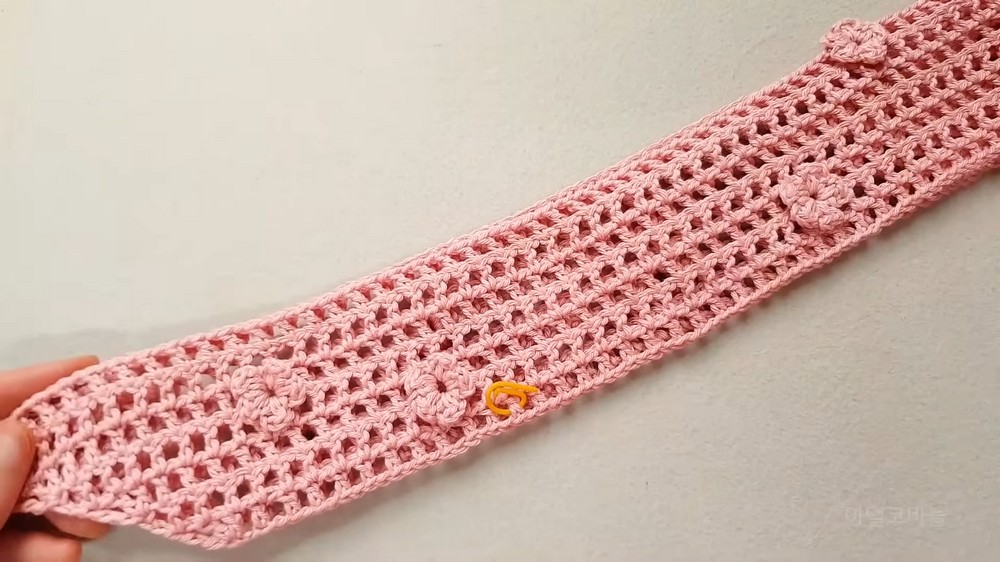
- The scarf is made up of multiple repeated rows using a light net pattern. The flowers are worked directly into the pattern.
- Adjustable Length & Width: You may increase or decrease the chain count or rows to customize the size. Ensure the starting chain is an odd number for proper stitch alignment.
- Flowers are worked seamlessly into odd-numbered rows while even-numbered rows maintain the net pattern.
- Always maintain a loose tension for the airy structure.
Step-by-Step Pattern
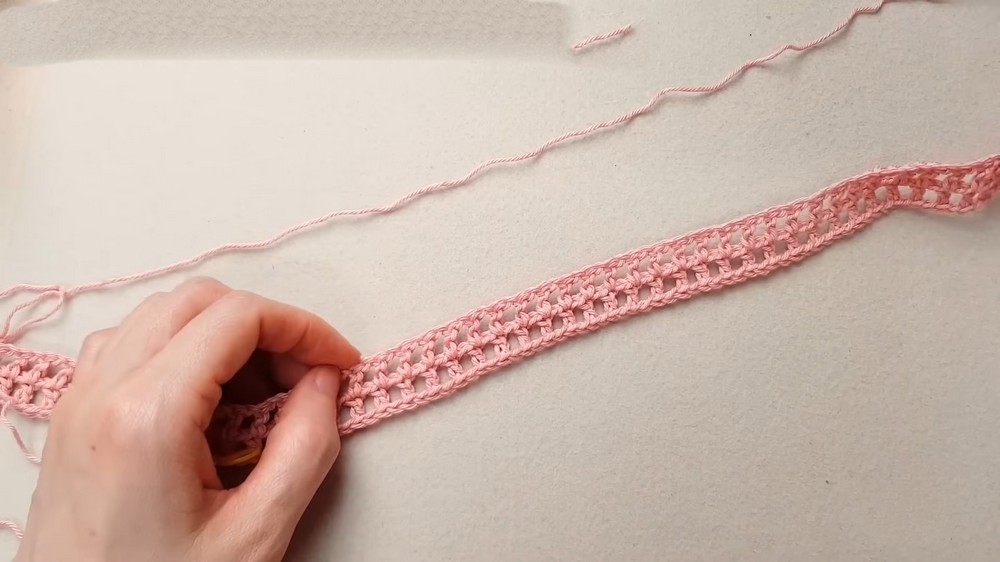
Foundation and Row 1: Setting Up the Net Pattern
- Foundation Chain:
- Begin with a slip knot.
- Chain 165 stitches (or any odd number of stitches as per your desired length).
- Row 1 (Right Side):
- Ch 3 (this will count as your first dc).
- Skip the next 5 ch, then work dc into the 6th ch.
- Insert hook into the back bump of the chain in the 6th stitch. Work 1 dc into that stitch.
- Mark the first dc using a stitch marker.
- Ch 1, skip the next st, and work 1 dc into the next st.
- Repeat the pattern: (ch 1, sk 1, 1 dc) across the row.
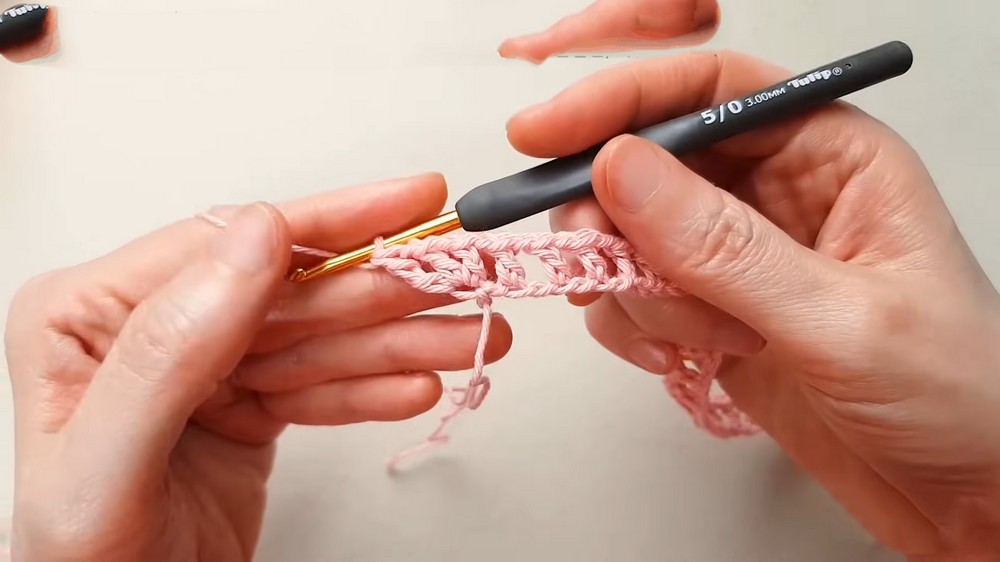
- At the end of the row: Insert 1 dc into the last ch.
- Ch 1, and work 1 more dc into the same last st (to elongate for edging).
Row 2: Continuing the Net Pattern
- Turn your work so you’re now working on the wrong side.
- Ch 3 to turn, and work dc into the first st.
- Skip the first ch-1 space. Work dc into the top of the next dc from the previous row.
- Mark this first stitch with the stitch marker.
- Ch 1, and work 1 dc into the next dc on the previous row.
- Repeat (ch 1, sk 1, dc) pattern across.
- At the end of the row: Work 2 dc into the final stitch to elongate for edging.
Tip: Even-numbered rows maintain the net pattern without flowers. Keep loose tension to maintain the airy structure.
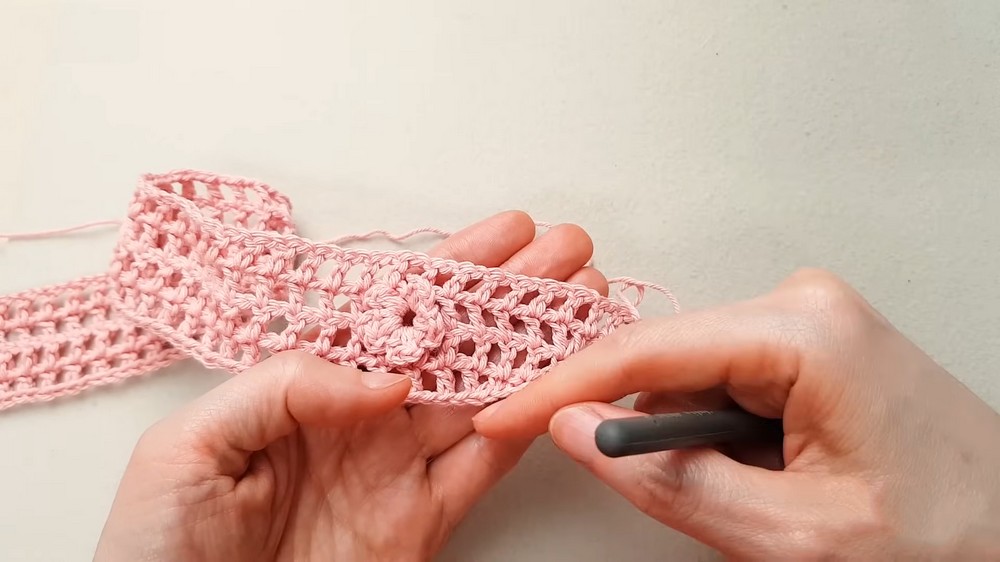
Rows 3–4: Adding the 3D Flowers
Row 3: Adding the Flowers (Right Side)
- Work Rows 1 and 2 as a base for the next 3D flower row. The flowers are only created on odd-numbered rows.
- Begin Row 3 by following the same net pattern from Row 1.
- For the base of the flower, when you reach the desired location for the flower, work the following:
- Instead of the ch 1, work 2 dc into the same stitch.
- This adds an additional dc that will hold the flower.
- For the base of the flower, when you reach the desired location for the flower, work the following:
Creating the Flower in Row 3
- Flower – Petal 1:
- Ch 2, yarn over, and insert your hook into the dc post where the flower will sit.
- Work a puff st: Yarn over, pull through, repeat this 2 times, and then pull through all loops on hook.
- Ch 2 and secure the petal with a sl st into the same post.
- Flower – Petal 2:
- Ch 2, yarn over, and insert your hook around the same post.
- Work another puff st, followed by Ch-2. Secure this petal with a sl st around the post.
- Continue Adding More Petals:
- Proceed to create 5 total petals using the same steps. Use the subsequent chain spaces for remaining petals.
- After the last petal, Ch 1, and resume the net pattern.
Pro Tip: You can shape the petals by pulling and adjusting them for a neater, three-dimensional look.
Repeating Rows
- Continue Rows 1 & 2 for the base of the scarf.
- Create flower rows every 4 to 5 rows. You can randomly place flowers for a natural scattered look.
Final Rows and Finishing Touches
- When the scarf reaches your desired width (e.g., seven rows or larger), finish with a row of dc for the final touch.
- Fasten off and weave in all ends securely using a darning needle.
Tips for Success
- Stitch Markers: Always mark the start of your rows to maintain a straight edge.
- Petal Placement: Flowers can be randomly placed or evenly spaced for a symmetrical design.
- Flower Variation: Experiment with the number of petals (e.g., 3 or 7) for different looks.
- Yarn Choice: Use a soft yarn (e.g., lightweight cotton or bamboo blend) to create a scarf that drapes well.
Customization Ideas
- Scarf Dimensions: Adjust the starting foundation chain for a longer or shorter scarf. Ensure the number is odd for proper stitch alignment.
- Color Variations: Alternate colors for rows or flowers to create stripes or vibrant designs.
- Petal Size: Use additional loops in puff stitches for fuller, larger petals.
Conclusion
Congratulations on creating a beautiful 3D Flower Scarf! Its lightweight and breathable texture are perfect for various seasons, while the charming flower accents make it a standout accessory. Feel free to customize the dimensions or colors to suit your personal style or gifting occasions.
Pattern Correction
- Ensure your foundation chain is odd-numbered for accurate alignment in the net pattern.
- Keep tension loose for airy stitches; tight stitches may alter the drape.
Final Tip
Blocking the finished scarf will help set the stitches and enhance the scarf’s final appearance. Lay it flat and use pins to shape the flowers and net pattern perfectly while it dries.