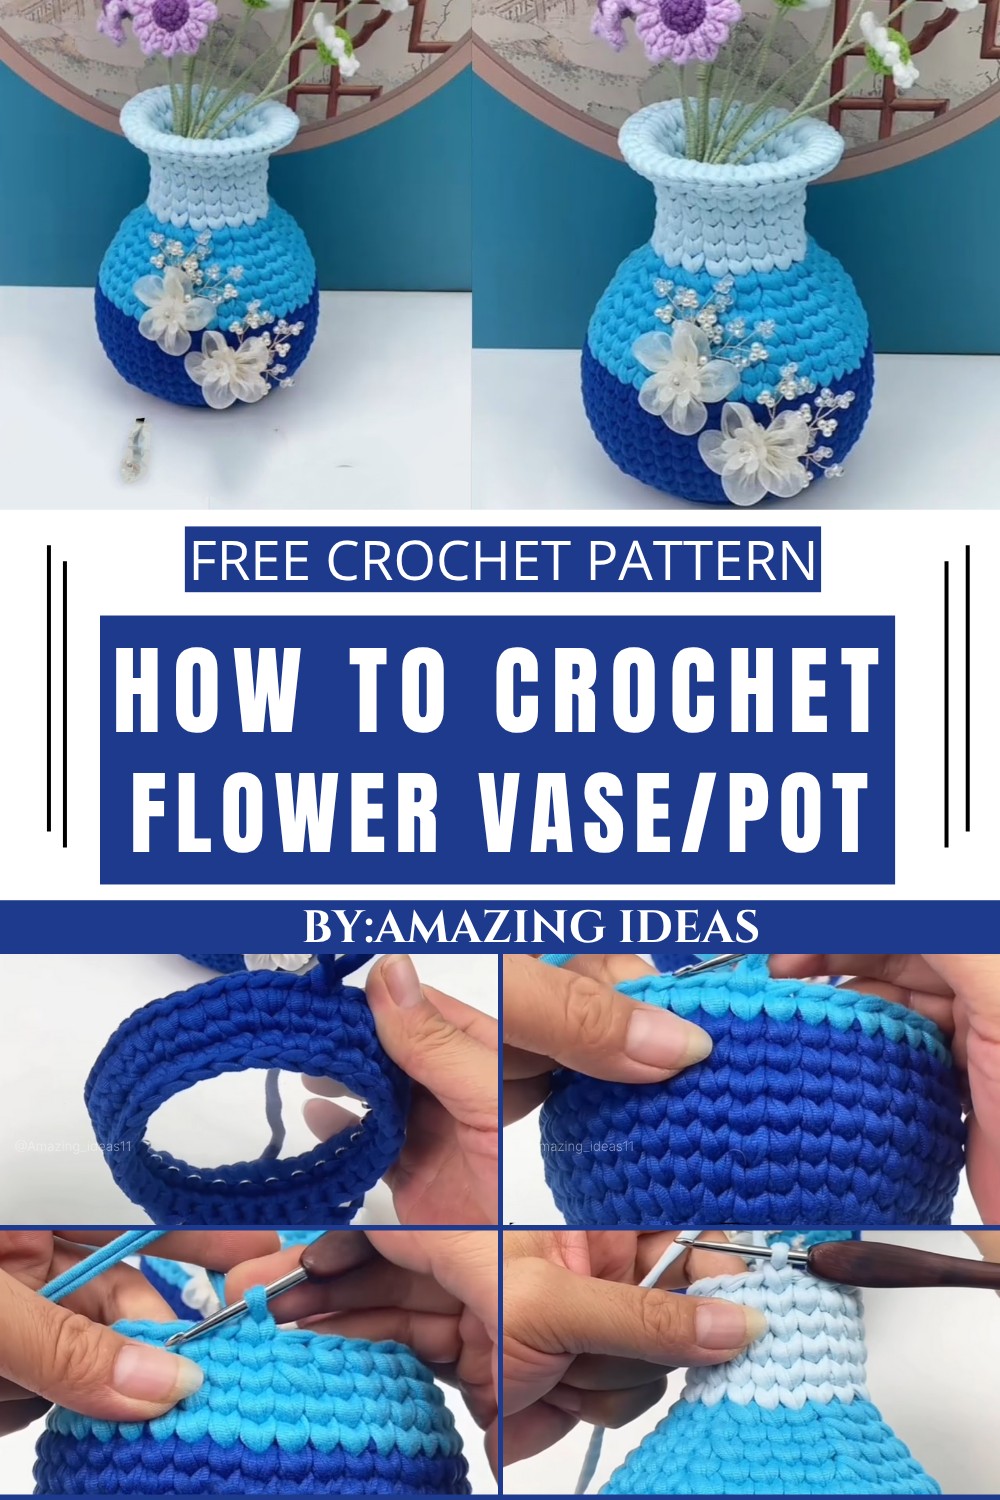
Free Crochet Flower Vase Pattern To Beautify Your Space
Bring life to your space with this easy and creative Free Crochet Flower Vase Pattern which is for adding elegance and charm to your home decor.
Free Crochet Flower Vase Pattern That’s for Quick Décor
Imagine giving your space a charming, handmade touch that feels both personal and beautiful. A crochet flower vase brings life to any room, transforming simple spaces into delightful spots of creativity. With soft textures and intricate details, it adds a unique elegance to home décor. This free crochet flower vase pattern makes it easy to create something special, even for beginners.
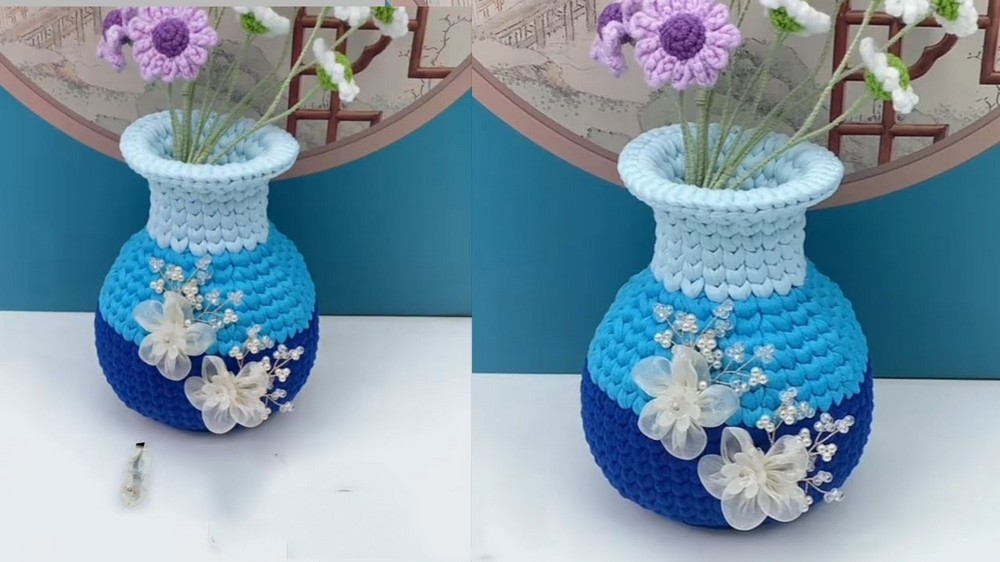
Its design lets you highlight your favorite flowers, whether fresh blooms or artificial ones and ensures they stand out in a truly stylish way. Beyond its looks, it’s versatile too, serving as a centerpiece for tables or as a lovely decoration for shelves, desks, and mantles. The cozy appearance of the vase blends perfectly with modern or classic interiors. Whether gifted or kept for yourself, it’s bound to be admired for its craft and charm. A perfect project to enjoy, cherish, and proudly display at home.
Materials Needed
Yarn:
- T-shirt Yarn: Approximately 3 meters for durability.
- Alternatively, you can use cotton yarn or a 4-ply yarn (use double strands for 4-ply).
- Suggested Colors: Fresh shades such as soft pastels, greens for contrast, or vibrant hues depending on your design goals.
Crochet Hooks:
- 2 mm hook: For working the base.
- 5 mm hook: For creating rows and shaping the flower pot.
Base Material:
- Plastic Sheet (9 cm diameter): Punch 24 evenly spaced holes around the edges of the sheet.
- Alternatively, use cardboard, a plastic bottle lid, or another sturdy material. Ensure the base is resistant to moisture if planning long-term use outdoors or with plants.
- If using cardboard: Heat a nail and punch 24 holes around the circular edge.
Additional Supplies:
- Scissors: For cutting yarn.
- Darning/Weaving Needle: For finishing and sewing ends.
- Cotton Stuffing: Optional, for filling the flower piece to give it volume.
Gauge
This project is gauge-friendly, but tension determines the finished size.
Examples:
- With T-shirt yarn and a 5 mm hook: Finished diameter of flower pot base is 9–10 cm, height approximately 12 cm.
- Adjust hook size or yarn weight for larger or smaller results.
Finished Size
- Base Diameter: Approximately 9 cm.
- Height of Flower Pot: 12–15 cm.
Customizable depending on the number of rows added.
Pattern Instructions
Below is the detailed pattern for crocheting the flower pot. Read carefully and follow step by step, paying attention to stitch placements and row counts.
Abbreviations (US Terminology)
| Abbreviation | Meaning |
|---|---|
| ch | Chain |
| sl st | Slip Stitch |
| sc | Single Crochet |
| hdc | Half Double Crochet |
| dc | Double Crochet |
| inc | Increase (work multiple stitches in one stitch) |
Step-by-Step Pattern
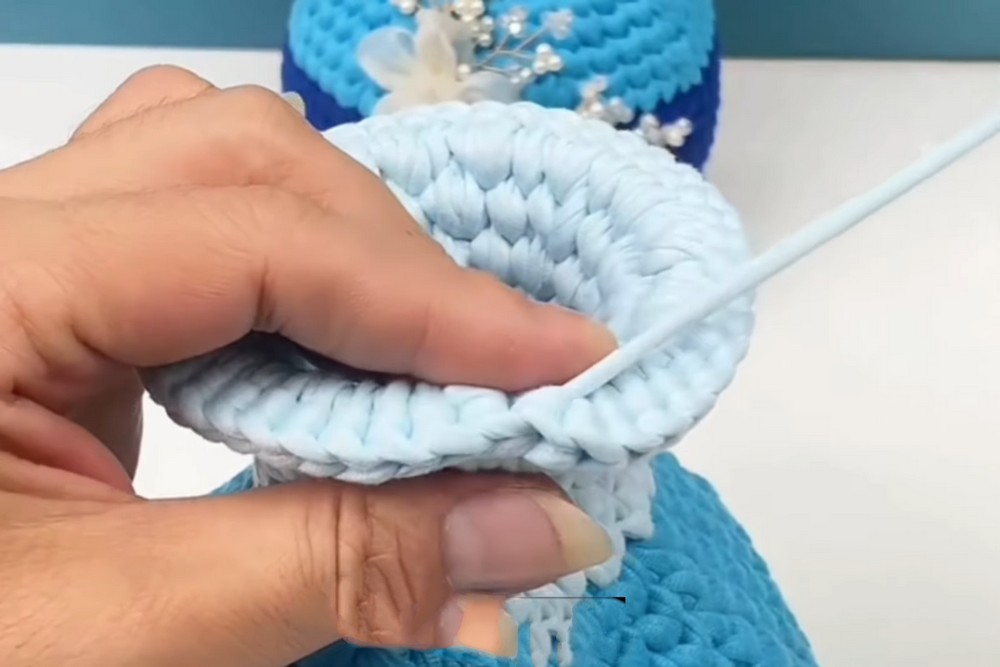
Part 1: Preparing the Base
- Prepare the Base:
- Use your plastic sheet (or cardboard or bottle lid) and create 24 evenly spaced holes punched along the circular perimeter.
- If using cardboard, ensure durability by reinforcing it if necessary.
- Attach Yarn:
- Begin by inserting your 2 mm hook into any hole on the base.
- Pull up a loop and chain 1 to secure the yarn.
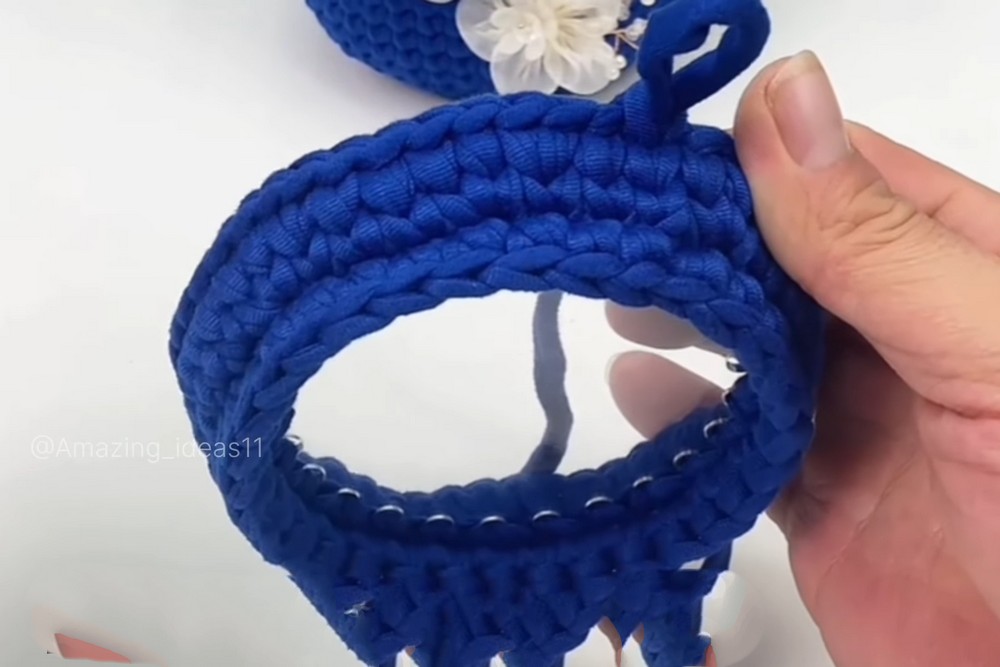
Part 2: Working the Base Shell
- Round 1:
- Work 1 single crochet (sc) in every hole around the base.
- Use the 2+1 method: Work 2 sc in one hole, followed by 1 sc in the next hole. Repeat this pattern around.
- At the end of Round 1, you will have 8 groups (multiply groups per hole setup). Total stitches = 32 sc.
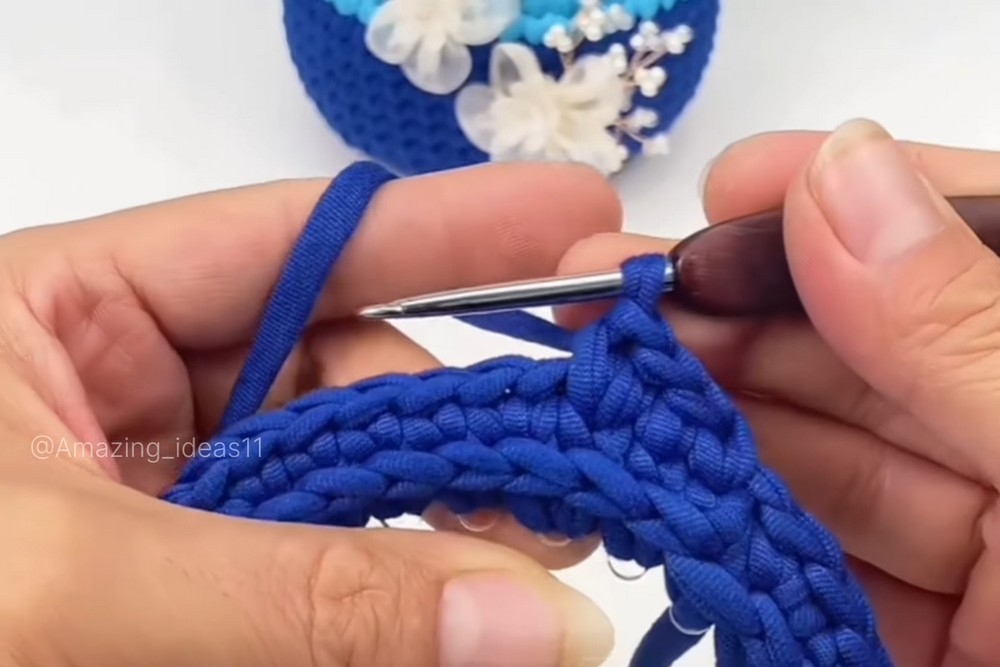
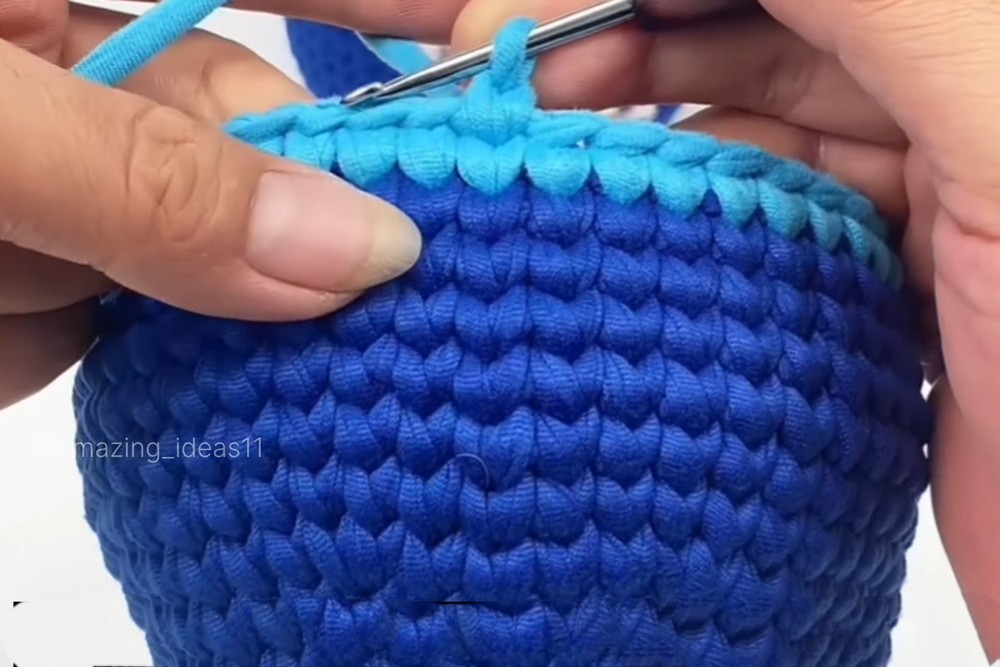
- Round 2:
- Switch to your 5 mm hook.
- Begin from the last stitch and do not make a slip stitch.
- Insert your hook from the back side of the chain, pull through the loop, and continue into the bottom threads.
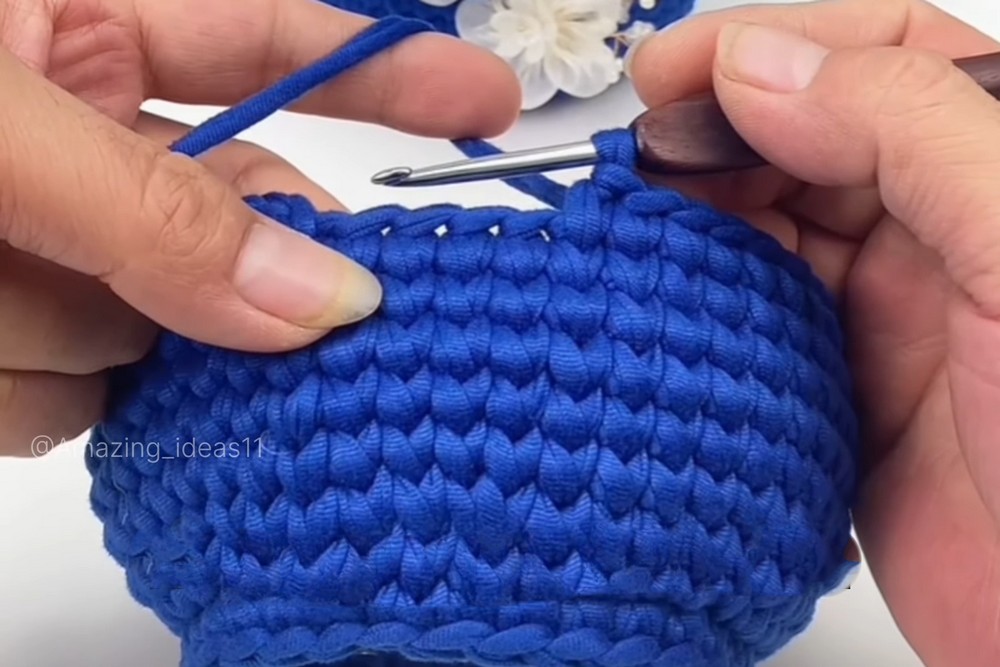
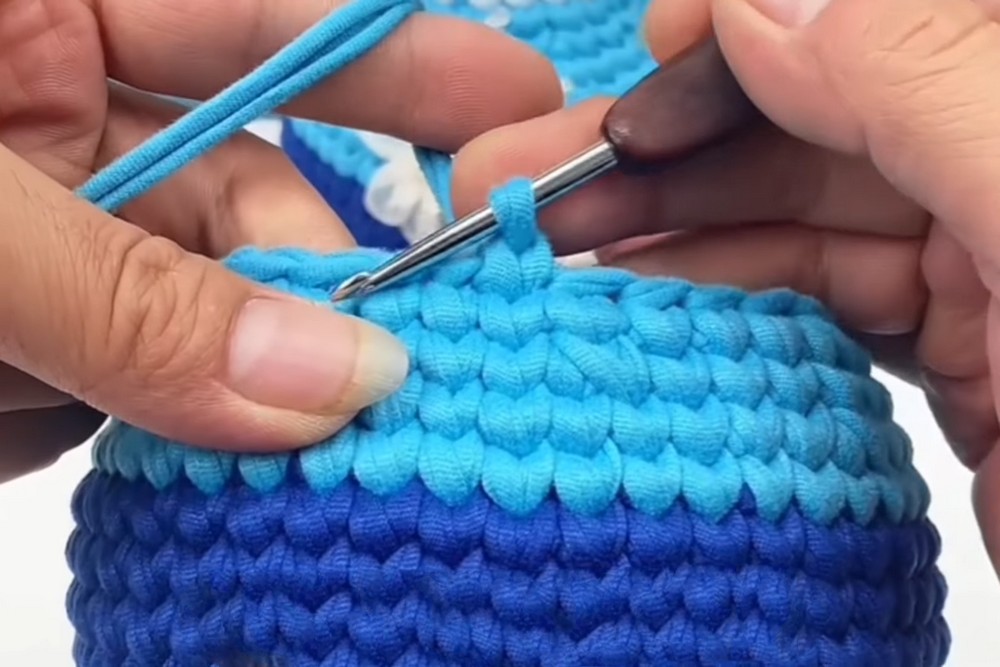
- Row Expansion – Adding Rows:
- Round 2: Begin the next row by chaining 3. Work 3 sc in separate chains, and in the next chain, work 2 sc in one stitch. Repeat this 3+1 method, and complete the row with 40 sc.
- Follow the slip stitch-less method for seamless rounds.
Part 3: Forming the Flower Pot Shape
- Row 3 – Shell Expansion:
- Begin with 4 sc in four separate chains, and work 2 sc in one chain at the end of the group.
- Repeat the 4+1 method across the row. Increase 8 stitches, totaling 48 sc.
- Adding Base Rows:
- Create 7 rows total using single crochet (sc) without increasing or decreasing.
- Each row will have 48 stitches.
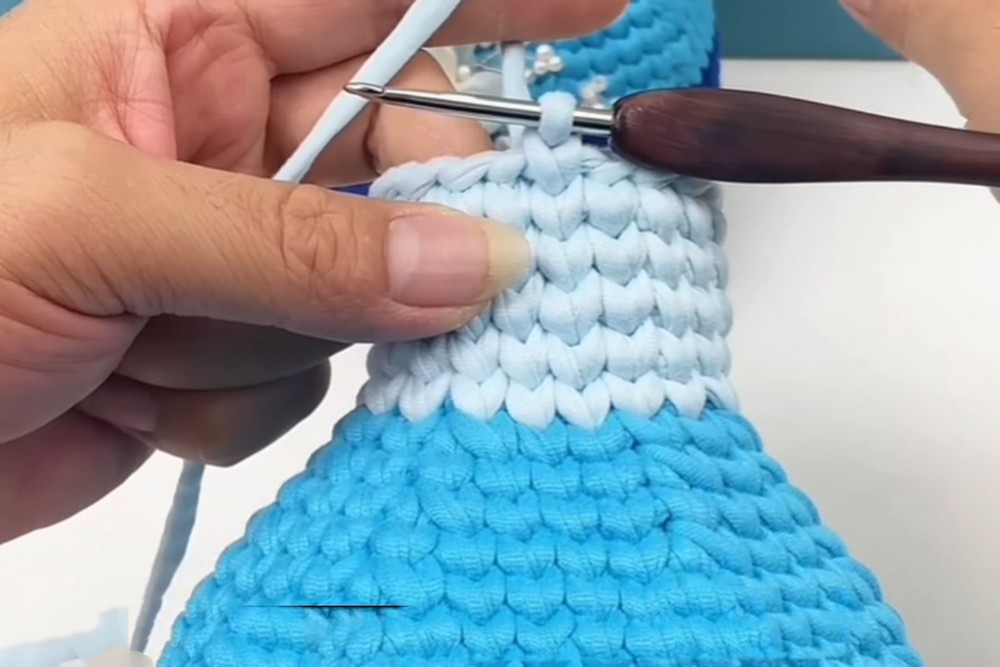
Optional Customization:
- Thread Color Change: After completing several rows, switch to a new thread color to add contrast. Use the same method by pulling the thread through and crocheting over the new color.
Part 4: Decreasing Rows – Forming the Pot’s Shape
- Decrease Rows – Gradual Reduction:
- Row 10: Crochet 10 sc straight, then decrease 1 stitch (join two loops for decrease).
- Follow this pattern: 10 sc, decrease 1. Total stitches = 44 sc.
- Row 11: Crochet 9 sc, decrease 1. Total stitches = 40 sc.
- Row 12: Crochet 8 sc, decrease 1. Total stitches = 36 sc.
- Repeat this gradual decrease pattern until reaching 4 sc per stitch group.
Part 5: The Flower Petals
- Final Rows:
- Change thread color and begin petal rows (Rows 23–24).
- Work 2 sc, 2 dc in same chain, forming raised edges or curves to give life to the pot’s flower.
- Fill Flower Petals (Optional):
- Add cotton stuffing if desired for a plush effect.
Finishing and Assembly
- Fasten Off:
- Cut remaining yarn, leaving a 10 cm tail. Secure the end with a knot.
- Neaten Edges:
- Use a darning needle to weave in ends around the base. Ensure threads are tucked neatly.
- Adding Stability:
- For cardboard bases, reinforce with glue or felt backing for long-term durability.
- For cardboard bases, reinforce with glue or felt backing for long-term durability.
- Optional Filling:
- Add cotton or decorative fillers inside the pot to bring volume and texture to your design.
Tips for Success
- Maintain Consistent Tension: Especially when switching thread weights or yarn sizes.
- Experiment with Colors: Use gradient yarn for unique flower pot patterns.
- Attention to Base: Ensure the punched holes are evenly spaced to avoid uneven stitches.
Conclusion
Congratulations on completing your beautiful flower pot! This crochet pattern combines various techniques to create a structured container that’s whimsical and decorative. Whether used as a tabletop ornament or a handmade gift, this project allows customization to suit any occasion.
Final Remarks:
This flower pot design is adaptable for both practical and decorative purposes. Experiment with sizes, colors, and materials to match your creativity. The seamless rows and petal shaping mimic the natural aesthetics of a real flower pot, making it a delightful addition.