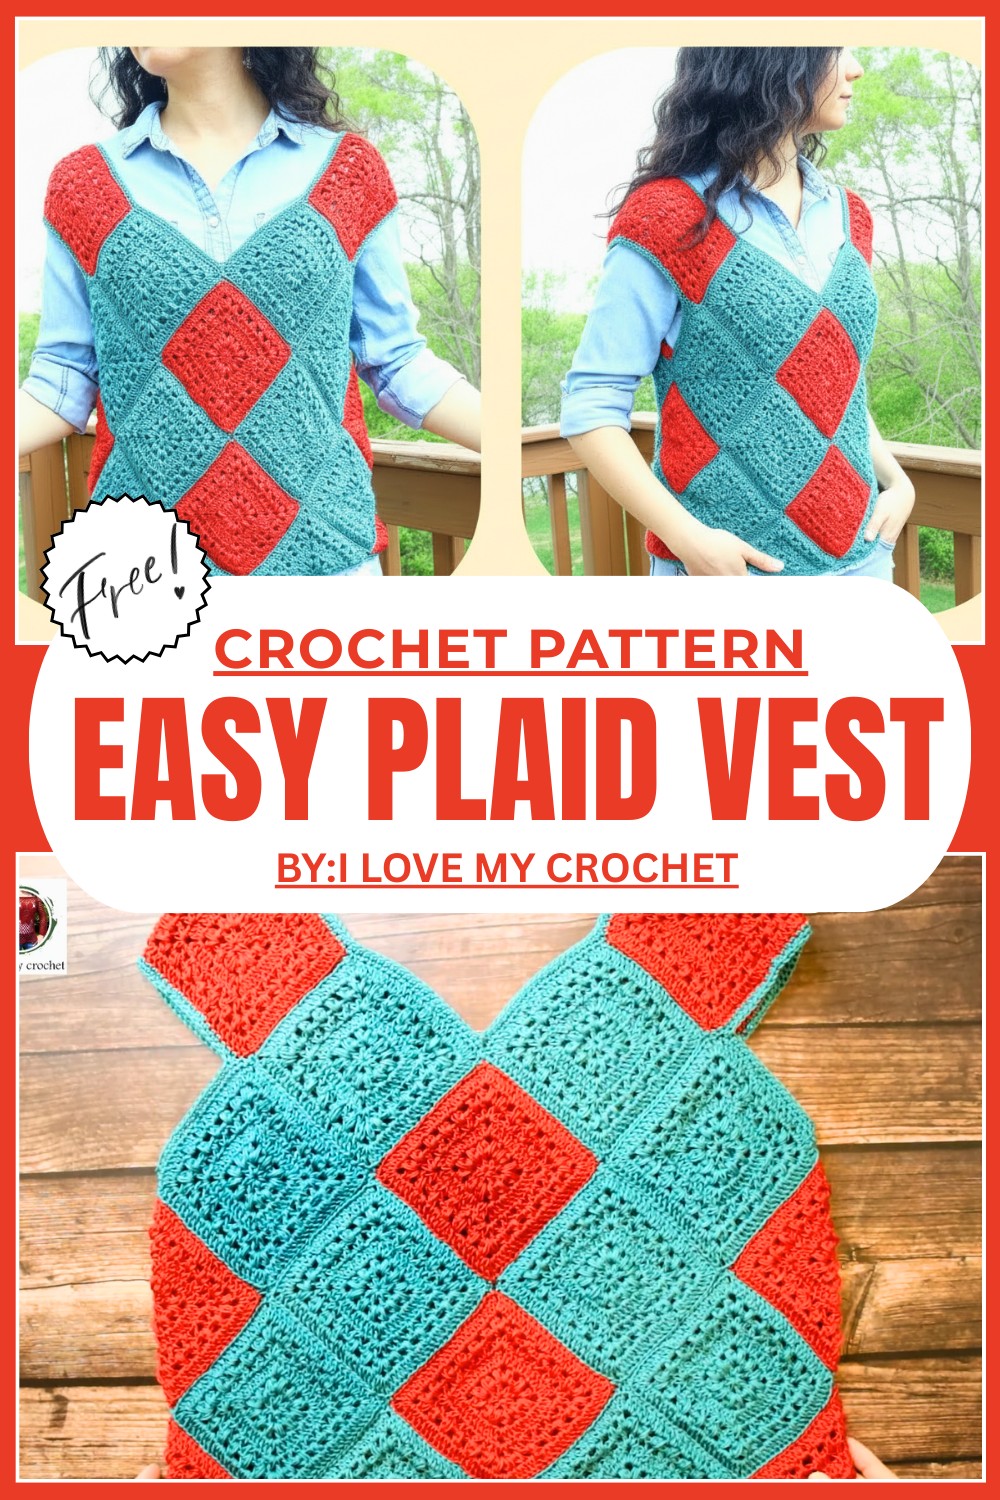
Stylish Crochet Plaid Vest Pattern That Screams Cozy Vibes
Wrap yourself in cozy style with this fun crochet plaid vest, featuring timeless checks that layer perfectly for any season and show off effortless charm.
Crochet Plaid Vest Perfect for Everyday Chic Looks
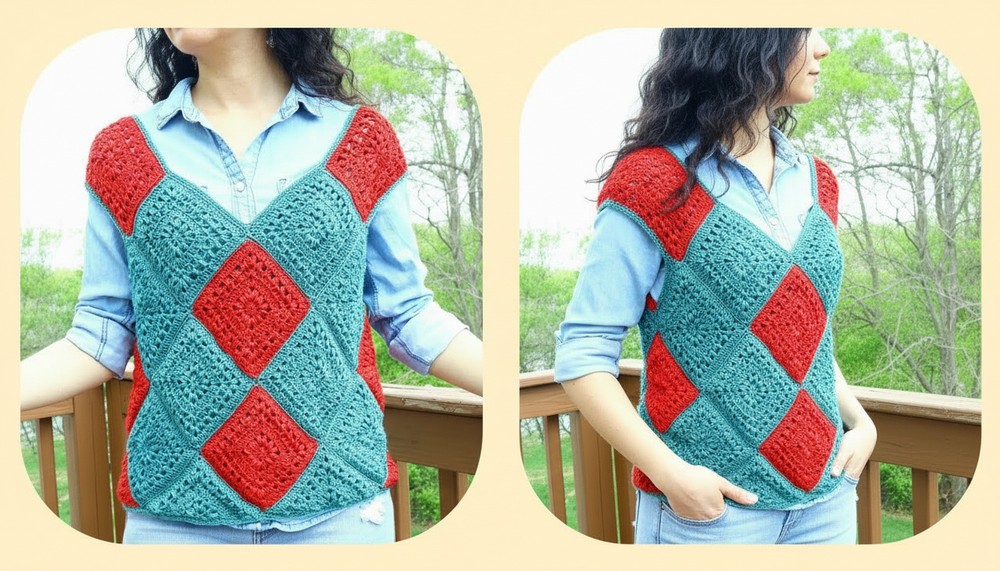
There’s something timeless about cozy layering, and nothing does it quite like a plaid vest. The beauty of a crochet plaid vest lies in its classic pattern and bold design, combining warmth and style effortlessly. Perfect for chilly days or a breezy evening, this piece is a versatile wardrobe staple that’s both functional and fashionable.
The plaid look brings a rustic, yet modern charm that pairs well with jeans, skirts, or even dresses, making it suitable for all kinds of occasions or casual outings. With vibrant color combinations or neutral tones, you can make a statement or keep it subtle, it’s your choice. Its timeless checkered design adds texture and life to your outfit, creating a cozy yet polished vibe. Whether you want to dress it up or keep it relaxed, this vest is practical and eye-catching for every wardrobe and perfect for layering throughout the seasons.
Crochet Granny Square Vest Pattern
Materials
Yarn
- Type: 100% acrylic yarn (or similar for a lightweight drape).
- Yarn Weight: Fingering weight or any thin yarn you have available.
- Colors: Multiple colors or scraps for granny squares. Example: red, blue, or mixed.
Hook Sizes
- 3.0 mm crochet hook for making the squares (to keep the squares loose).
- 2.5 mm crochet hook for adding single crochet rounds on the neckline, armholes, and hem.
Other Tools
- Tapestry needle (to weave in ends).
- Scissors.
- Stitch markers (optional).
Skill Level
Beginner to Intermediate
- Basic knowledge of granny squares and slip stitch joining is required.
- Simple construction and assembly techniques are used.
Pattern Details
- Square Size: Each square measures approximately 12 cm (5 inches) with 6 rounds in the granny square pattern.
- Triangles: Half-square triangles are used to create straight edges along the bottom of the vest.
- Finished Size: This pattern creates a vest for size small with adjustments provided for larger sizes.
Special Techniques
- Granny Square: This classic stitch forms the basis of the vest.
- Slip Stitch Join (Flat Join): Used for connecting the squares.
- Half-Square Triangle: A triangle is created by modifying the granny square pattern.
- Neckline and Armhole Edging: Single crochet rounds to stabilize and adjust the fit.
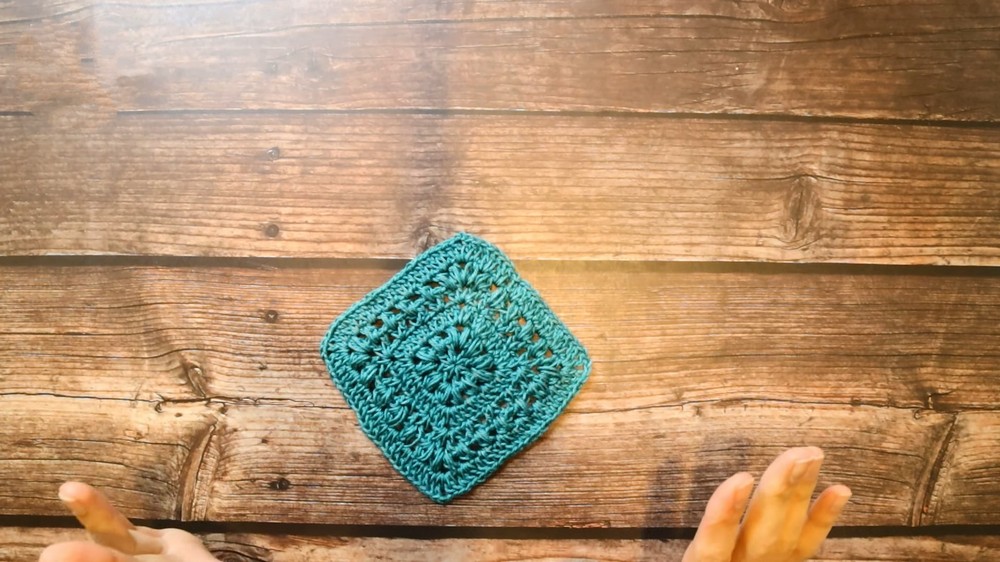
Granny Square Pattern
If you’re already familiar with granny squares, feel free to use your preferred pattern. For reference, this square consists of 6 rounds:
- Round 1: Create a magic circle, chain 3 (counts as 1 dc), work 2 dc into the circle, ch 2, 3 dc, repeat from * 3 more times, ch 2, sl st into the top of the starting chain 3. Fasten the circle tight. (4 corners formed).
- Rounds 2–6: Work clusters of 3 dc in each space and create corners with 3 dc, ch 2, 3 dc in the corner spaces.
Square Size: Measure your square after 6 rounds to ensure it is 12 cm (5 inches). Adjust hook or tension as needed. Create 26 granny squares.
Half-Square Triangle Pattern
To create straight bottom edging, you’ll also need 6 triangles for the pattern’s hemline.
- Foundation: Begin with a magic circle, ch 3, (counts as 1 dc).
- Row 1: Work 3 dc into the magic circle, ch 2, 3 dc, and turn your work.
- Row 2–5: In each row, work granny stitches (clusters of 3 dc) along the row with an increase on the edges (work 2 clusters in the first and last stitch).
Step-By-Step Pattern
Assembly Preparation
- Create 26 granny squares and 6 half-square triangles.
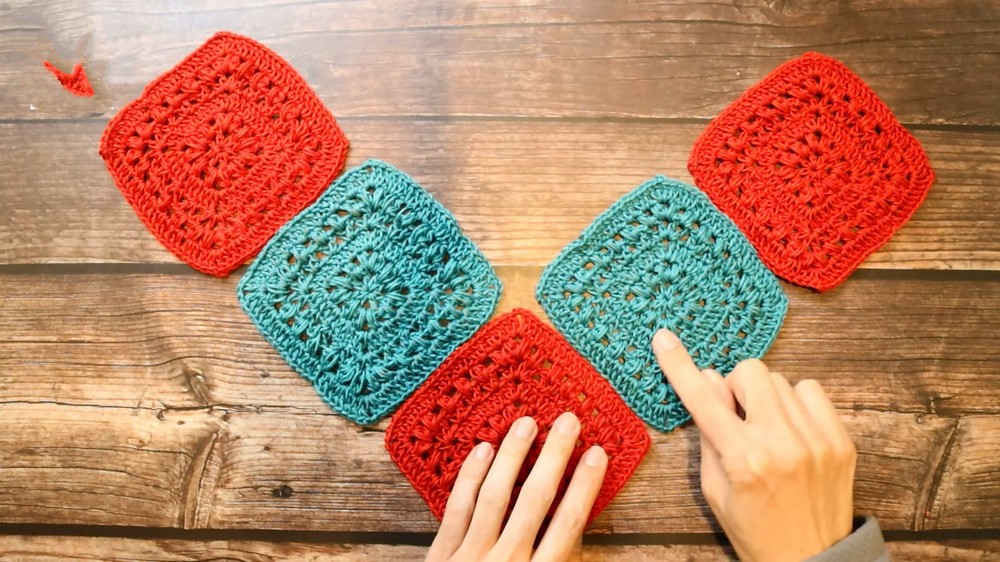
- Lay out your squares and triangles following the layout explained in the video. Use a camera or draw a diagram to ensure consistency during assembly.
Step 1: Joining Squares (Slip Stitch Join)
- Place two squares with their right sides facing each other.
- Insert the hook into the back loop only of the nearest square, and the back loop only of the furthest square.
- Yarn over and pull through both squares with a slip stitch. This creates a flat join.
- Continue joining all the required squares for the neckline, body, and sides according to the layout.
Tip: Use a slightly larger hook for joining to avoid tension and stiffness in the seams.
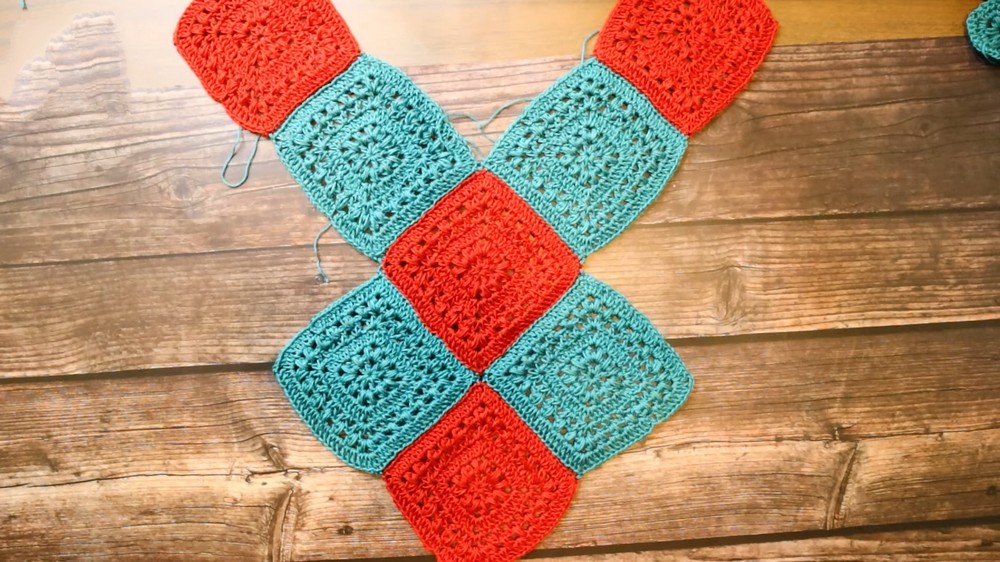
Step 2: Form the Neckline
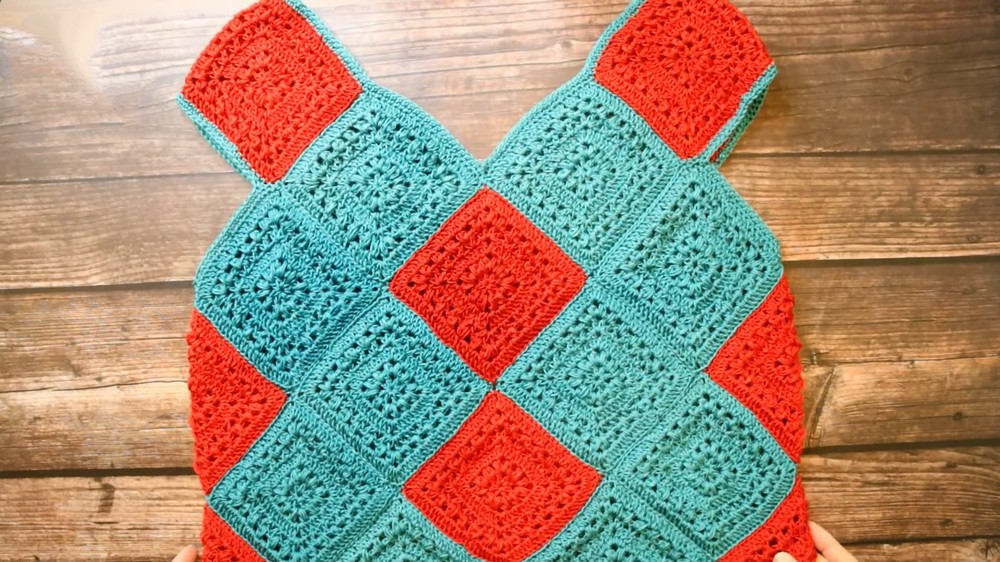
- Align the squares to create a V-neck shape as follows:
- Place one square in the form of a diamond (rotated) at the center front of the vest.
- Attach additional squares around the neckline to fit your size. For a lower neckline, use more squares.
- Repeat the same layout for the back neckline.
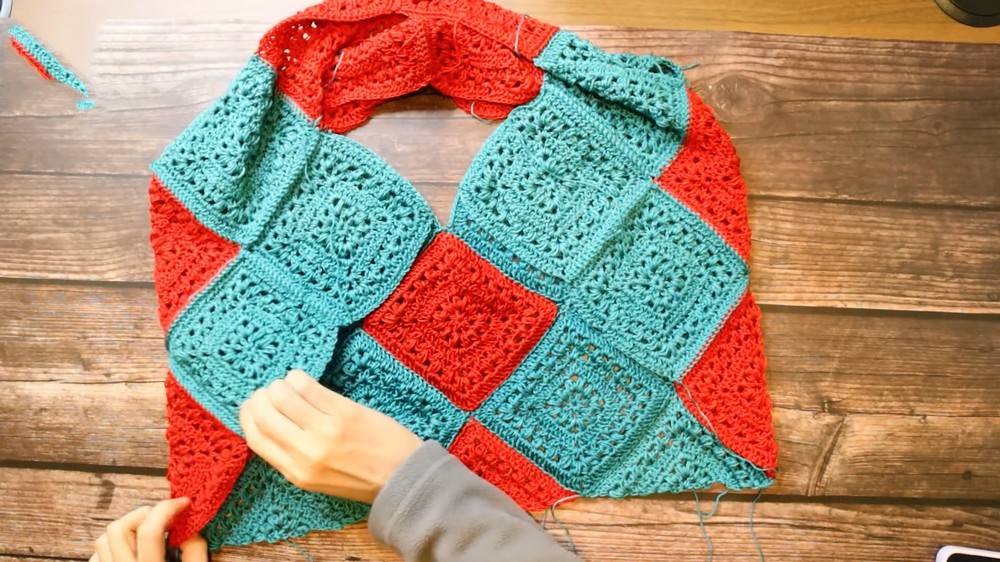
Step 3: Front and Back Assembly
- Position 2 rows of additional granny squares directly below the neckline diamond to form the body of the vest.
- For the side seams, attach additional squares vertically on each side, extending from the bottom edge up to the armholes.
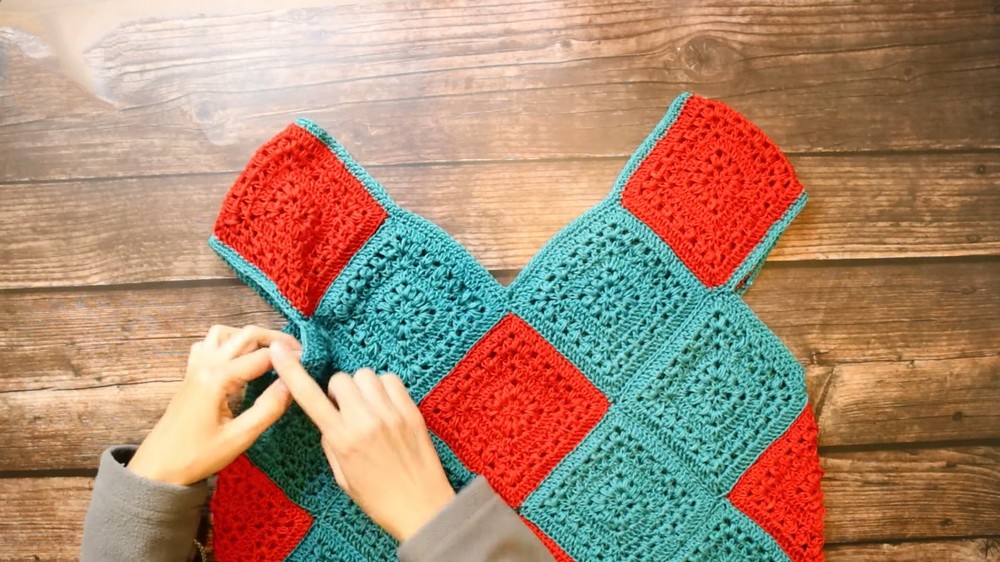
Step 4: Attach Front to Back
- Place the front and back panels right sides facing each other.
- Use the flat slip stitch join method across the shoulders to join the front to the back.
- Align and attach the side seams, leaving room for the armholes.
Step 5: Add Half-Square Triangles for Hem
- Attach half-square triangles to the bottom edges of the vest for a straightened hemline.
- Use a flat slip stitch join for seamless integration.
Step 6: Edging
To clean up the edges and create a polished finish:
Neckline Edging:
- Use the 2.5 mm hook and single crochet evenly around the neckline.
- Work 2 rounds of sc to bring structure to the neckline.
Armhole Edging:
- Single crochet evenly around the armholes (2 rounds).
- Use the smaller hook size for a snug and clean edge.
Hem Edging:
- Finish the bottom hemline with 2 rounds of sc, blending the squares and triangles seamlessly.
Finishing
- Weave in all remaining loose ends with a tapestry needle.
- Block your vest to shape and relax the fabric.
- Optional: Add decorative buttons or beads at the neckline or armholes for personalization.
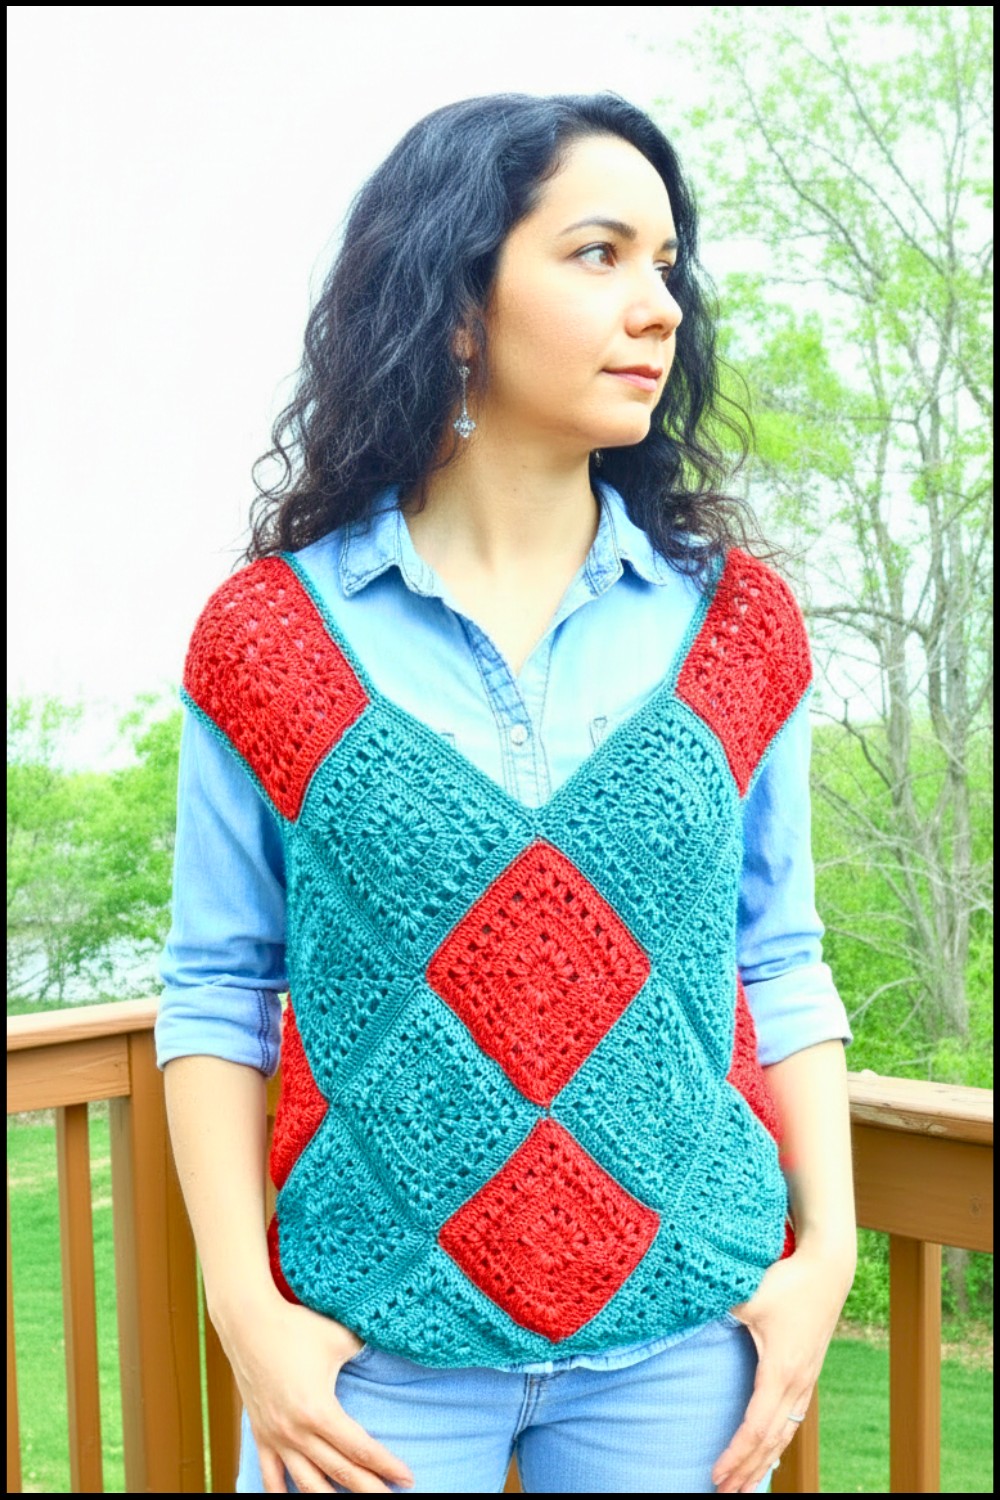
Final Words
Congratulations! You’ve successfully completed your Granny Square Vest. This project is ideal for summer and spring, offering a versatile, handmade addition to your wardrobe. You can style this vest over a simple blouse or dress for a casual yet elegant look. Whether crafted as a vest, blouse, or tunic, this creative use of granny squares is sure to be a conversation starter!
Tips for Maintaining Your Vest
- Washing: Hand wash gently with cool water to maintain shape and color.
- Drying: Lay flat to dry; avoid hanging, as this may stretch the fabric.
- Storage: Fold delicately to preserve the structure.