Free Crochet Rose Pattern You’ll Keep Reusing Forever
Bloom with creativity and charm with this free crochet rose, a lasting beauty perfect for decorating, gifting, or adding a handmade touch to your favorite items.

Whimsical Crochet Rose Pattern Suited for Endless Fun
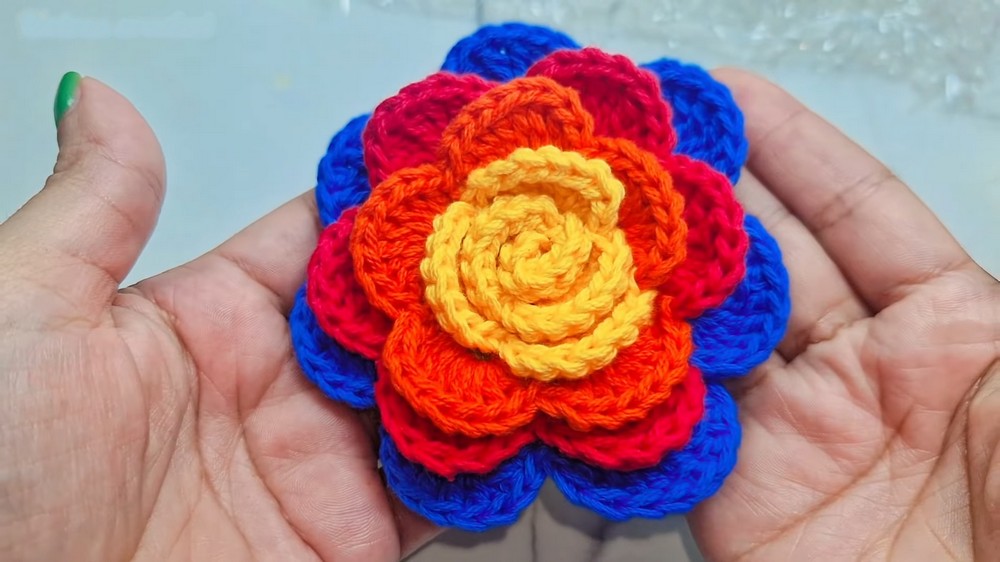
A flower that lasts forever, soft to the touch and full of charm, is something truly special. A crochet rose is a timeless beauty shaped with care, layer by layer, to mimic the elegance of a real petal. Its lifelike appearance, complete with delicate folds and rich texture, makes it stand out in any setting. This stunning rose serves many purposes as it looks lovely on clothing or accessories, can be arranged in a bouquet that never fades, or used as a decoration to fill your home with warmth and personality.
Available in endless colors, it can match any style while adding a personal, heartfelt touch to gifts or special occasions. Whether displayed on its own or as part of a larger piece, it carries a sense of beauty and love that makes it unforgettable. A crochet rose is not just an object; it is a soft, colorful symbol of care and creativity.
Crochet Rose Motif Pattern
Materials List
- Yarn: Four colors of yarn suitable for a 3mm crochet hook. Granny yarn was used in the video, but you can choose any yarn of similar gauge that works well with your hook.
Example: Use cotton or acrylic DK (Category 3) yarn for vibrant clarity. - Crochet Hook: 3mm hook (US size 11).
- Stitch Markers (optional): Helpful for marking petal sections and tracking progress.
- Scissors.
- Rowing Needle: Essential for sewing petals and layering the rose.
Skill Level
Intermediate to Advanced
- Crocheters should have prior knowledge of working in rounds and executing advanced stitches.
Key Abbreviations (US Terminology)
- Ch: Chain
- SC: Single Crochet
- HDC: Half Double Crochet
- DC: Double Crochet
- DTR: Double Treble Crochet
- St/s: Stitch/es
- Sl St: Slip Stitch
- Rep: Repeat
Special Notes
- Color Changes: The rose includes multiple color transitions. Use seamless color-changing techniques (as described) to ensure neat joins.
- Petal Formation: To create realistic curves, always count accurately as you increase/decrease within petals.
- Layering: Ensure proper placement of petals during assembly for an intertwined effect. Use stitch markers if needed to maintain accuracy.
Step-by-Step Pattern
Foundation Round
- Begin with a Slip Knot:
- Chain 72 stitches (multiples of 3).
- If creating a smaller or larger rose, adjust in multiples of 3.
- Round 1 – Base Layer:
- Skip the first two chains.
- HDC in the third chain. Continue working HDCs in each chain until the end of the row.
- Turn your work.
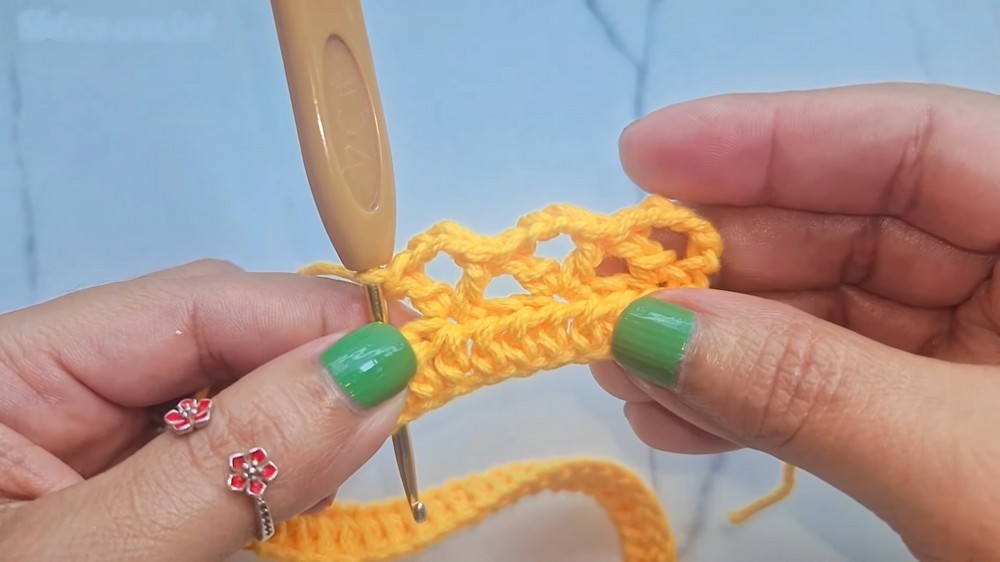
- Round 2 – Fan Base:
- Chain 5 (counts as 1 DC + 3 separation chains).
- Skip 2 stitches of the base and make 1 DC in the third stitch.
- Chain 3, and make 1 DC in the same stitch to form a “fan”.
- Repeat: Skip 2 stitches, then form another fan (1 DC, 3 chains, 1 DC) in the third stitch.
- Work in this manner until you create 24 fans around.
Building Petals
Petal Layer 1
- First Petal (Color 1):
- Into the fan space, chain 2 (counts as 1 DC).
- Work 7 DCs into the fan space. Combined with the chain 2, you’ll have 8 DCs total in the fan.

- Close the petal: SC into the space between the two fans (low point).
- Repeat Across Fan Spaces:
- Work 8 DCs into each fan, closing each petal with SC between fans.
- Complete 6 petals in total for this layer.

Petal Layer 2 (Color Change)
- Color Change:
- Secure new yarn at the close of the 6th petal using the seamless color change method described.
- Repeat Petal Formation:
- Work 8 DCs into each fan and close each petal with SC in between fans.
- Complete 5 petals in total for this layer.
Petal Layer 3 (Third Color Change)
- Build Larger Petals:
- Work 2 DCs, 4 DTRs, and 2 DCs into the fan space.
- This forms 8 stitches total per petal, with double treble crochets creating a slightly elongated center within each petal for enhanced layering.
- Close each petal with SC in between fans.
- Work Across Fan Spaces:
- Repeat petal formation for 6 petals.

- Repeat petal formation for 6 petals.
Final Petal Layer (Fourth Color Change)
- Begin Final Petals:
- Into the fan, make 1 DC, 7 DTRs, and 1 DC. This creates more pronounced petals for the outer layer.
- Close each petal with SC in between fans.
- Repeat Across Spaces:
- Work 7 petals of the same design in this layer.
Assembly
- Begin Rolling the Rose:
- Starting with the first petal, roll it inward tightly, layering subsequent petals around it.
- Pay attention to alternating petal placement for an intertwined and realistic look.
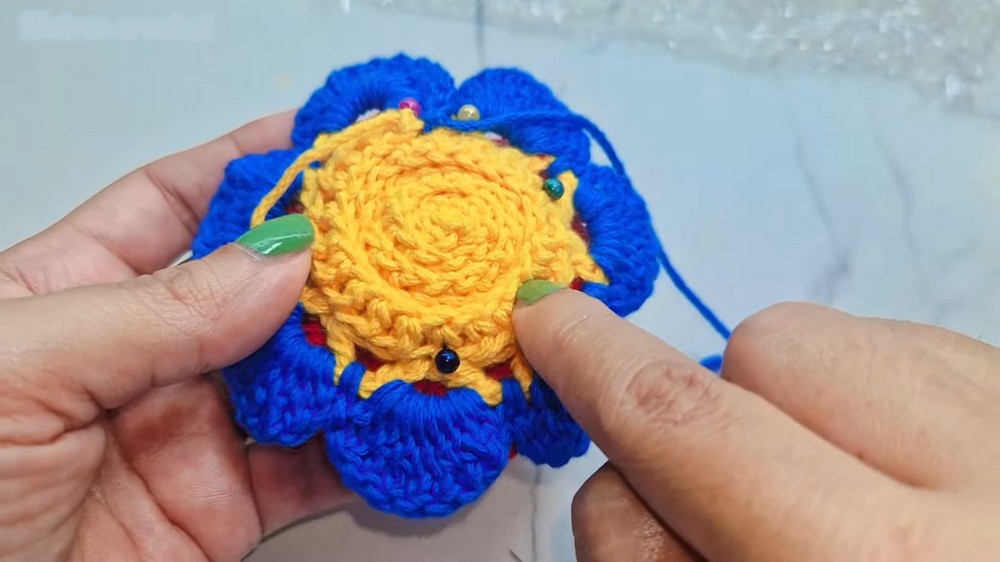
- Secure Layers:
- Once satisfied with the arrangement, sew through the bases of the petals using a rowing needle. Use tight stitches to ensure security. Sew carefully to maintain the shape and remove visible gaps.
Finishing
- Weave Ends:
- Using a yarn needle, hide all loose threads by weaving them into the underside of the rose.
- Shape & Adjust:
- Add stuffing or embellishments if desired, such as attaching leaves, a stem, or a chalice to the rose.
Conclusion
The layered crochet rose motif is now completed! With its intricate design and realistic petal arrangement, your rose serves as a stunning addition to garments, home décor, or gifts. Its versatility, paired with precise layering techniques, allows you to recreate it in various sizes and color schemes.
Pattern Corrections
- For adjustments, ensure you count stitches in fan spaces carefully to maintain petal uniformity.
- If the rose begins to unravel during assembly, double-check petal placement and reinforce seams.
Tips
- Consistent Tension: Maintain even tension throughout petals to keep their size uniform.
- Customization: Add beads to the petals’ edges or vary stitch heights for unique textures.
- Storage Advice: Store roses flat or rolled in tissue paper to preserve their shape.